In the previous entry of the series, we took a break from writing code to take a dive into AWS Cognito, how it works, how to set it up, and why you’d want to. We’re going to utilize the User Pool created in that article to see how to secure our API using API Gateway Authorizers and Cognito.
What is an Authorizer?
An Authorizer in API gateway is a way for API Gateway to check that the request coming in is being sent by someone who is authorized. When a request hits an API Gateway route configured with an Authorizer, it will check with the Authorizer before passing the request to any code or upstream system. There are two types of Authorizers available to HTTP APIs in API Gateway:
- JWT – Uses an OpenID JWKS endpoint to validate the incoming tokens.
- Lambda – Passes the token to a Lambda for custom validation.
Once an Authorizer is properly set up, any requests to those routes will be denied if the provided token is missing or invalid.
Gather info from Cognito
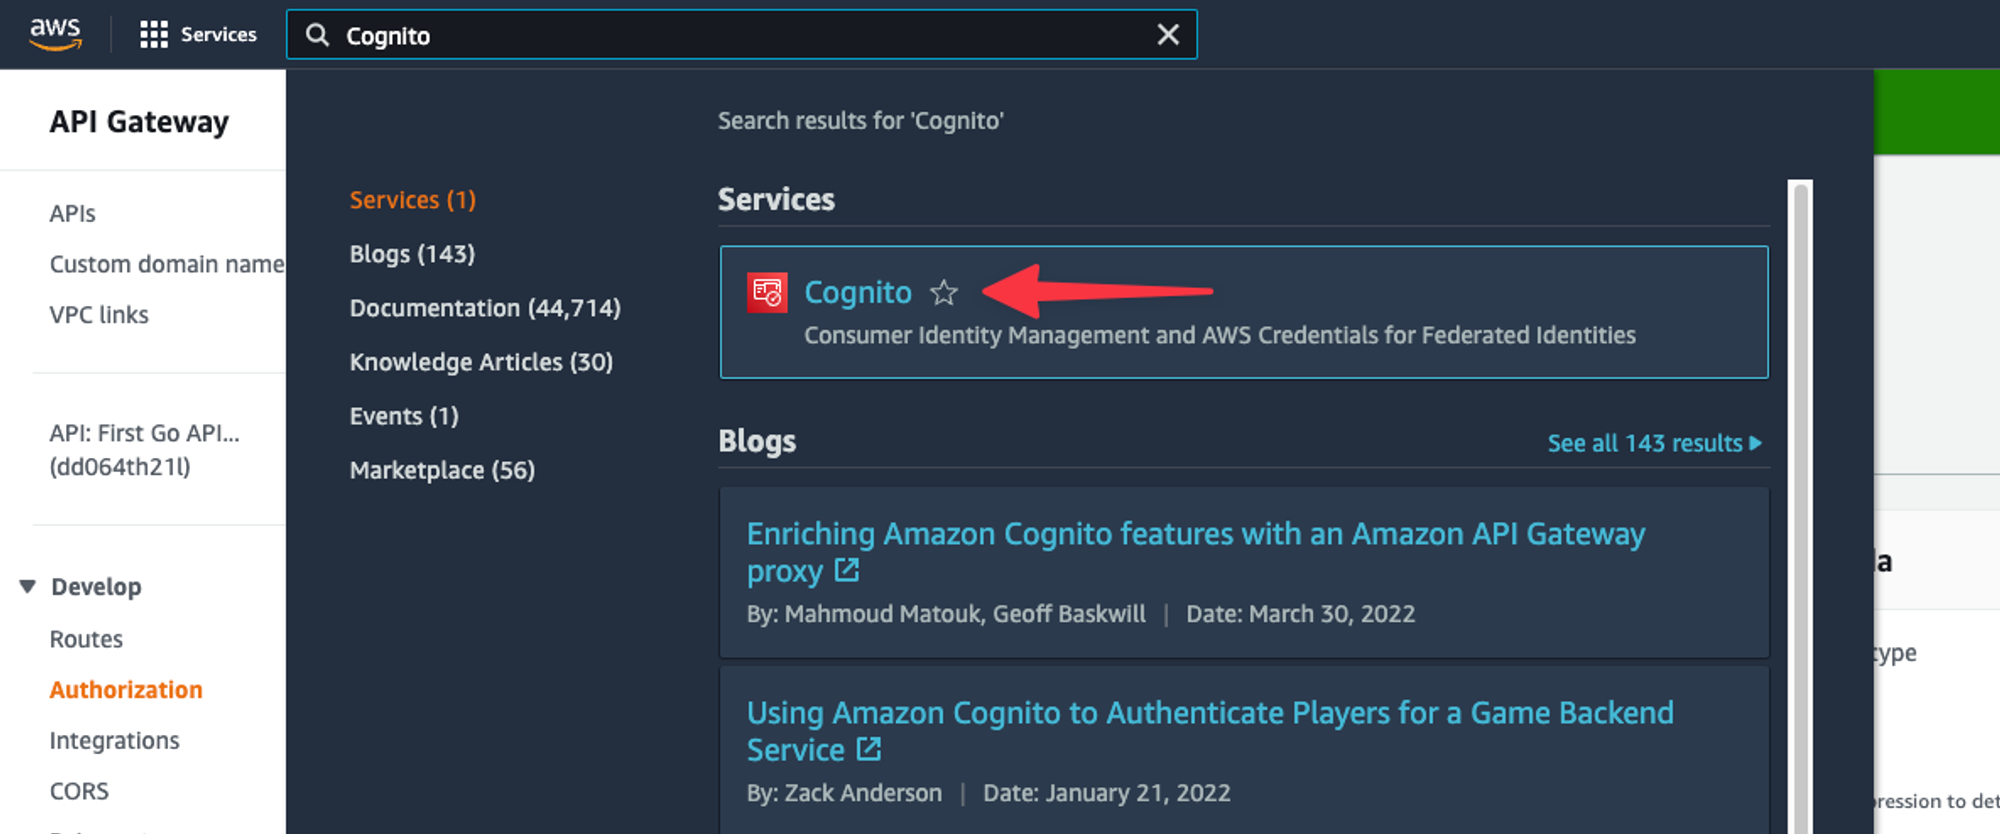
Before we move forward, there are a few pieces of information we need to grab from the Cognito user pool that was created in the previous setting. Search for ‘Cognito’ in the AWS console search and select it from the list.
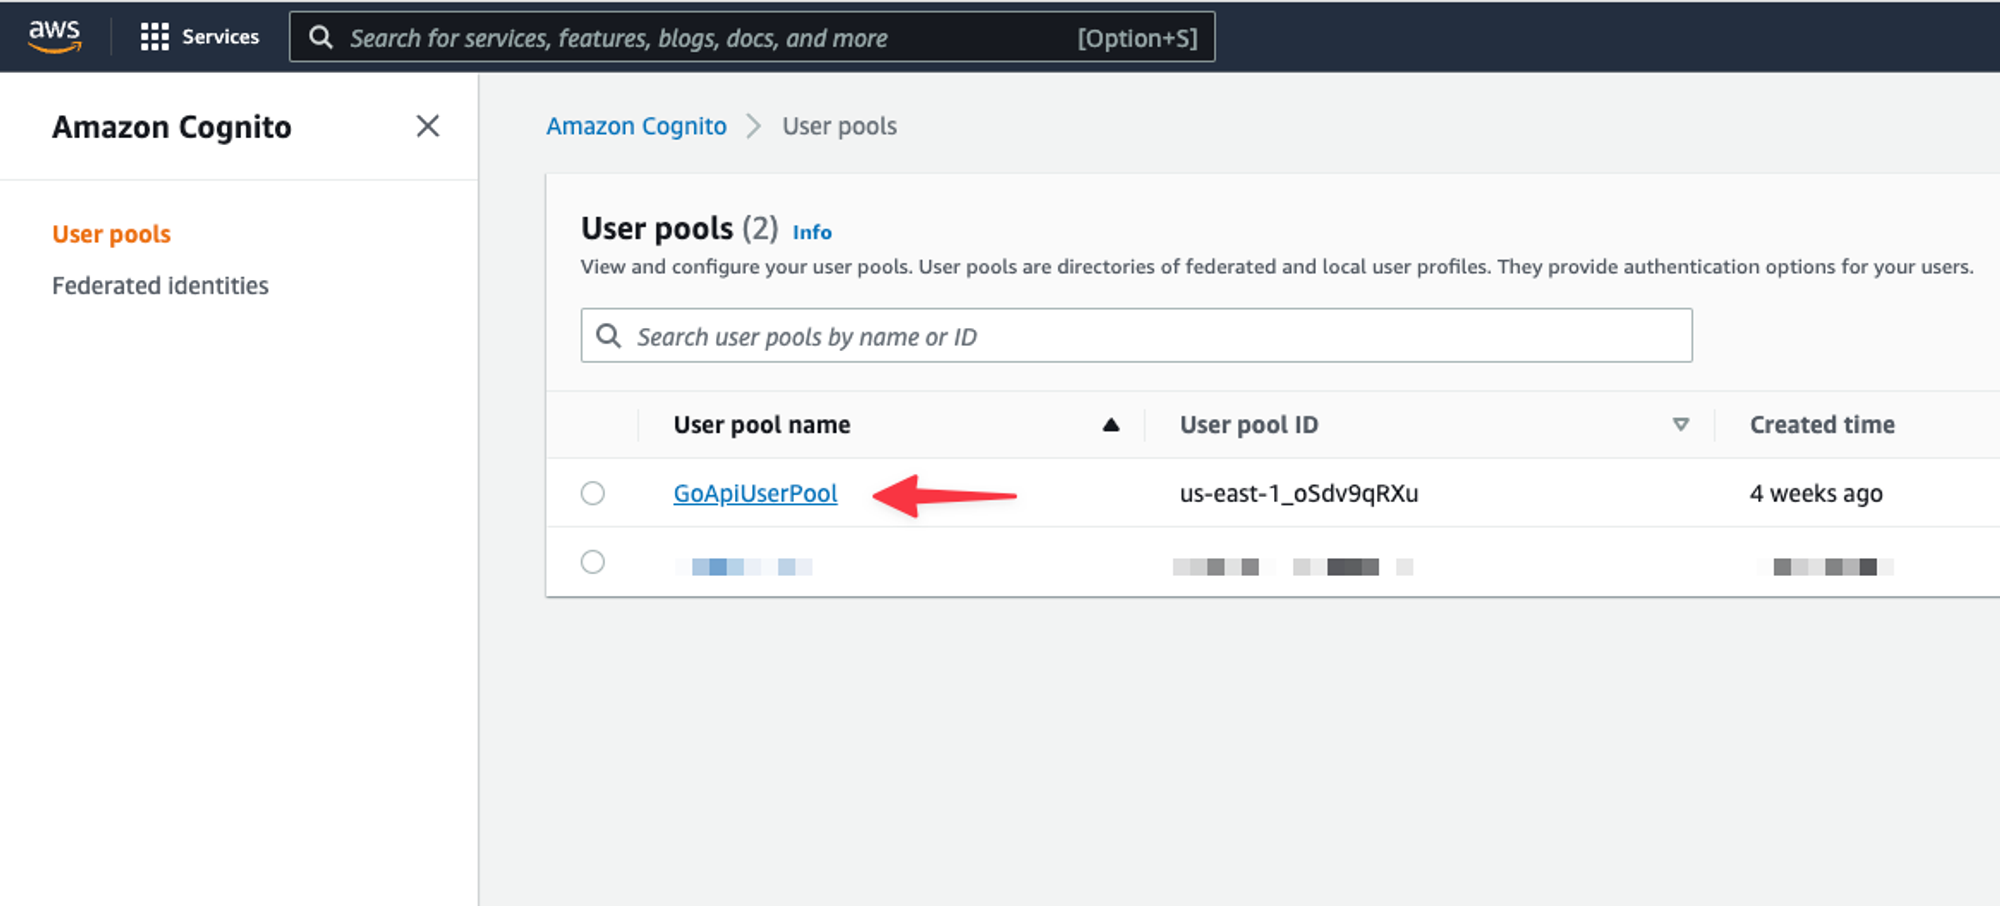
Select the user pool from the list.
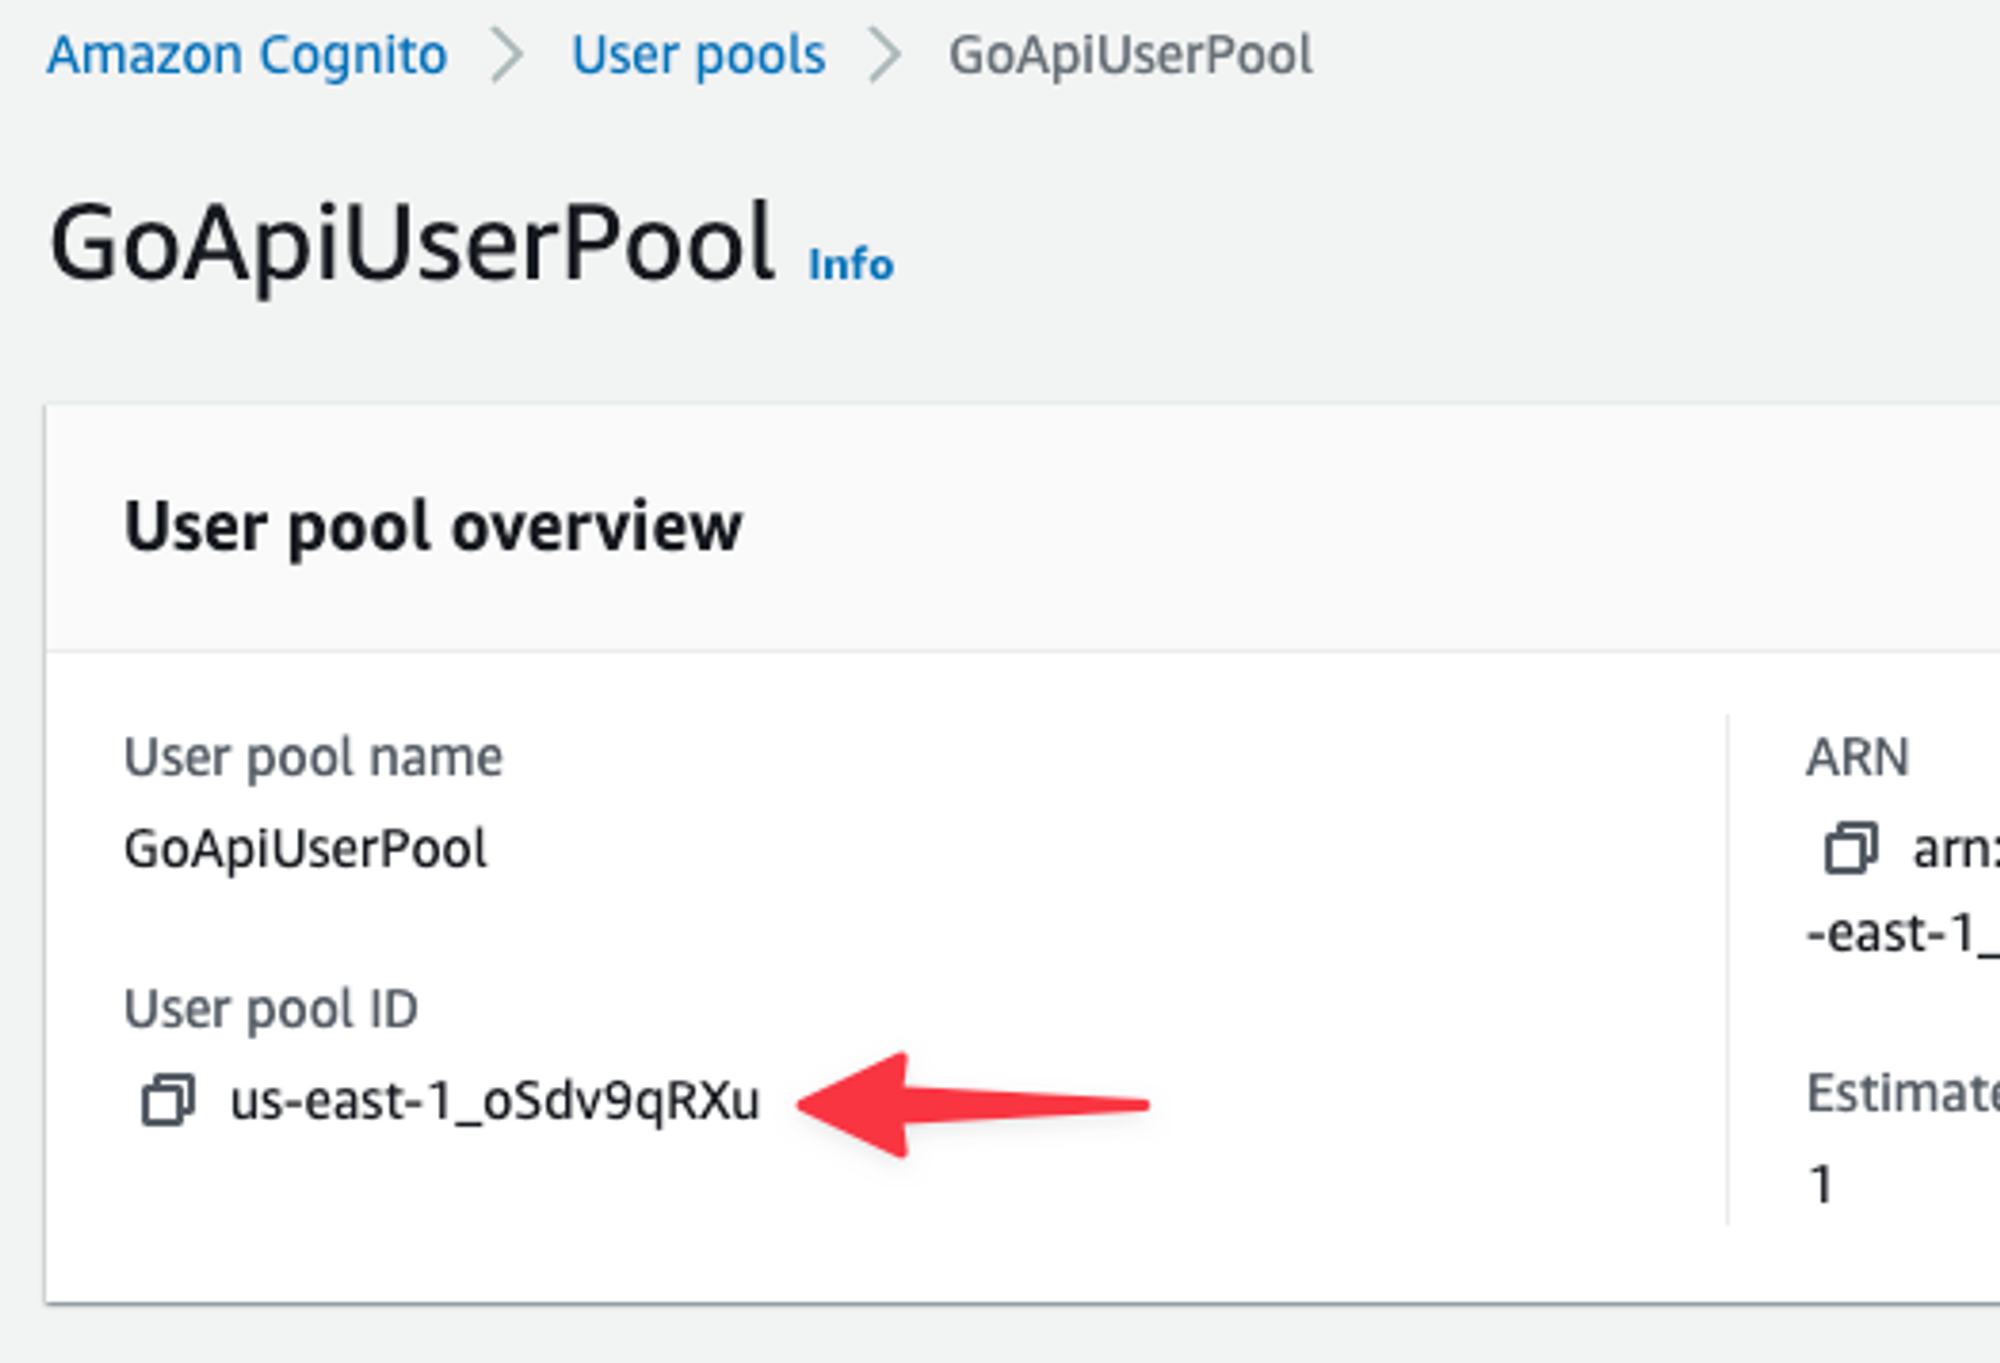
First thing to grab is the User pool ID.
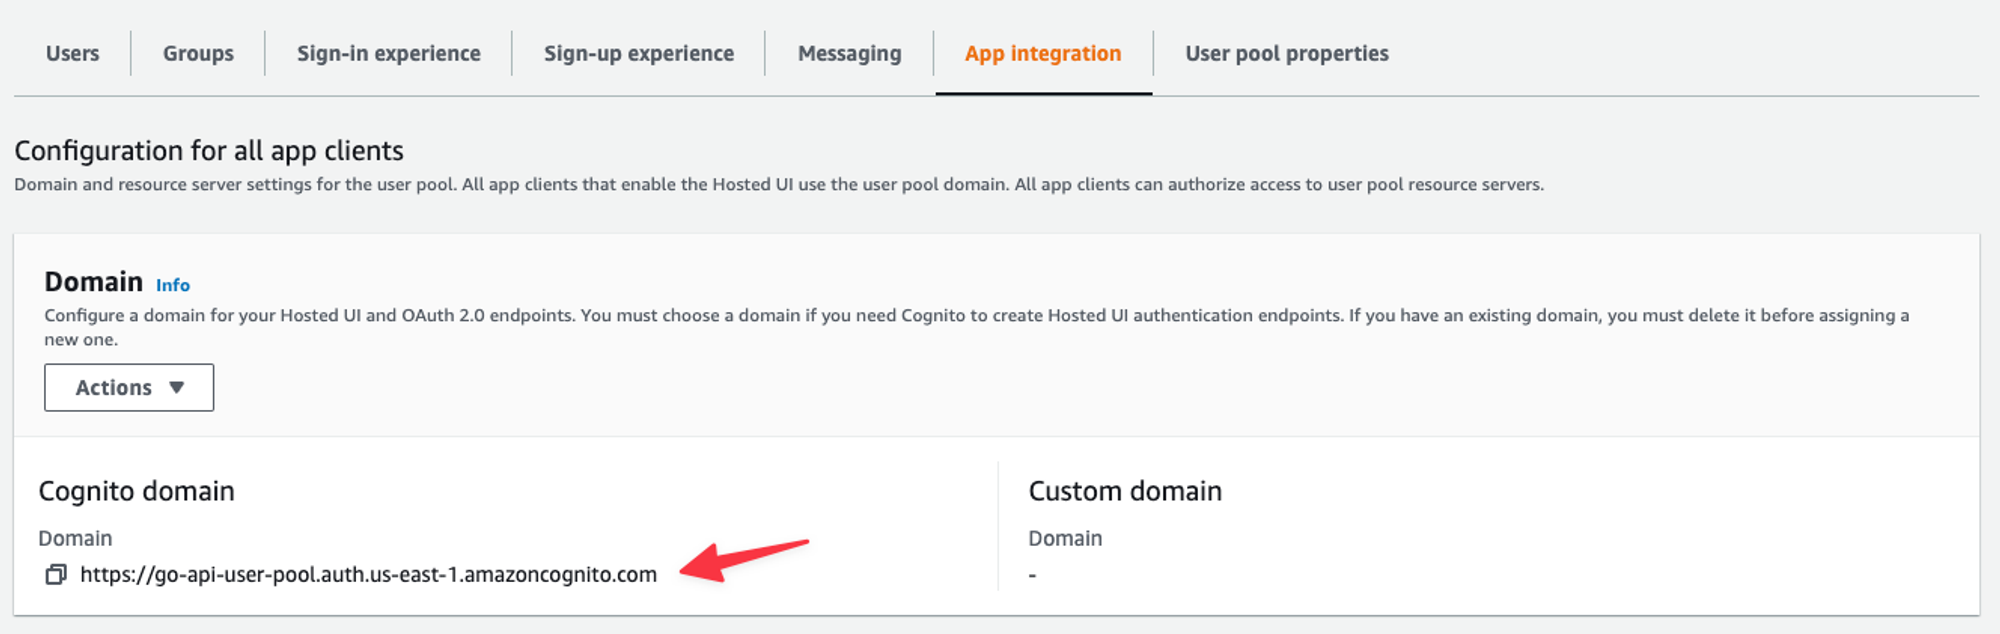
Next, click on the “App integration” tab and grab the Domain.
Lastly, scroll down and grab the Client ID under App clients and analytics.

Set up the Authorizer in API Gateway
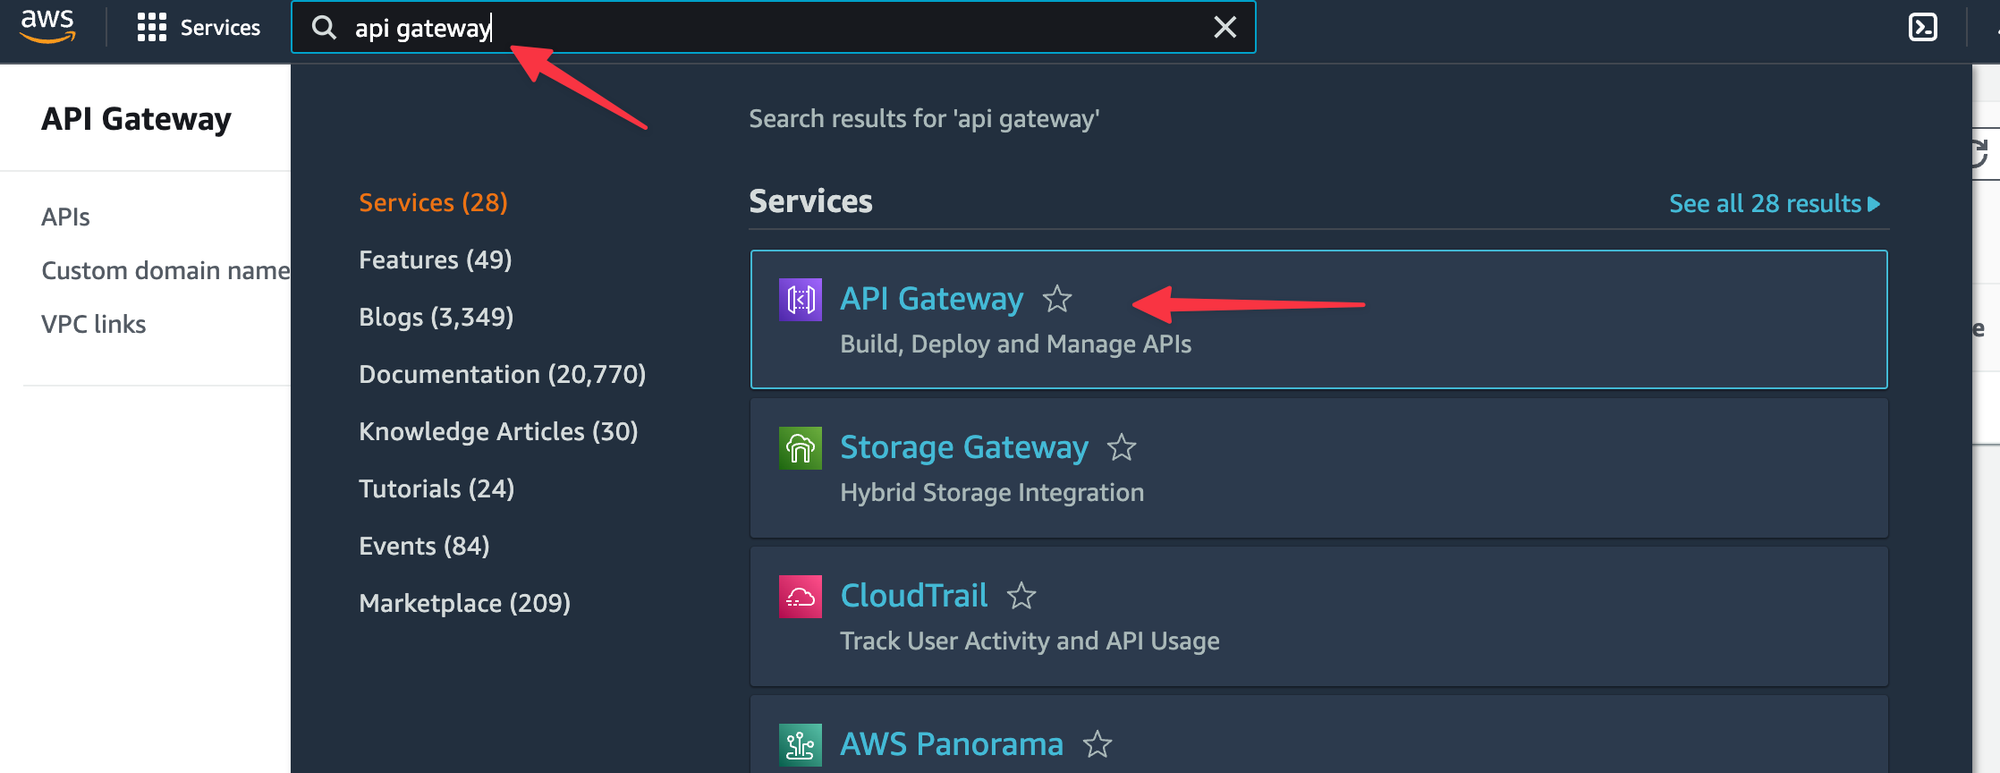
Open API Gateway using the global search on the AWS Console.
Open your API, I’m using the First Go API created in the previous entry.

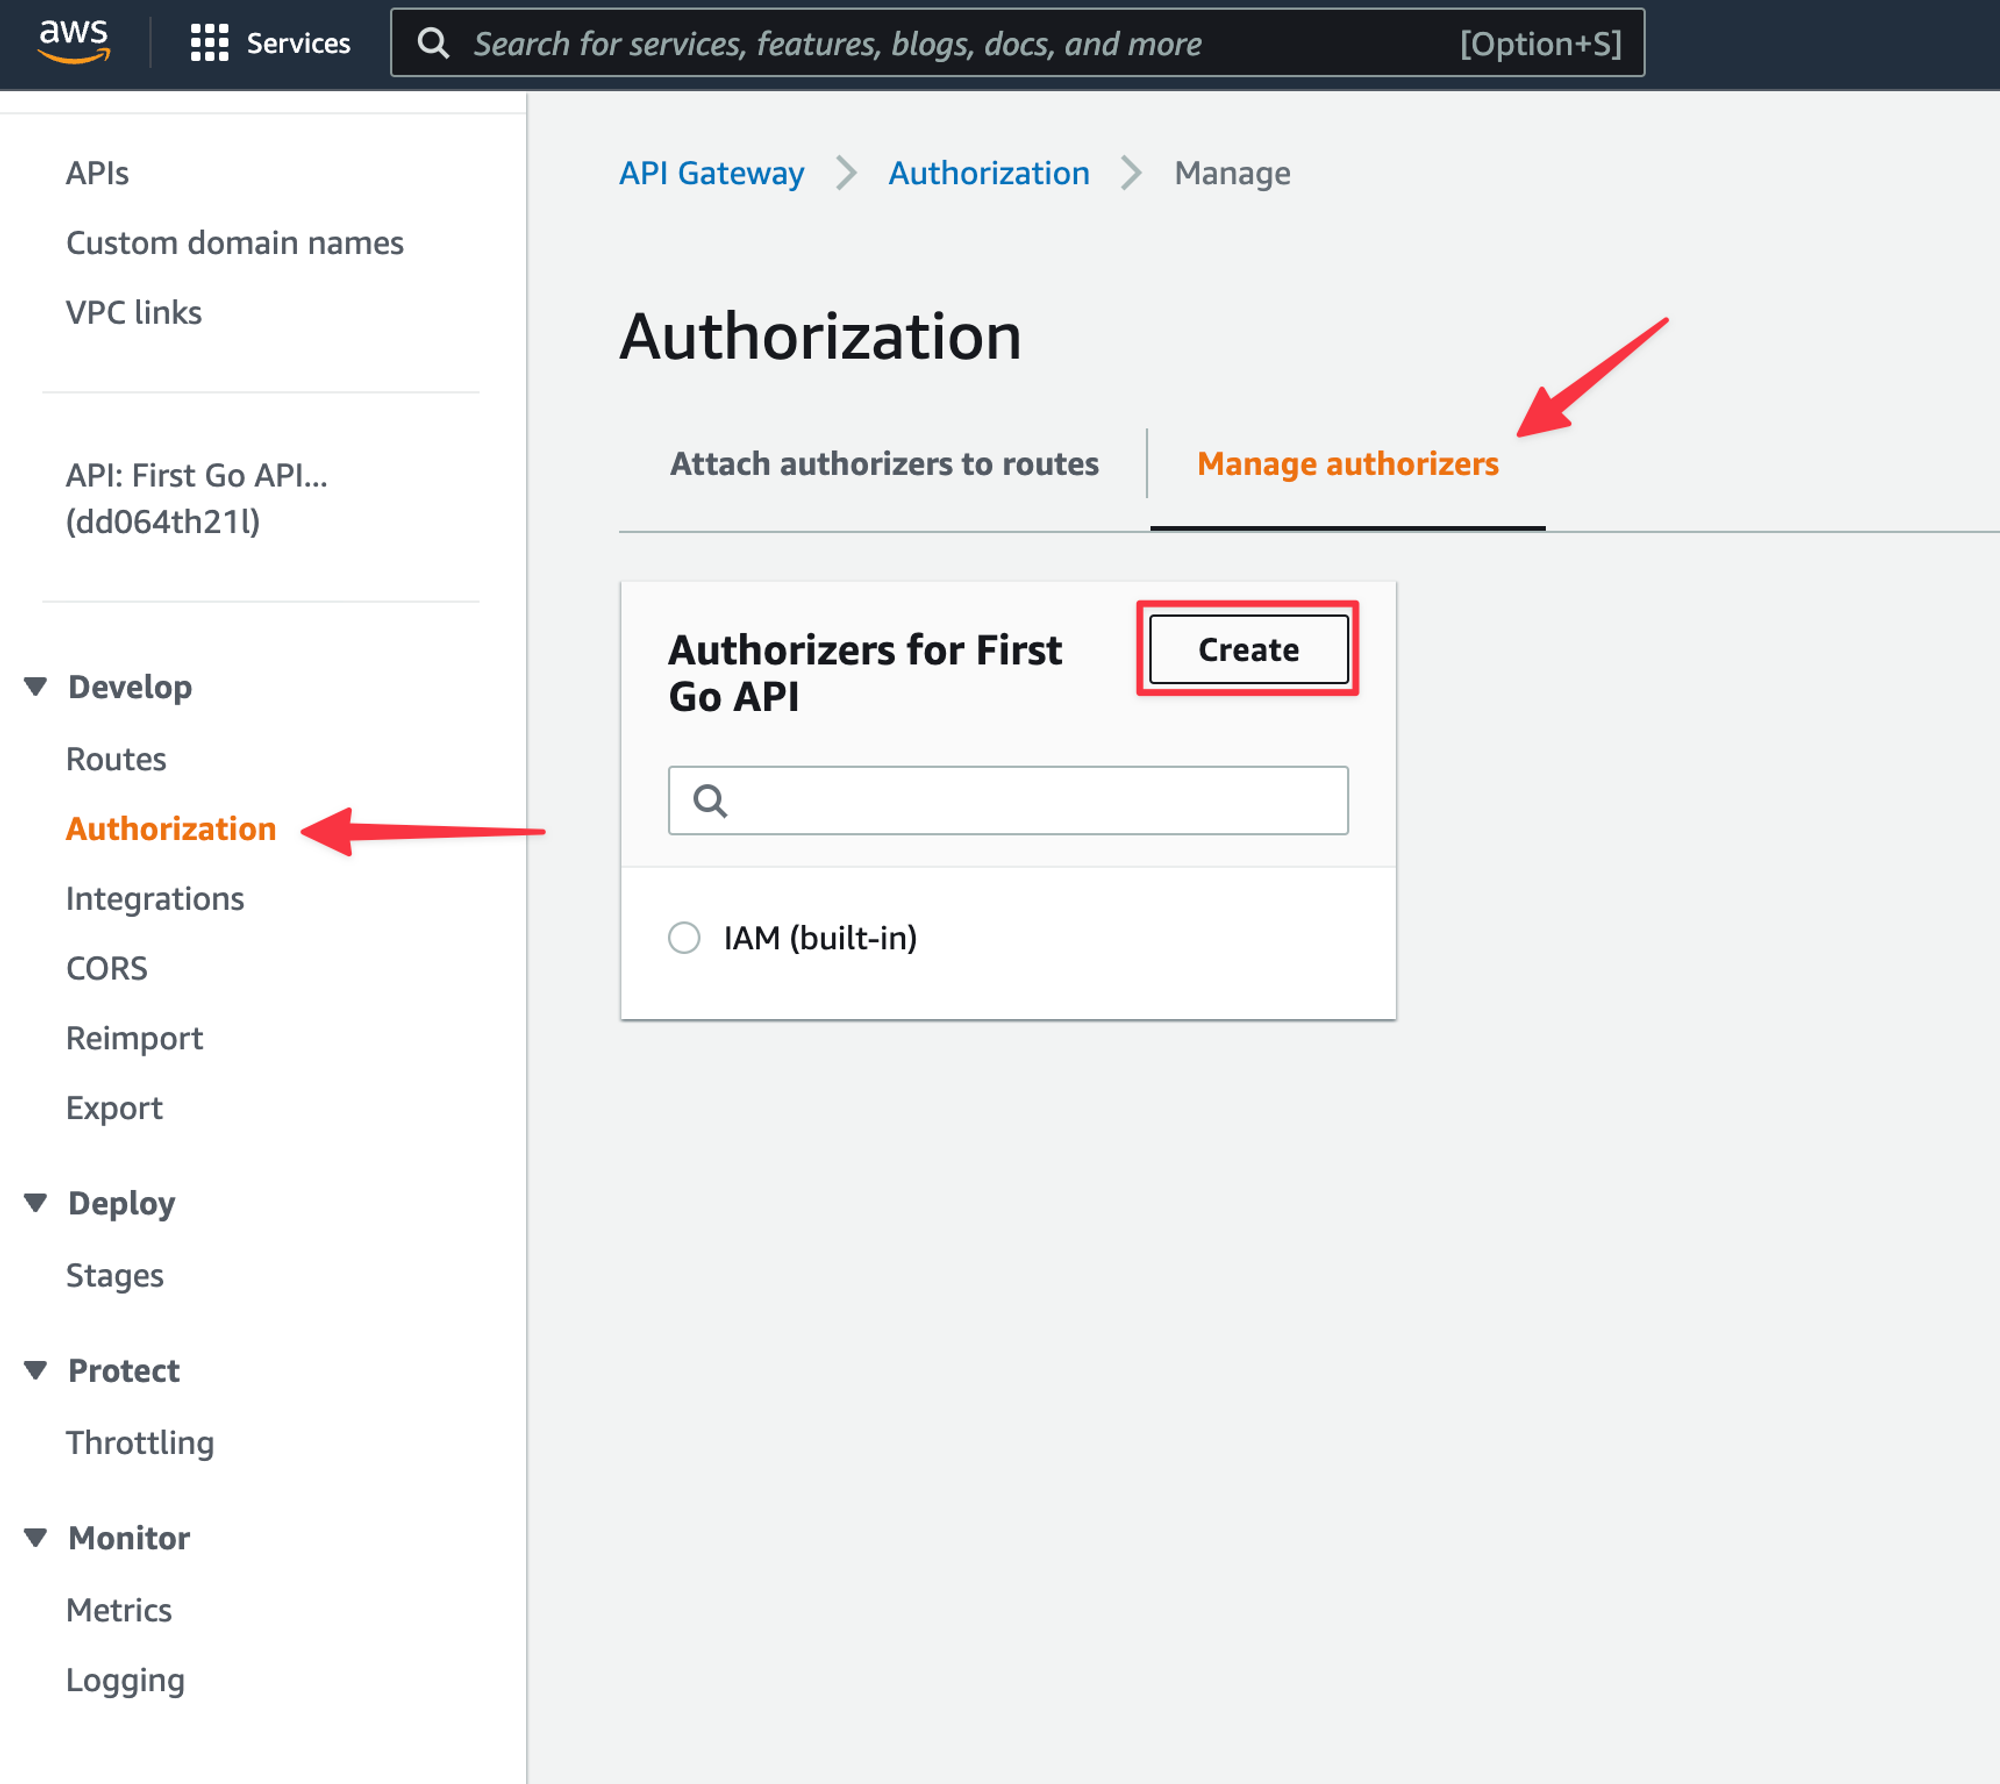
Select “Authorization” from the left, then select the “Manage authorizers” tab, and then click the “Create” button.
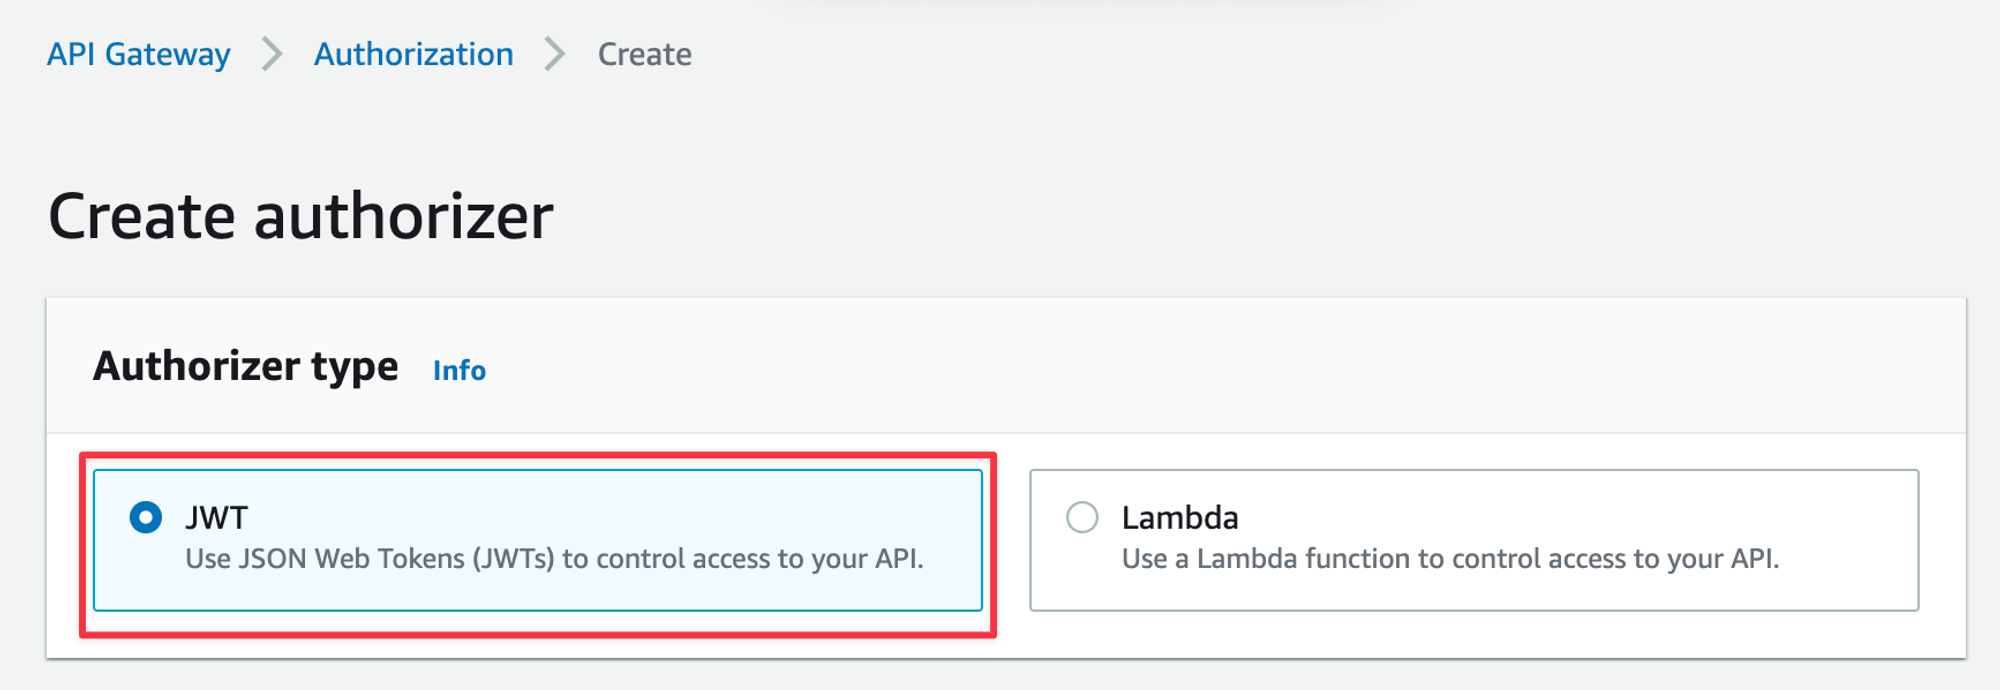
You’ll have the option of a JWT authorizer or a Lambda authorizer, select the “JWT” option.
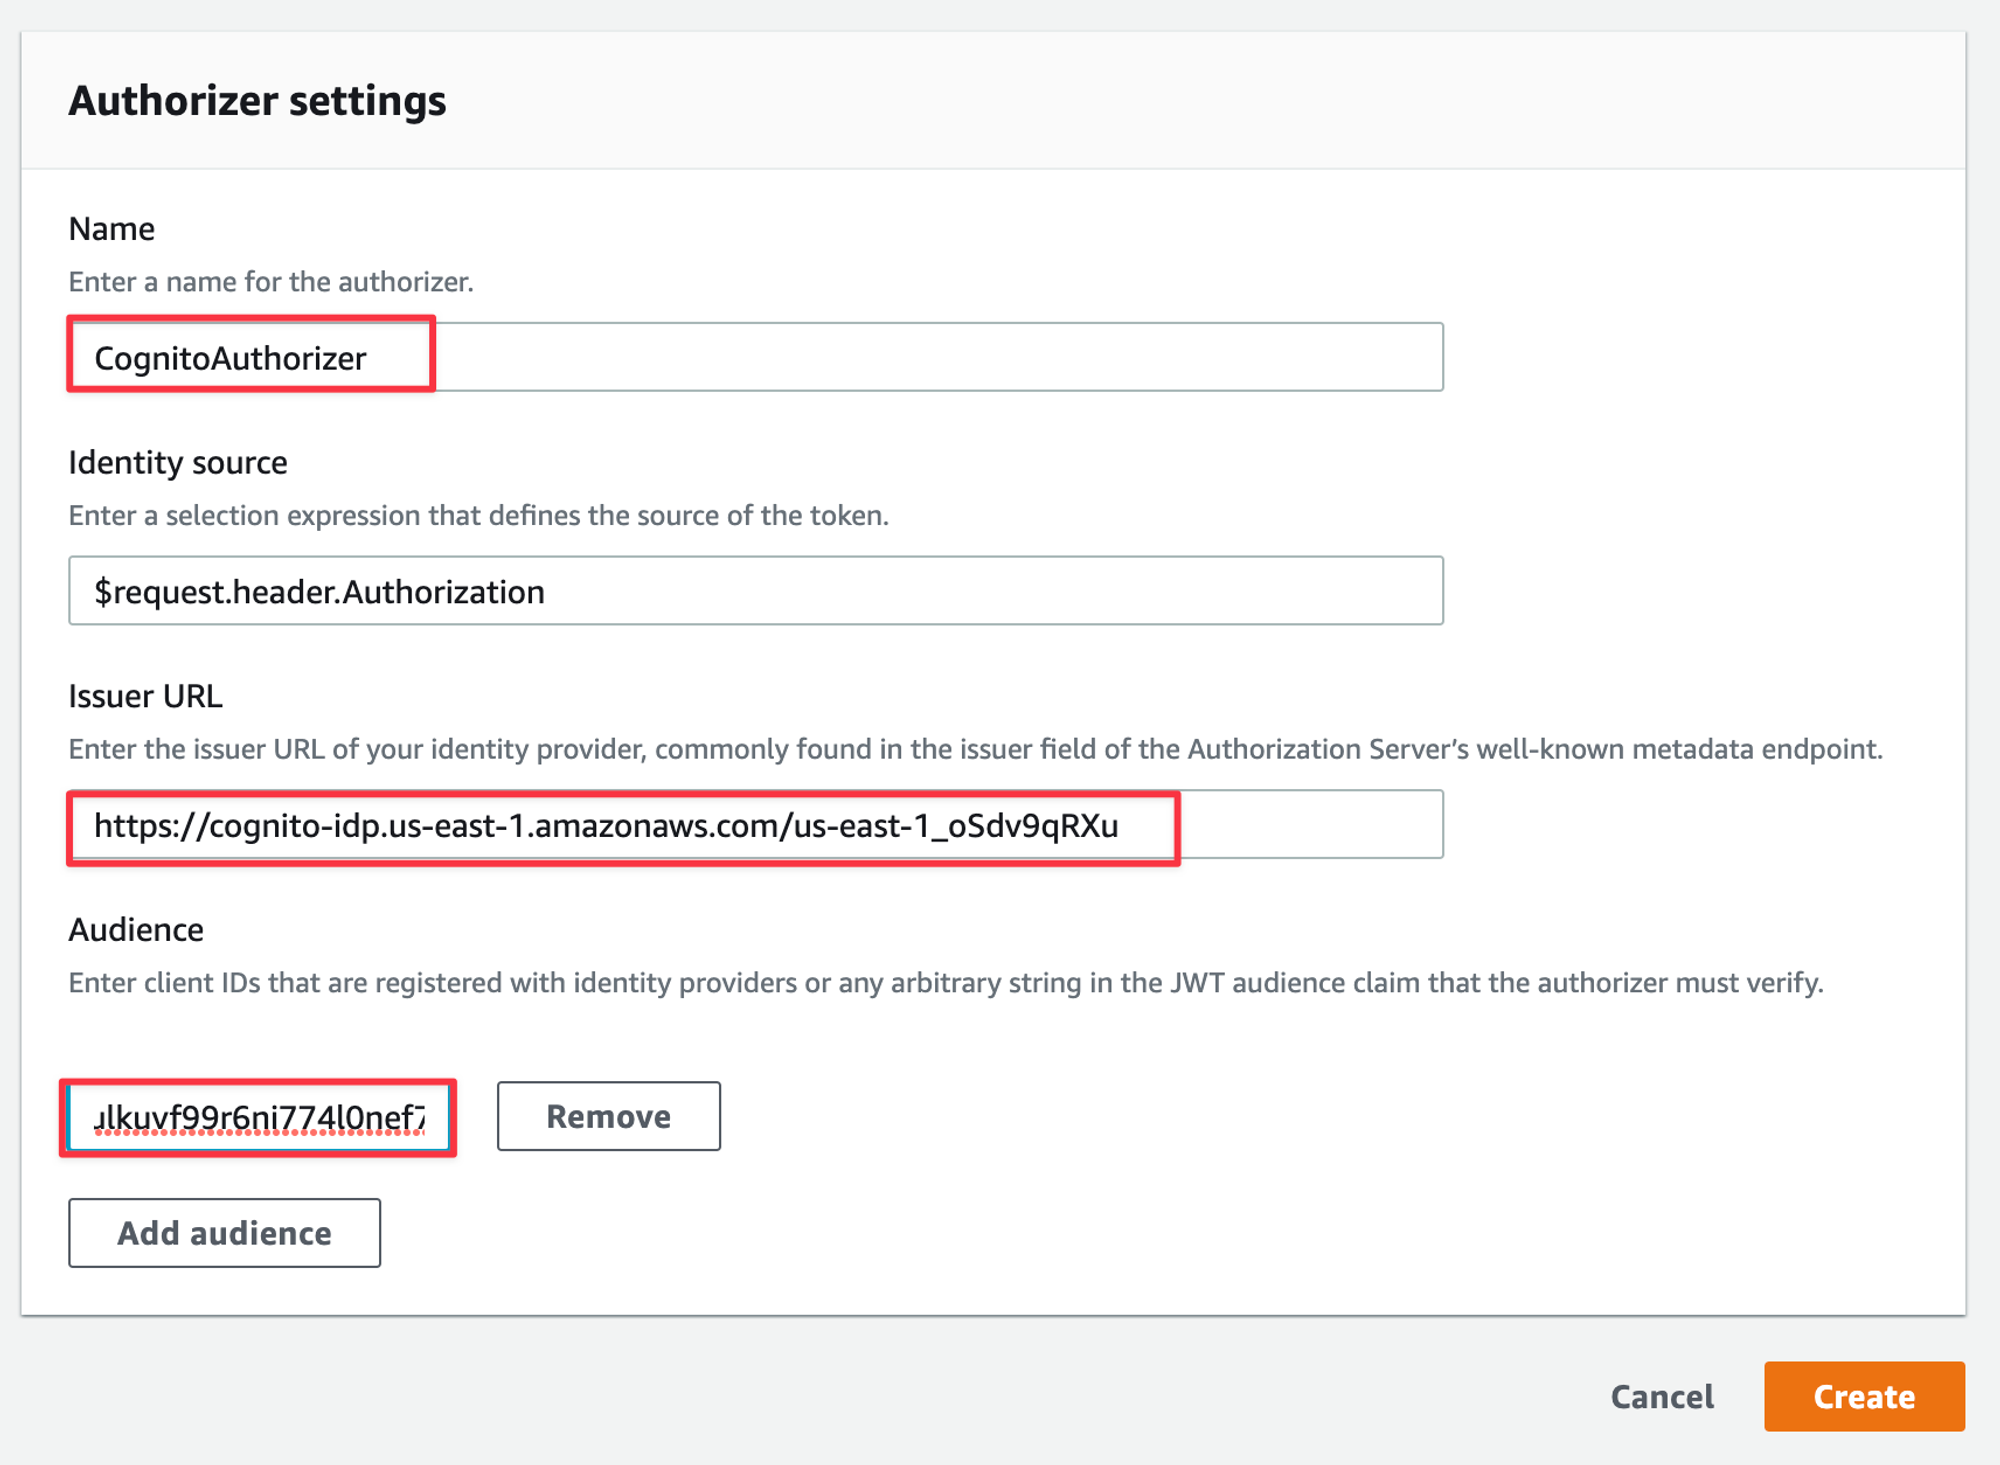
In the form below, give the Authorizer a name. For the Issuer URL, use the format https://cognito-idp.
and replace the variables taken from Cognito in the previous section. For Audience, add the Client ID taken from Cognito. Click “Create” once the form is completed.
Now select the “Attach authorizers” to the routes tab, select the route you want to secure, select the CognitoAuthorizer from the drop-down and then “Attach authorizer”.
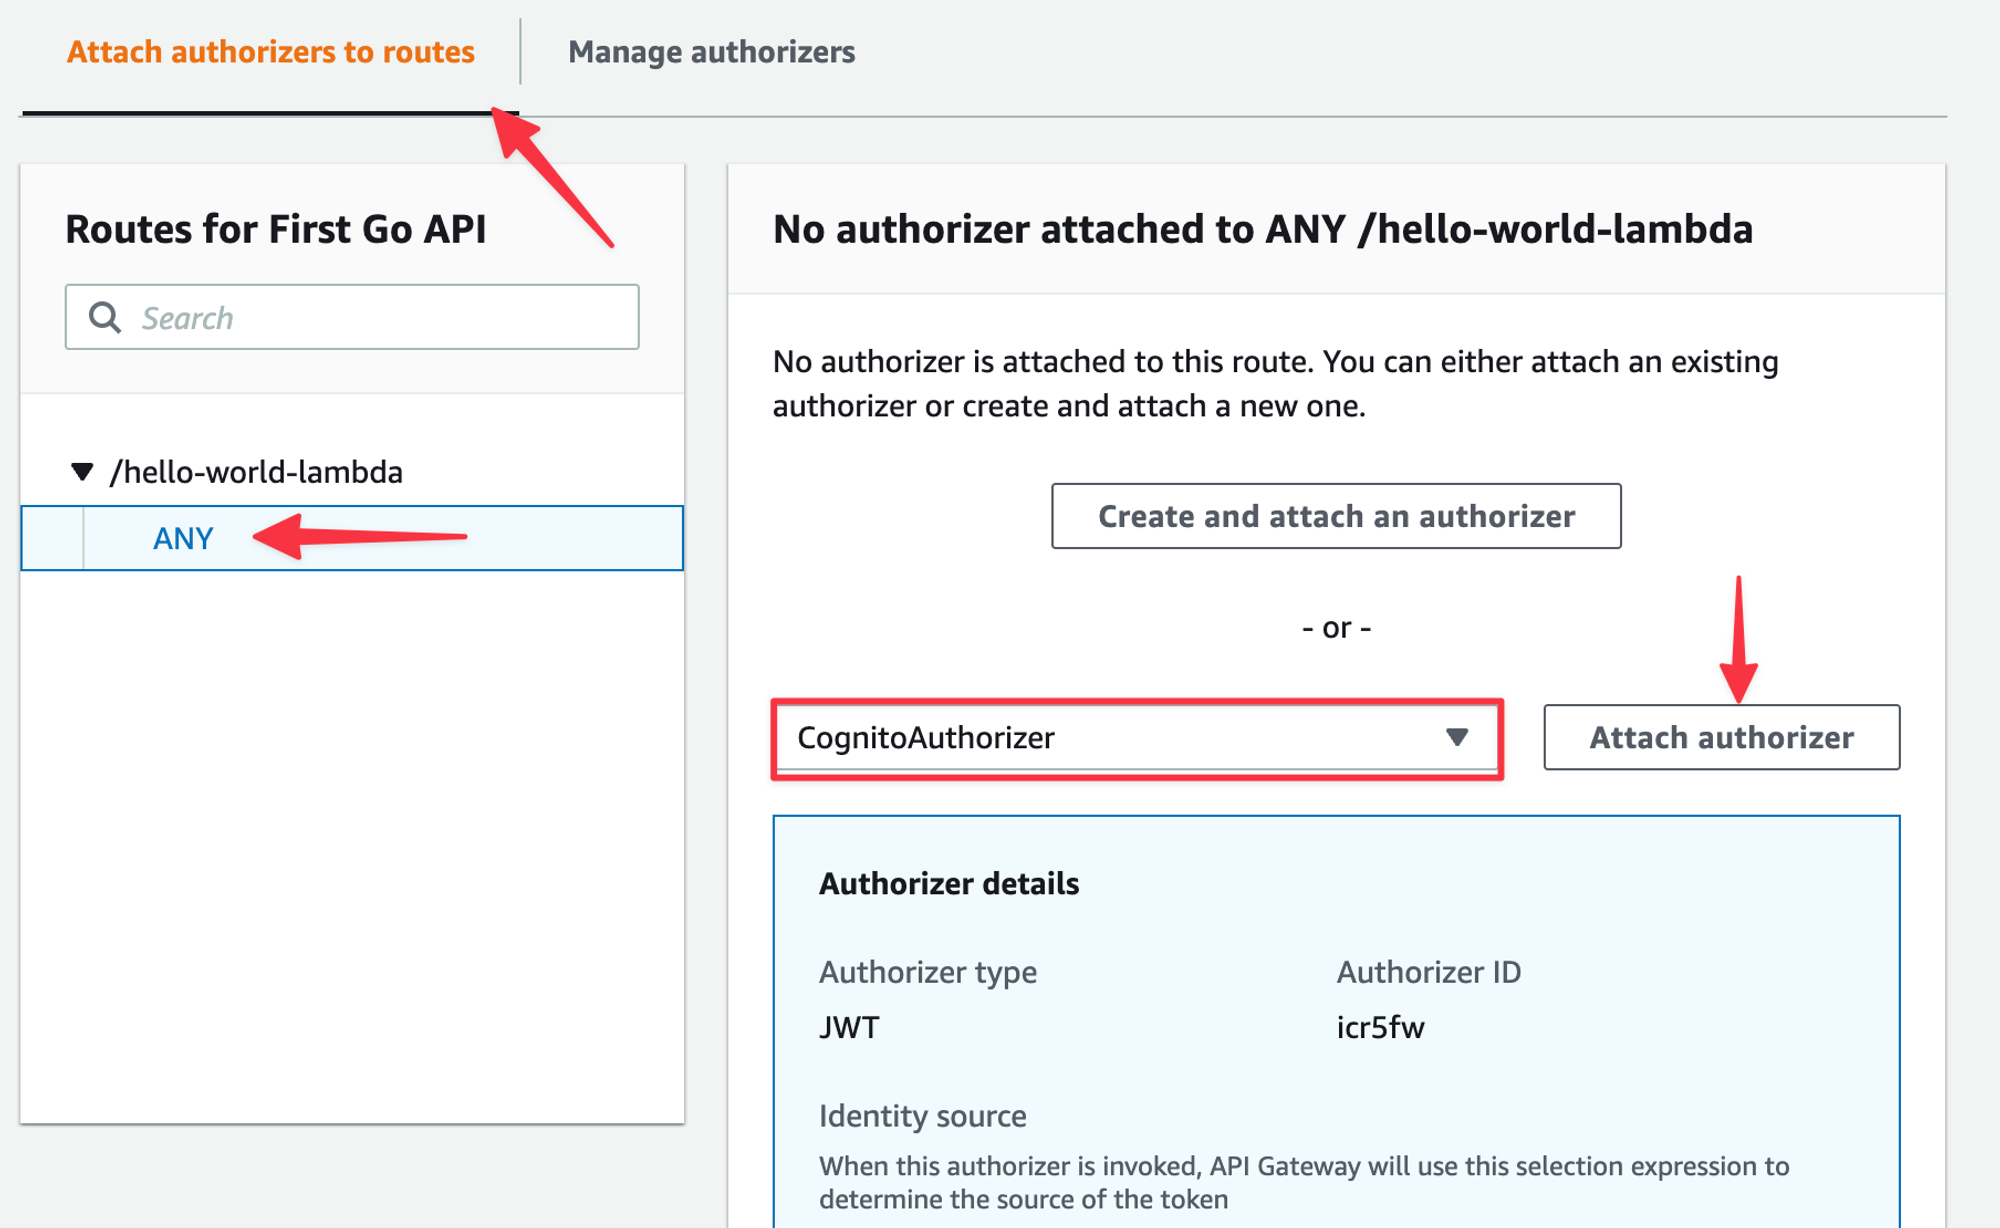
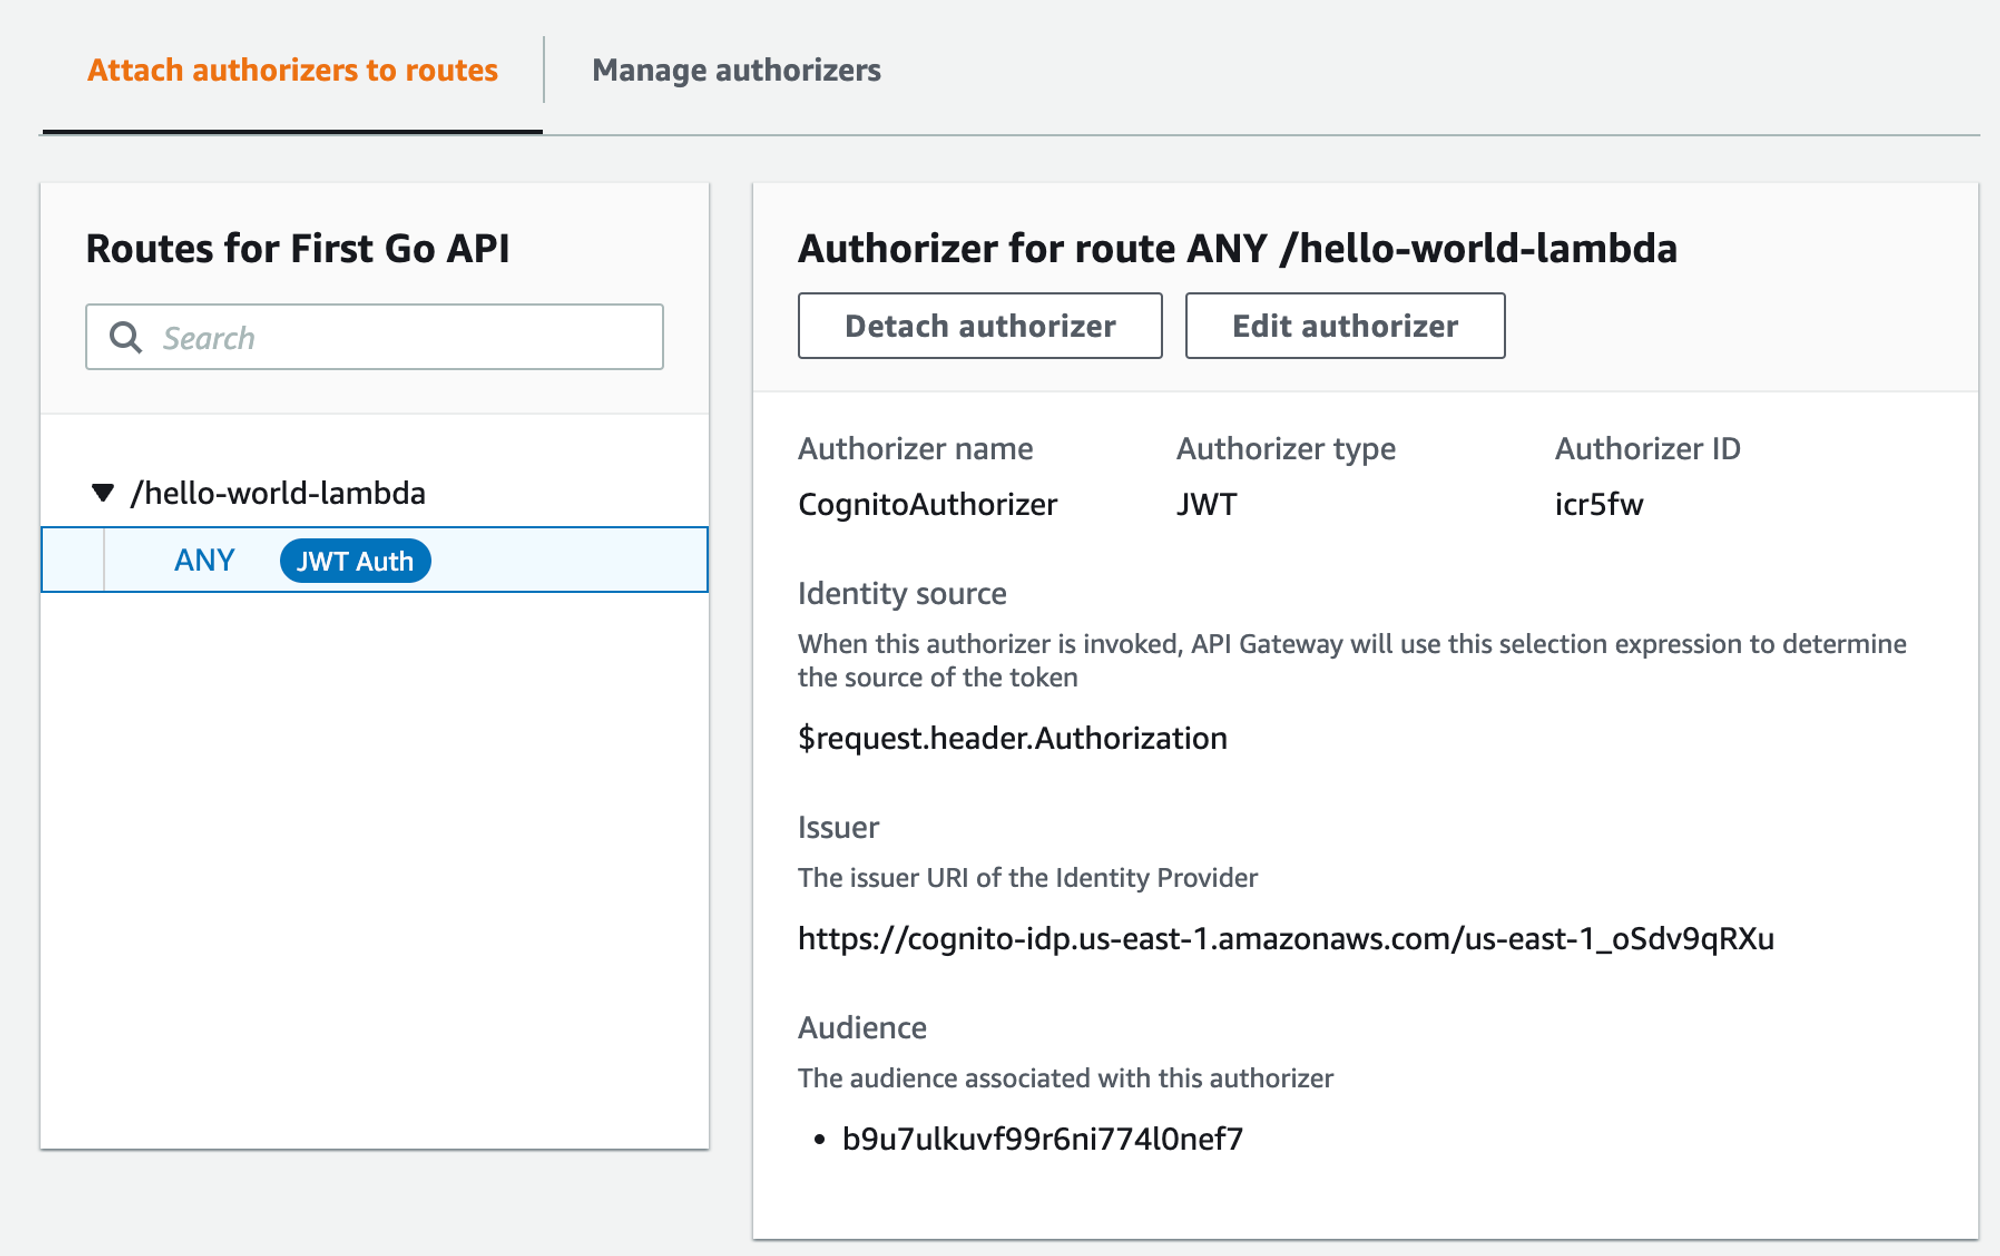
The form should update to reflect the Authorizer being attached.
Test the function
Now that you’ve added the Authorizer to the API Gateway route, we can re-test the function using the exact same parameters as last time.
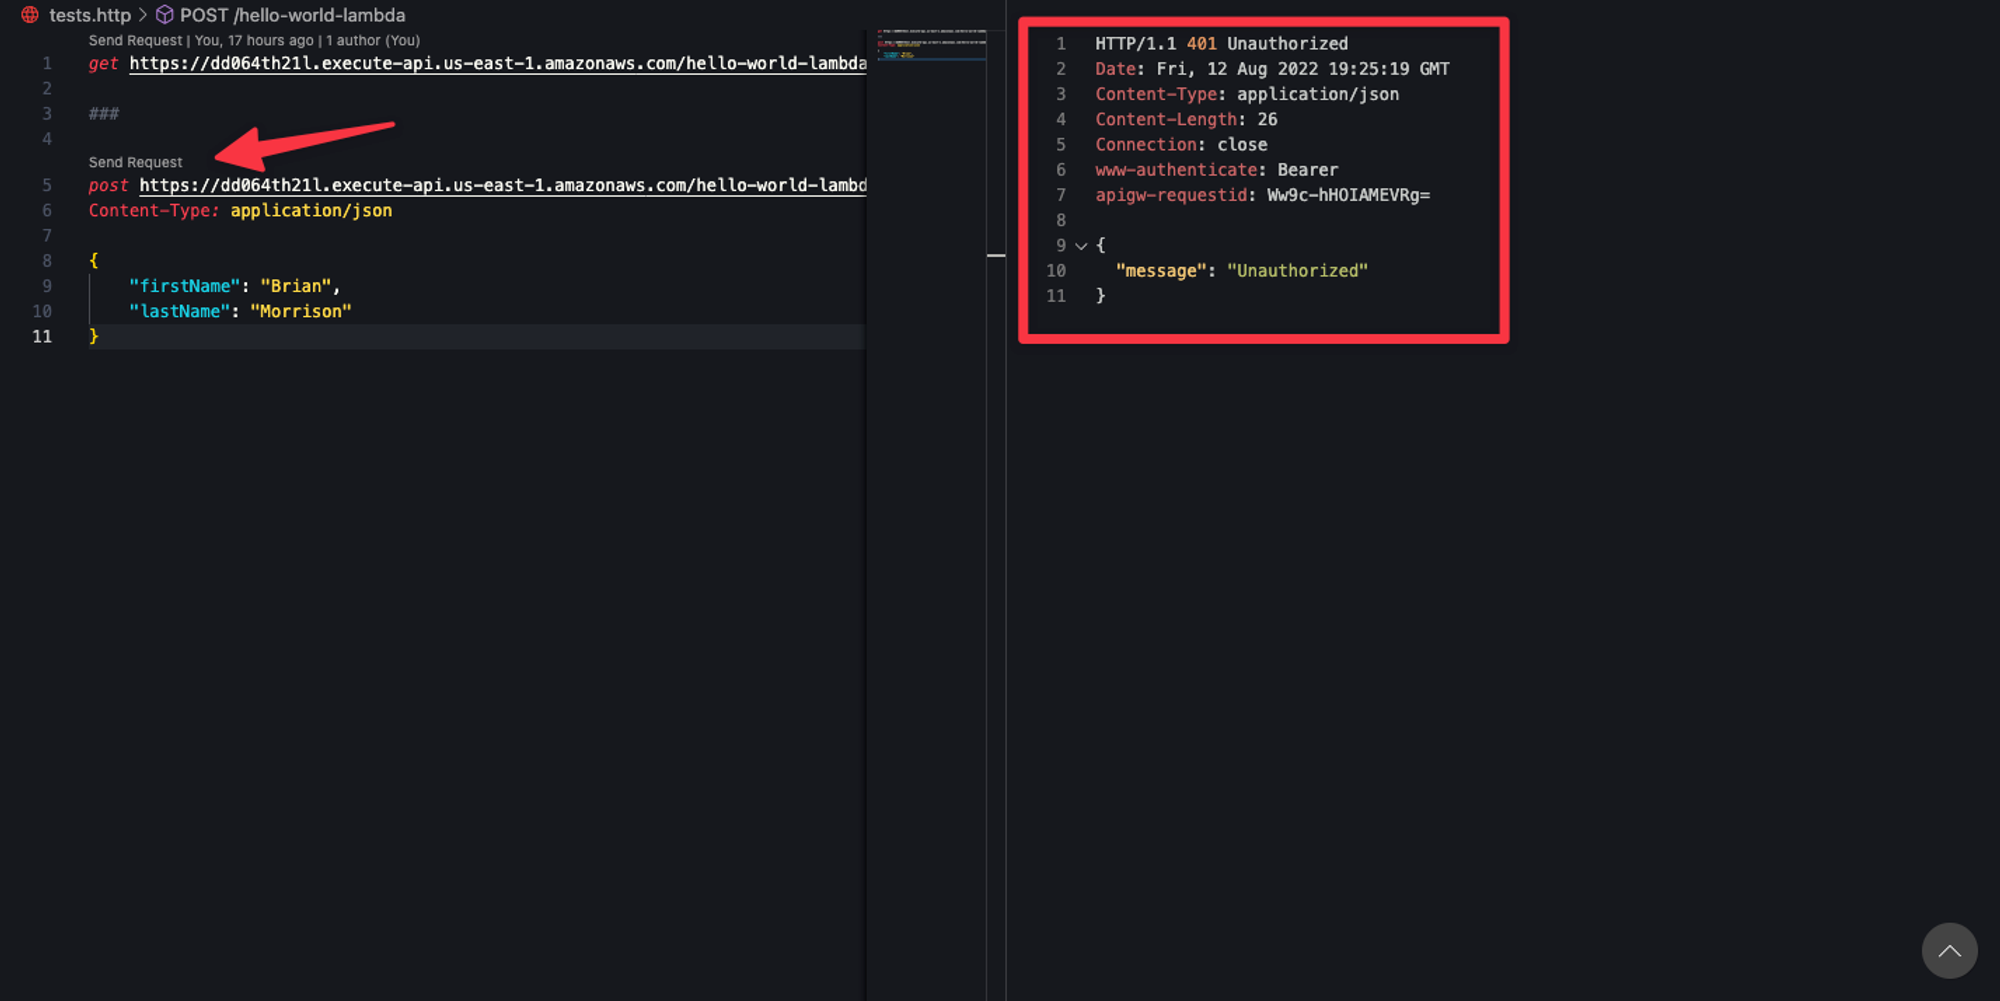
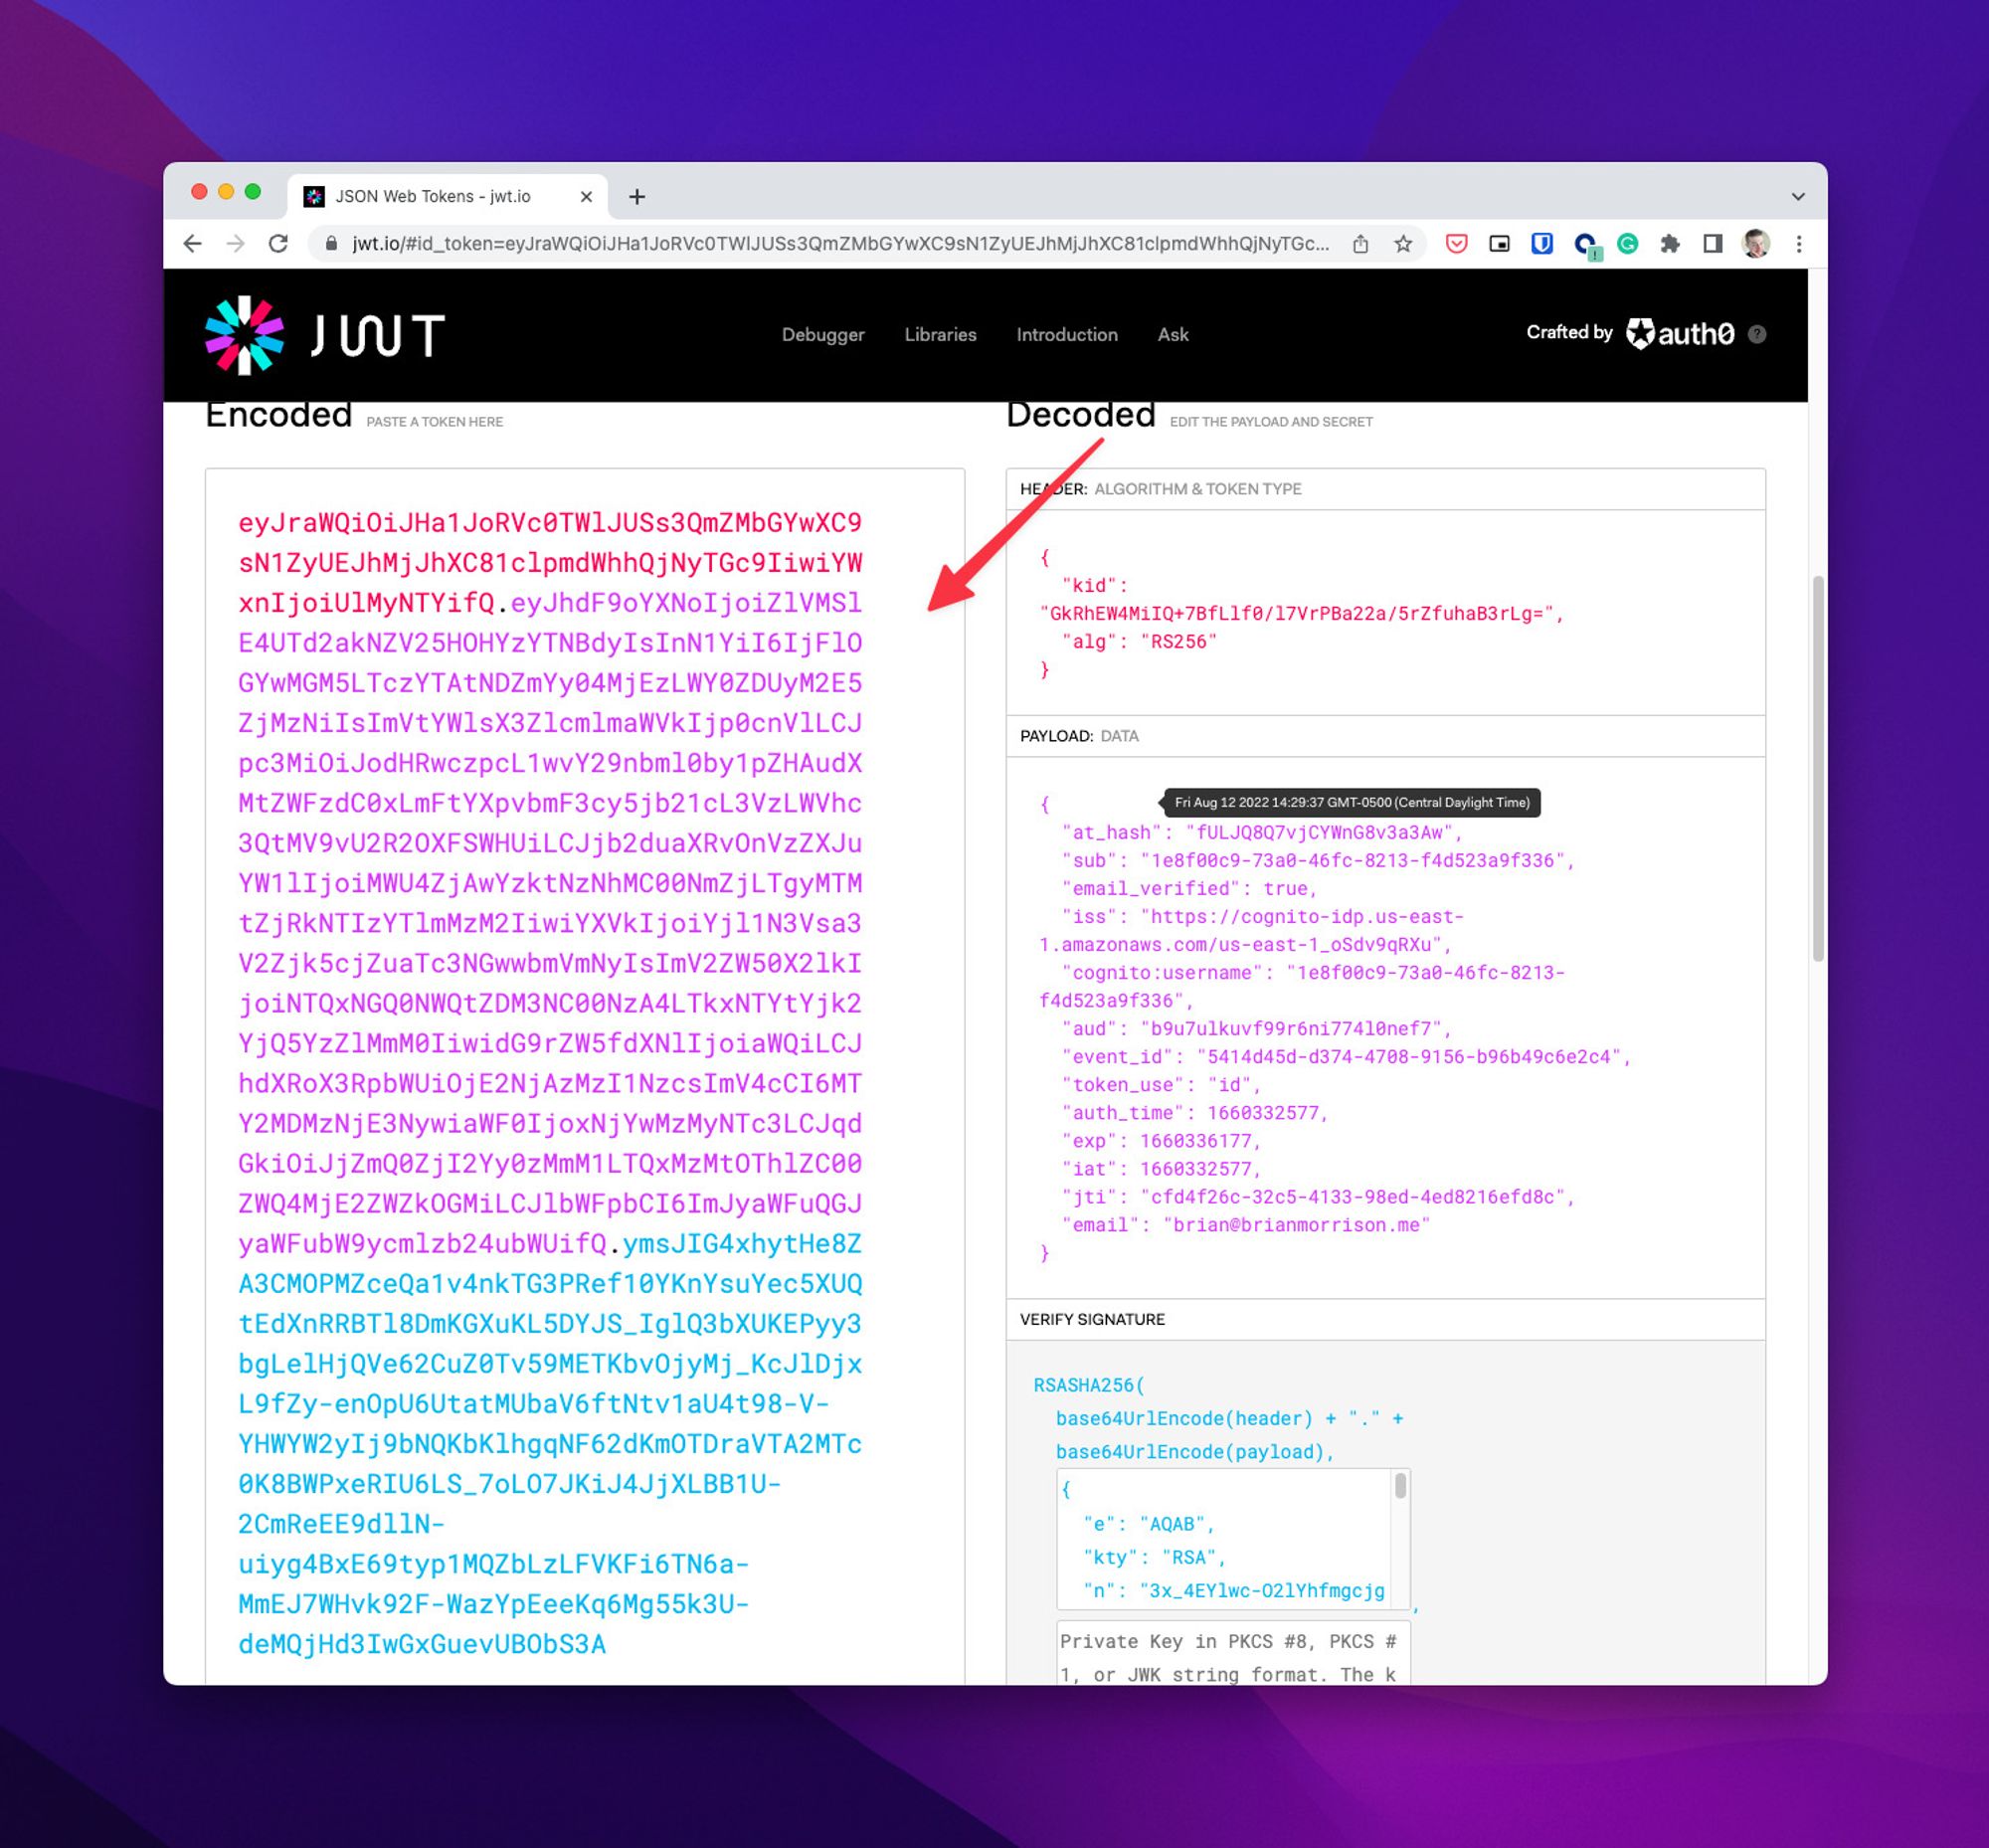
As you can see, the response is returning Unauthorized now, which is exactly what we want. API Gateway is expecting a JWT, specifically one issued by the Cognito user pool, to be in the Authorizationheader. Since that is missing, the Lambda doesn’t even execute before API Gateway sends back the 401 response. Now let’s generate a JWT from the user pool and try the request again. Use the same login URL that we built in the previous entry to get your login form.
<COGNITO_DOMAIN>/oauth2/authorize?response_type=token&client_id=<CLIENT_ID>&redirect_uri=https://jwt.io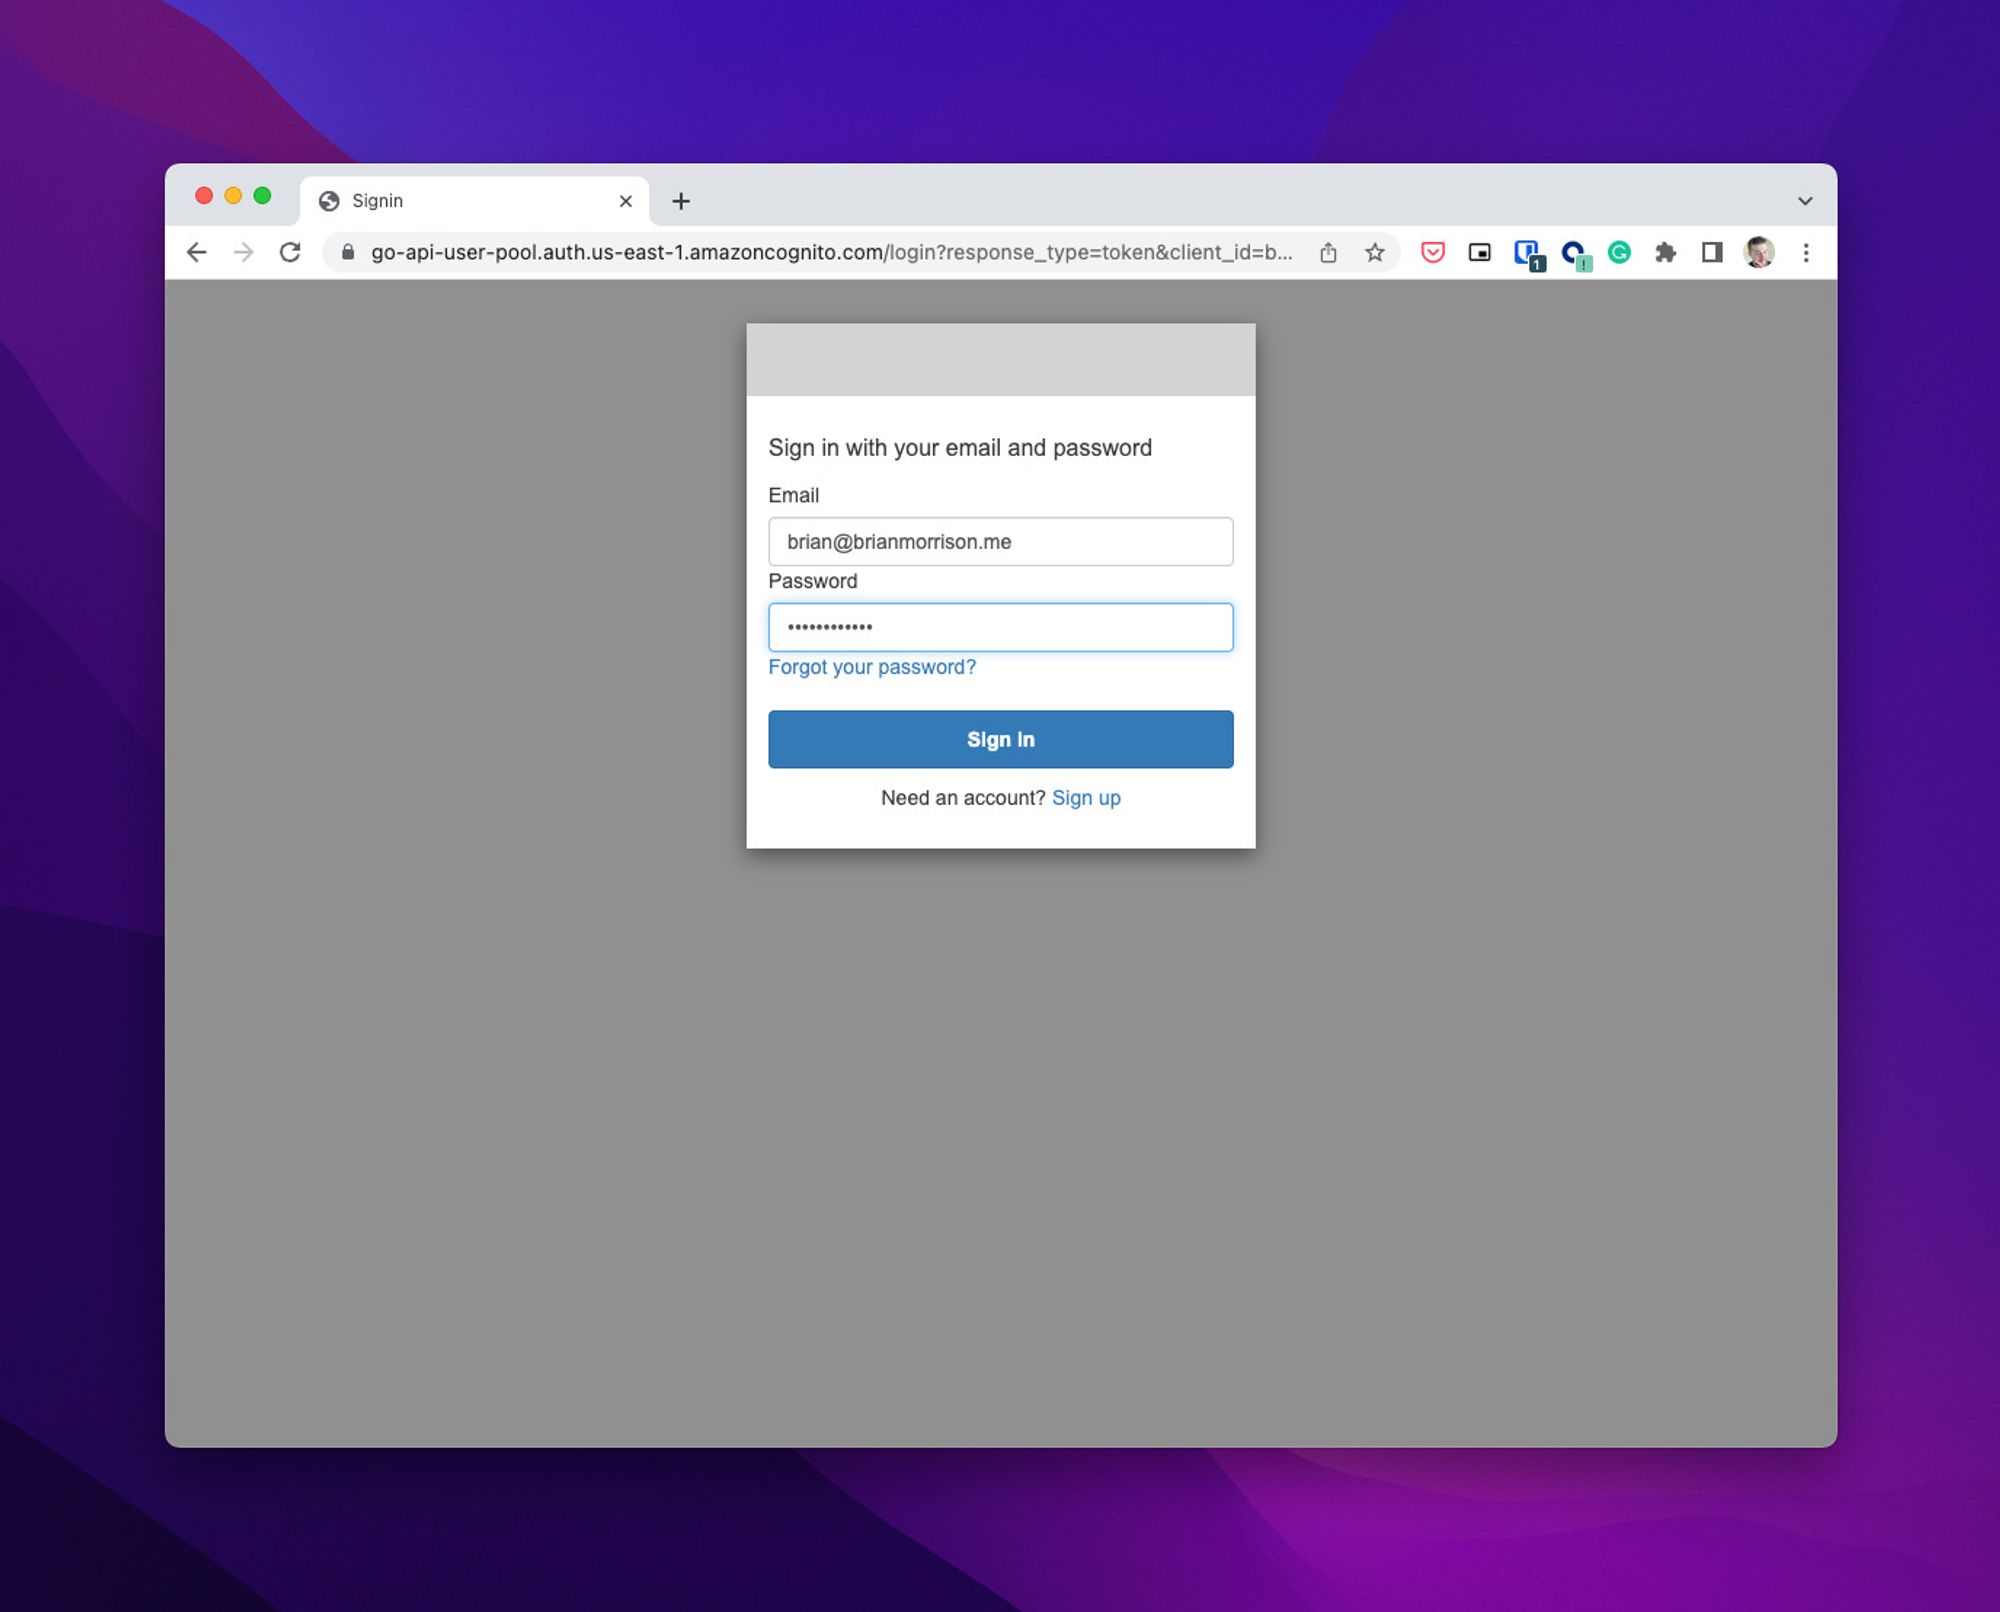
Now login and grab the token from jwt.io.
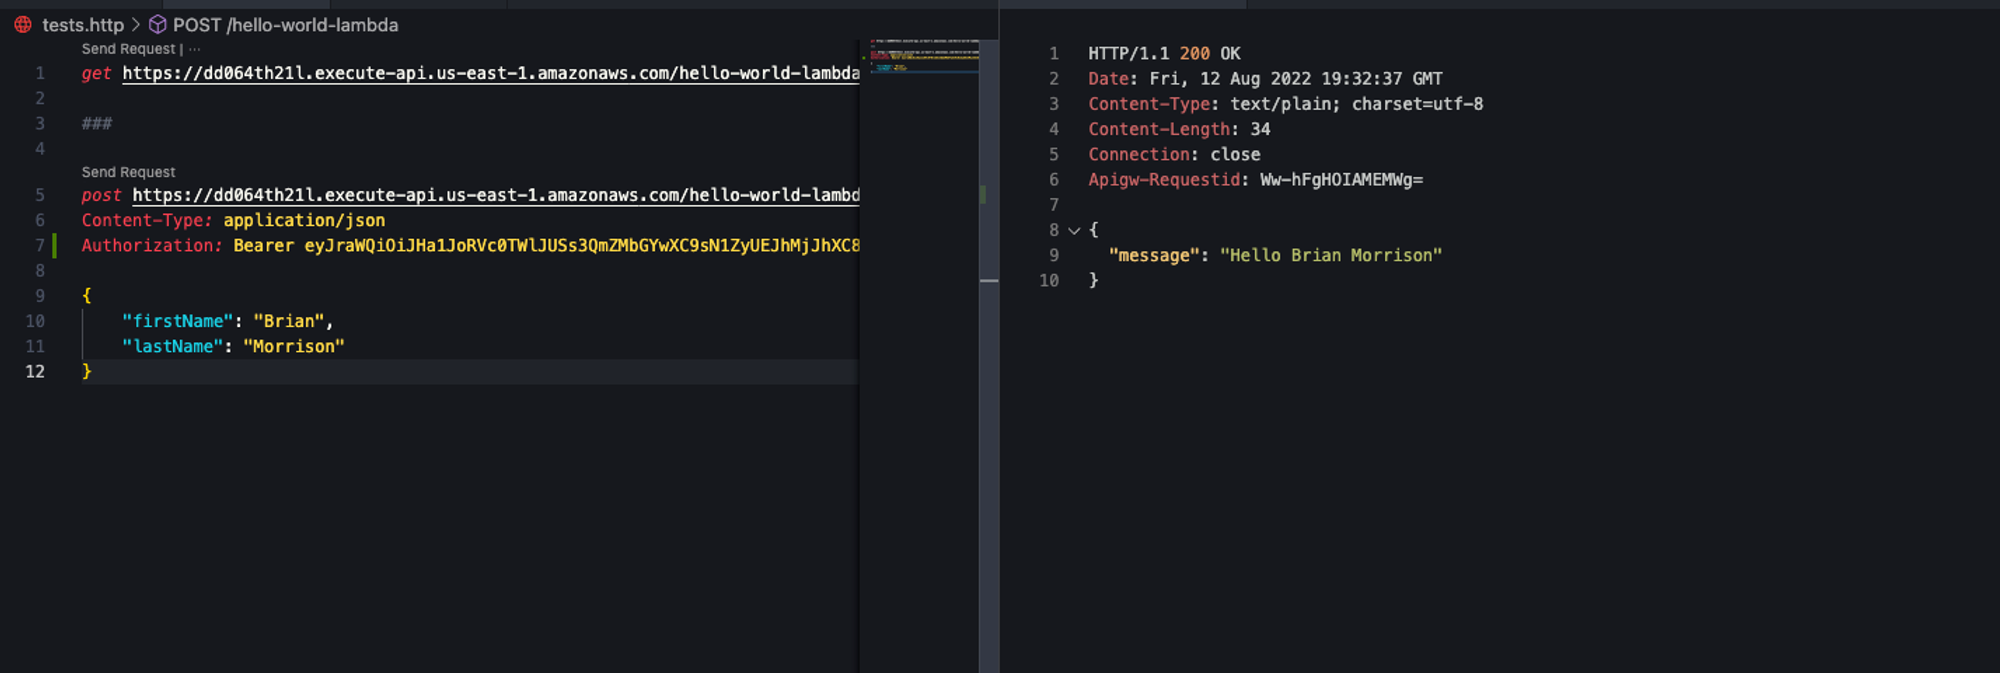
Update the request in the http file and add the Authorizationheader like so:
post <https://dd064th21l.execute-api.us-east-1.amazonaws.com/hello-world-lambda>
Content-Type: application/json
Authorization: Bearer eyJraWQiOiJHa1JoRVc0TWlJUSs3QmZMbGYwXC9sN1ZyUEJhMjJhXC81clpmdWhhQjNyTGc9IiwiYWxnIjoiUlMyNTYifQ.eyJhdF9oYXNoIjoiZlVMSlE4UTd2akNZV25HOHYzYTNBdyIsInN1YiI6IjFlOGYwMGM5LTczYTAtNDZmYy04MjEzLWY0ZDUyM2E5ZjMzNiIsImVtYWlsX3ZlcmlmaWVkIjp0cnVlLCJpc3MiOiJodHRwczpcL1wvY29nbml0by1pZHAudXMtZWFzdC0xLmFtYXpvbmF3cy5jb21cL3VzLWVhc3QtMV9vU2R2OXFSWHUiLCJjb2duaXRvOnVzZXJuYW1lIjoiMWU4ZjAwYzktNzNhMC00NmZjLTgyMTMtZjRkNTIzYTlmMzM2IiwiYXVkIjoiYjl1N3Vsa3V2Zjk5cjZuaTc3NGwwbmVmNyIsImV2ZW50X2lkIjoiNTQxNGQ0NWQtZDM3NC00NzA4LTkxNTYtYjk2YjQ5YzZlMmM0IiwidG9rZW5fdXNlIjoiaWQiLCJhdXRoX3RpbWUiOjE2NjAzMzI1NzcsImV4cCI6MTY2MDMzNjE3NywiaWF0IjoxNjYwMzMyNTc3LCJqdGkiOiJjZmQ0ZjI2Yy0zMmM1LTQxMzMtOThlZC00ZWQ4MjE2ZWZkOGMiLCJlbWFpbCI6ImJyaWFuQGJyaWFubW9ycmlzb24ubWUifQ.ymsJIG4xhytHe8ZA3CMOPMZceQa1v4nkTG3PRef10YKnYsuYec5XUQtEdXnRRBTl8DmKGXuKL5DYJS_IglQ3bXUKEPyy3bgLelHjQVe62CuZ0Tv59METKbvOjyMj_KcJlDjxL9fZy-enOpU6UtatMUbaV6ftNtv1aU4t98-V-YHWYW2yIj9bNQKbKlhgqNF62dKmOTDraVTA2MTc0K8BWPxeRIU6LS_7oLO7JKiJ4JjXLBB1U-2CmReEE9dllN-uiyg4BxE69typ1MQZbLzLFVKFi6TN6a-MmEJ7WHvk92F-WazYpEeeKq6Mg55k3U-deMQjHd3IwGxGuevUBObS3A

{
    "firstName": "Brian",
    "lastName": "Morrison"
}
Now run the test again and it should respond as expected!
Handling the token in code
Now that the API endpoint is secure, let’s actually extract some of the claims from the token so we can identify the user. Update the handlefunc in the main.go file to look like the following code:
func handler(request events.APIGatewayV2HTTPRequest) (events.APIGatewayProxyResponse, error) {
    jbytes, err := json.Marshal(request)
    if err != nil {
        return events.APIGatewayProxyResponse{}, err
    }
    log.Println(string(jbytes))

    var person Person
    err = json.Unmarshal([]byte(request.Body), &person)
    if err != nil {
        return events.APIGatewayProxyResponse{}, err
    }

    msg := fmt.Sprintf("Hello %v %v", *person.FirstName, *person.LastName)
    responseBody := ResponseBody{
        Message: &msg,
    }
    jbytes, err = json.Marshal(responseBody)
    if err != nil {
        return events.APIGatewayProxyResponse{}, err
    }

    response := events.APIGatewayProxyResponse{
        StatusCode: 200,
        Body:       string(jbytes),
    }
    return response, nil
}
Now build & zip up the code so we can upload a fresh copy to AWS.
GOOS=linux GOARCH=amd64 go build -o ./dist/main .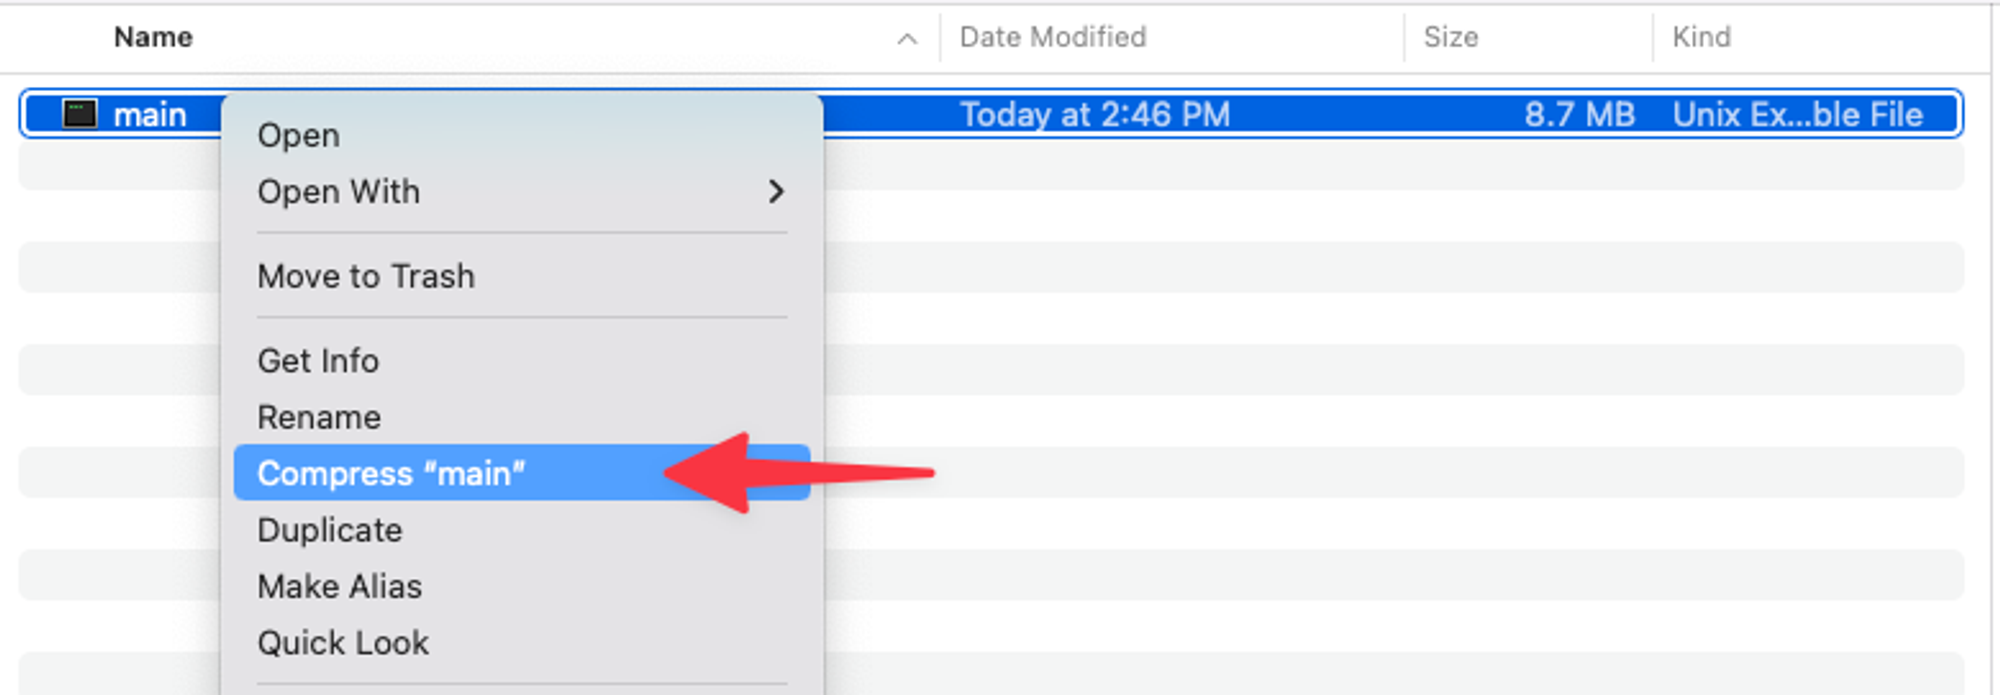
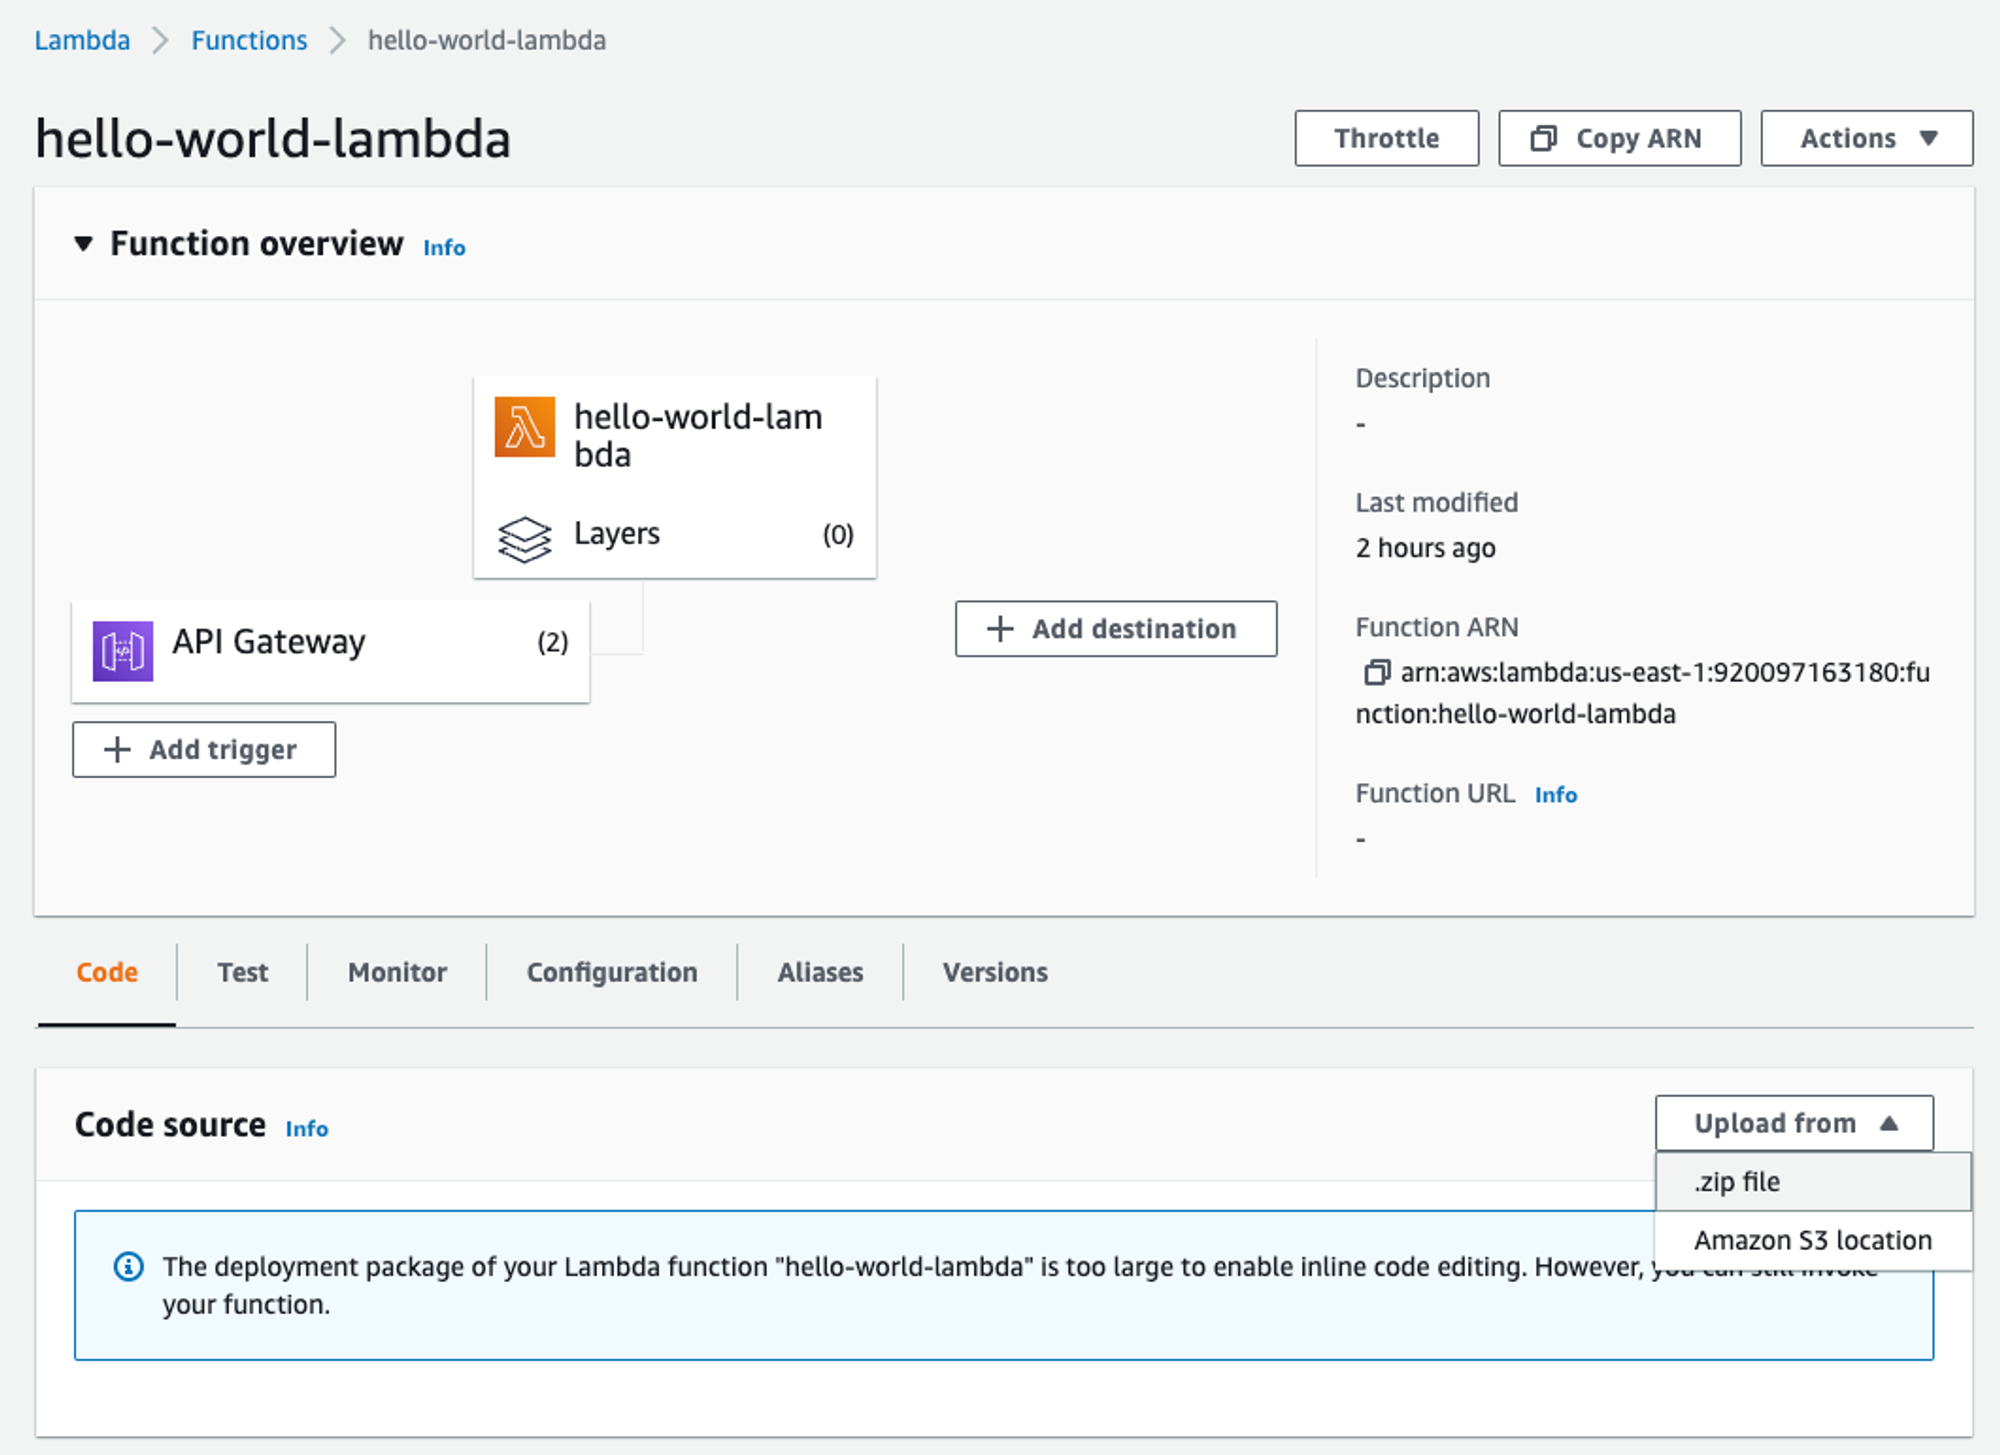
Now upload it to the Lambda function in AWS.
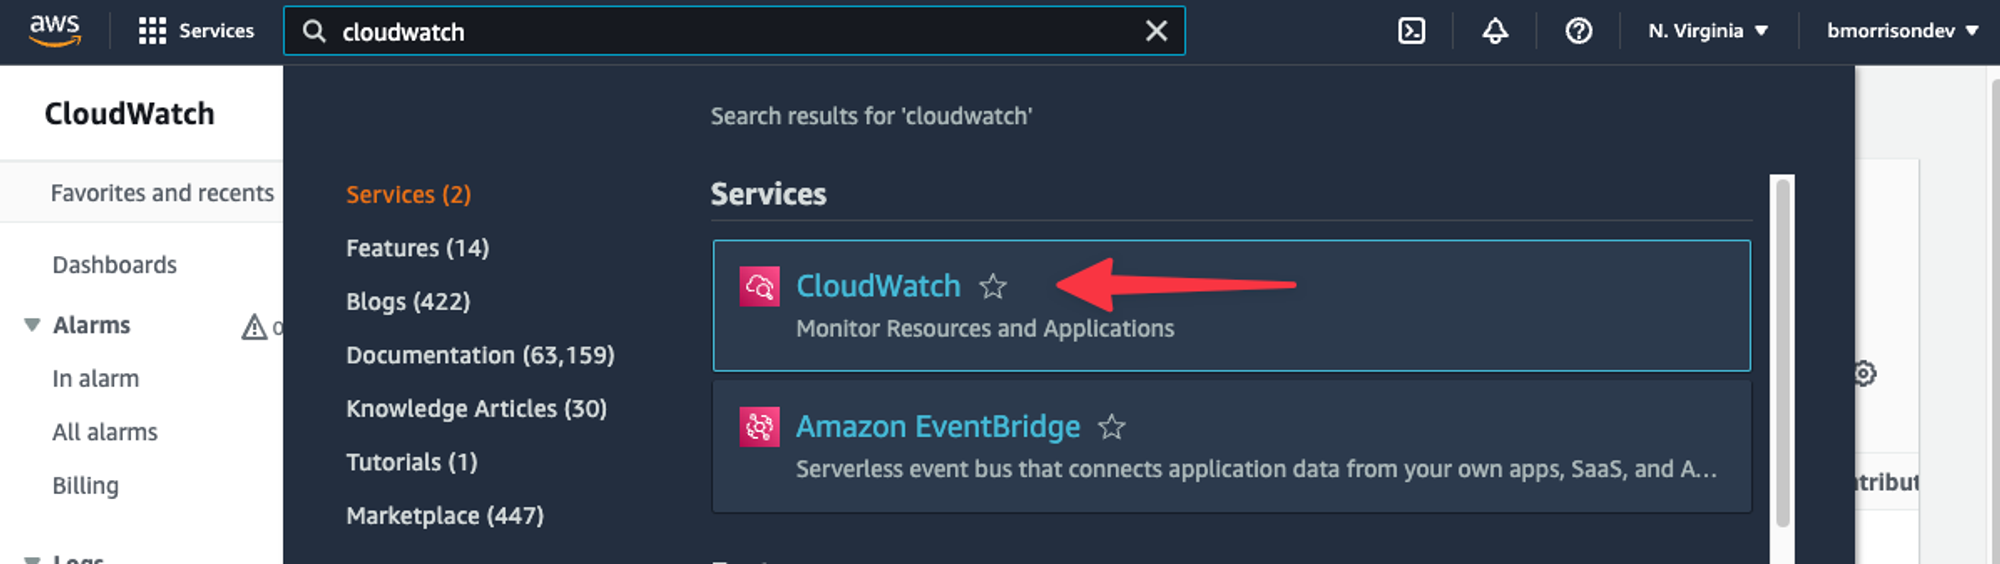
Run the test again, you shouldn’t see any difference in the response. Even though there is no change in the response, we can actually check the output of the function on AWS CloudWatch. Search for ‘CloudWatch’ in the AWS console search and select it from the list.
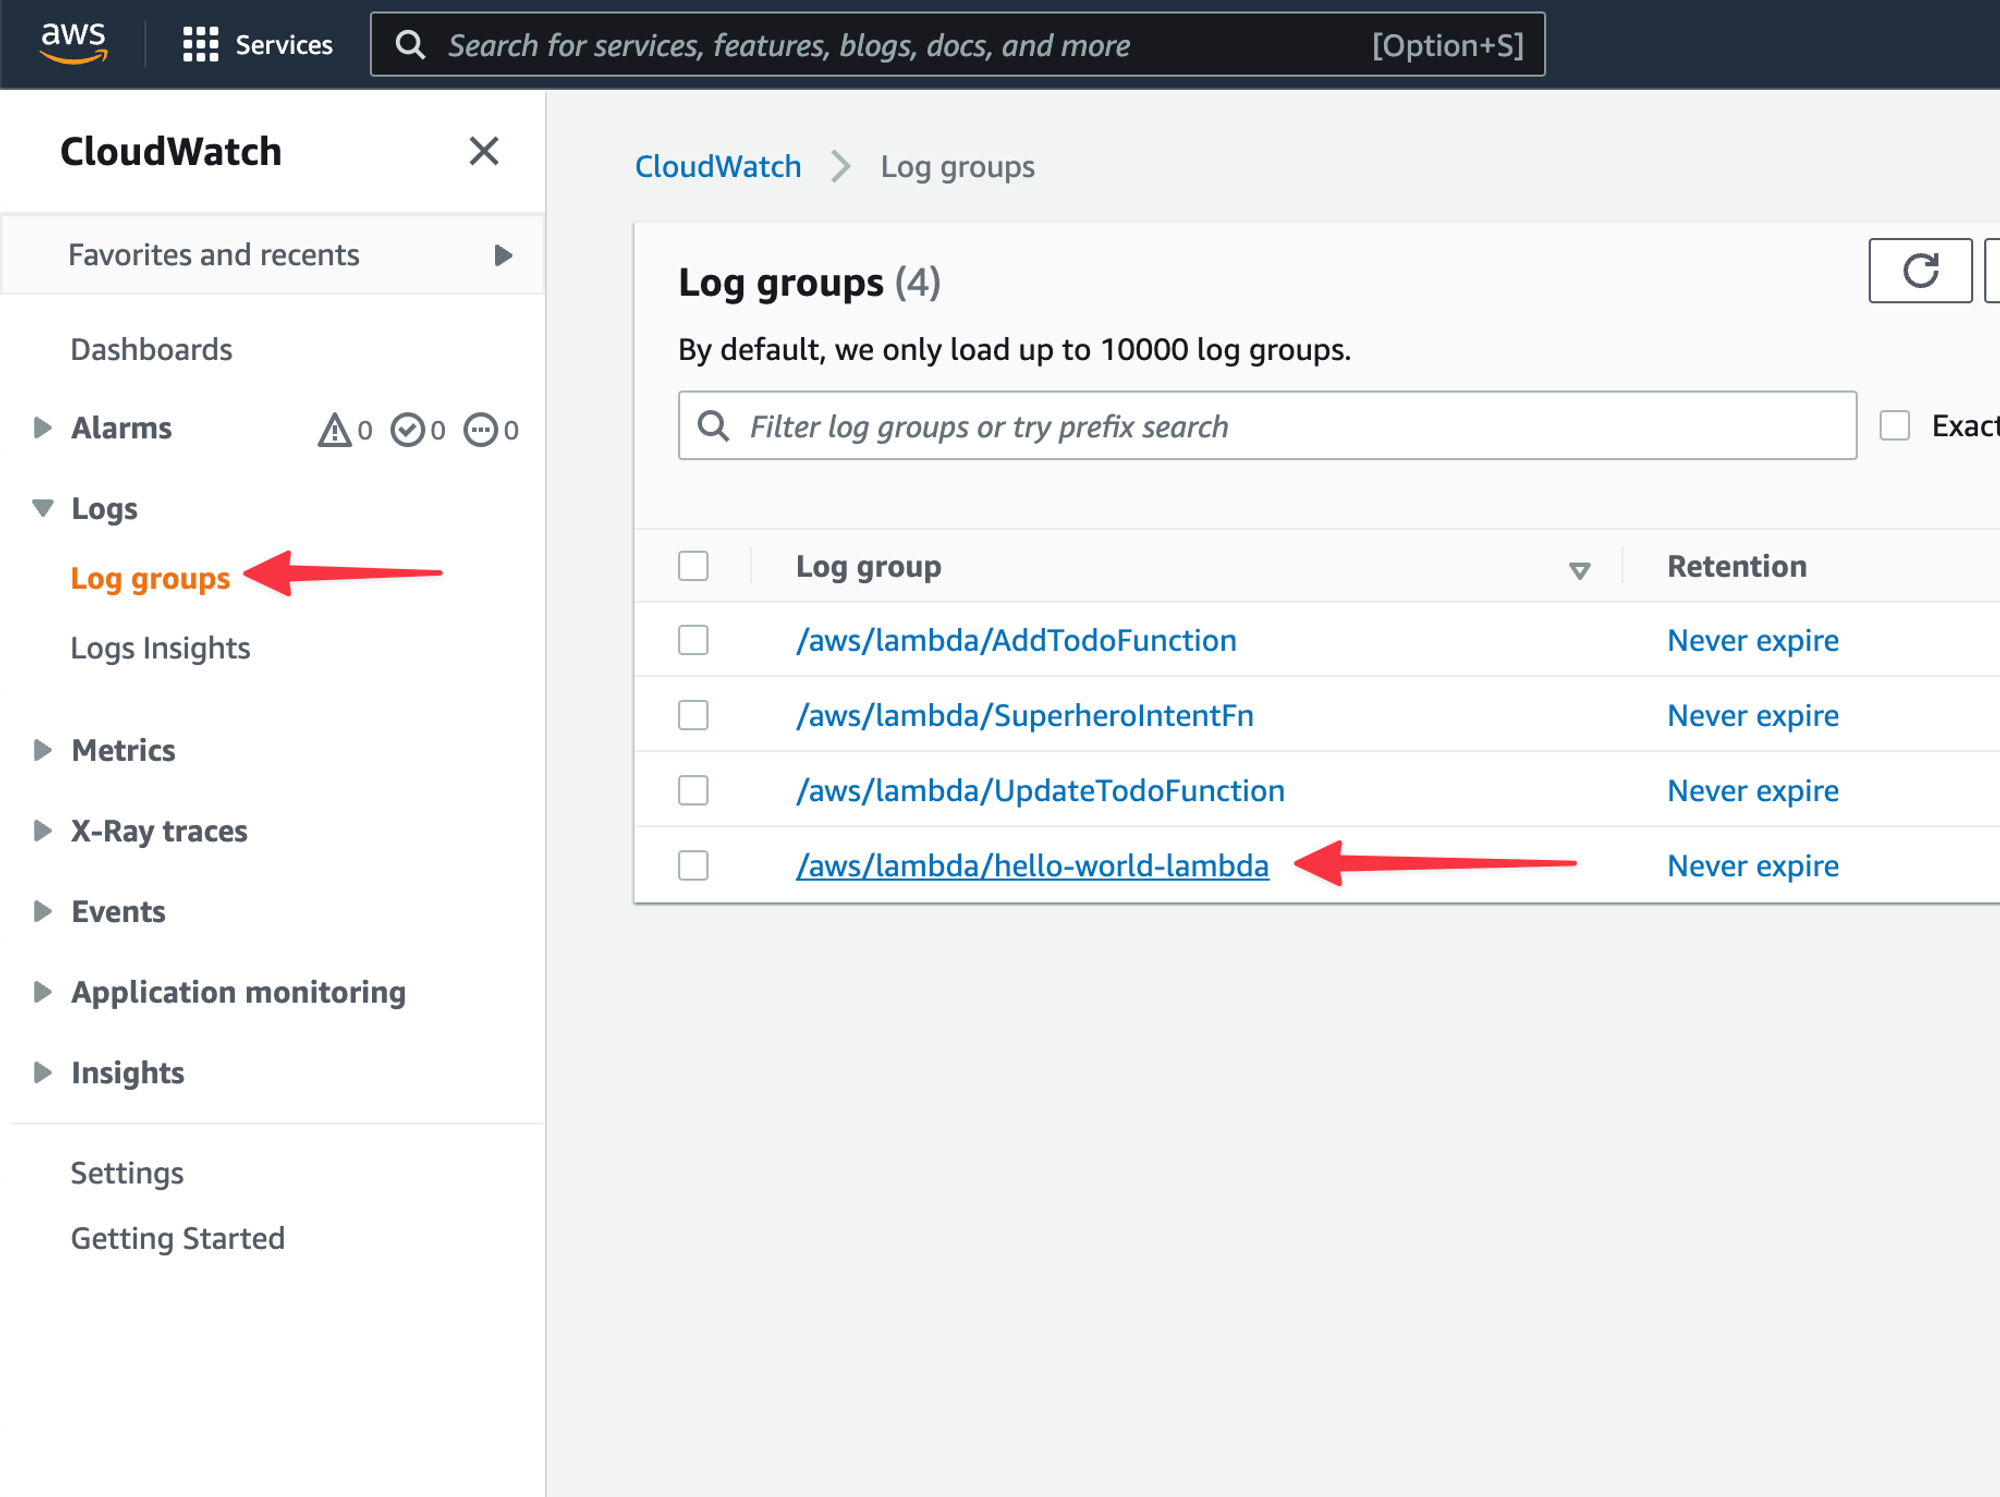
In the left nav, click “Logs” > “Log groups”, and select the proper log group from the list that matches the name of your Lambda function.
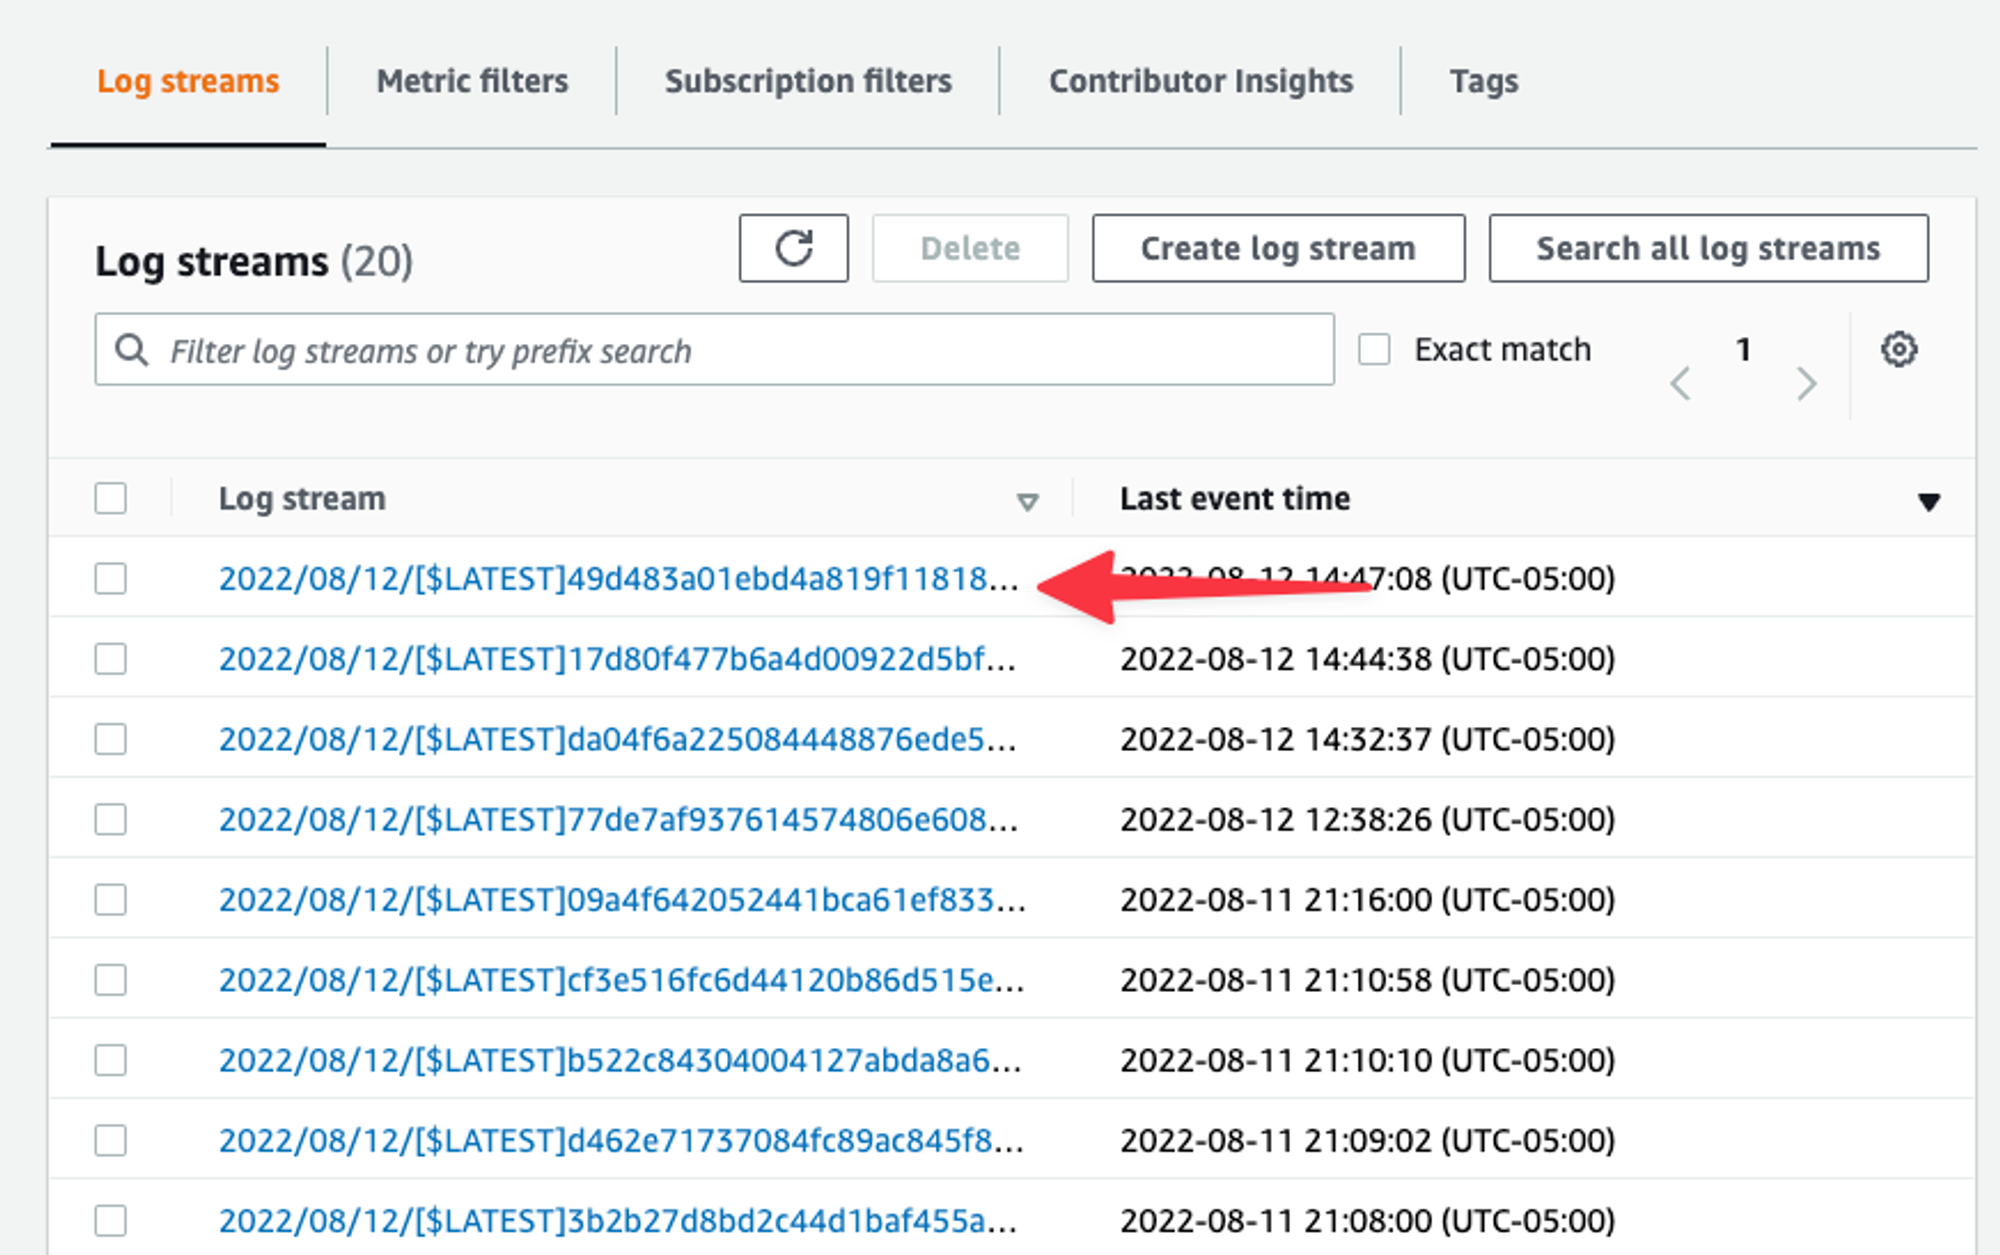
Select the latest Log stream from the list.
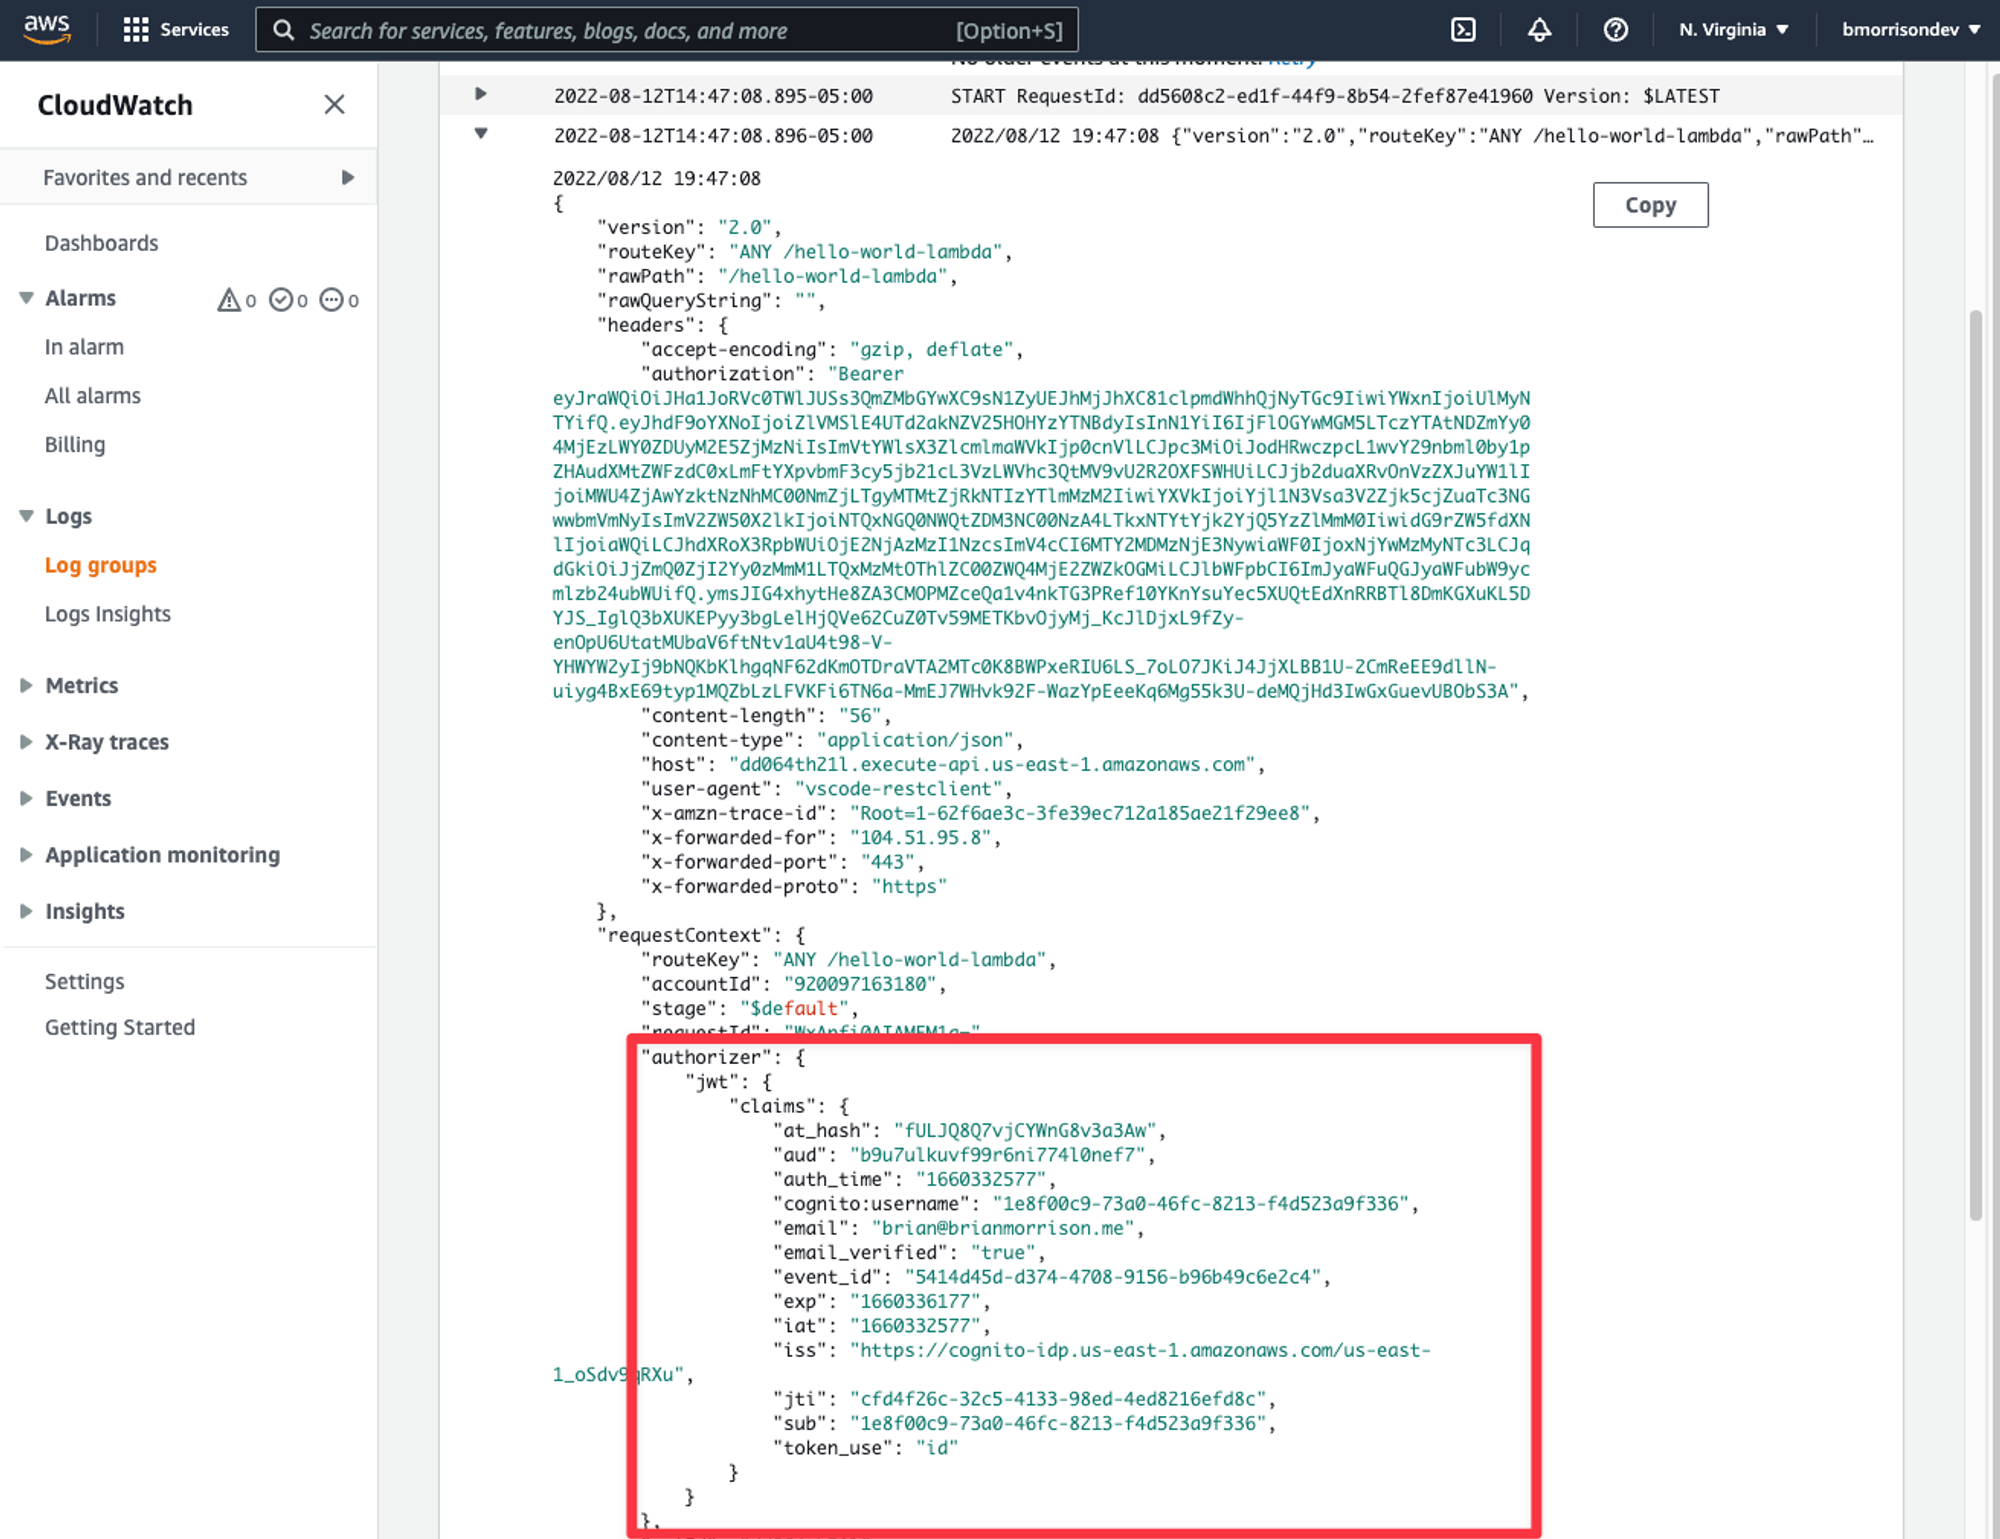
Expand the entry that looks at the start of some JSON and you can see that the claims are automatically extracted into the requestobject from the Go code. From all this data, we can use subto uniquely identify the user accessing the API.
The claimsobject is a string map, so to pull the user ID, you can add the following snippet to the handlerfunction.
claims := request.RequestContext.Authorizer.JWT.Claims
log.Println(claims["sub"])
What’s next?
In the next entry of the series, we’ll explore how we can use everything we’ve learned to build a simple Tasks API, complete with user authentication and a database to store info.