In the previous entry of the series, we build a very basic AWS Lambda Function in Go & tested it using the AWS Console. In this one, we’ll expand on that by updating our function to support what’s called the API Gateway Proxy Event, as well as connecting API Gateway to the Lambda function & testing it using the VSCode Rest Client plugin.
Lambda & Events
Before we get into the main portion of the article, I want to take a moment to explain how events & Lambda work. One of the best and most confusing things about Lambda is they are really designed to be agnostic as to what's executing them, meaning they really don’t care what service in AWS calls them.
Each service that calls a Lambda has a specific type of Event associated with it. For example, you can configure an AWS Lambda Function to trigger when a file is uploaded to S3 (a file hosting service in AWS) and the parameters that are passed into Lambda will be different than if API Gateway calls the function. In Go, the AWS SDK has a different struct designed for each caller of the Lambda function so you get a strongly typed object to work with when parsing data from the caller.
If this is confusing, it will make more sense as we progress in this article.
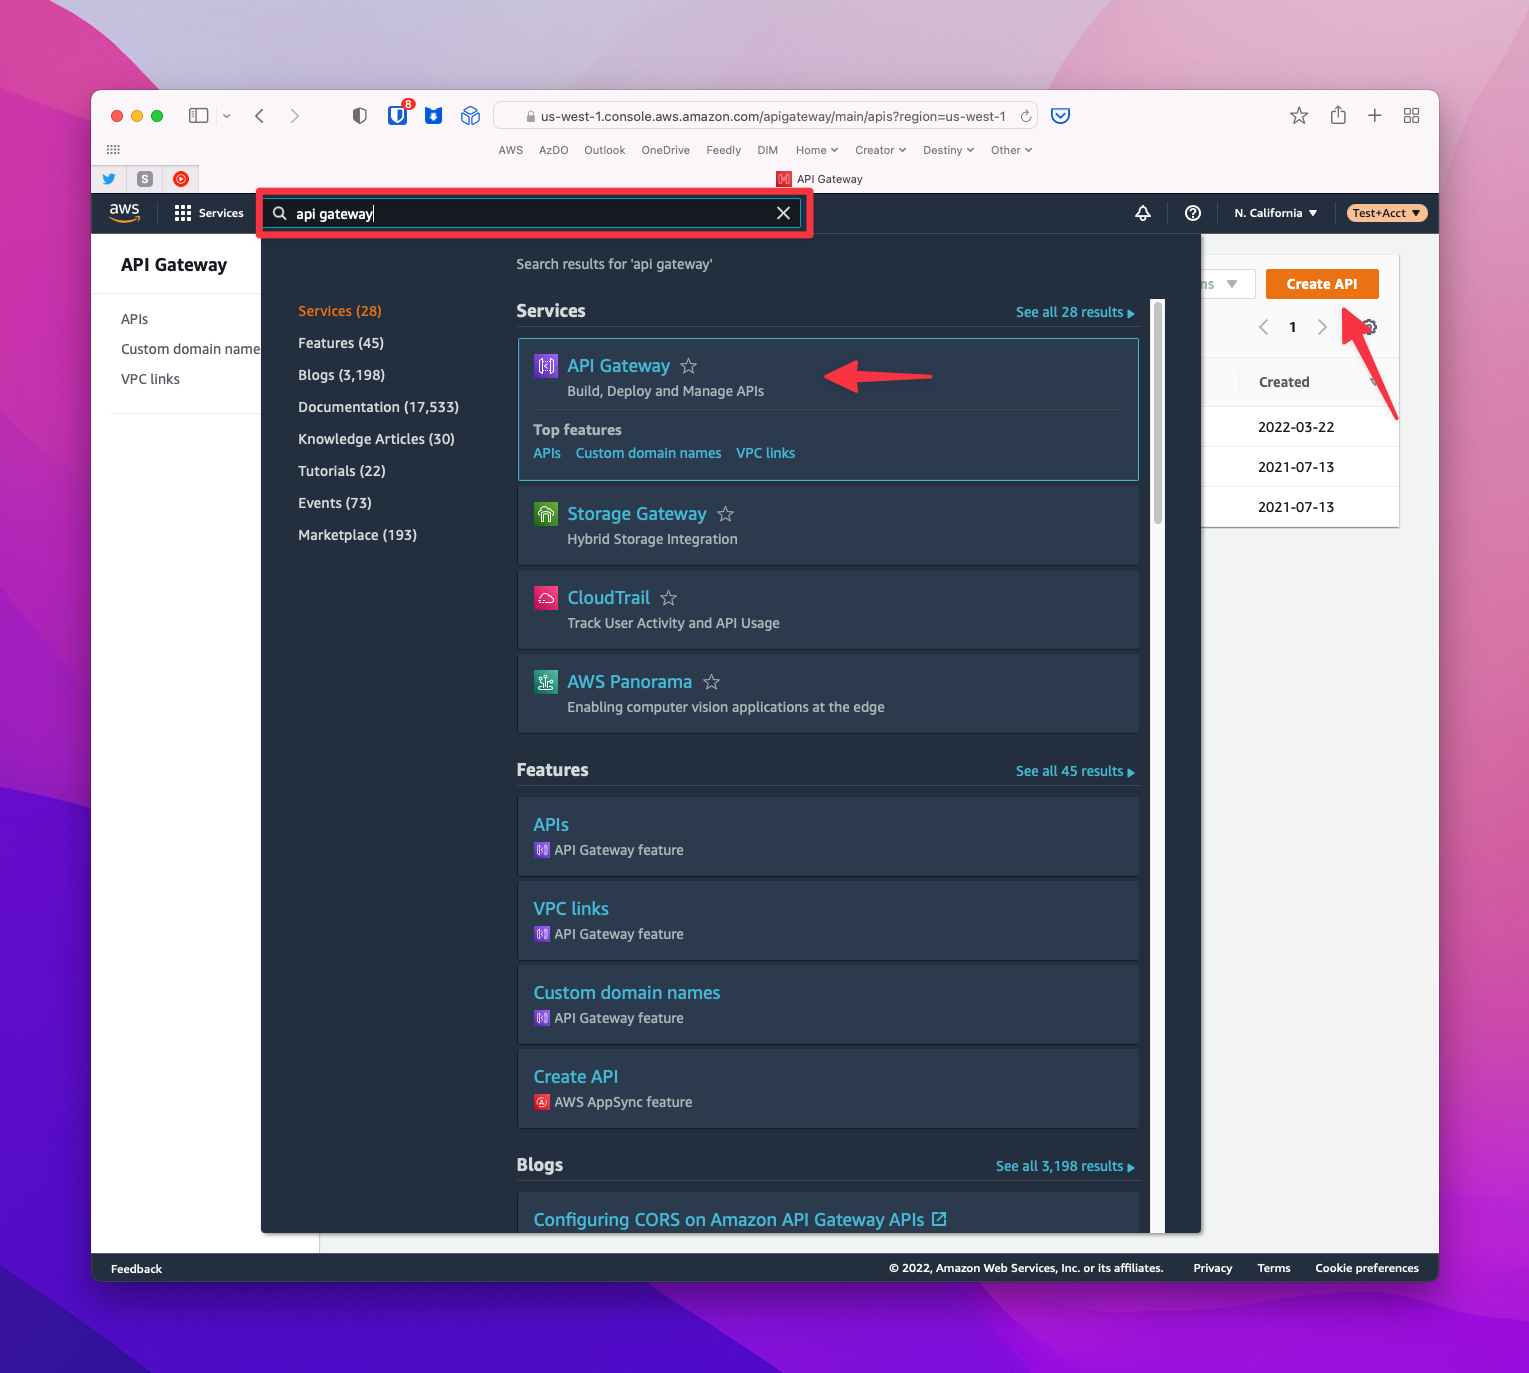
Wiring up API Gateway
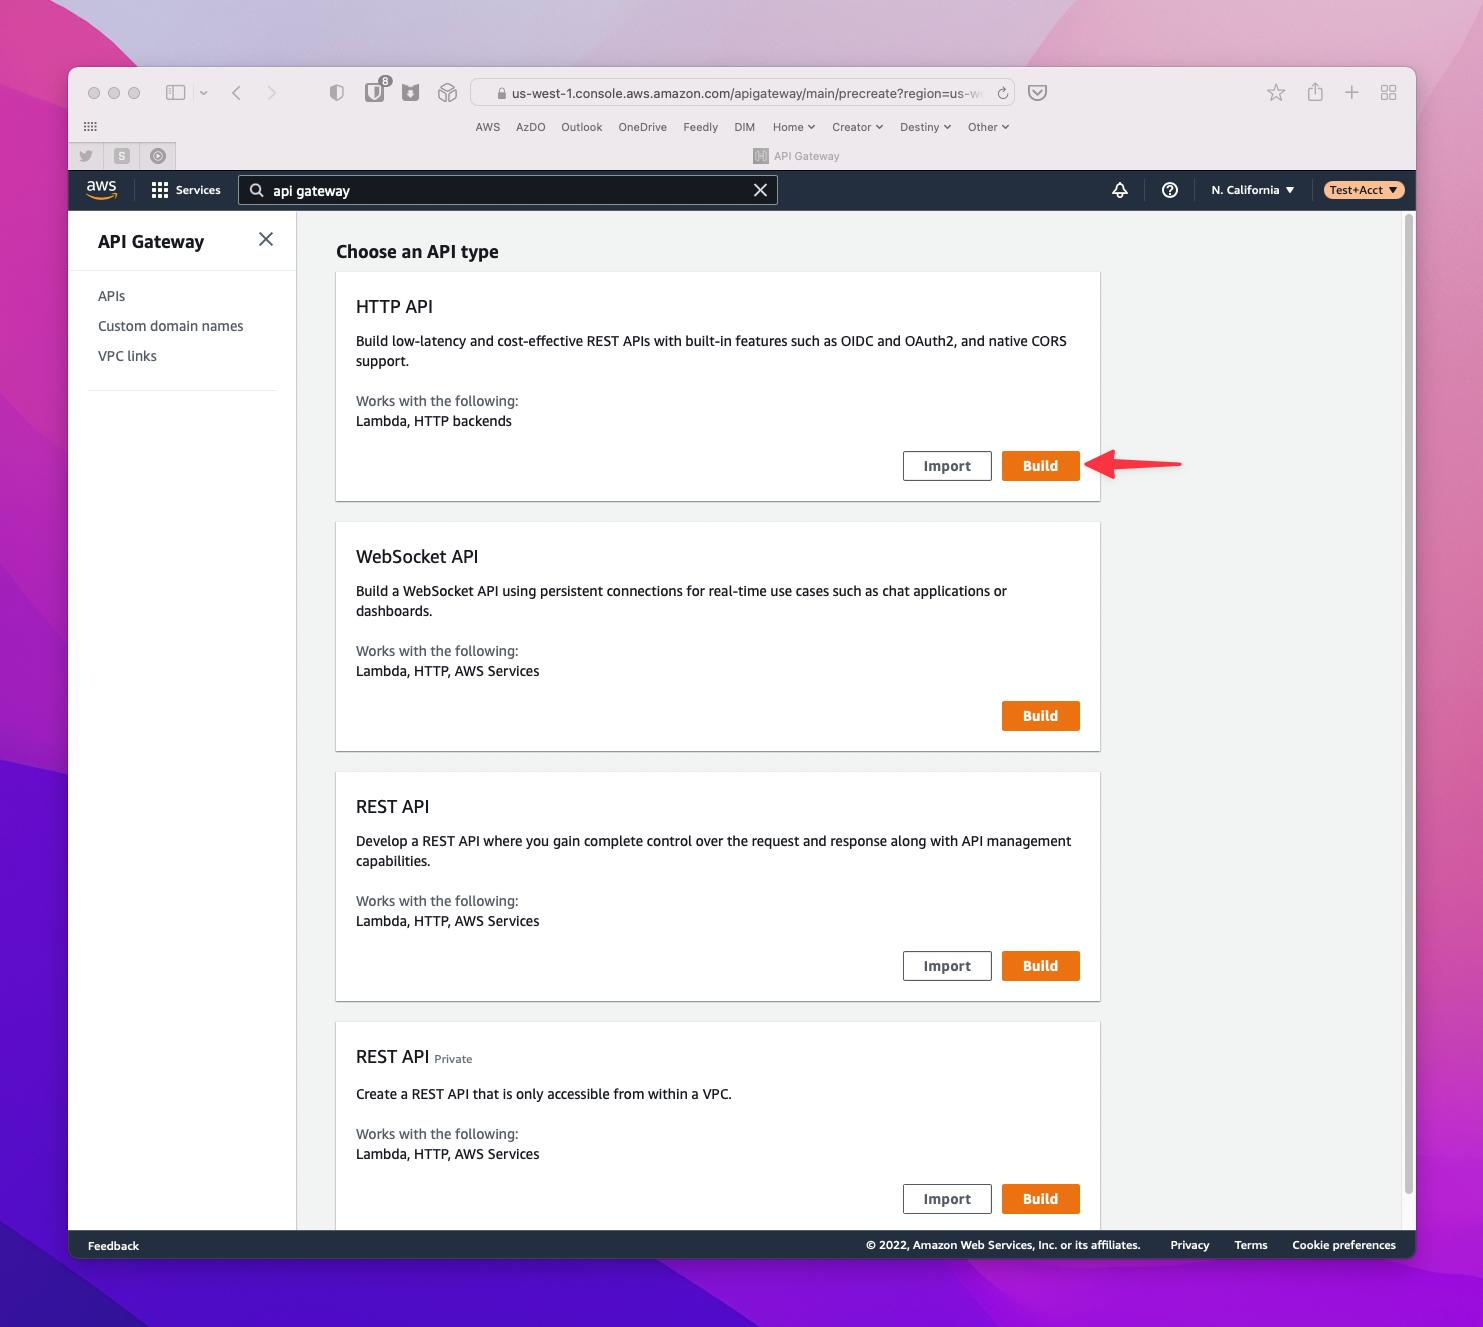
Let's start in AWS by navigating to the API Gateway service and creating a new API. On the next screen, select the Build button in the HTTP API card.
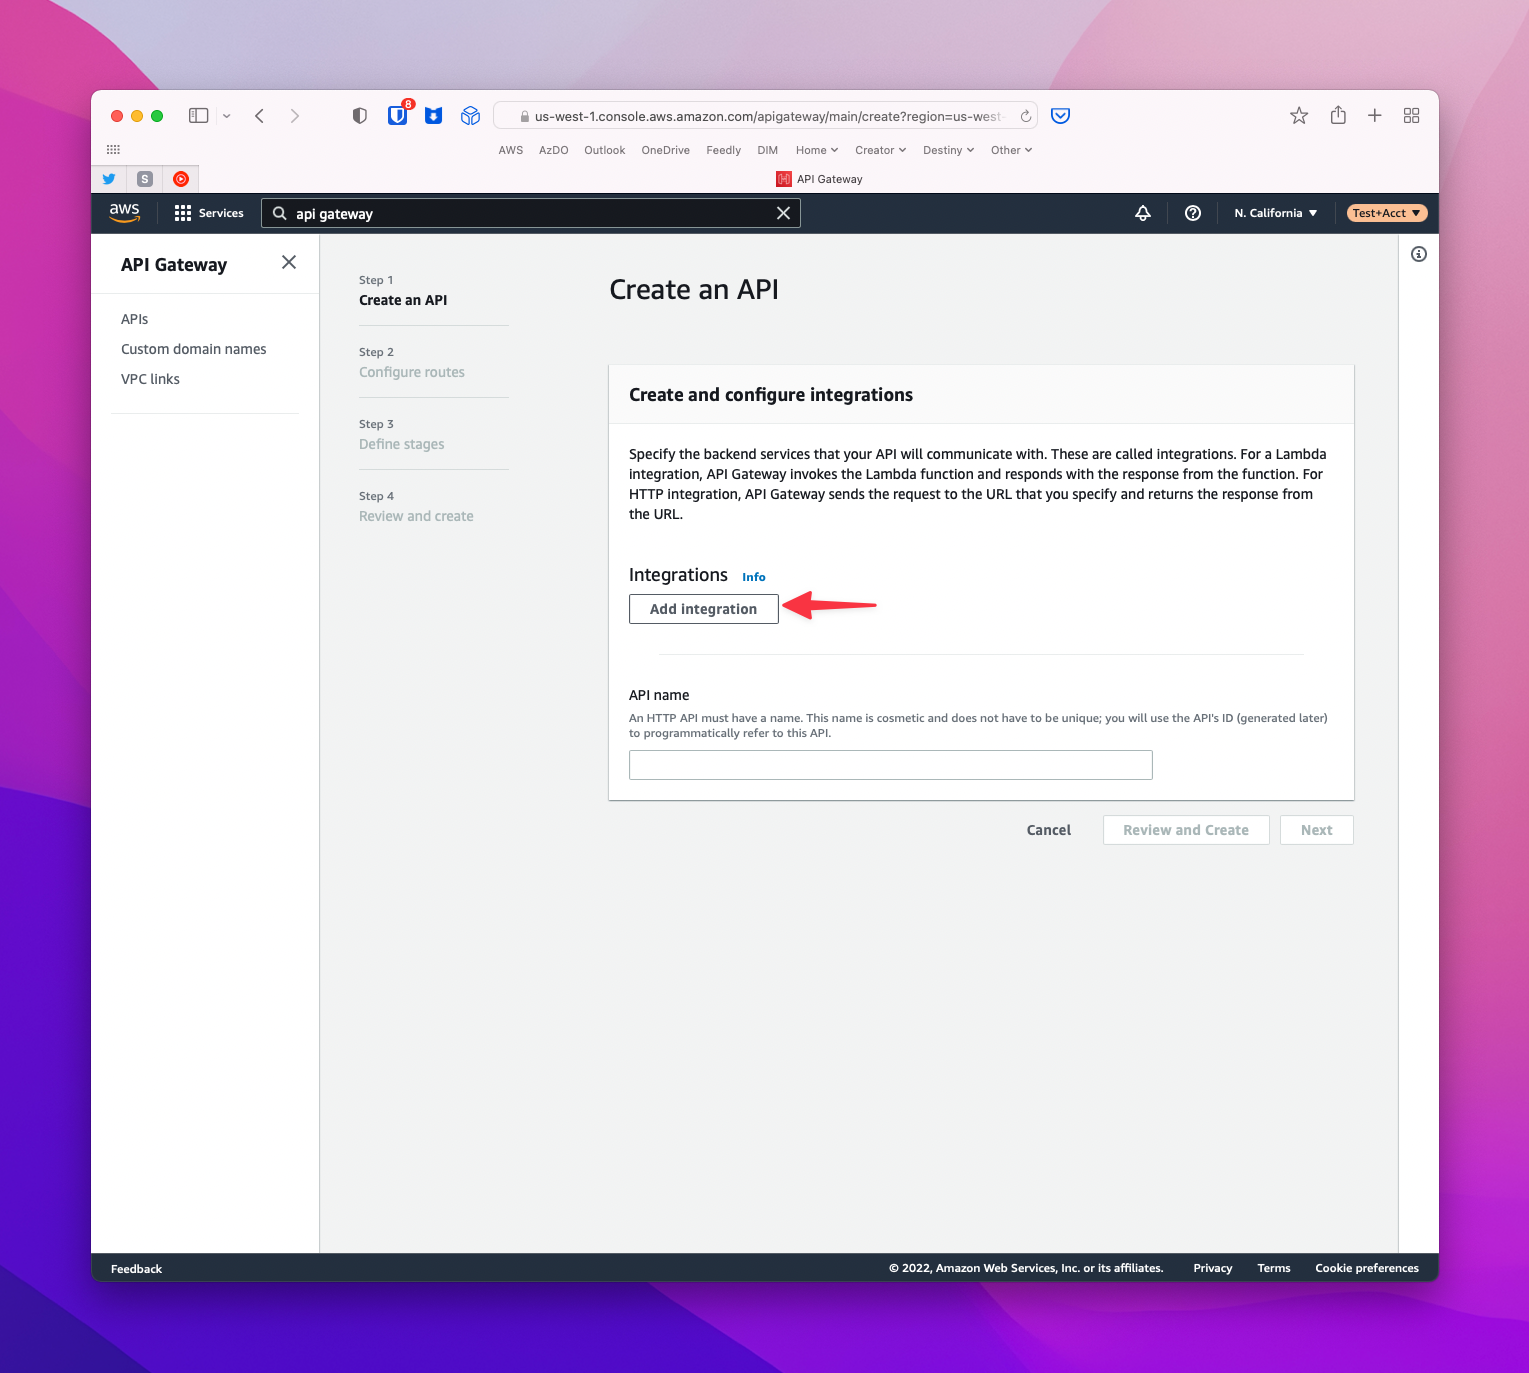
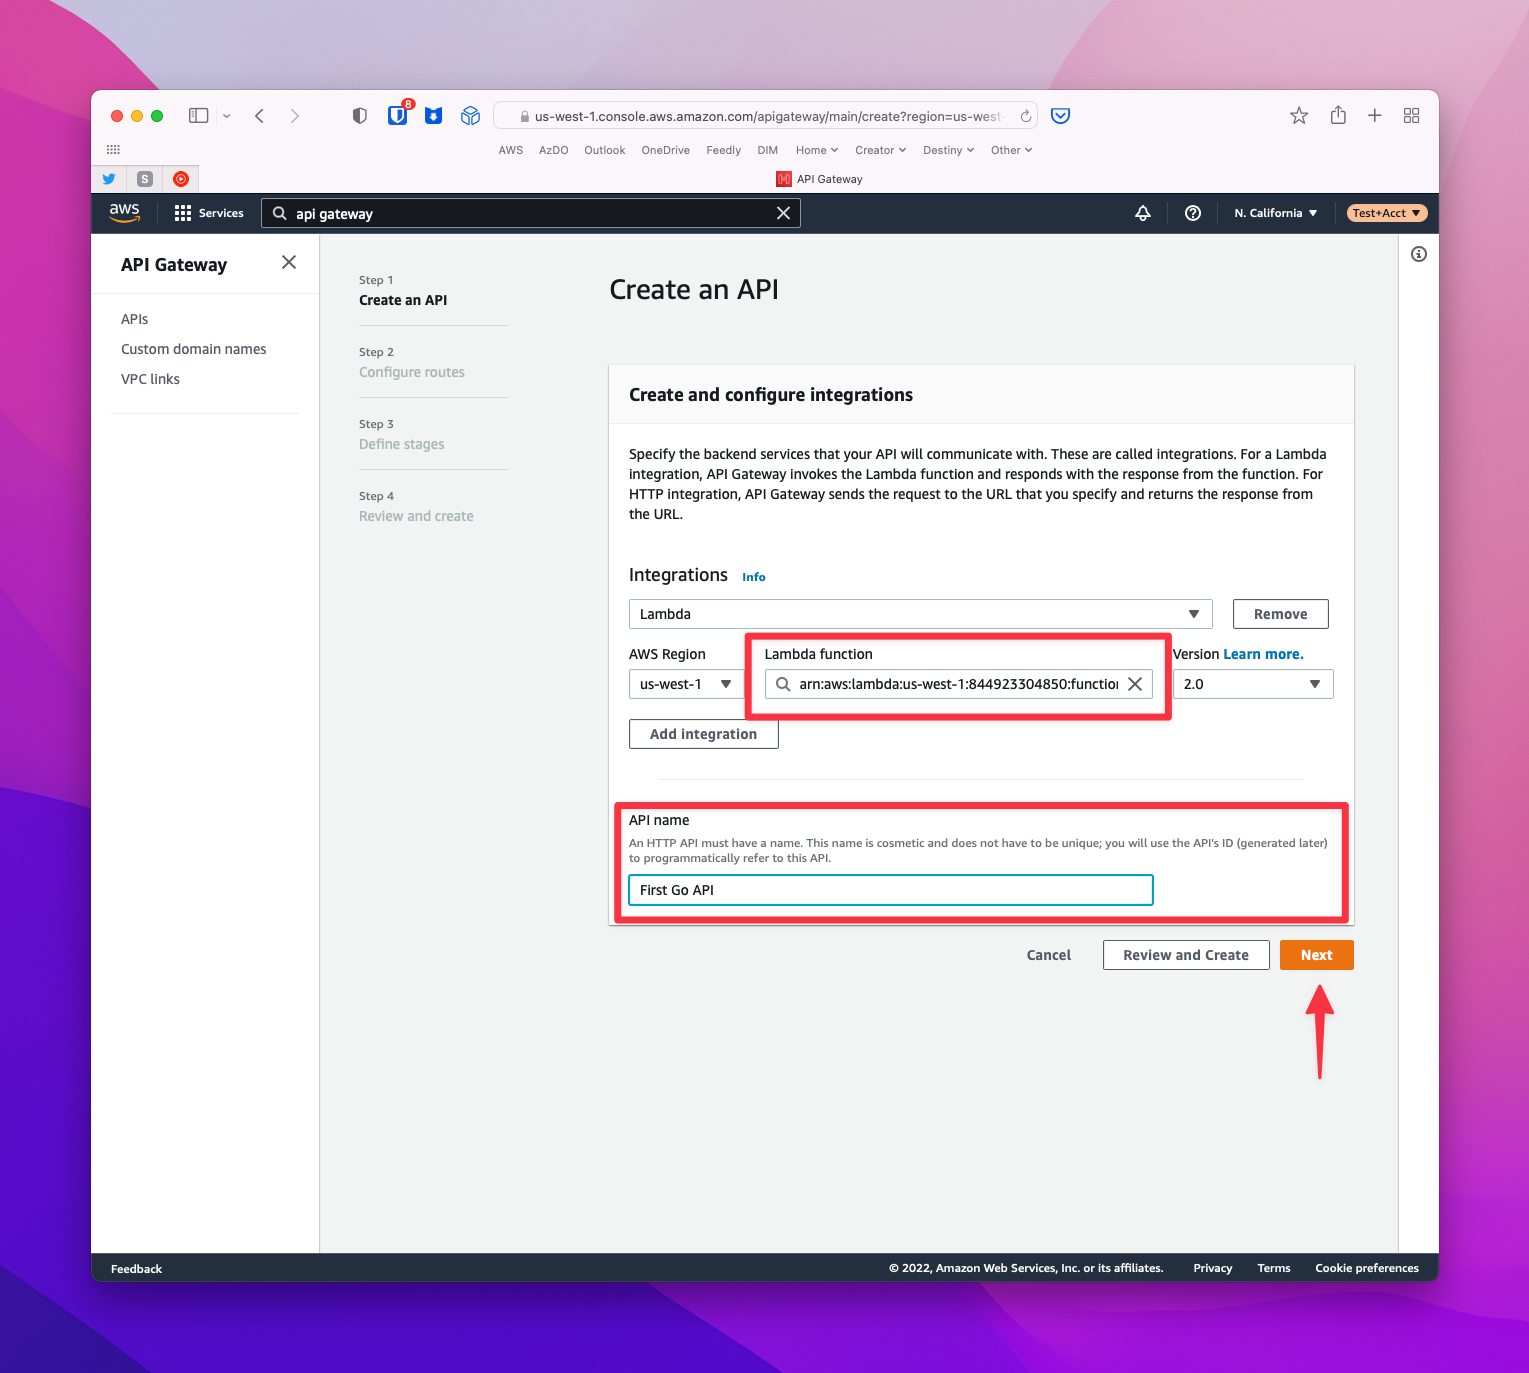
Now click Add Integration, select Lambda, and use the Lambda function box to search for the Lambda you created previously. Also make sure to give your API a name. Click Next.
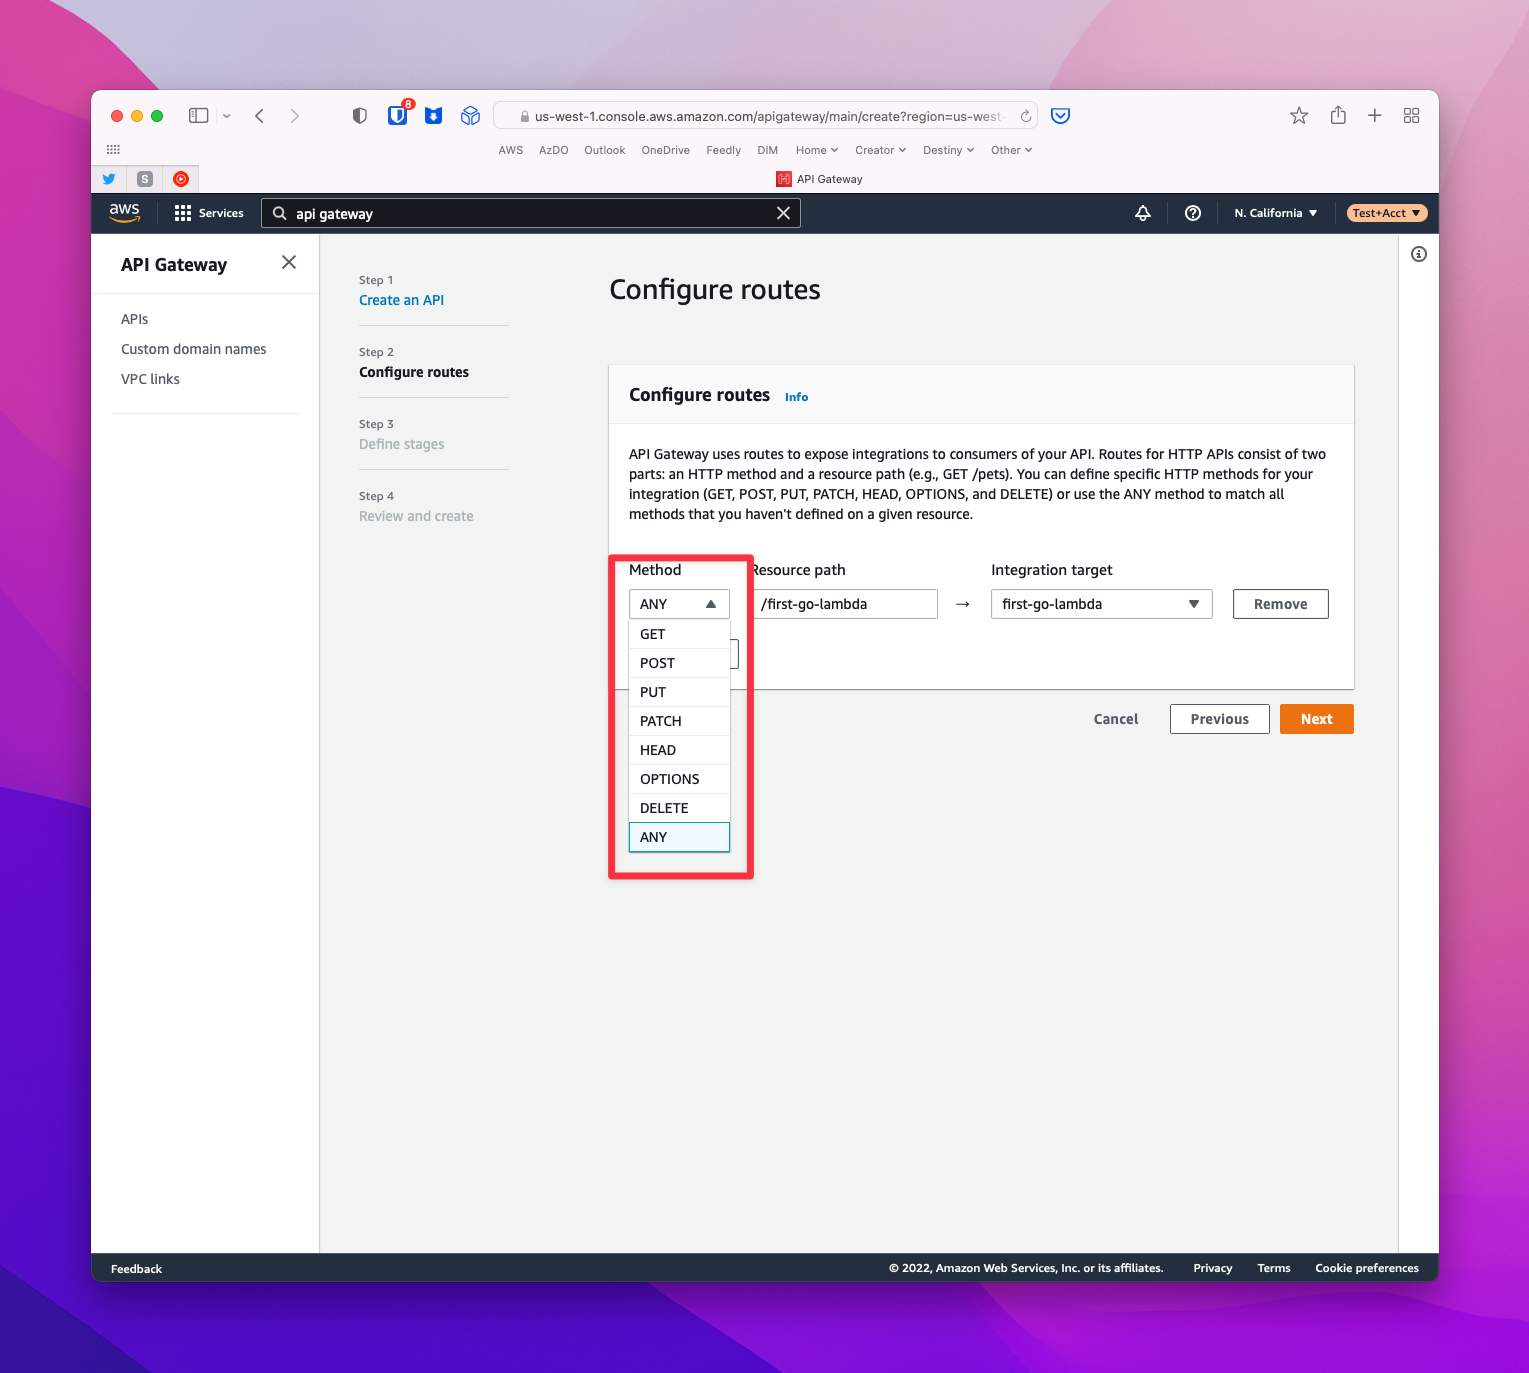
AWS will automatically create a resource path for you and default the Method to ANY. I just want to note that Method field. You have the option to create individual lambdas that are handled differently based on the incoming HTTP Method on a specific route/path, OR in this case pass all Methods into a single Lambda. I prefer the latter but it definitely gives you some flexibility if needed. You can click Next without changing anything.
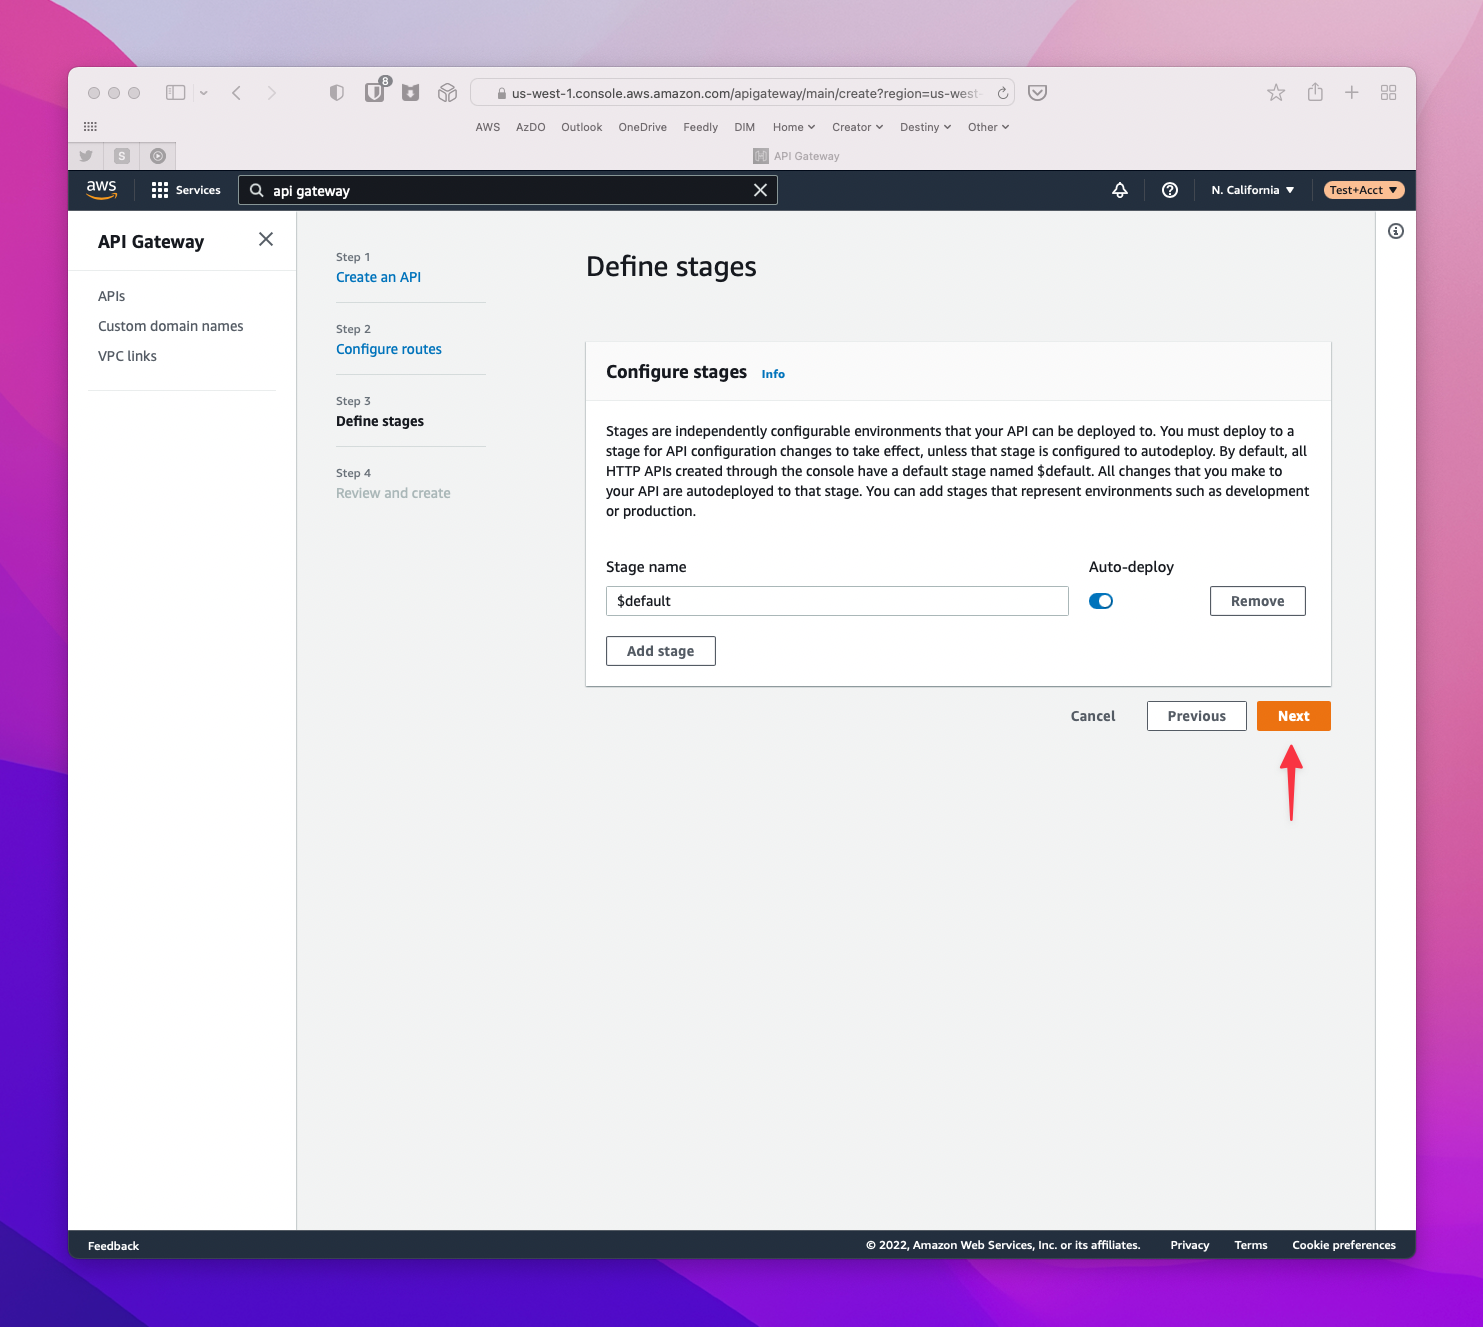
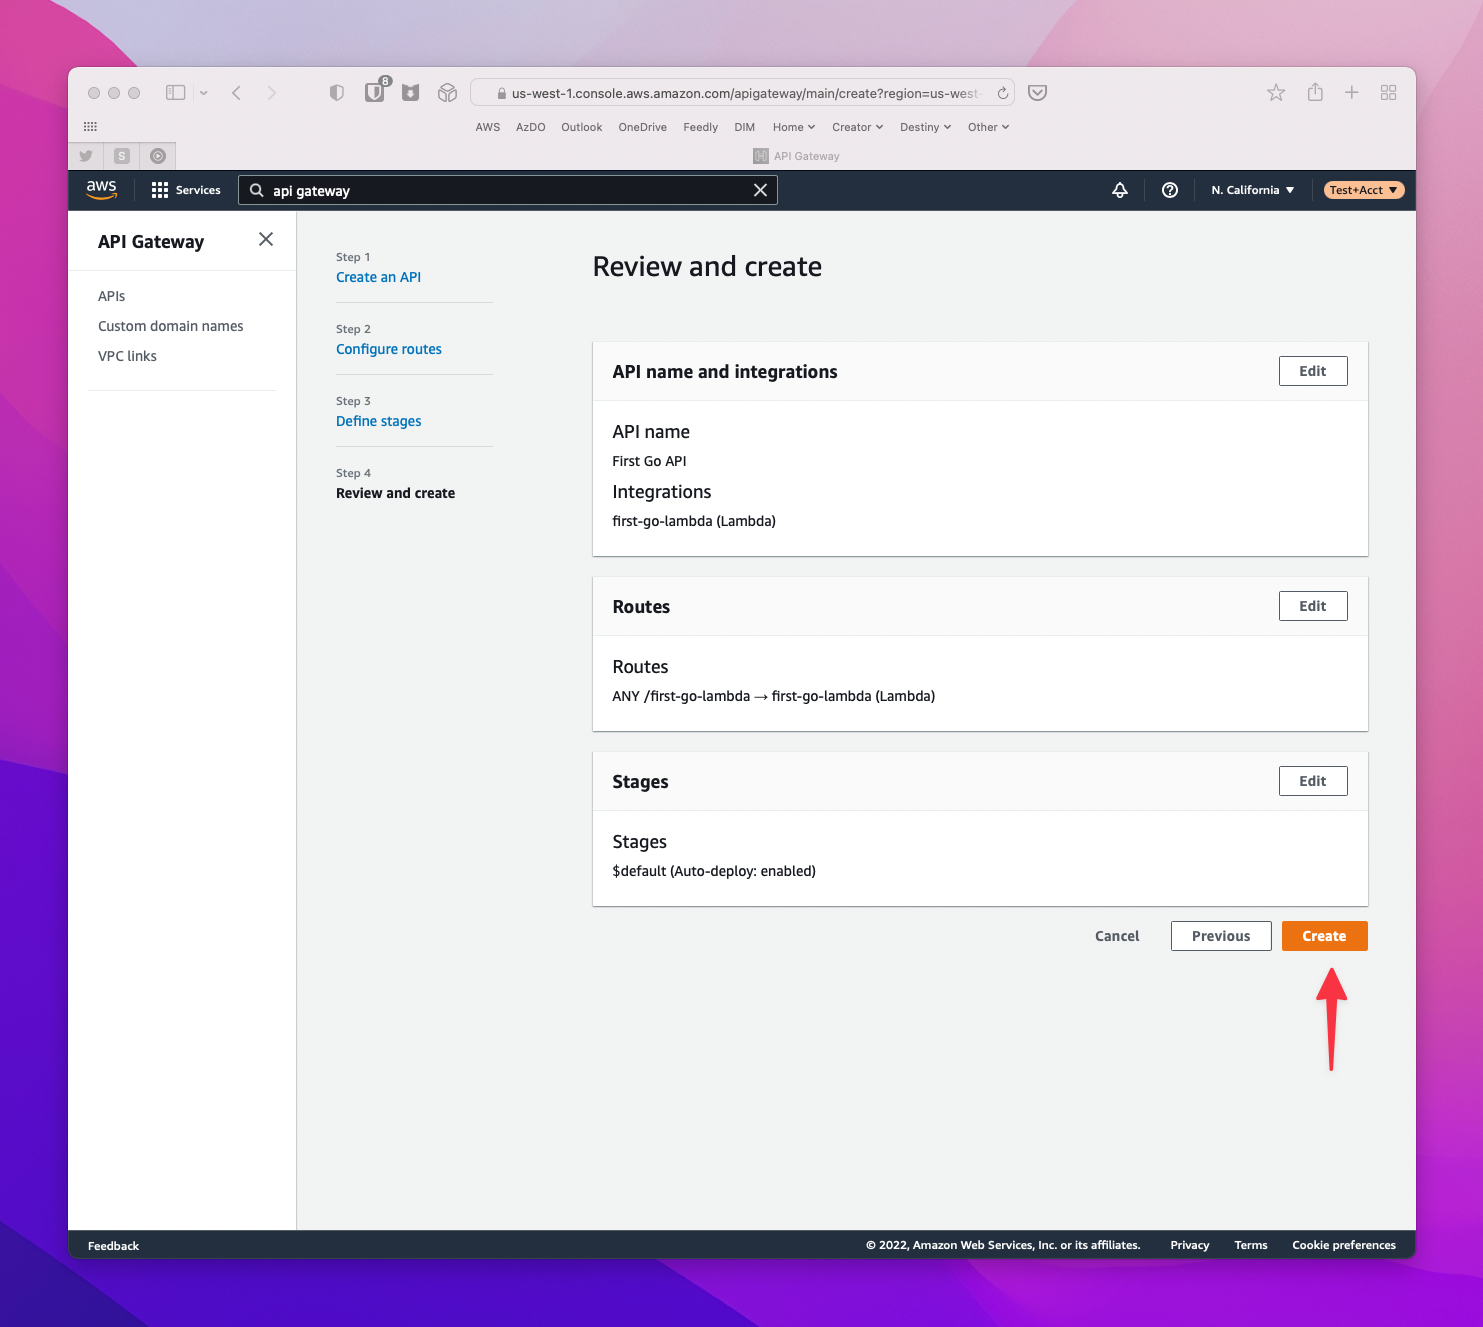
You can click Next on this screen as well as we won't be configuring any additional stages in this tutorial. Finally, click Create on the last screen.
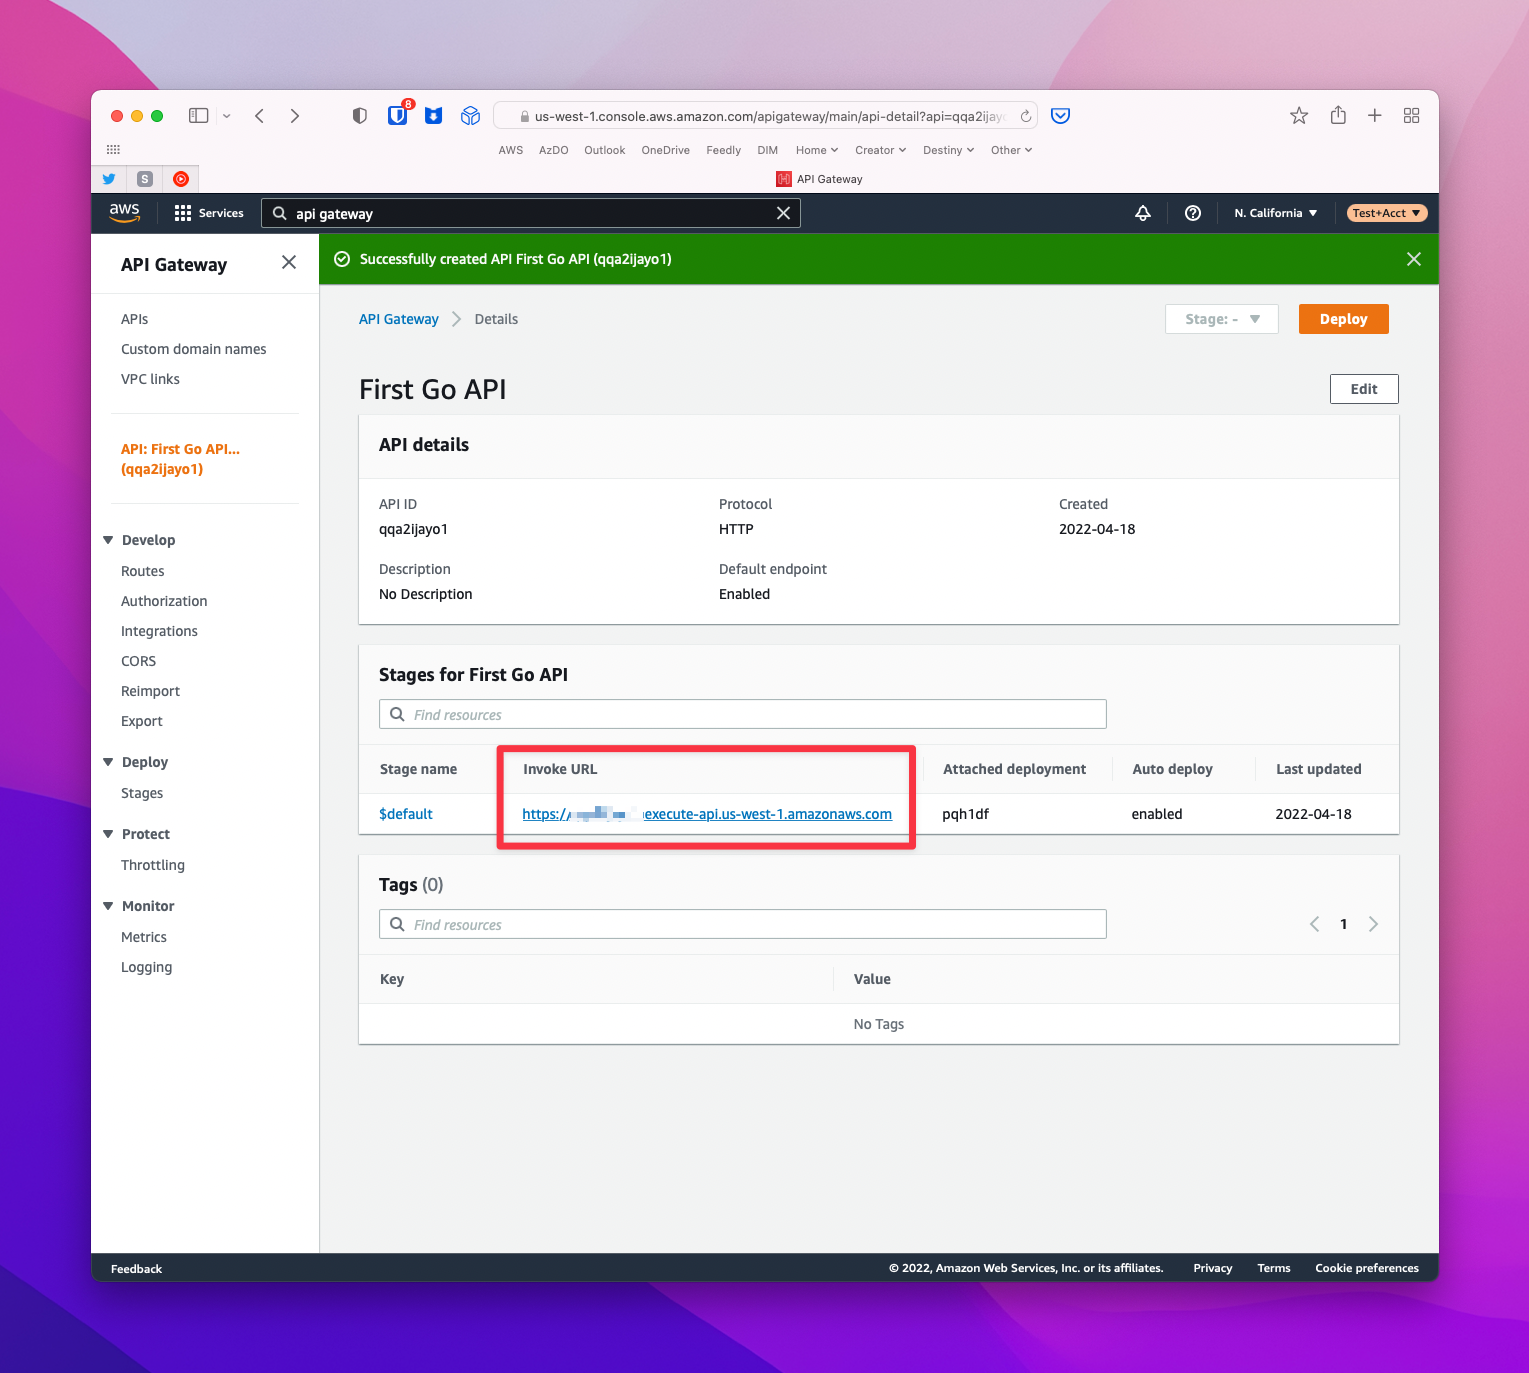
In the following screen after the API Gateway instance has been created, you’ll notice there is an Invoke URL listed. Note that down as we’ll be using that to test our API using the VS Code Rest Client plugin.
Testing our Integration
If you followed along from the previous article, we actually already setup our function to handle API Gateway Proxy Events as shown in the request parameter of our handler function. So at this point, we can simply execute a GET request to our endpoint. Simply take the route created earlier and append it to the Invoke URL to test it properly.
package main

import (
    "log"

    "github.com/aws/aws-lambda-go/events"
    "github.com/aws/aws-lambda-go/lambda"
)

func main() {
    lambda.Start(handler)
}

func handler(request events.APIGatewayProxyRequest) (events.APIGatewayProxyResponse, error) {
    log.Println("Hello world")

    response := events.APIGatewayProxyResponse{
        StatusCode: 200,
    }

    return response, nil
}
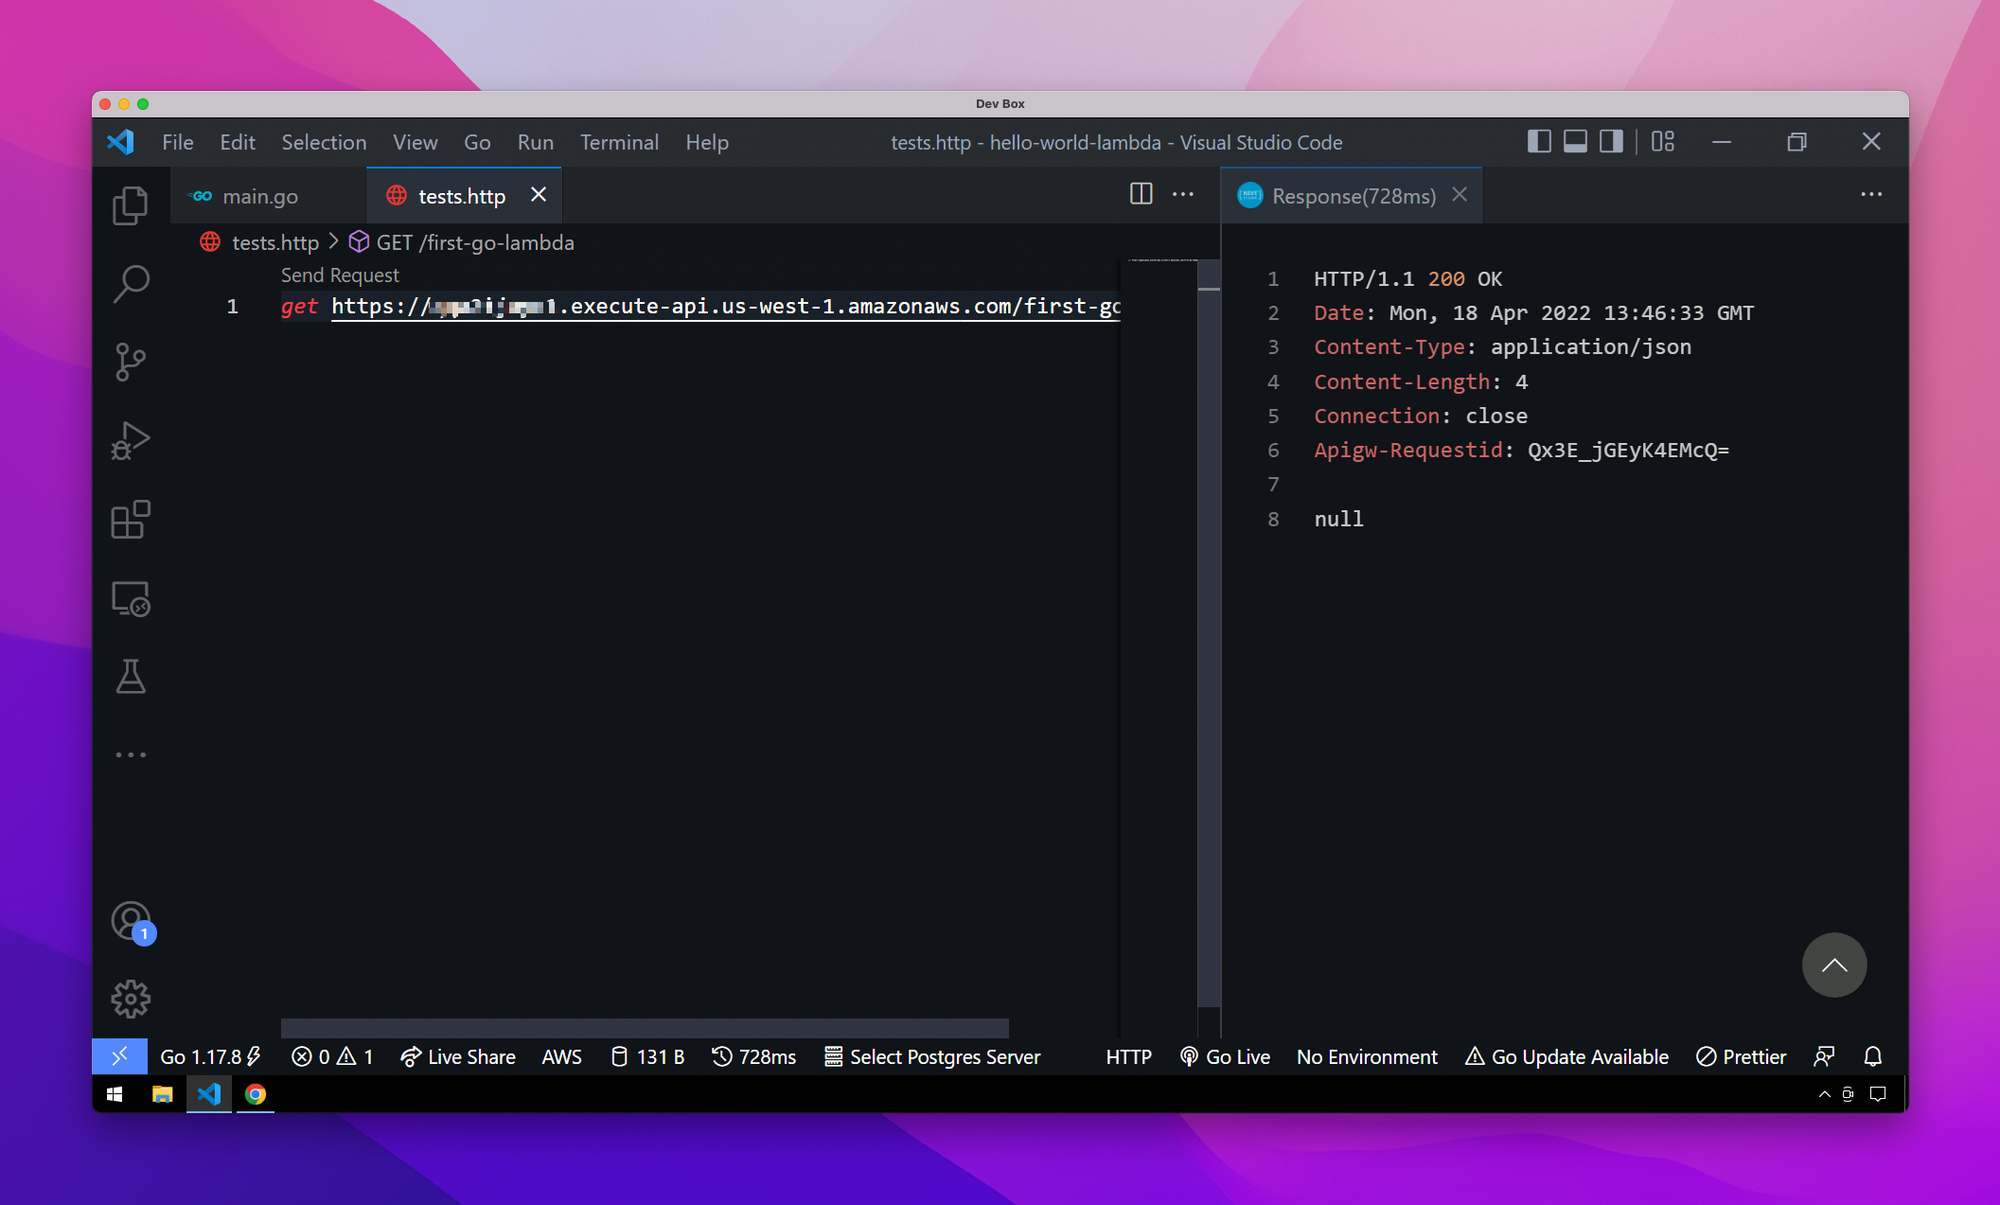
We received a 200 response with a null body, which is perfectly fine since we didn't actually return any data from the function. Let's fix that now.
Handling Incoming & Outgoing Data
Most APIs don't just return a 200 without being able to handle some kind of input & output, so let's explore how we can update our function to both receive & respond with some JSON data. To handle incoming data, there is a field in the request object called, as expected, Body. Body is a string value which means we’ll need to marshal it to an object if we’re passing in some kind of data. First thing I’ll do is create struct called Person and add a few fields to it. You can add this anywhere in your main.go file.
type Person struct {
    FirstName *string json:"firstName"
    LastName  *string json:"lastName"
}
Now update the handler function to parse the body into an instance of the struct.
func handler(request events.APIGatewayProxyRequest) (events.APIGatewayProxyResponse, error) {
    var person Person
    err := json.Unmarshal([]byte(request.Body), &person)
    if err != nil {
        return events.APIGatewayProxyResponse{}, err
    }

    response := events.APIGatewayProxyResponse{
        StatusCode: 200,
    }

    return response, nil
}
Let's also add a response struct that returns a message to the caller with the data passed in.
type ResponseBody struct {
    Message *string json:"message"
}
Update the handler to create the response body object and add a message. You’ll also need to convert that object to a string before it can be returned. Once you do that, simply assign it to the Body field of the response object. Below is what the final version of the function should look like.
package main
import (
"encoding/json"
"fmt"
"github.com/aws/aws-lambda-go/events"
"github.com/aws/aws-lambda-go/lambda"
)
func main() {
lambda.Start(handler)
}
func handler(request events.APIGatewayProxyRequest) (events.APIGatewayProxyResponse, error) {
var person Person
err := json.Unmarshal([]byte(request.Body), &person)
if err != nil {
return events.APIGatewayProxyResponse{}, err
}
msg := fmt.Sprintf("Hello %v %v", *person.FirstName, *person.LastName)
responseBody := ResponseBody {
Message: &msg,
}
jbytes, err := json.Marshal(responseBody)
jstr := string(jbytes)
response := events.APIGatewayProxyResponse{
StatusCode: 200,
Body: jstr,
}
return response, nil
}
type ResponseBody struct {
Message *string json:"message"
}
type Person struct {
FirstName *string json:"firstName"
LastName *string json:"lastName"
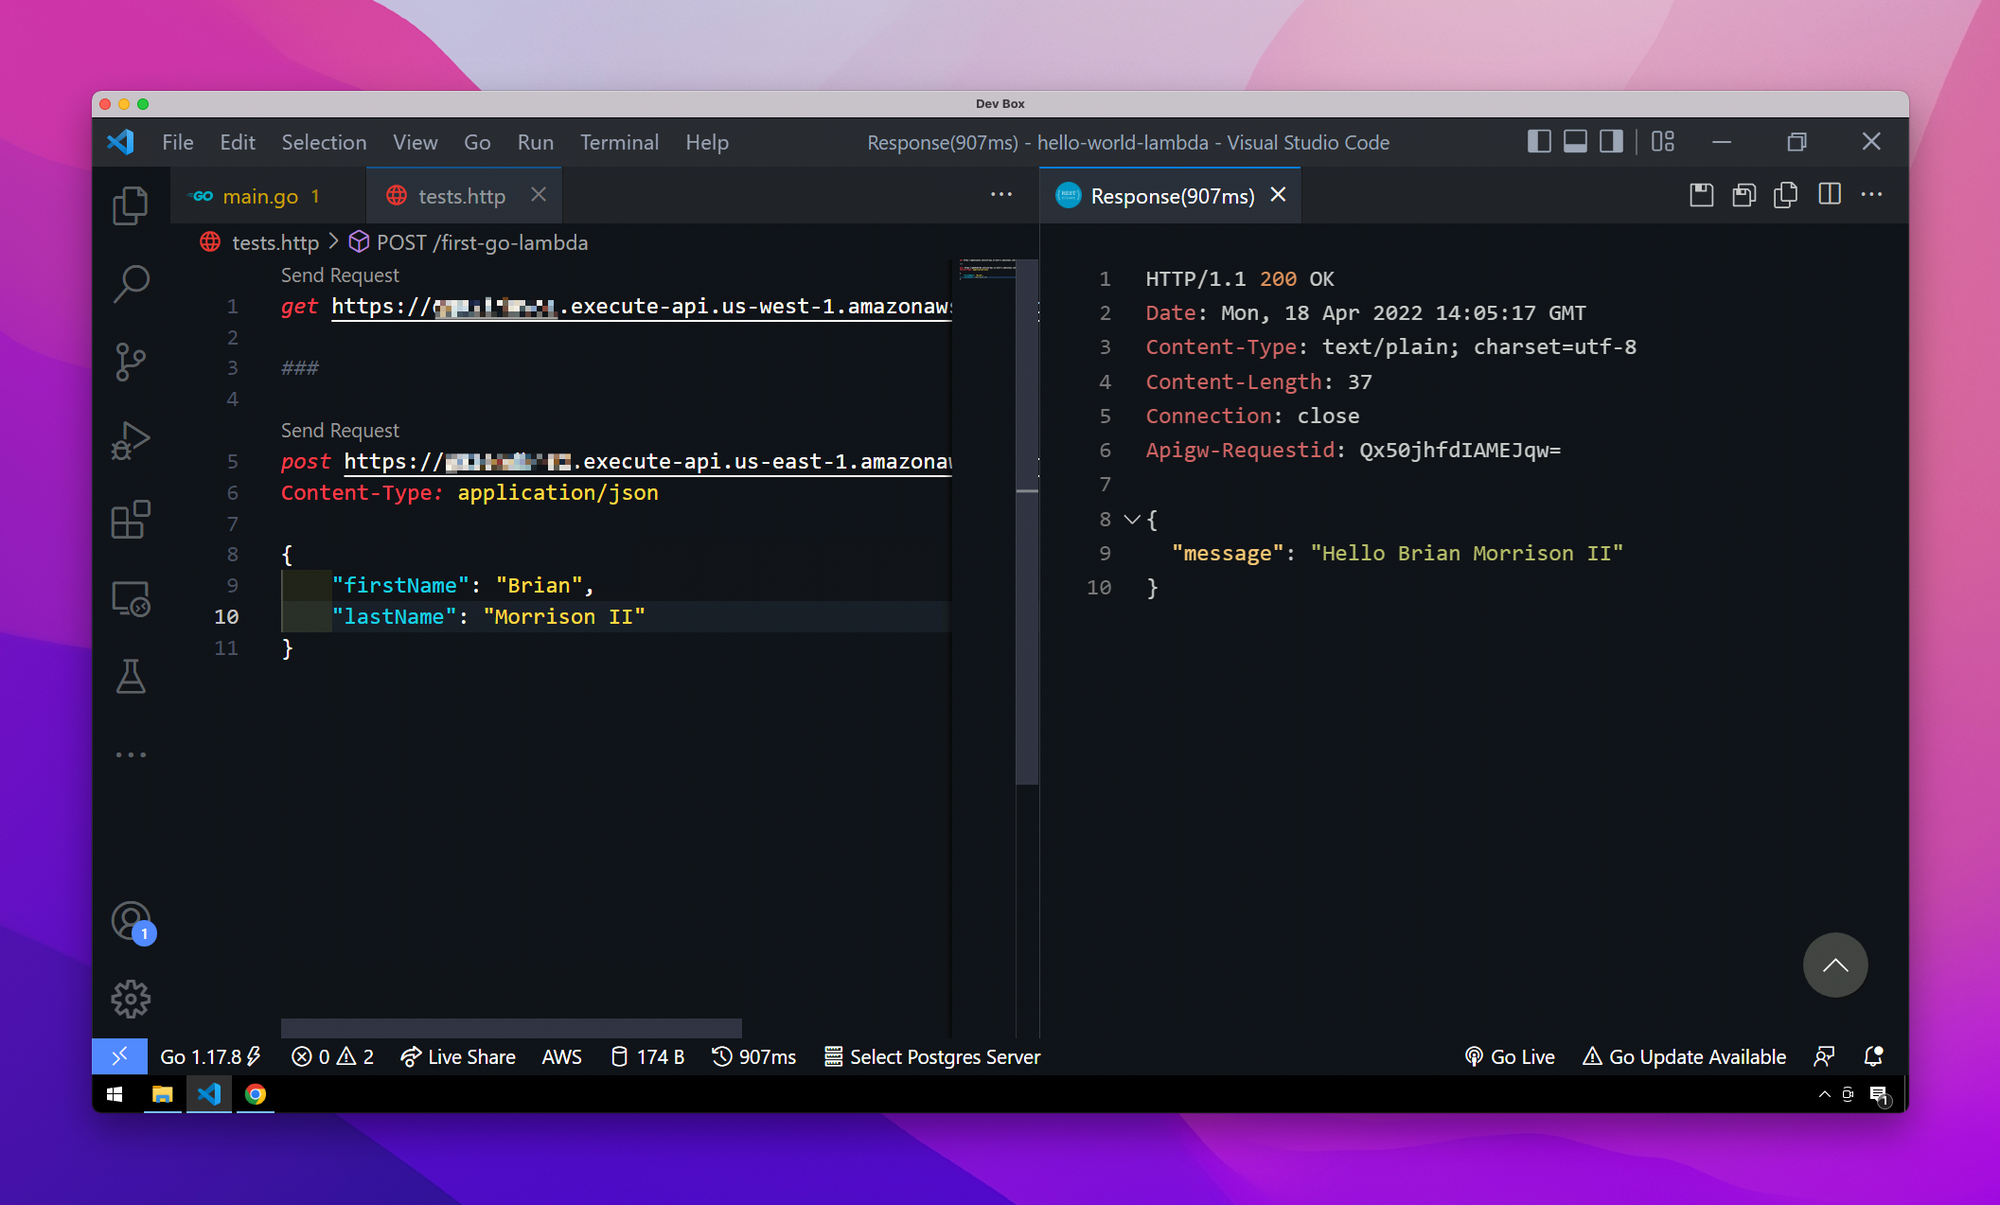
}Now let’s deploy our function out by zipping it up and uploading it to AWS. Follow steps in the previous article if you aren’t sure how to do that. Once done, create a POST request so you can send some data to the Lambda function.
In the next entry of the series, we’ll explore how to use Cognito to implement serverless Authentication into the API.