I recently started a series on building a serverless API with AWS & Go. When I started drafting this article, I intended for it to be part of that series since it is a prerequisite for properly demonstrating how Cognito, API Gateway, and Lambda can be the perfect combination for authenticating users. There was just a lot to configure up front so I figure this could benefit anyone looking to get an understanding of Cognito & OAuth in general.
What is OAuth?
OAuth is an open standard for authentication. It allows users to securely sign in to an application, whether that's using a standard username & password set, or by using a trusted third party that also implements OAuth. I’m sure most of you reading this have used an app that allows something like “Sign in with Google”, that’s OAuth in action.
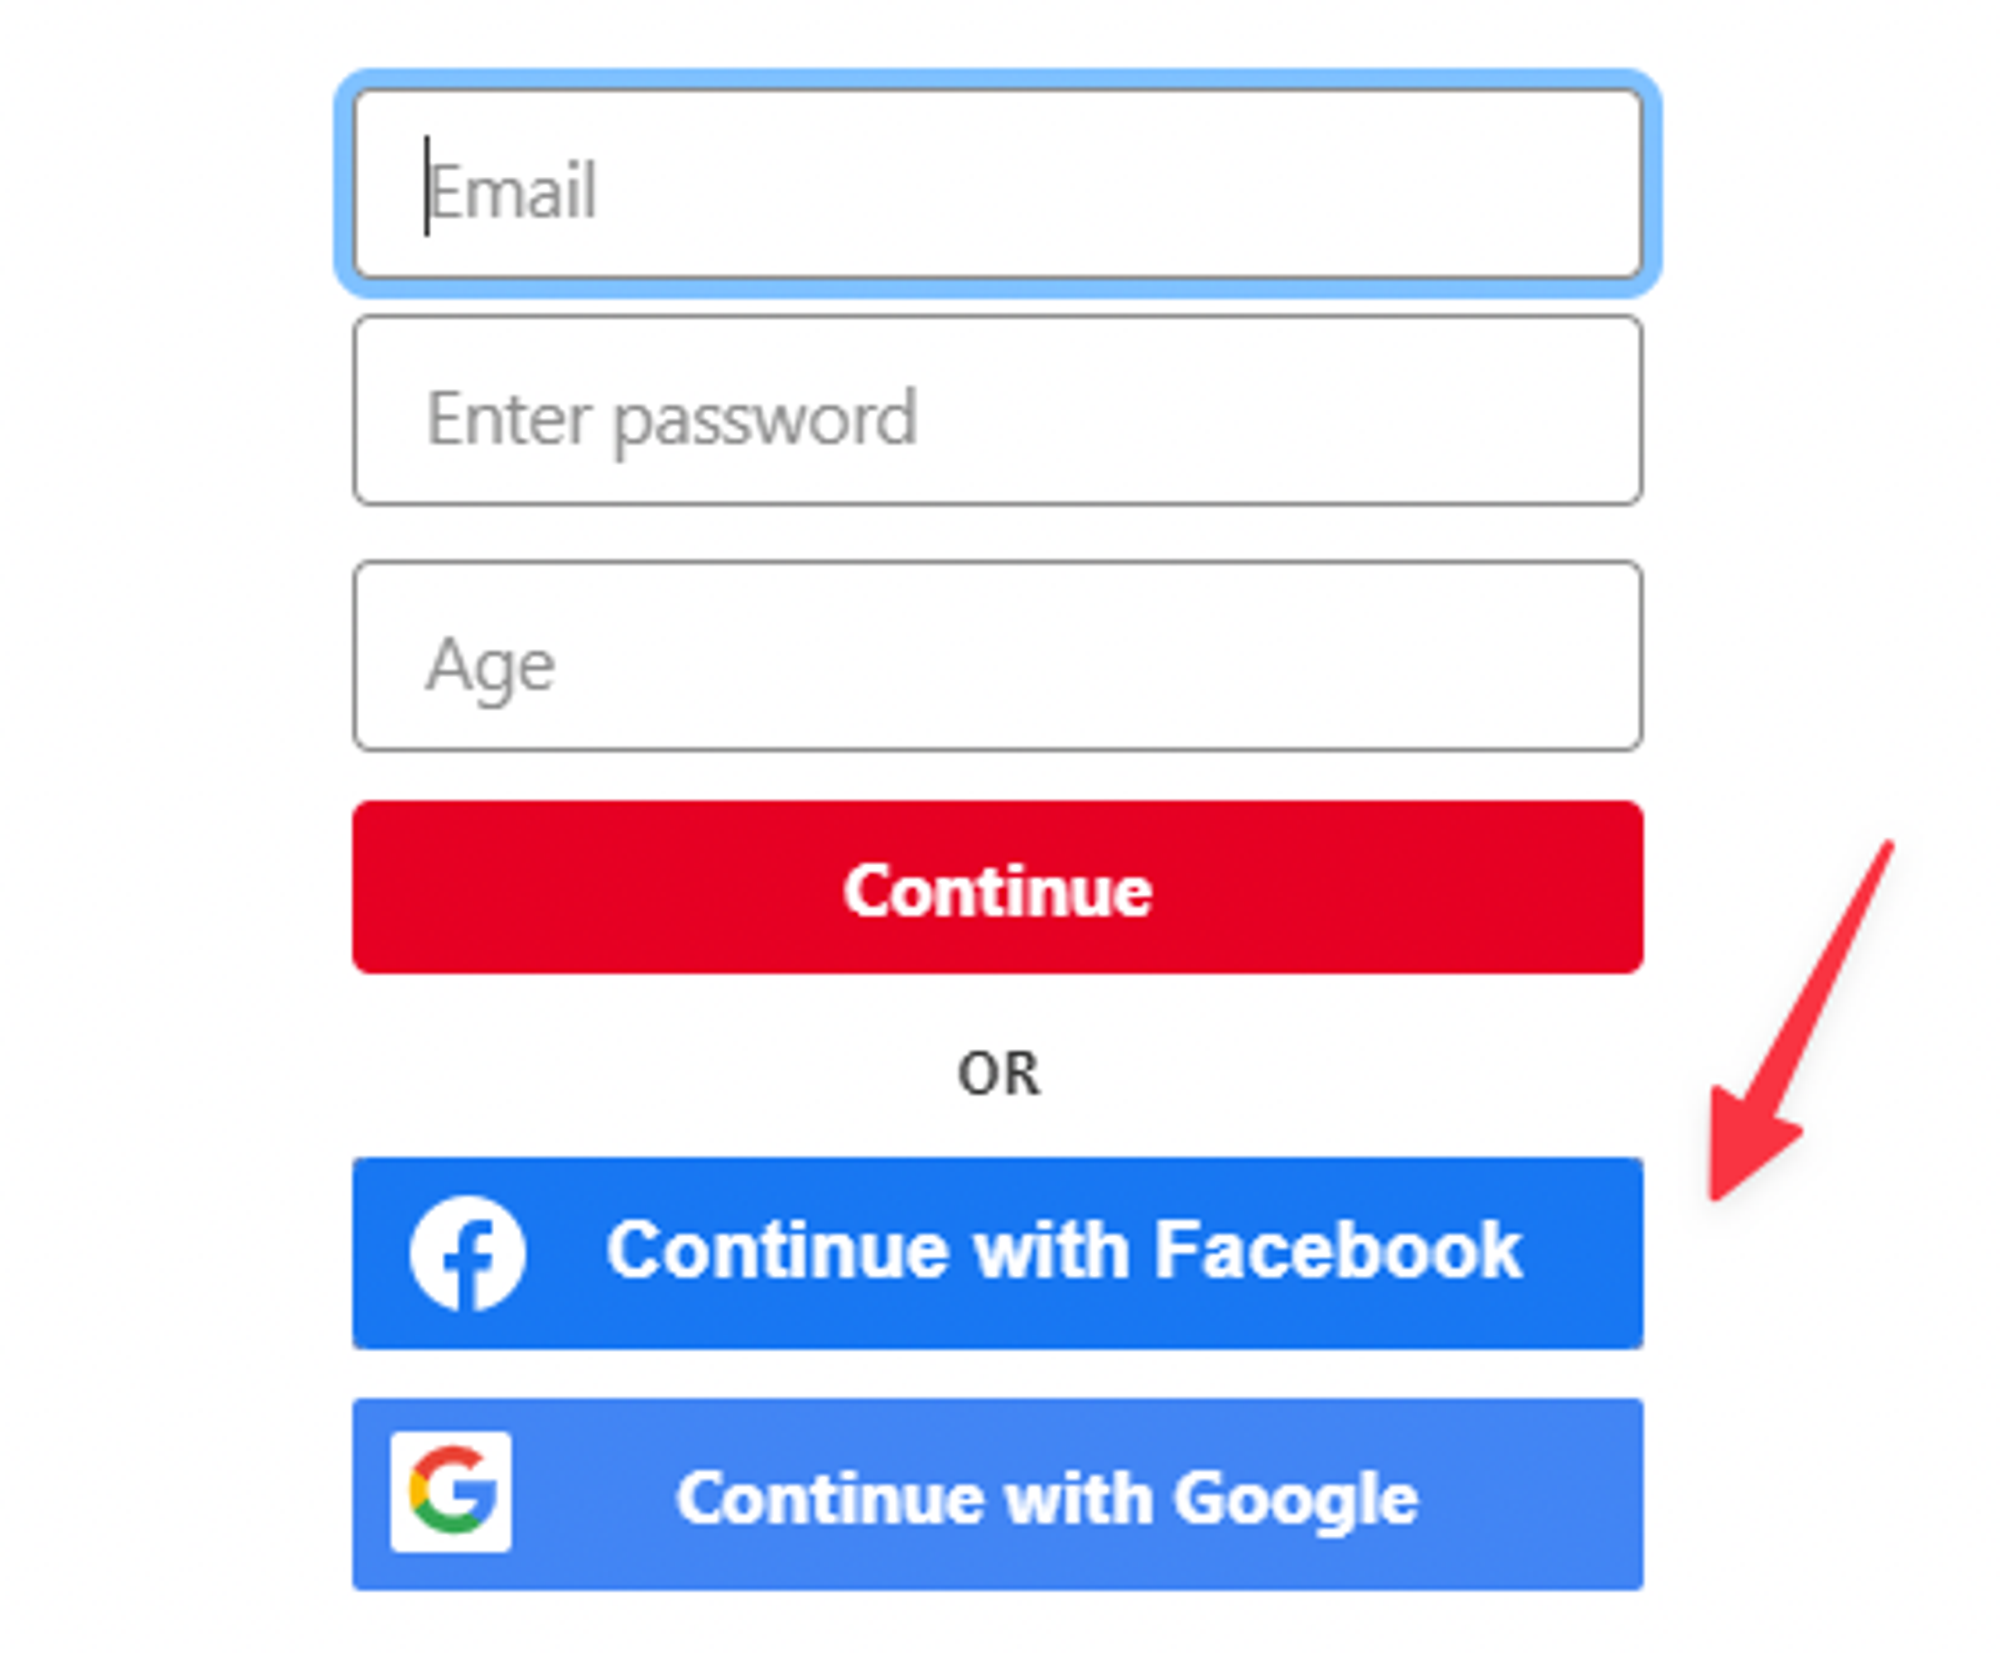
An example of social login implemented.
What are JWTs?
JSON Web Tokens (or JWTs for short) are the result of the login process. In older (or less secure web apps), an authentication scheme called Basic Auth was used, which is essentially a base64 encoded version of a username & password. The downside of this approach is anyone who gets the encoded credential set can easily decode it and then they have your password.
JWTs are base64 encoded AND signed with a secret of some kind. They also have expiration built in, so if someone does somehow get one of your tokens, they are only valid for a short timeframe.
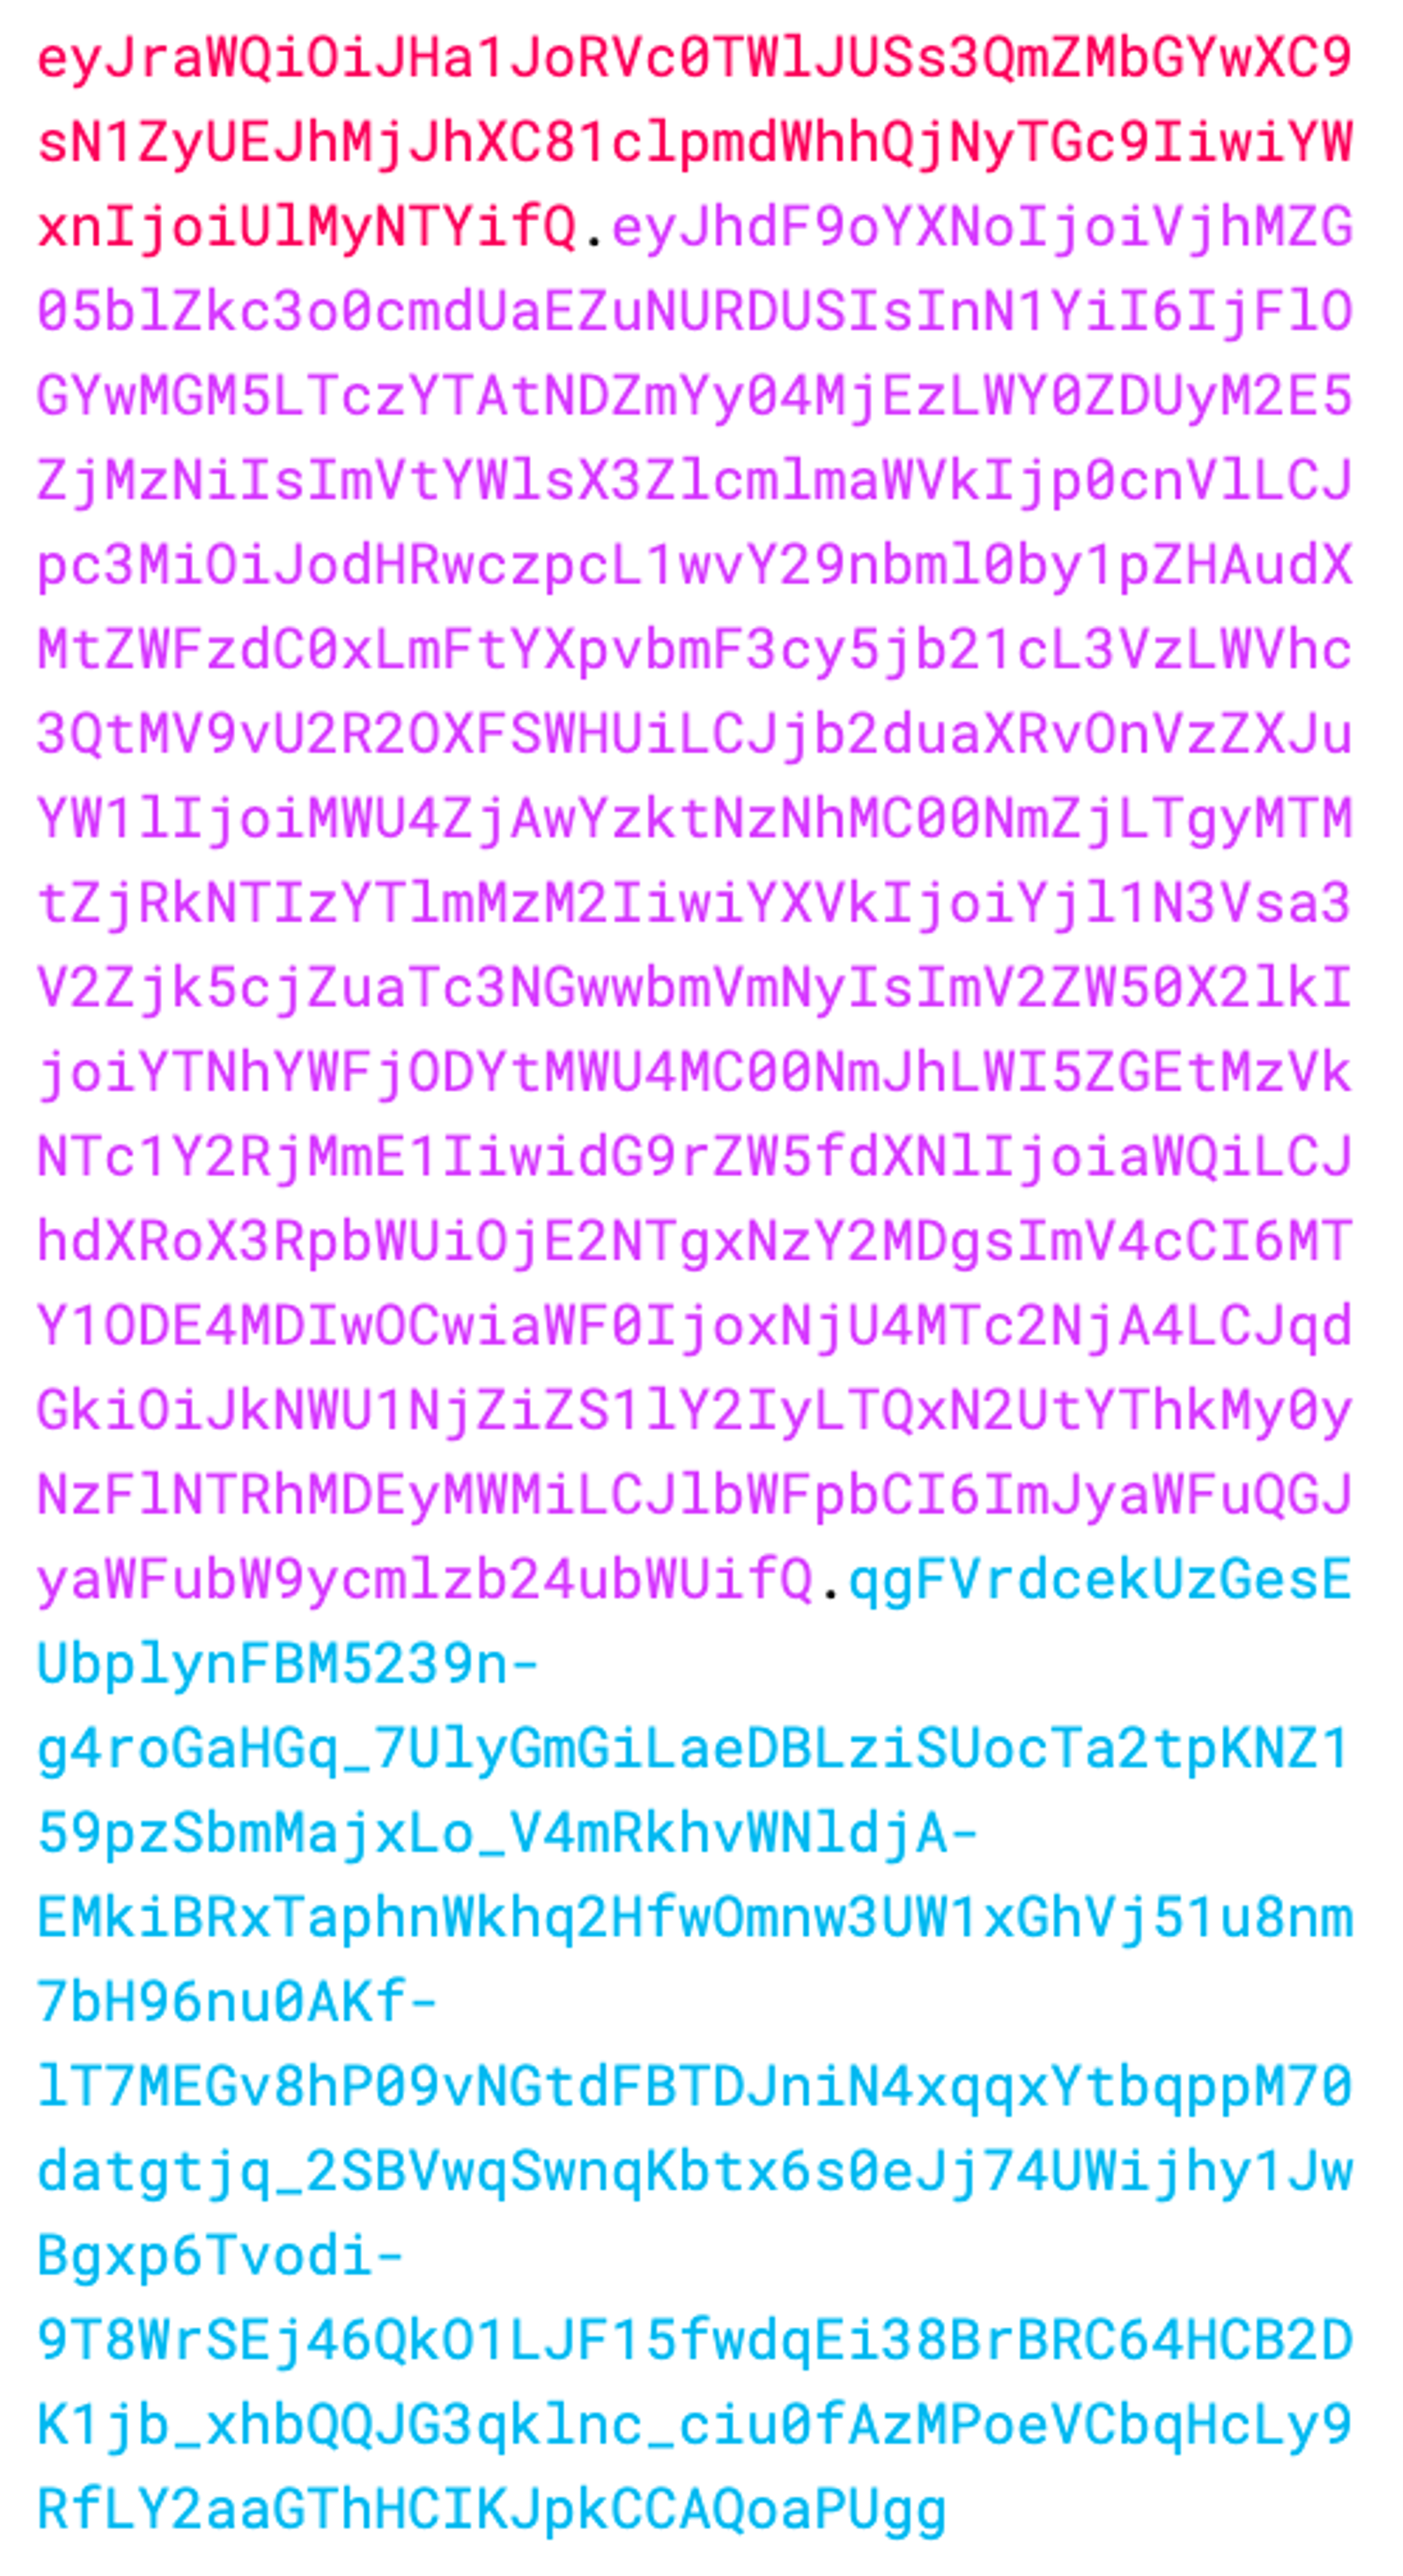
An example of the JWT we’ll create by the end of this article.
What is Cognito?
Cognito is a user management system in AWS designed to be used by applications and eliminate the need for developers to roll their own system. It allows you to add authentication & user management to your app without having to worry about being responsible for user credentials yourself. It also comes with a slew of nice features, including a sign-up & sign-in UI out of the box. Cognito uses OAuth to issue JWTs that you can use within your application to validate the identity of users. It also has excellent integrations built for all AWS services, so if you are using something like API Gateway, it can drastically cut the time it takes to implement auth in your app.
Setting up Cognito
Use the global search box to find “Cognito" and open it up. Once there, click “Create user pool”.
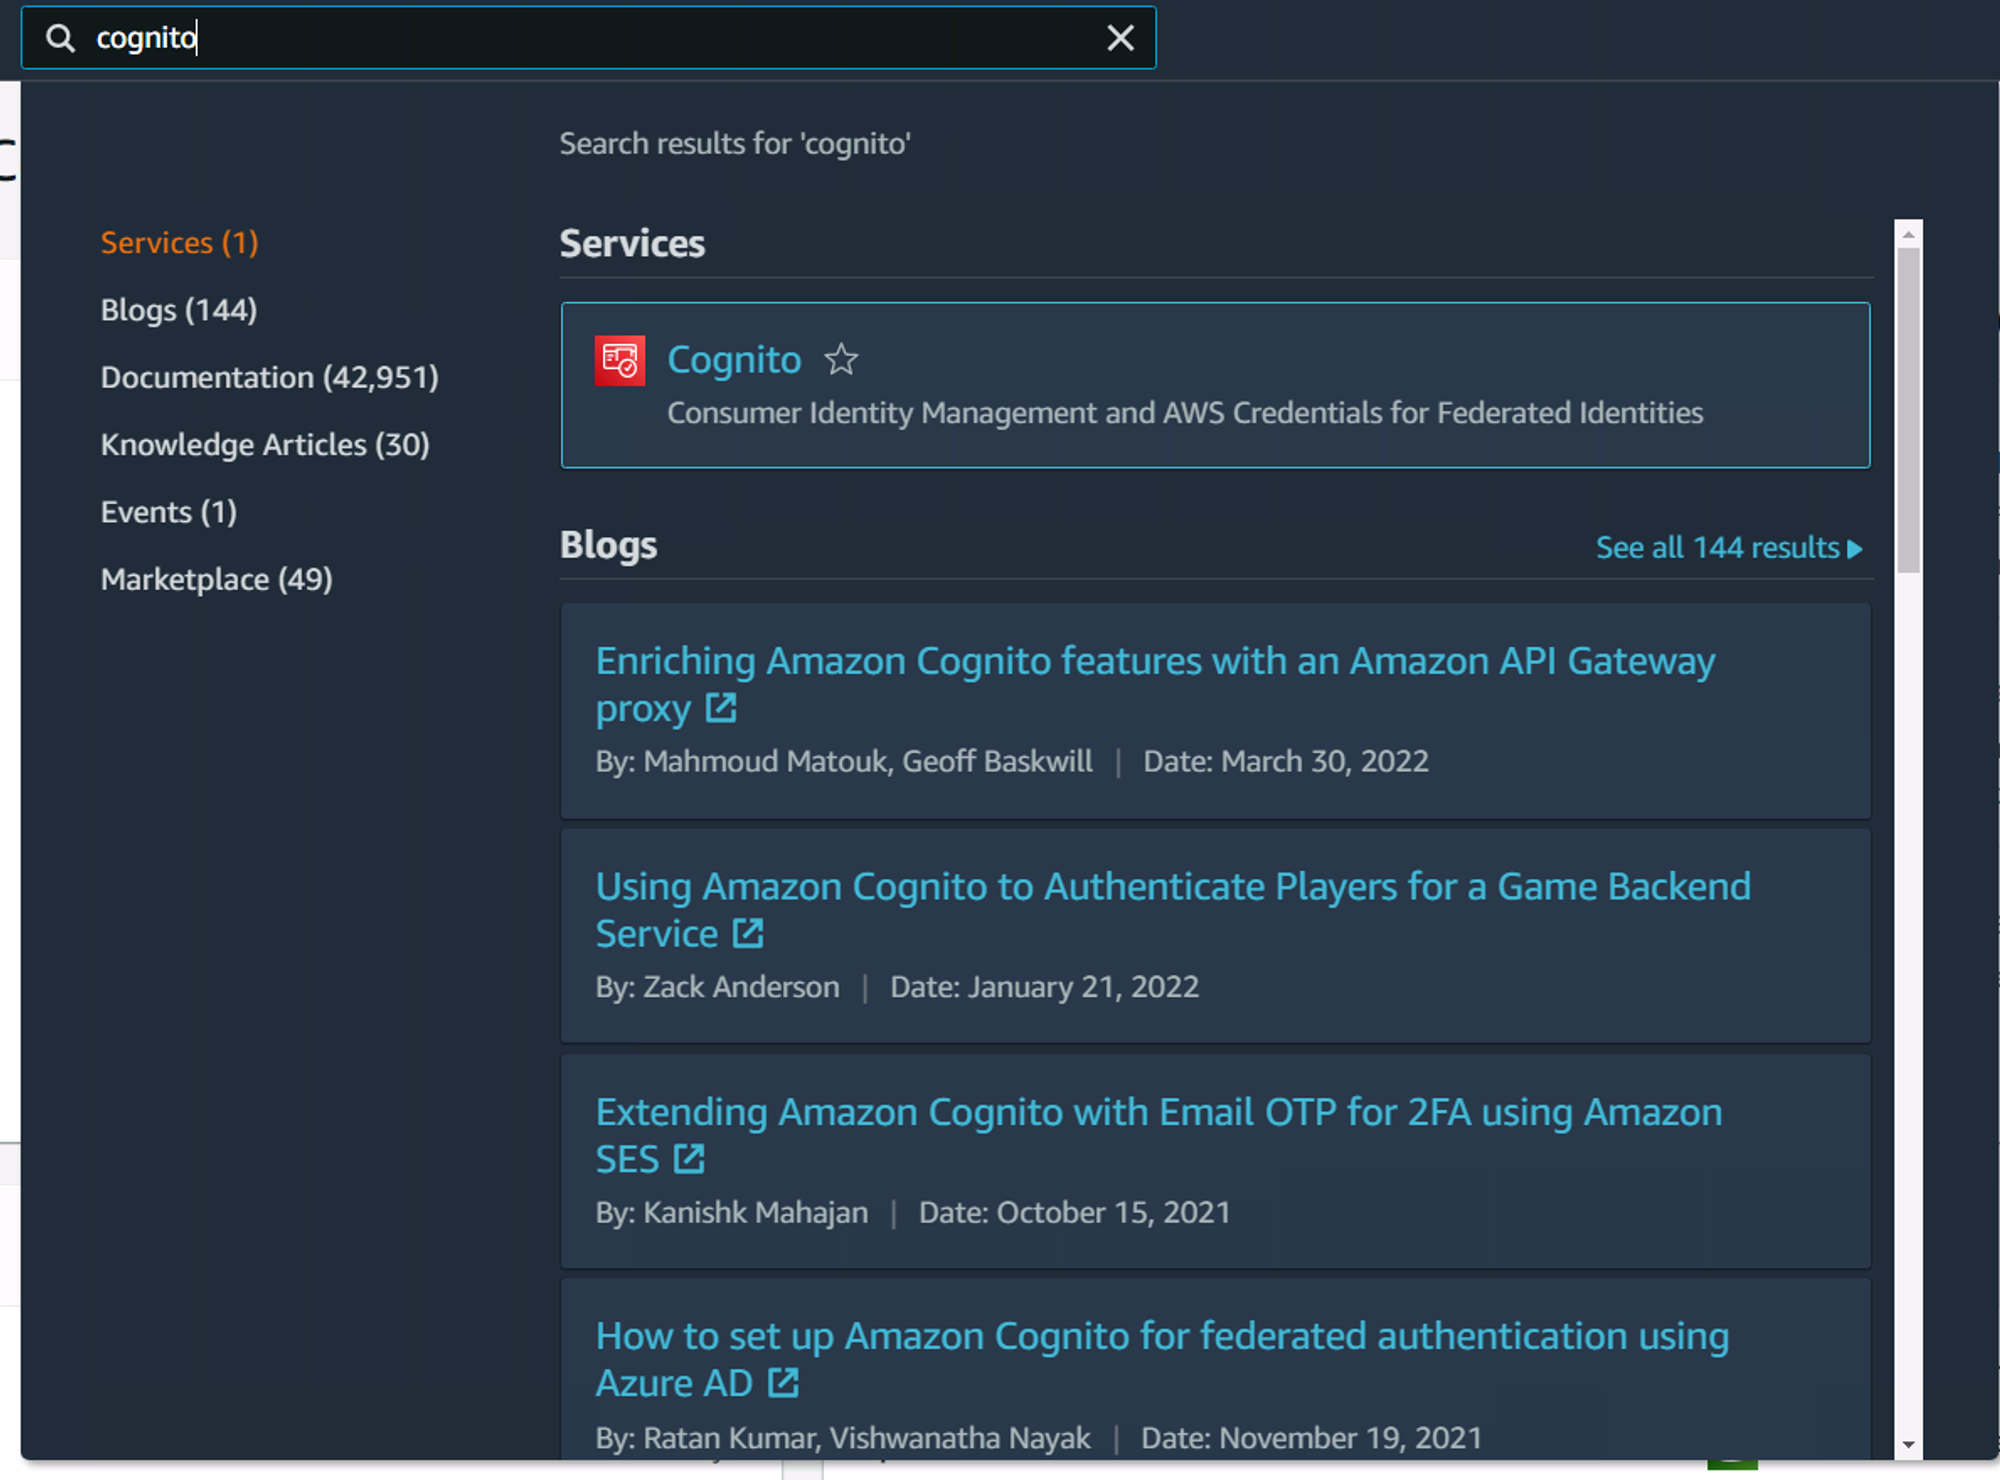
Searching for Cognito in the AWS global search.
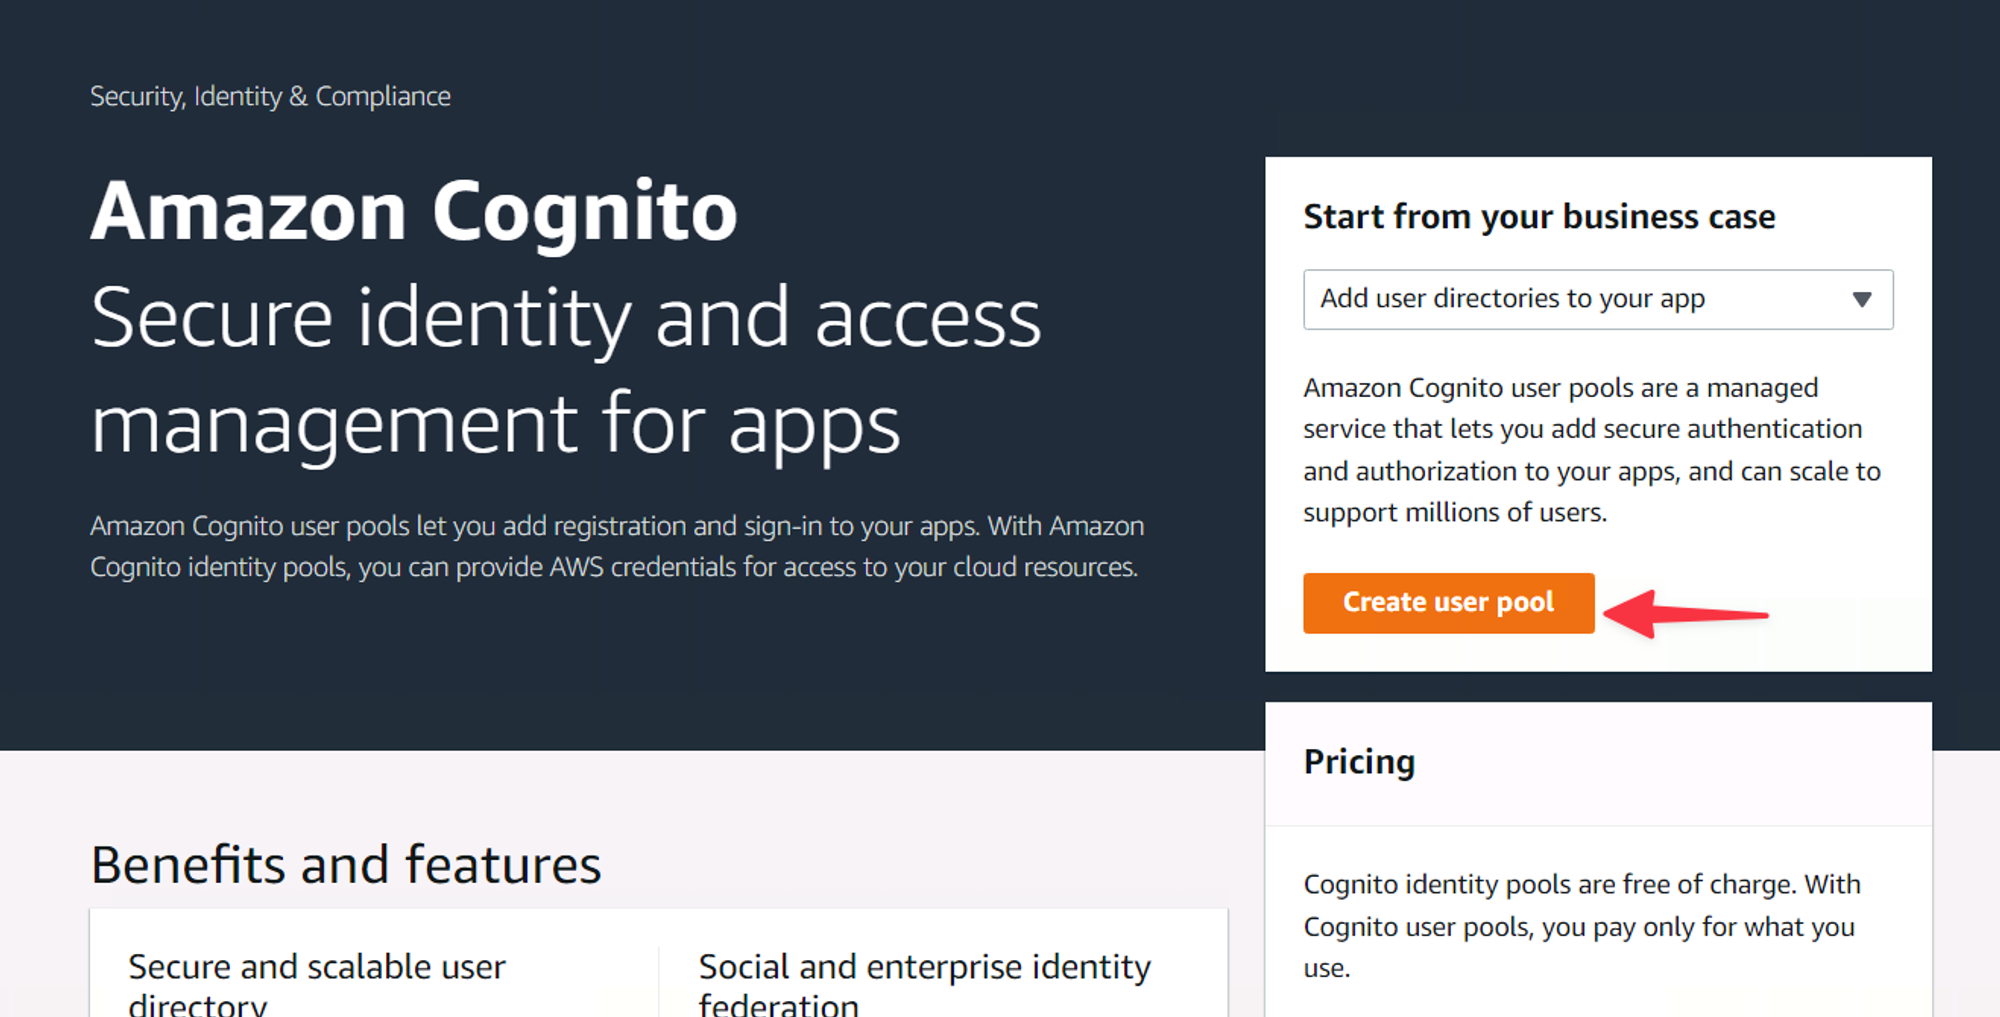
The default Cognito landing page, with Create user pool button highlighted.
Next, you’ll be stepped through the process of creating a user pool. The first page lets you select the primary method by which you want to allow users to sign in. I’m a fan of using the email address, so select that and click “Next”.
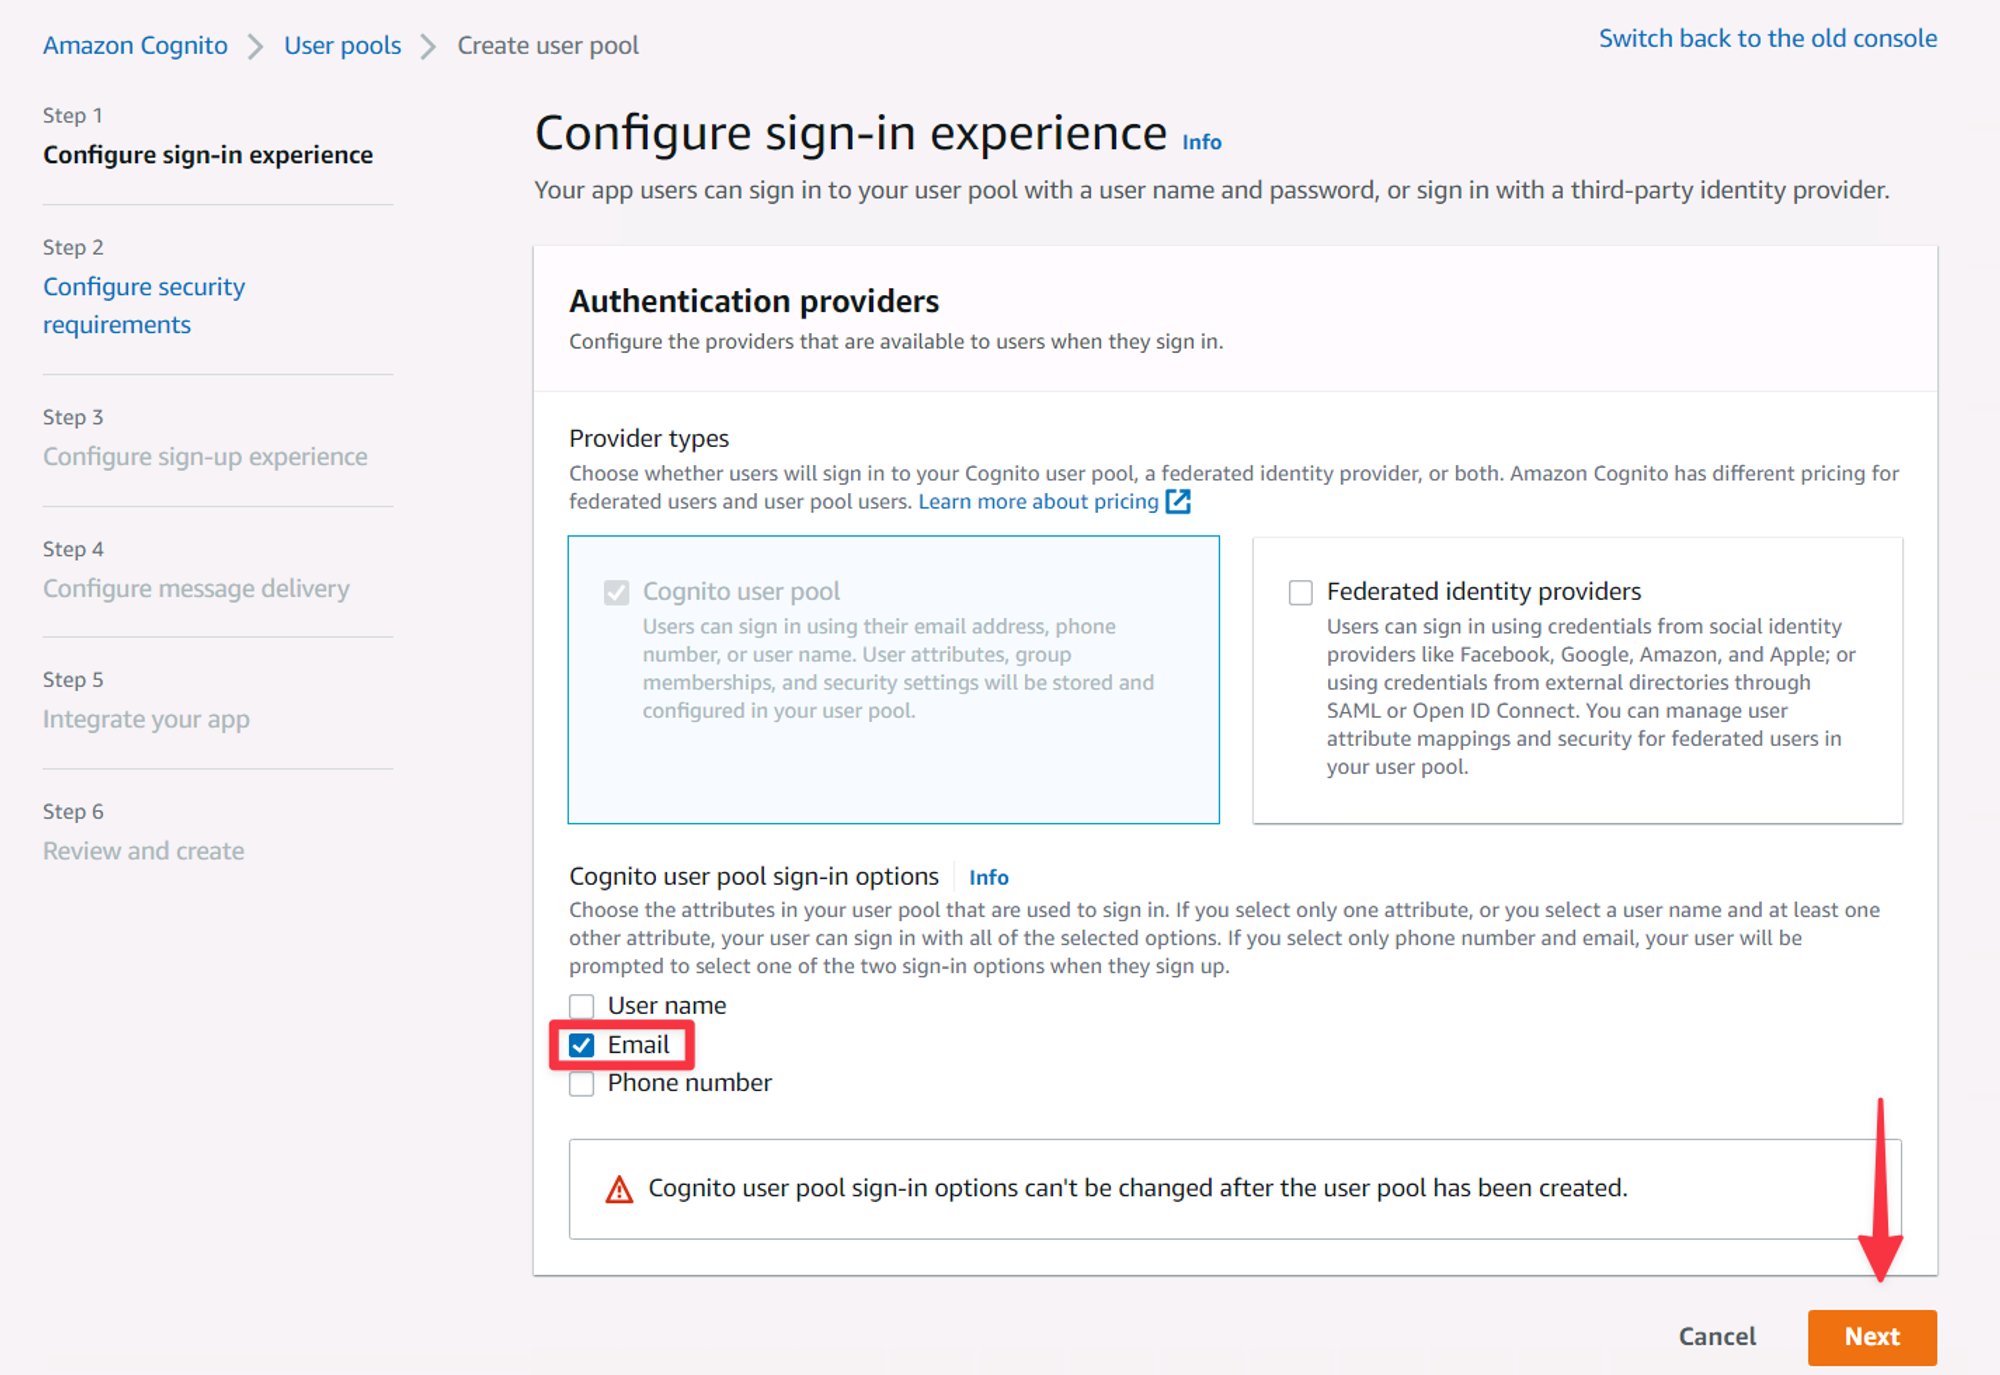
The first view of the Cognito new user pool wizard.
On the next view, you can configure security requirements for your user. All of these options can be left as default, with the exception of the Multi-factor authentication section. I recommend leaving this on for additional security, but set it to No MFA for keeping this tutorial on the simpler end (MFA adds little value to the walkthrough). Uncheck that box and scroll down to the bottom and click “Next”.
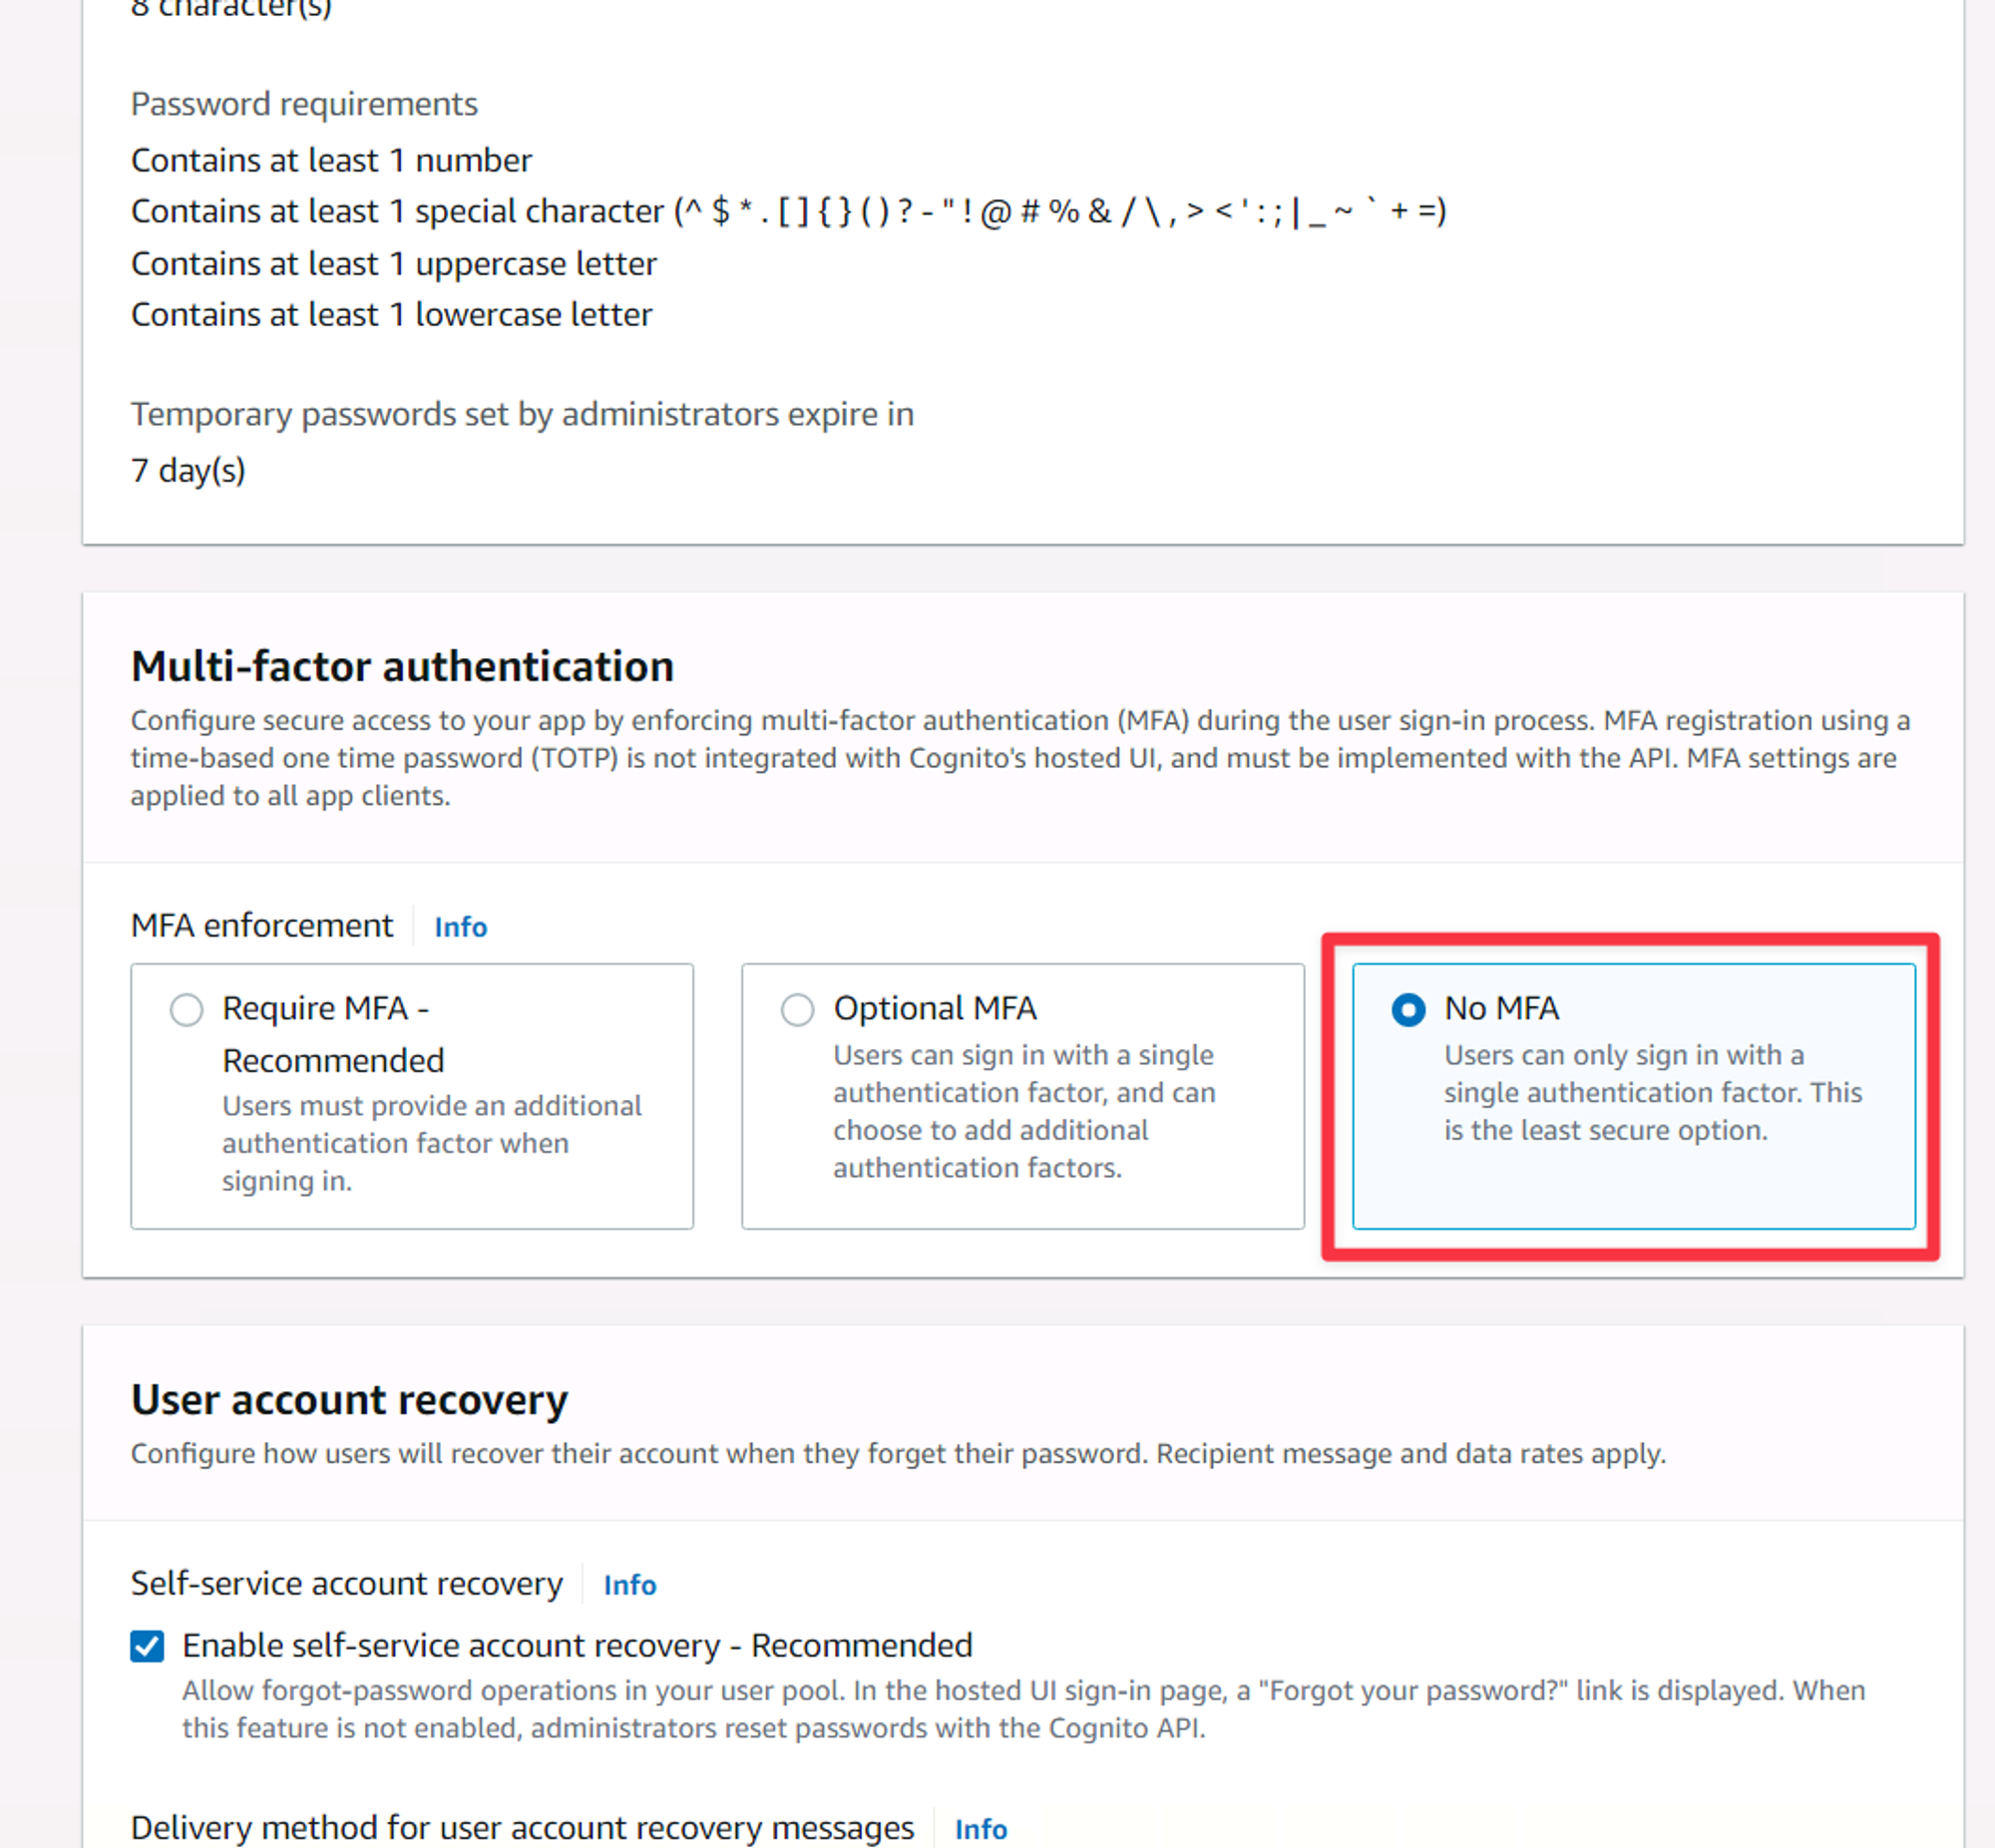
The Multi-factor authentication settings of creating a user pool.
The next view affects how the users will sign-up. Of all these settings, the first one is probably the most important. Self-registration allows ANYONE to create an account for your app. If you are creating an internal app, you definitely want to leave this unchecked. We can leave it enabled for now though. You can safely leave these settings as they are and click “Next”.
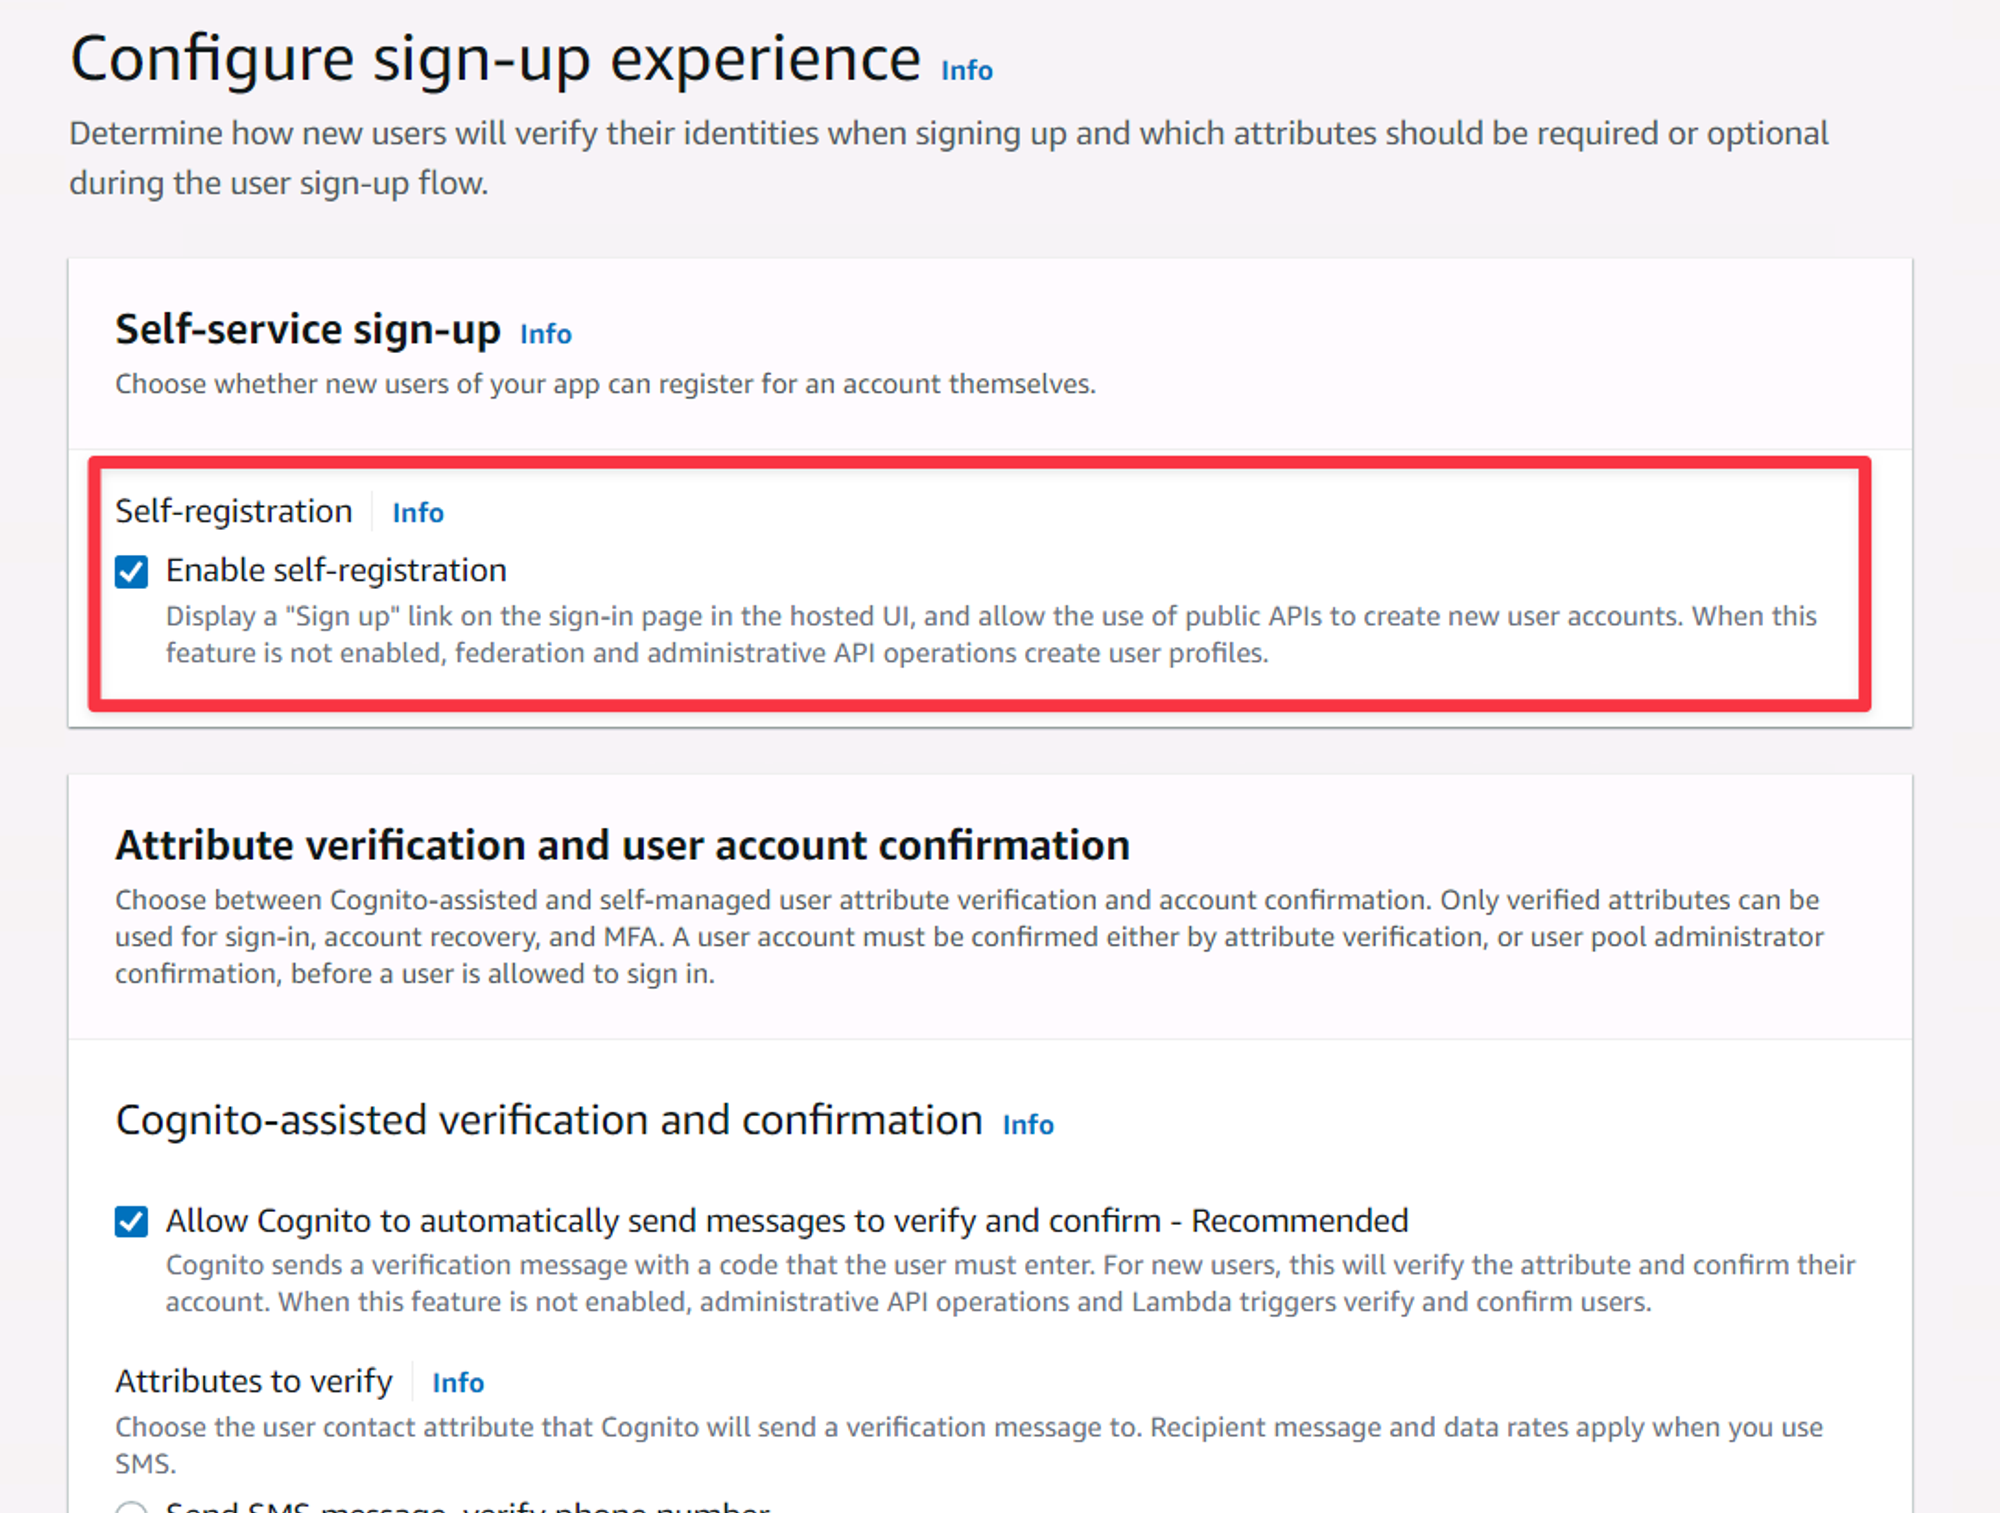
The Configure sign-up experience settings.
The next view allows you to customize how email messages are sent. While SES is recommended, it touches on services we haven’t covered so select “Send email with Cognito” and click “Next”.
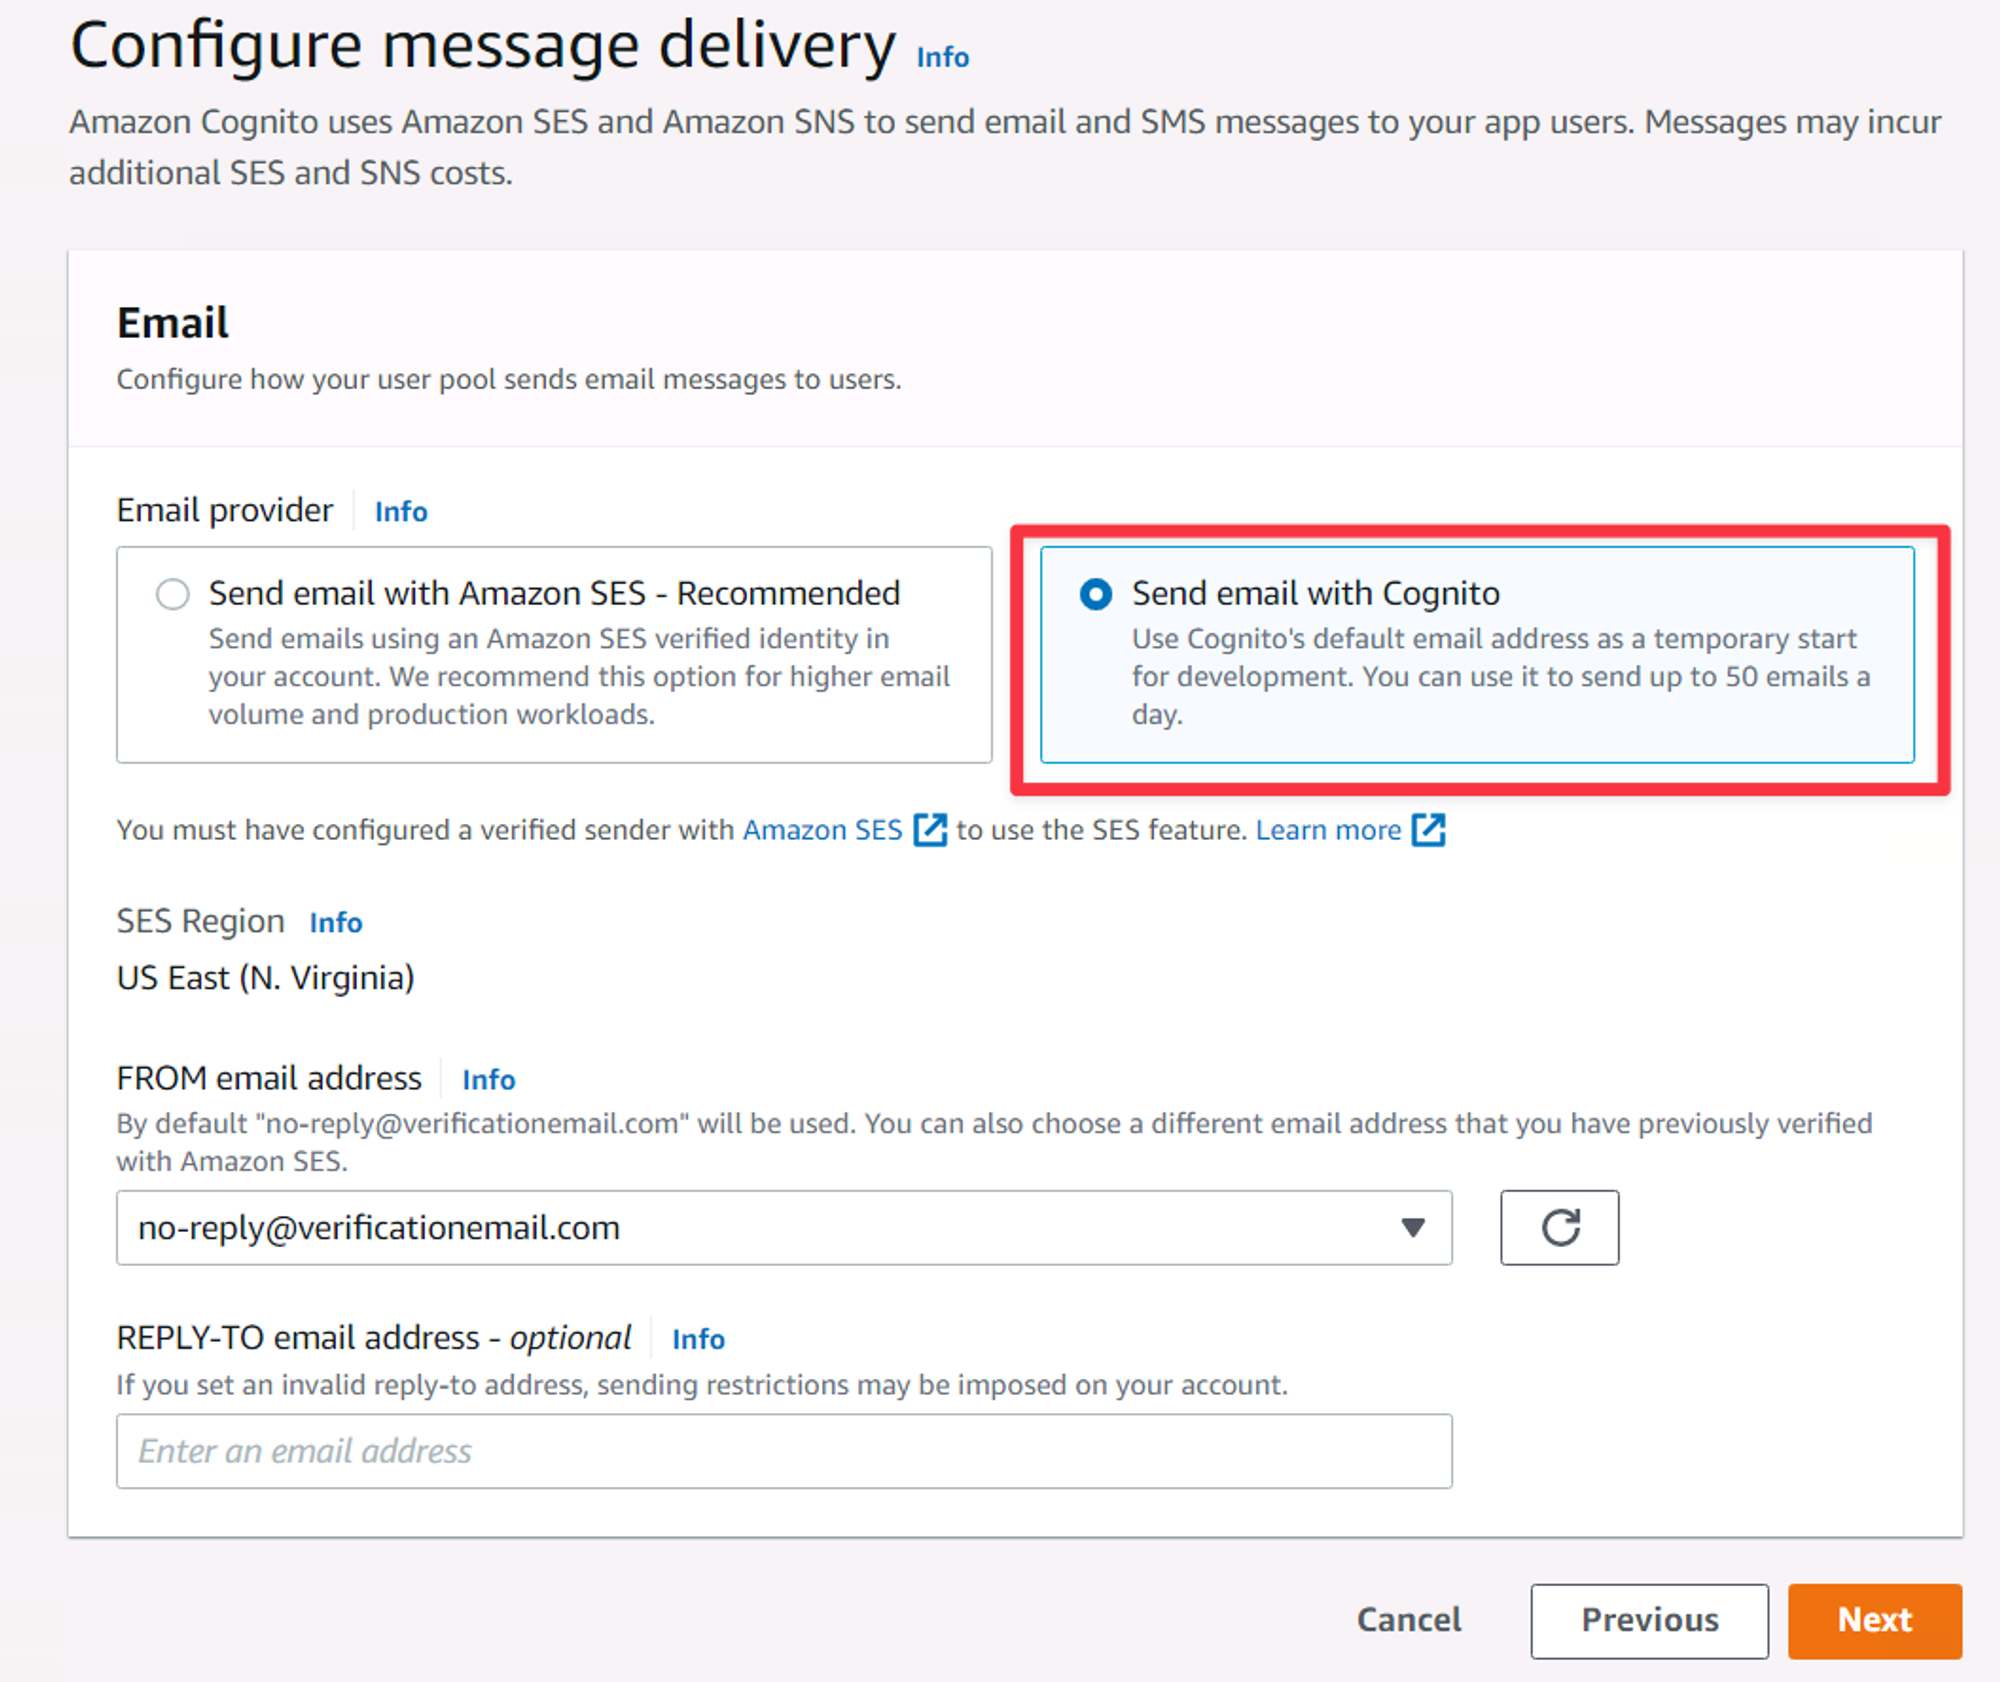
The Configure message delivery settings of the new user pool wizard.
Now you get to name your user pool and configure a few more connectivity options. For the name, typically you’d name it something similar to your app, but it's arbitrary. I’ll name mine GoApiUserPool. Next, make sure to check the “Use the Cognito Hosted UI” button as it lets users use the default interfaces without having to build UIs yourself.
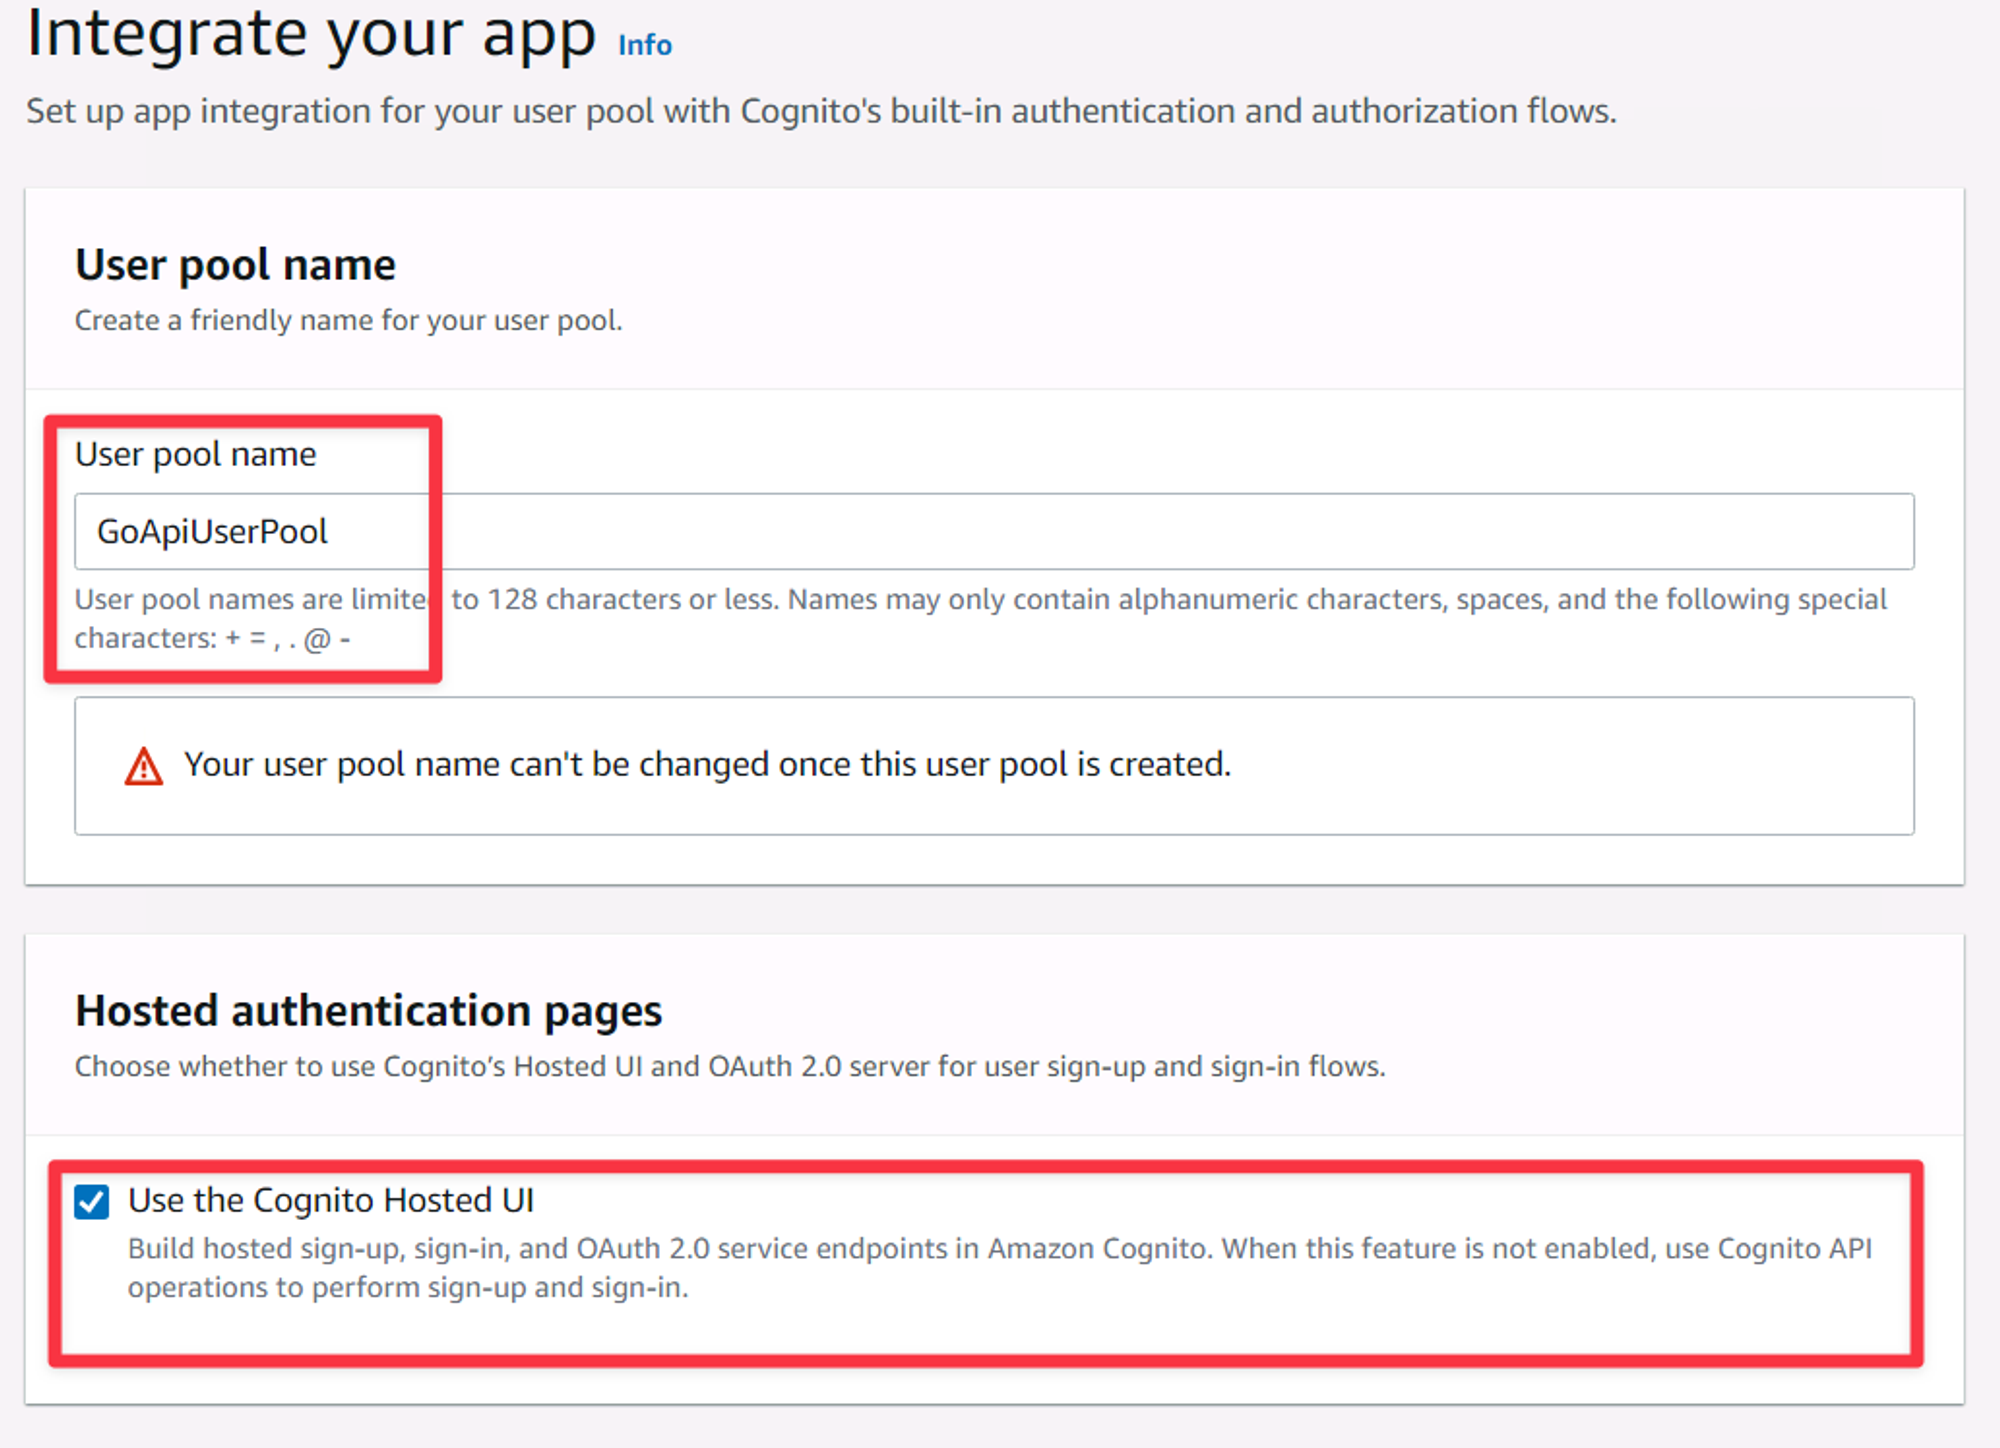
The User pool name and Hosted authentication pages sections of the new user pool wizard.
You’ll also notice a Domain section appear. Leave the “Use a Cognito domain” option set and select a domain prefix. It can be whatever you want it to be but has to be unique to the AWS region across ALL accounts, meaning nobody else can have selected that prefix. In my case, go-api-user-pool was available so I set mine to that.
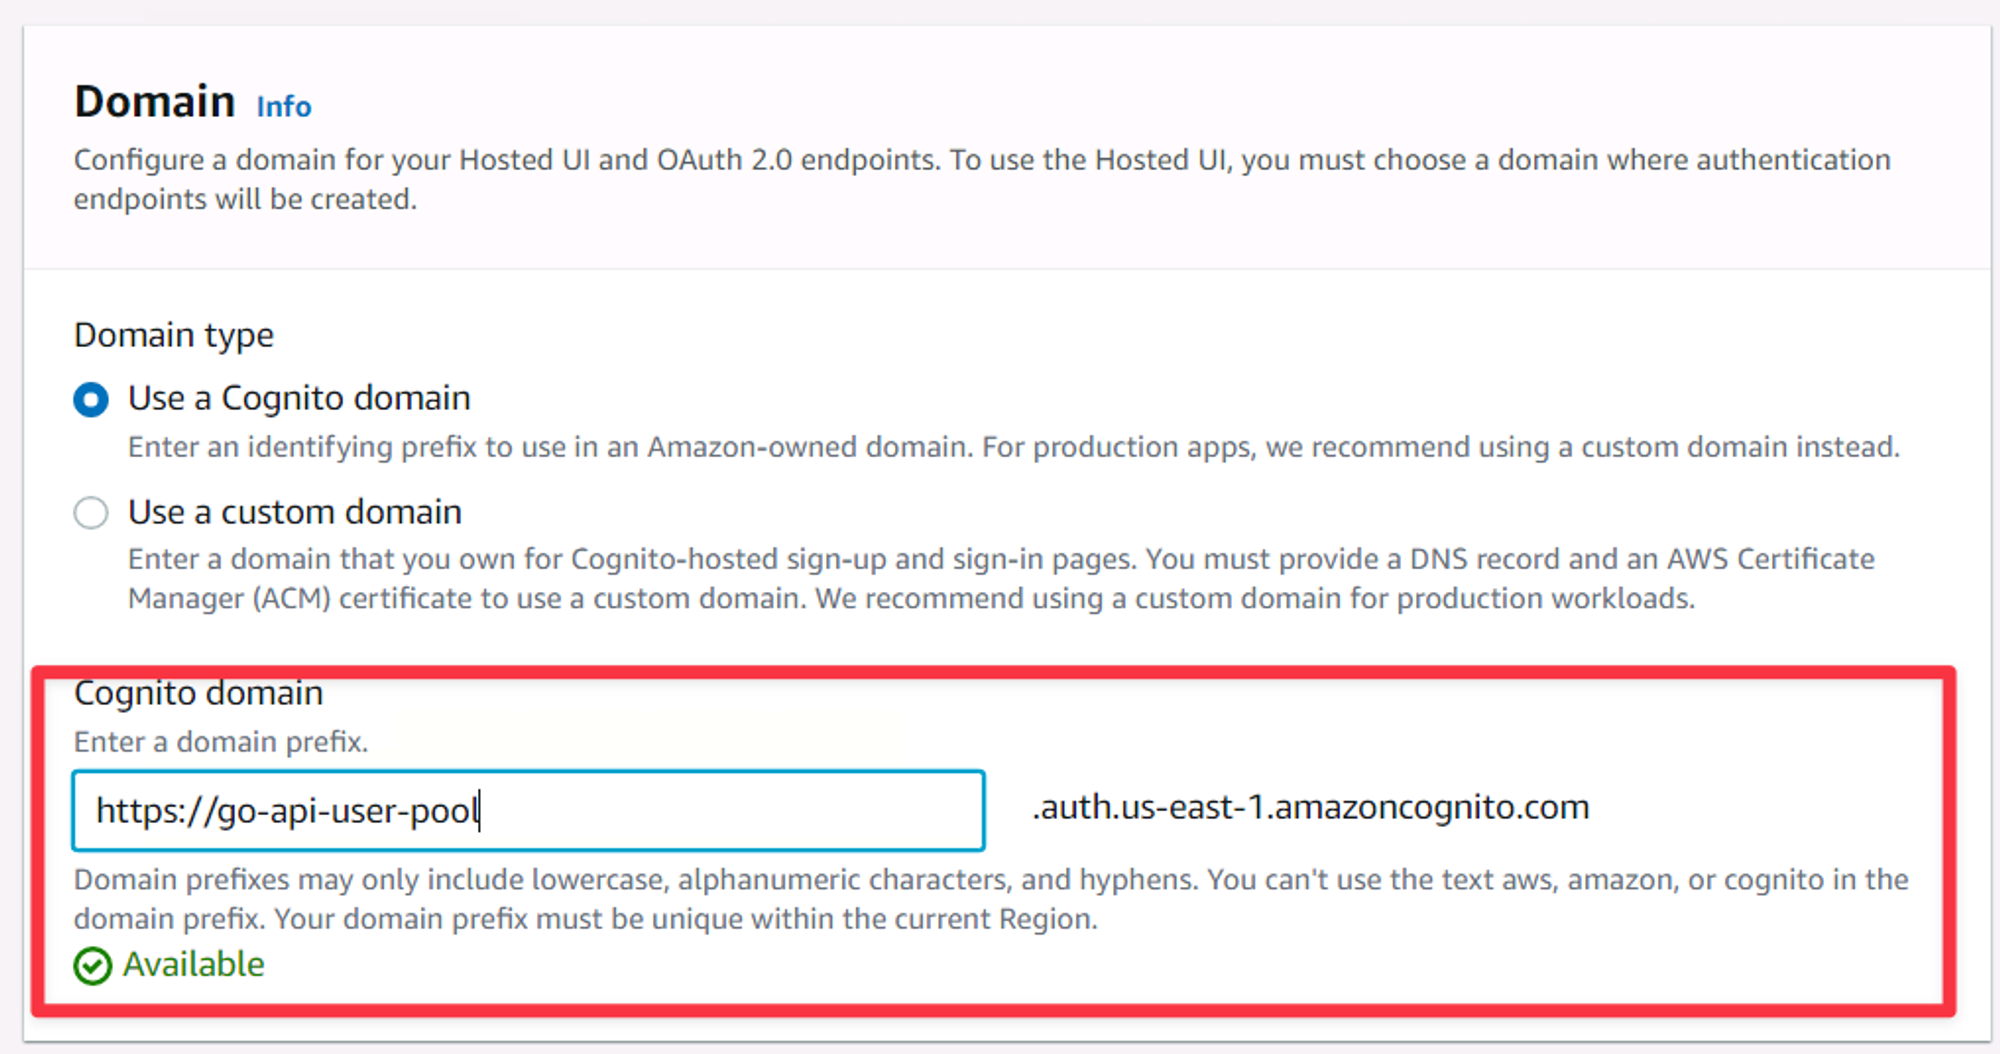
The Domain settings of the new user pool wizard.
Under the Initial app client section, there are quite a few bits to configure, so let’s start by giving your app client a name. The name is unique to your user pool, so it can be whatever you want. I’ll name mine Default App Client. For client secret, ensure the second option is selected.
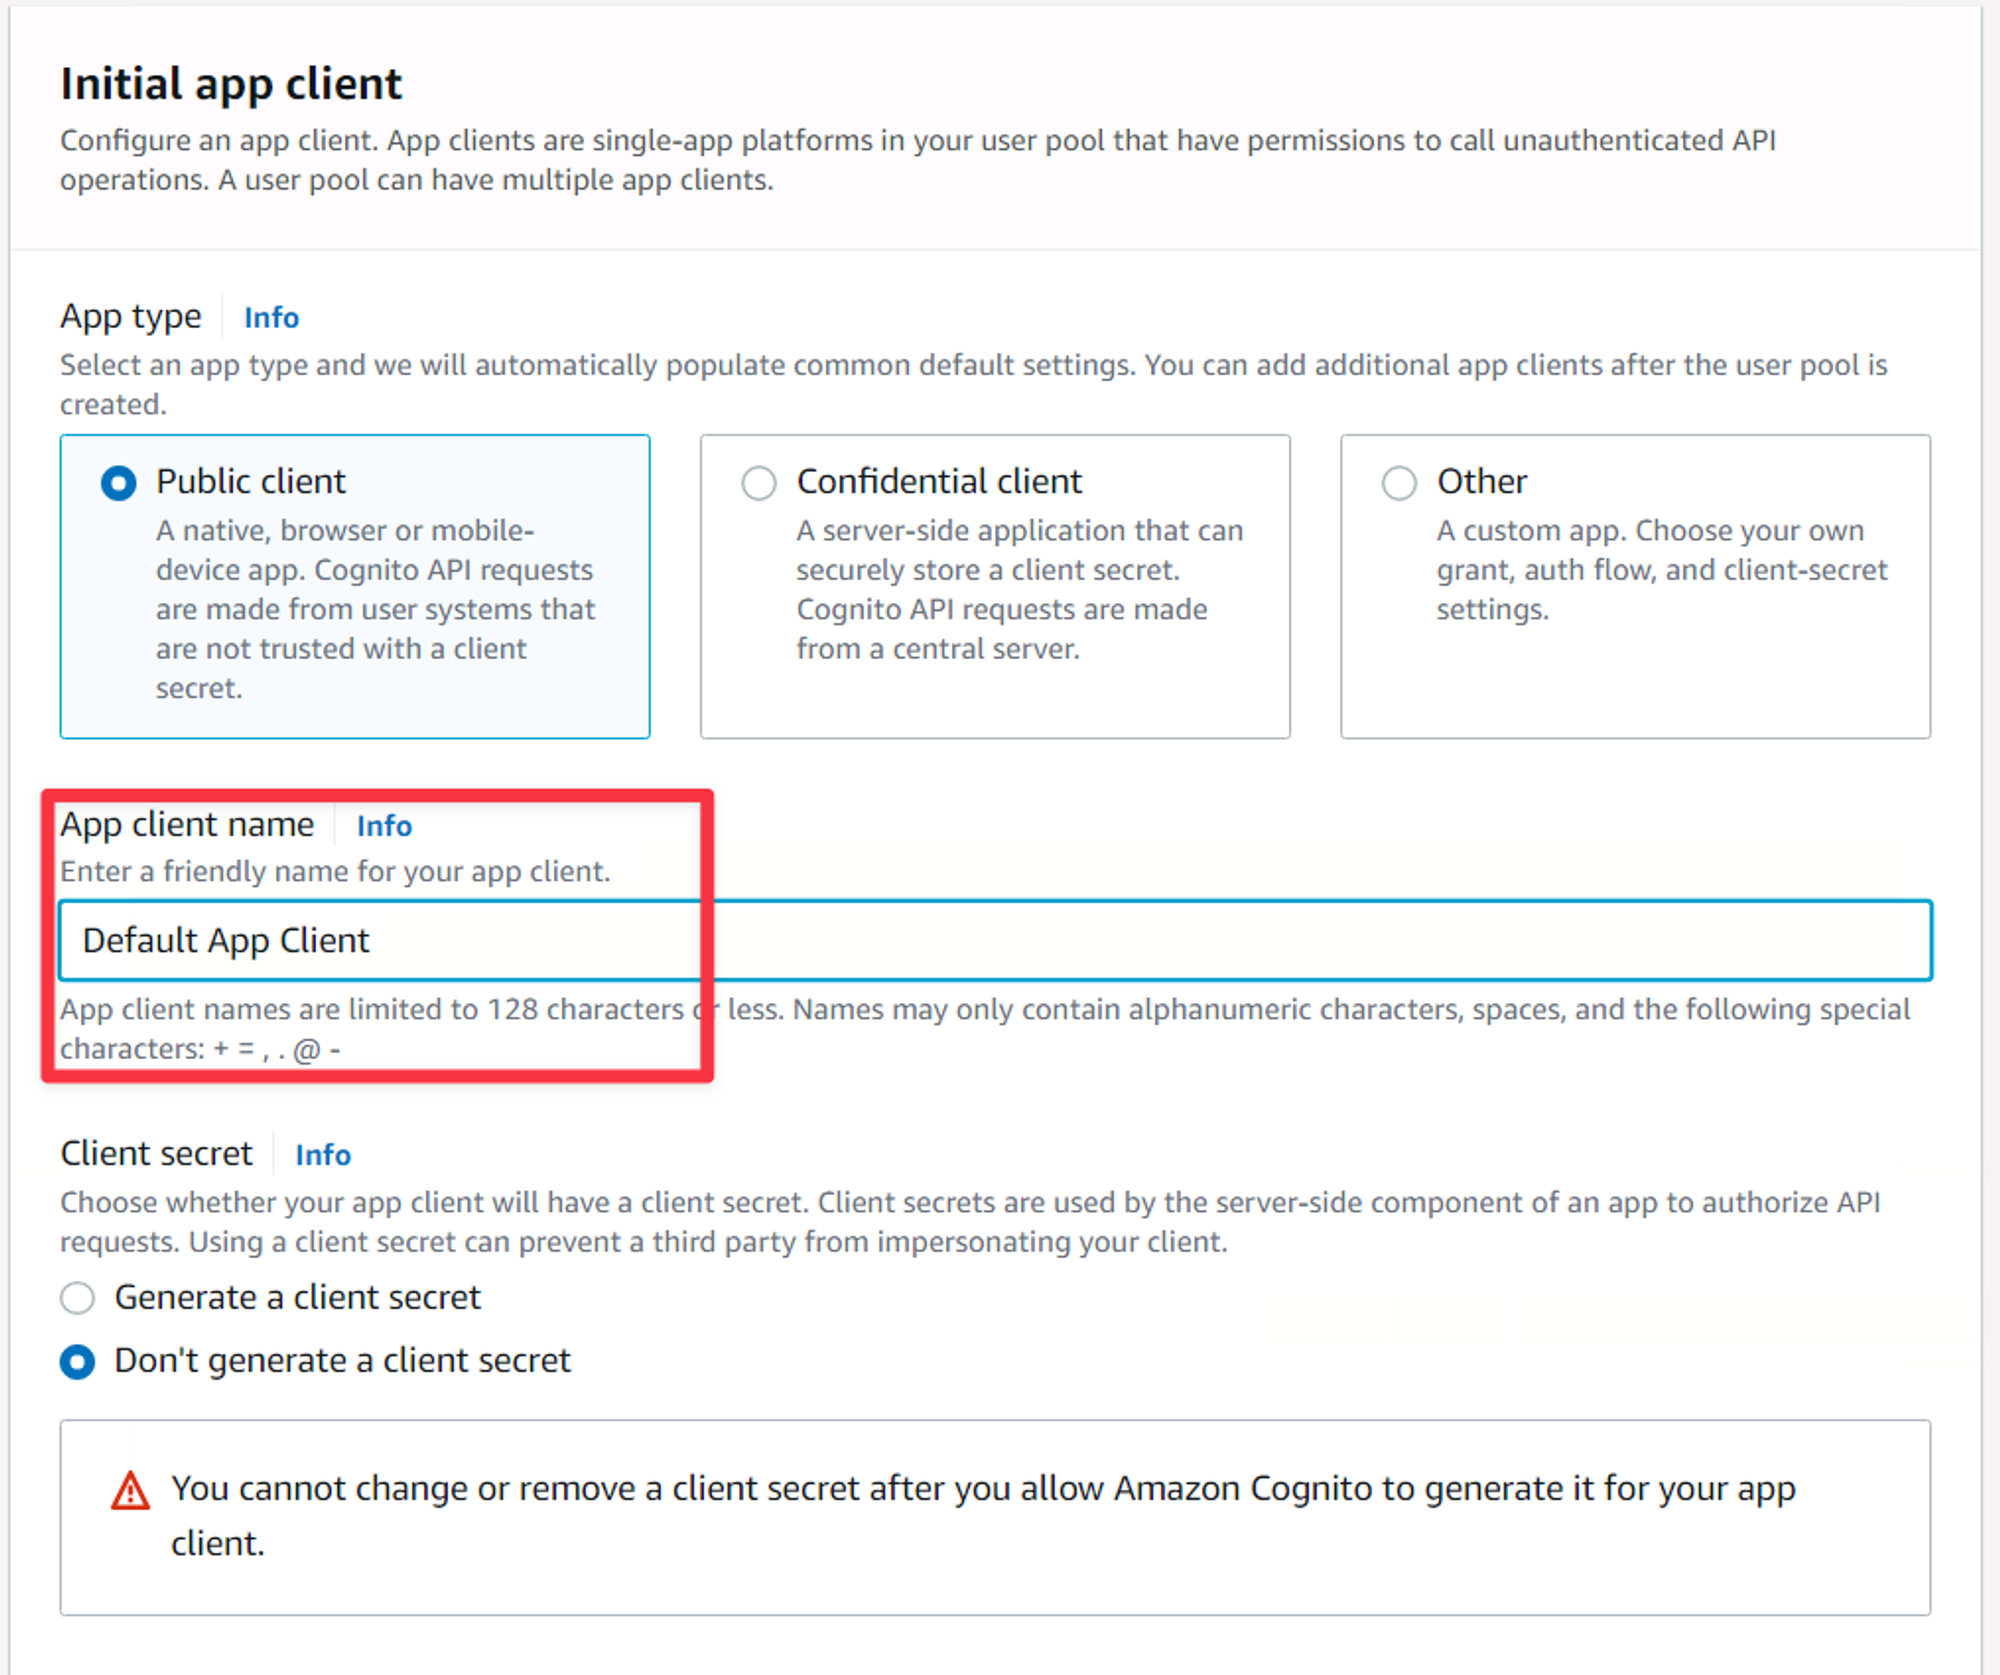
The Initial app client settings of the new user pool wizard.
Under Allowed callback URLs, you’d typically add a URL that is part of your front end and is capable of handling OAuth callbacks. In this series, we won’t be building a UI of any kind, but one of my favorite sites to use to analyze the tokens that will be created by Cognito is https://jwt.io, so put that in there. If you aren’t familiar with OAuth flows, it will make more sense when we see this all in action.
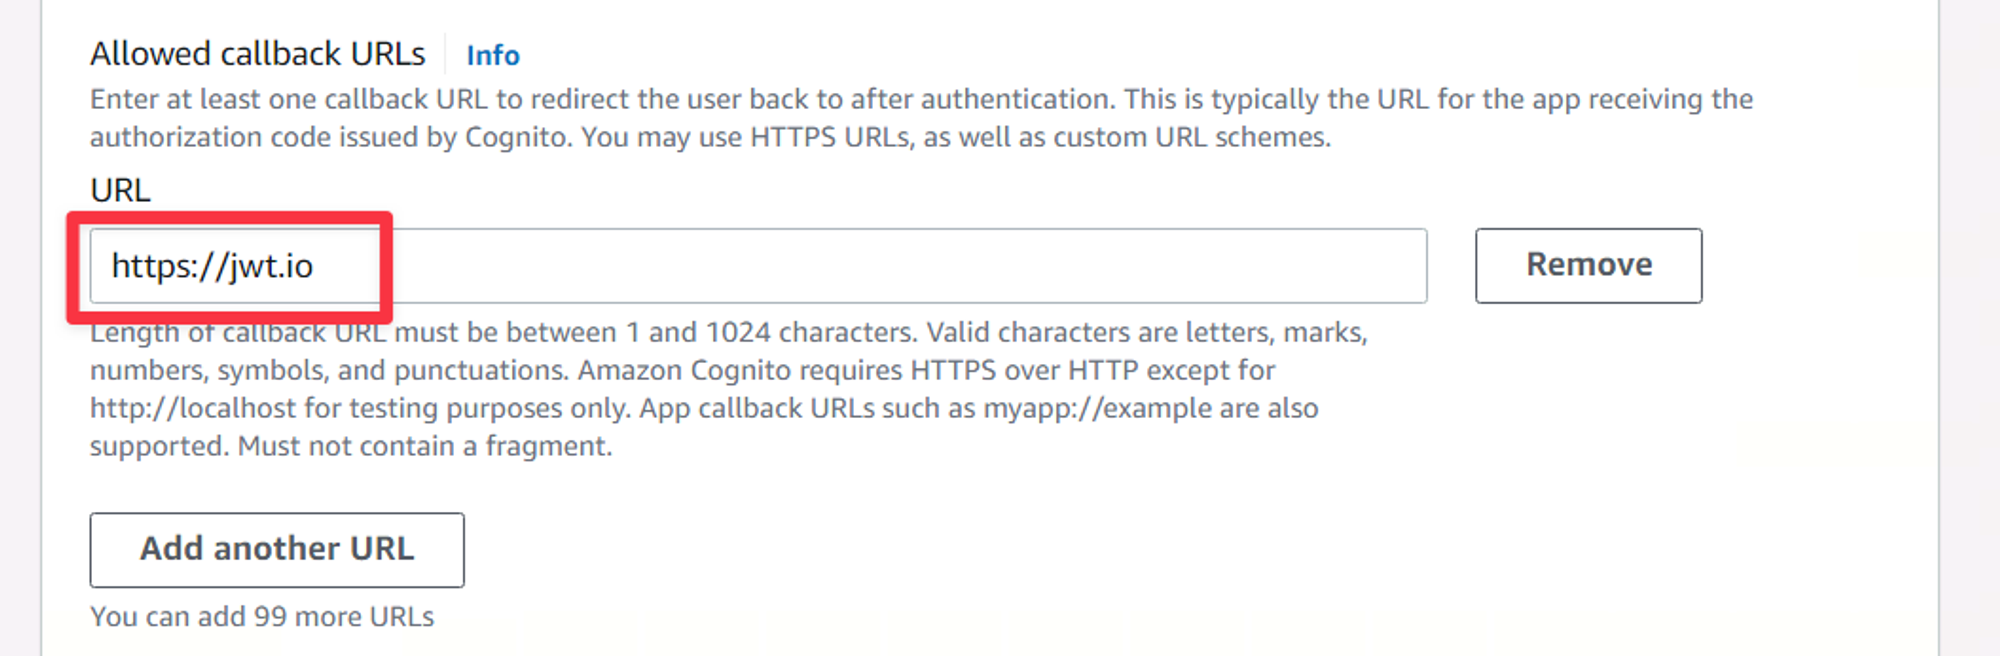
The Allowed callback URLs section of the new user pool wizard.
Now expand Advanced app client settings. Scroll down a bit until you see OAuth 2.0 Grant Types. “Authorization code grant” is selected by default, but you also want to make sure “Implicit grant” is selected as it will be easier to analyze the tokens in this demo. Once you’ve checked that, scroll to the bottom & click “Next”.
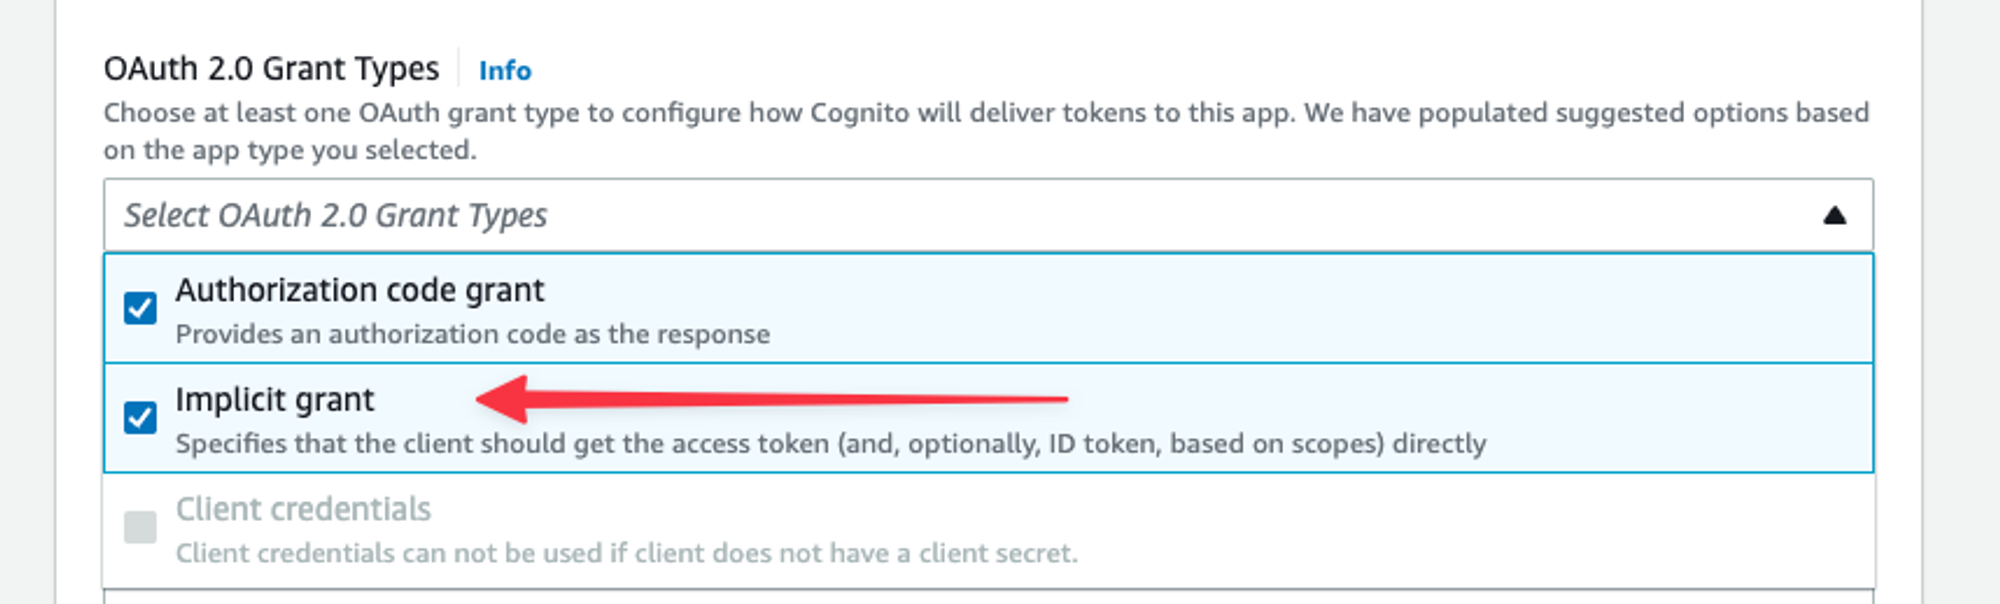
The OAuth 2 grant types section of the new user pool wizard.
This is the last view of the setup wizard. Feel free to double-check your settings then click “Create user pool” at the bottom of the page.
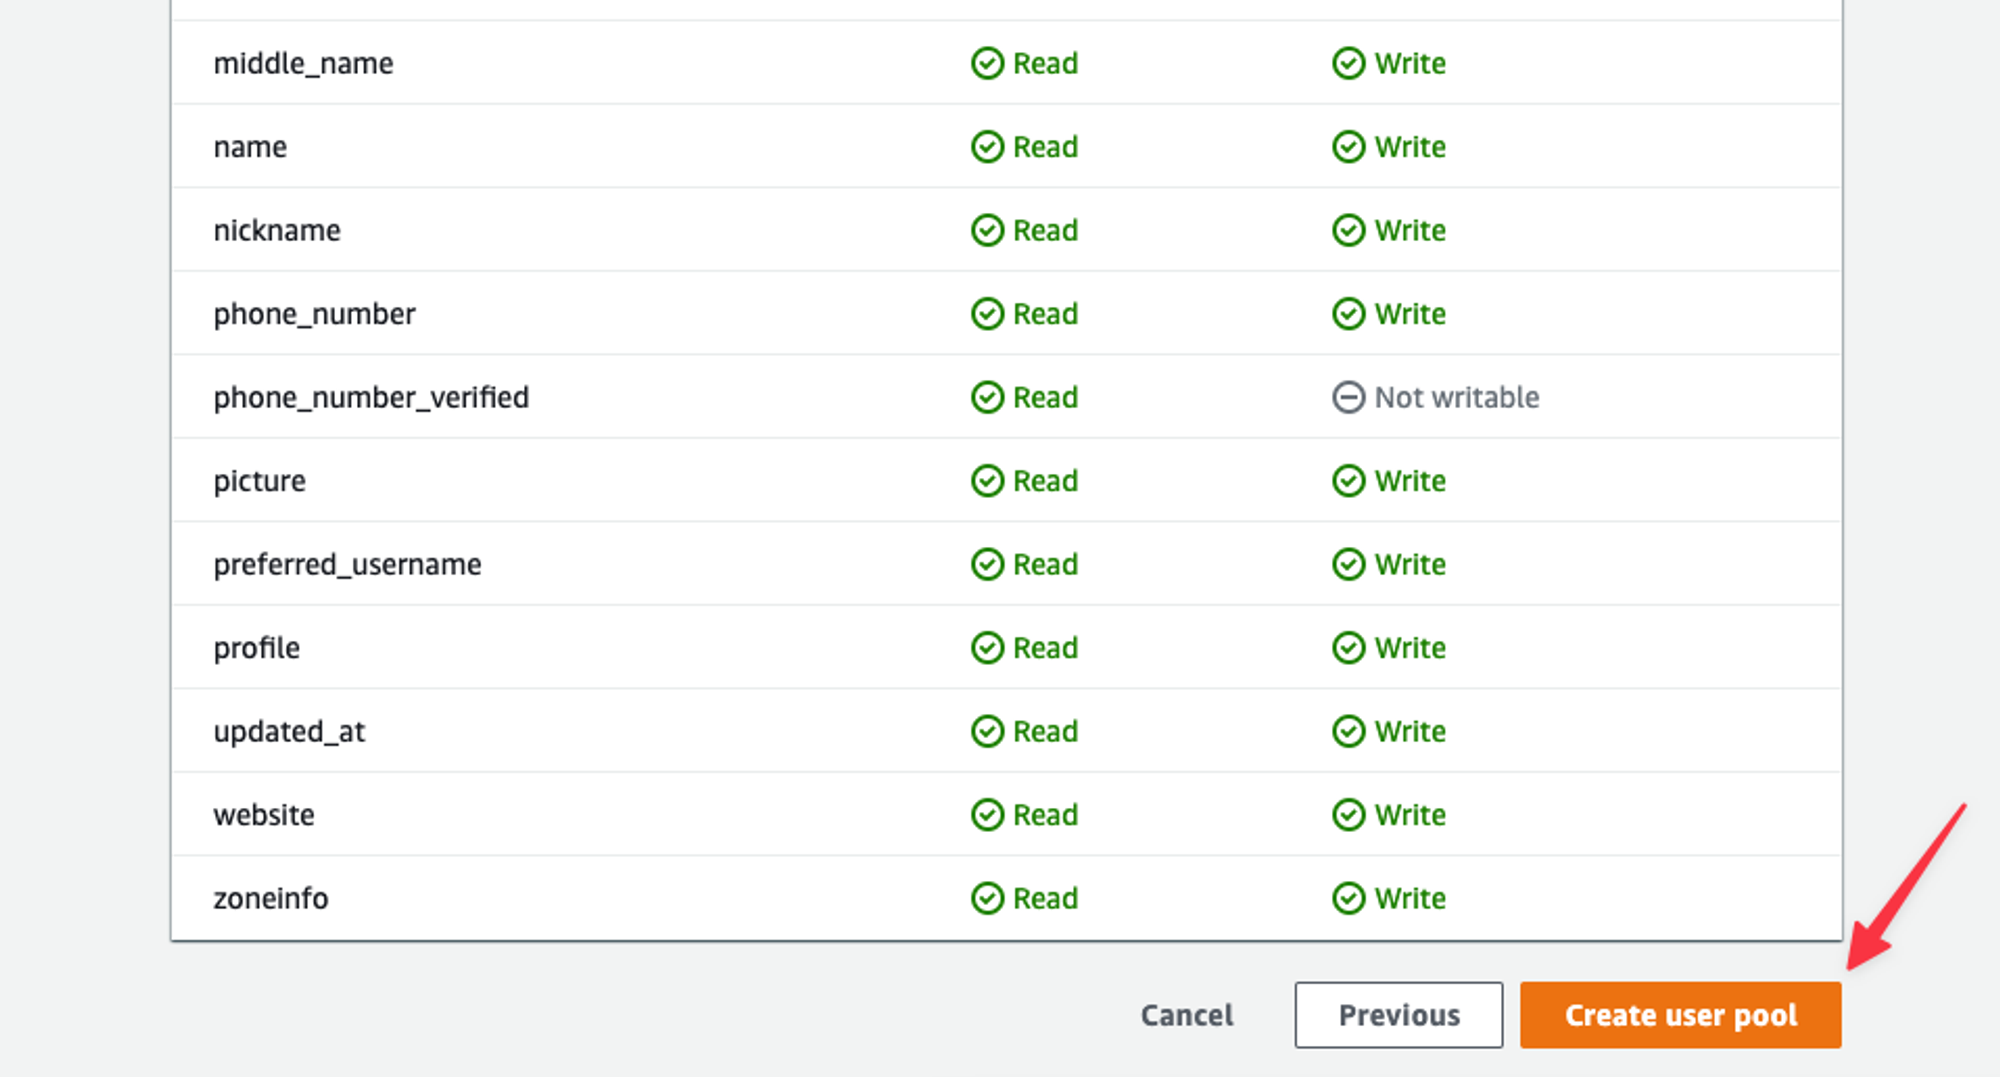
The review page of the new user pool wizard, with Create user pool highlighted.
You’ll be dropped into a list of your user pools. Select the new user pool you just created in the list.
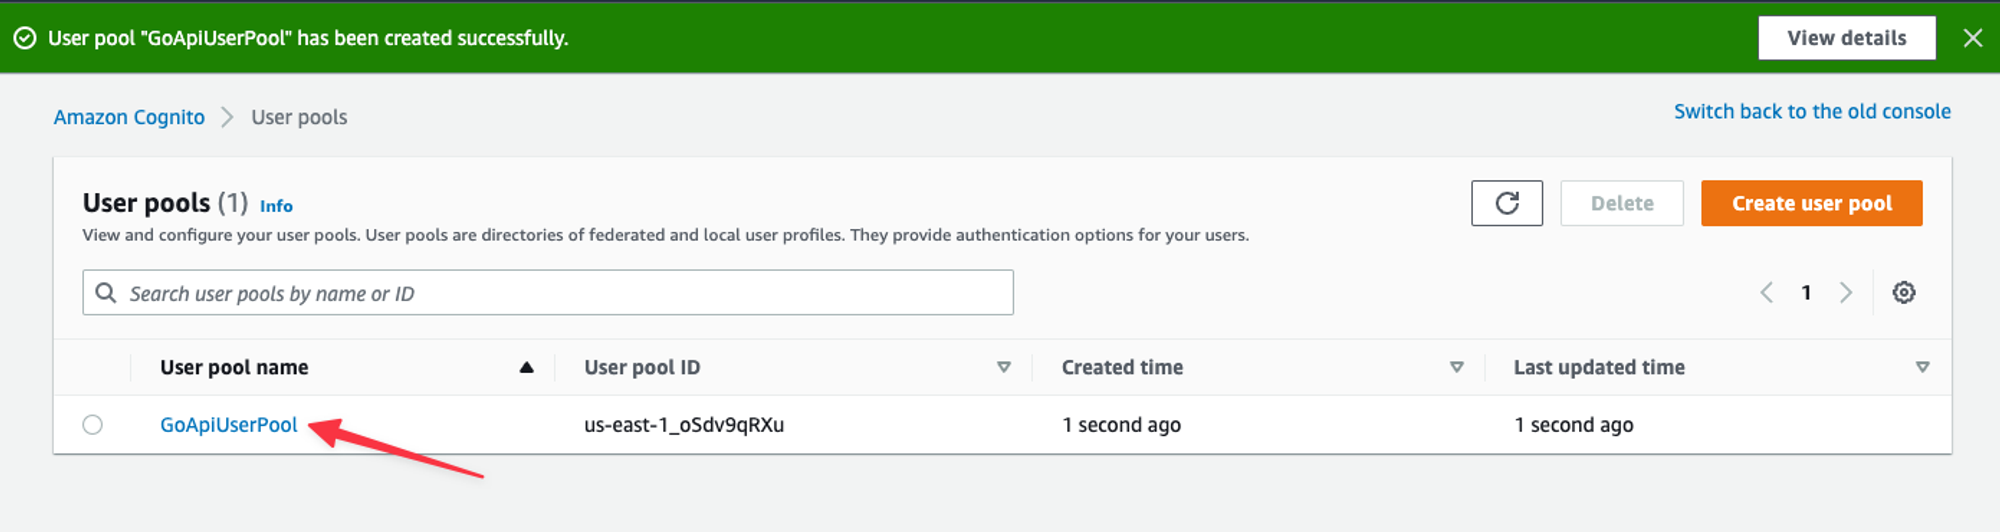
A list of your user pools.
Let’s create a new user to test the login portion with. Click the “Create user” button in the center of the page. You’ll be presented with a form to create a user. Let’s set up the form like so:
- Invitation message: Send an email invitation
- Email address: Your email address
- Mark email address as verified: Checked
- Temporary password: Generate a password
Click “Create user”.
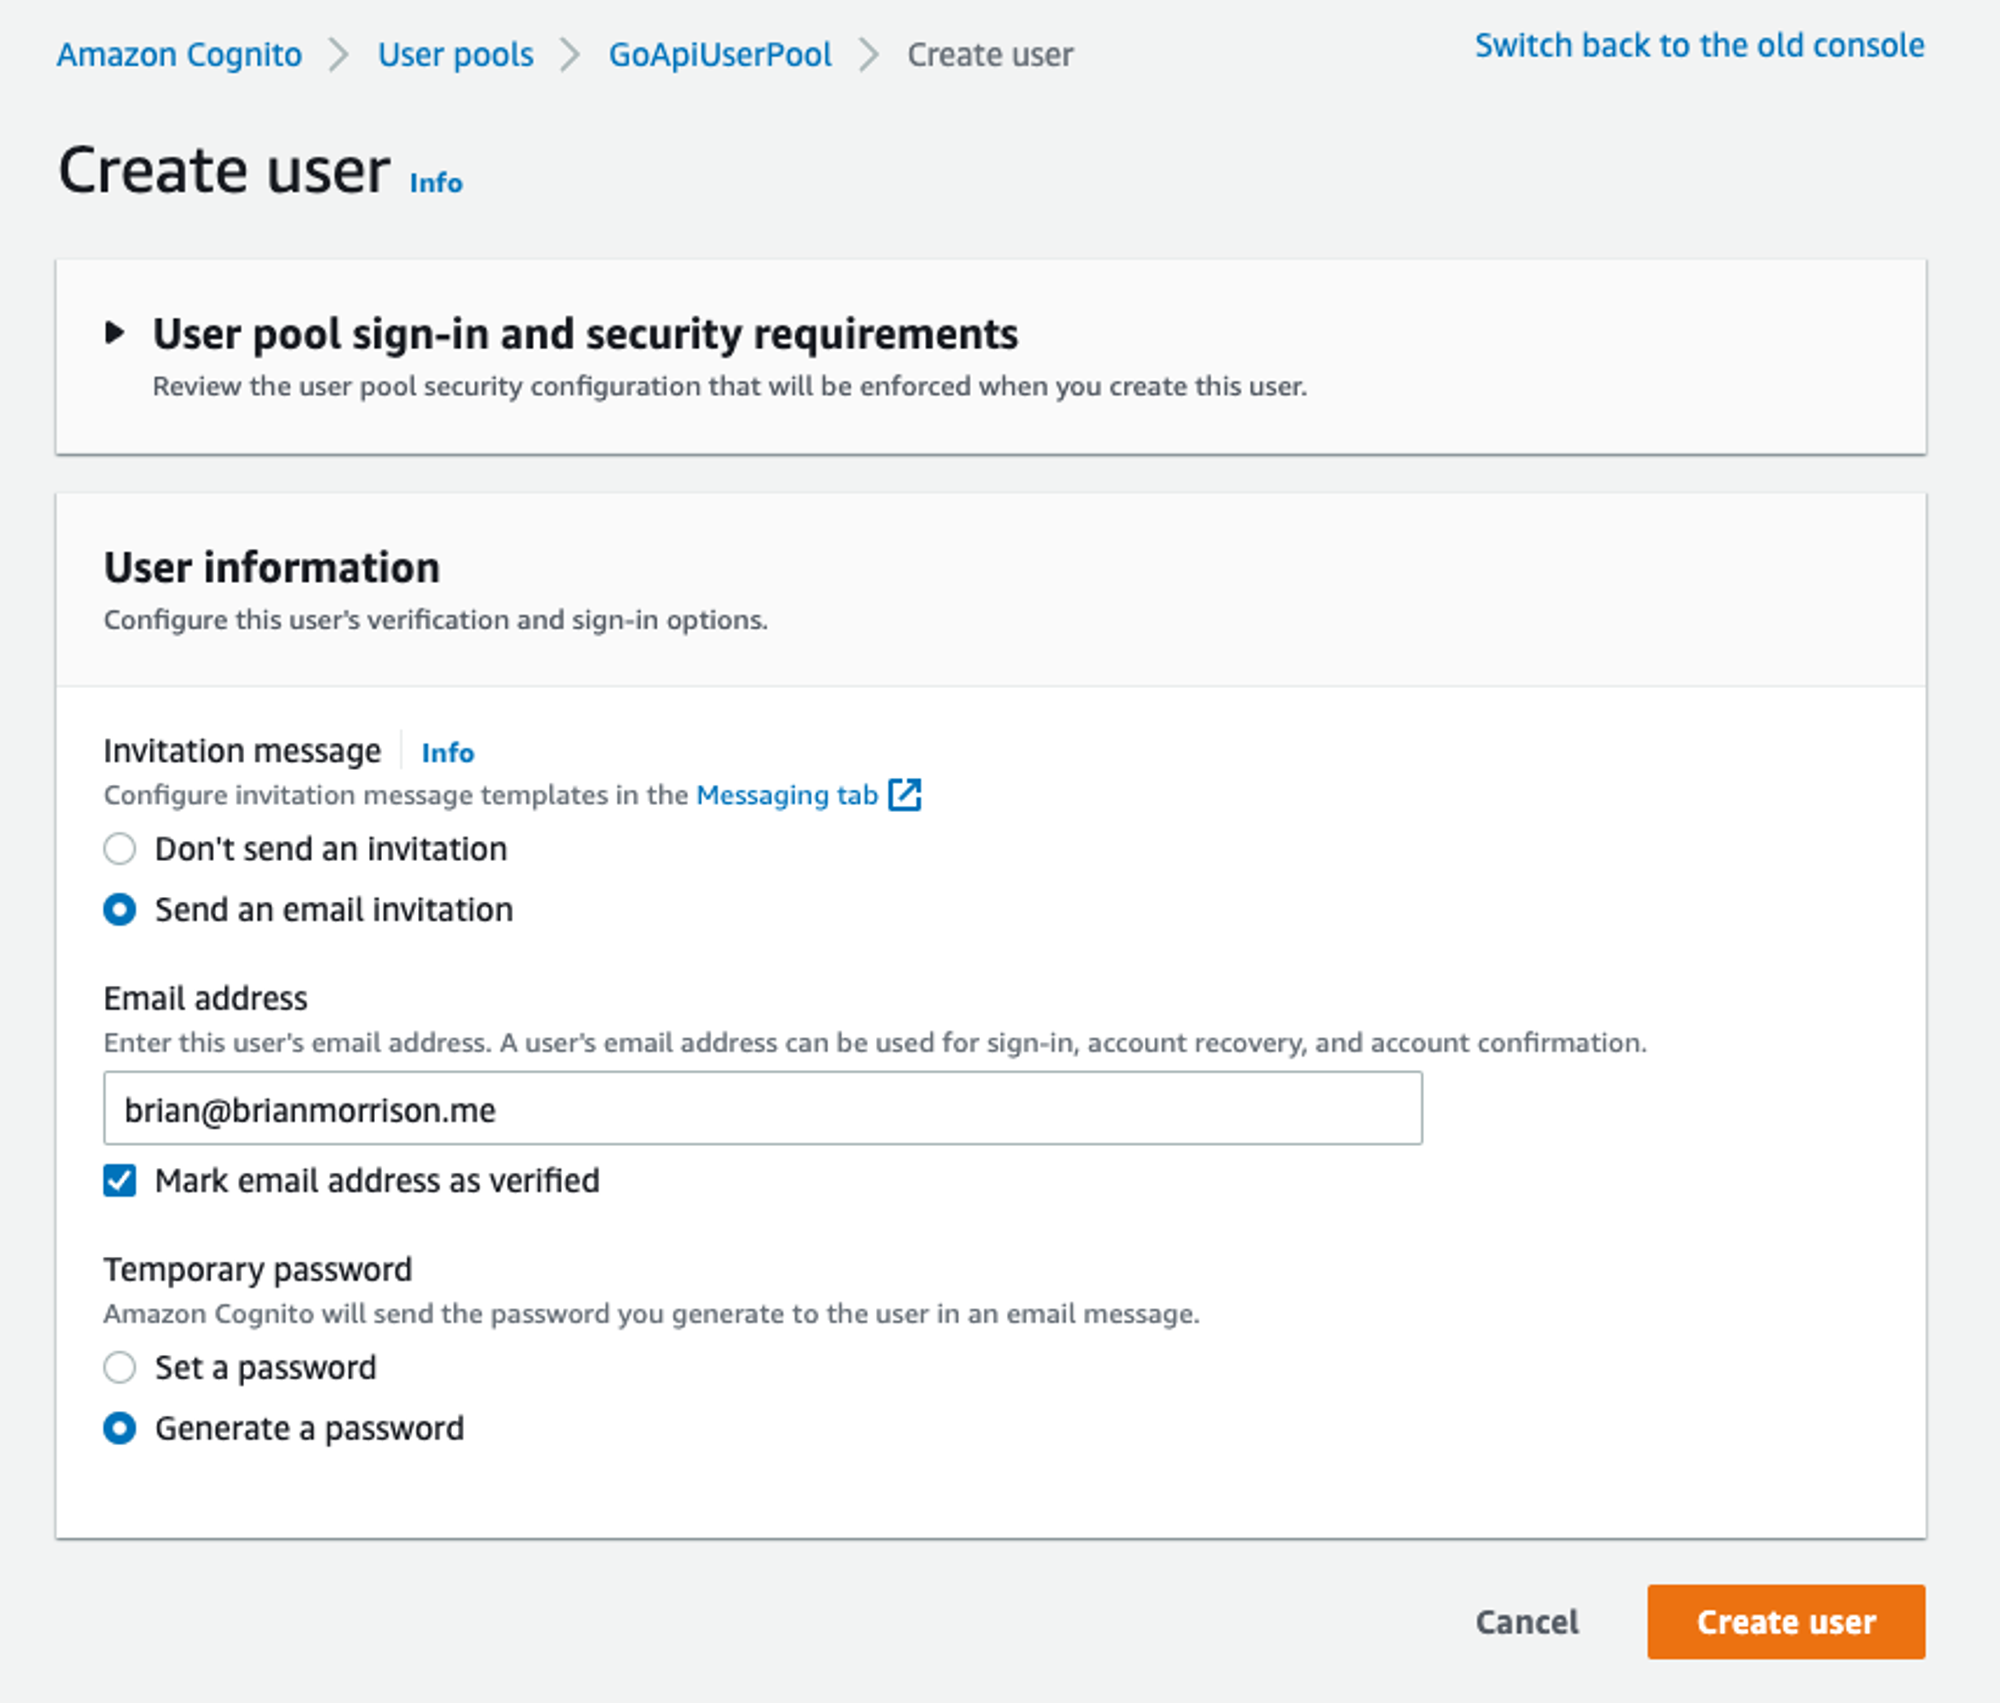
The form to create a new user.
Back in the previous view, you now have a list that should show the new account that was created. Notice how the Confirmation status is set to Force change password.
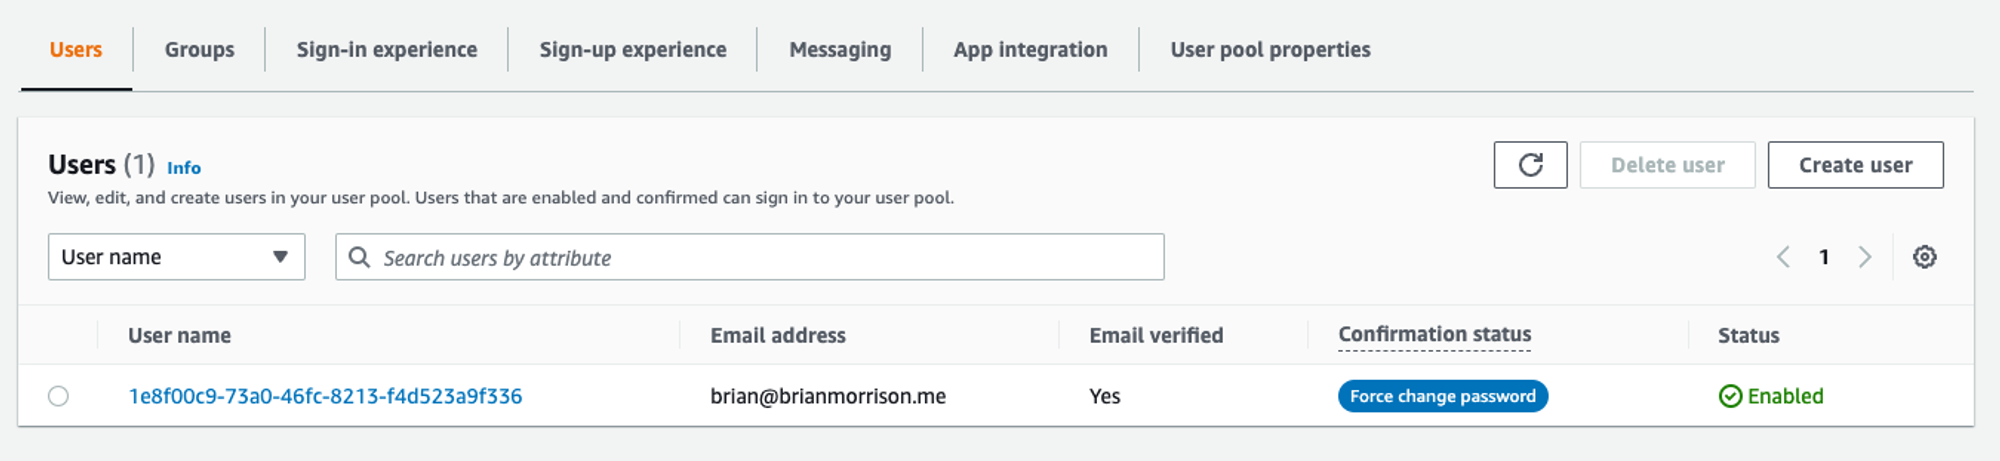
The users list of the user pool created.
Now check your email and you should have received an email to confirm your new account in Cognito, along with a temporary password.
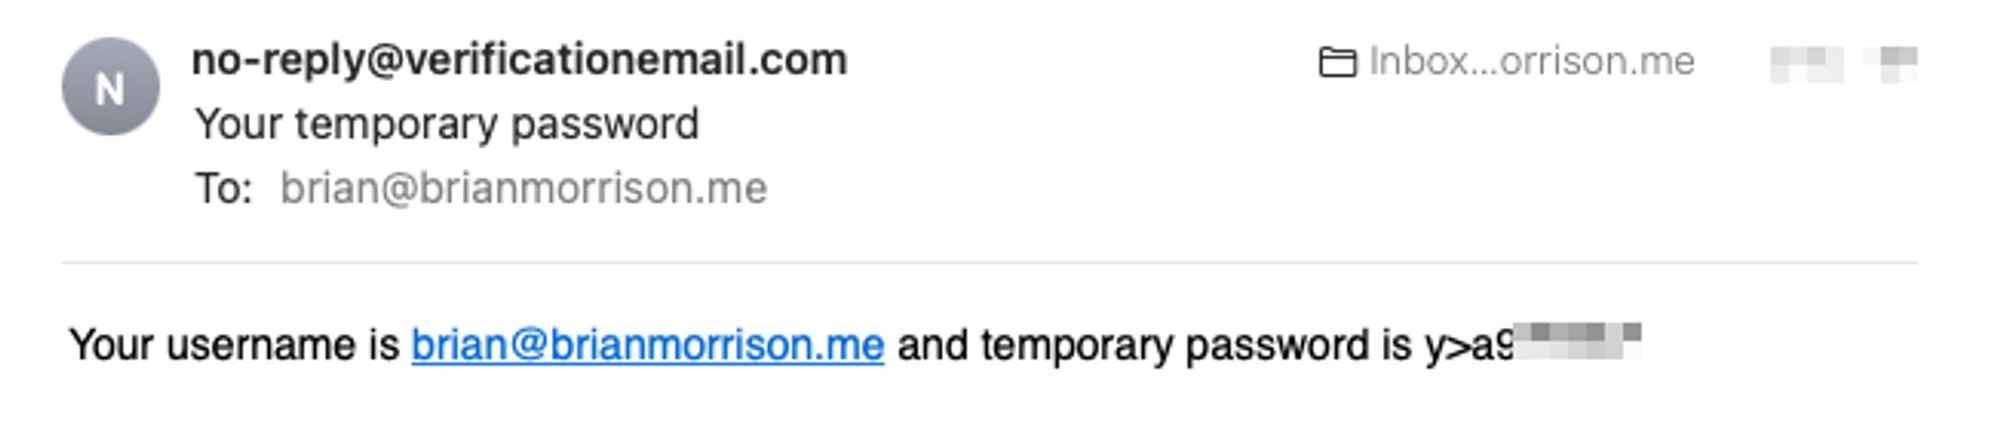
The email a new user will receive with their temporary password.
To test your new account, you actually need to manually craft a URL to put into your browser. To create the URL, you’ll need to grab the Cognito domain from the “App integration” tab.
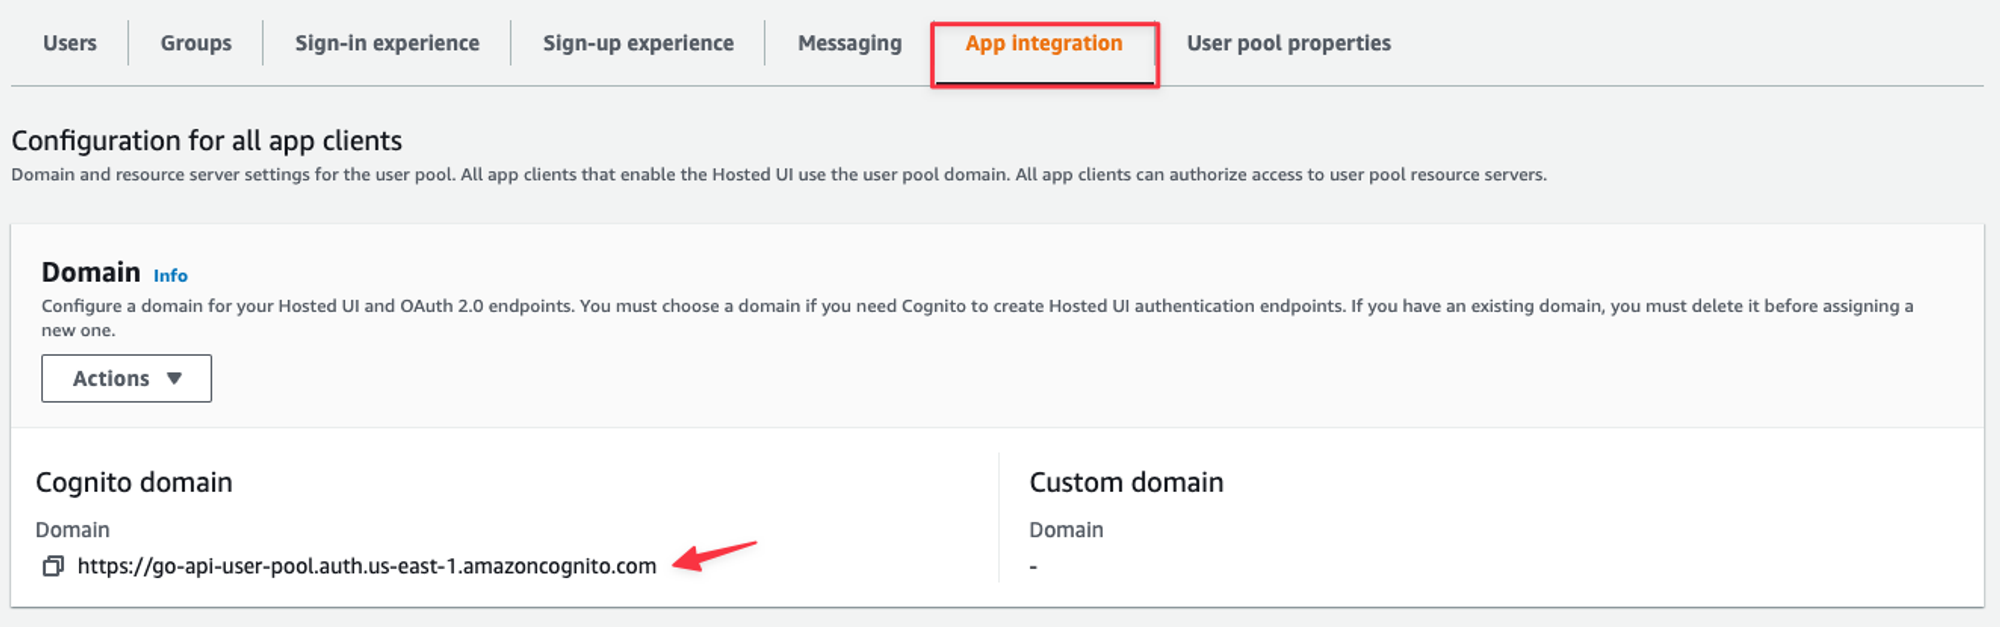
The App integration tab for the user pool.
In the same tab, scroll to the bottom and grab the Client ID from the App client list.
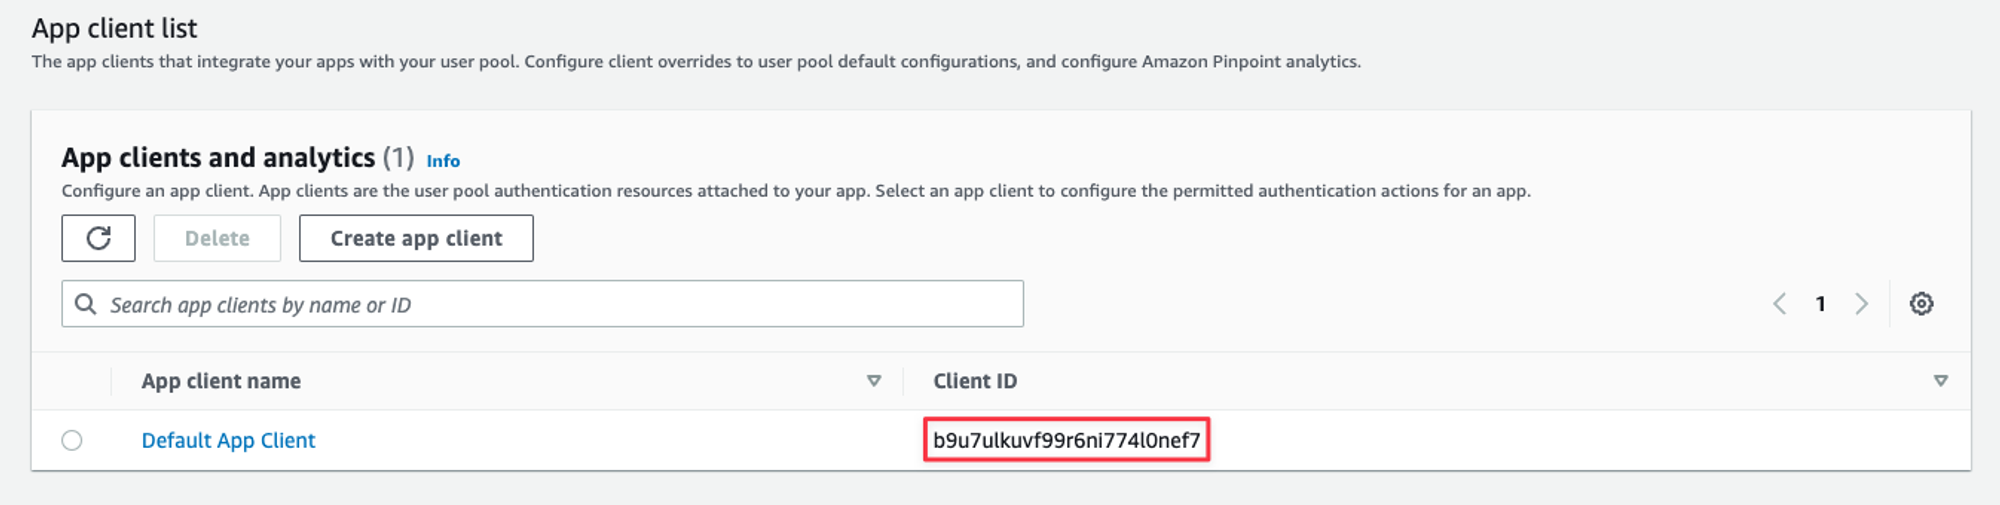
The App clients list for the user pool.
The URL you’ll create will have the following format:
<COGNITO_DOMAIN>/oauth2/authorize?response_type=token&client_id=<CLIENT_ID>&redirect_uri=https://jwt.ioBreaking this URL down, here are what each of the components of the query string are used for:
- response_type: Tells Cognito which OAuth flow we’ll be using (token is Implicit Grant)
- client_id: Matches the request to the settings that were configured in the App client we created during the initial wizard.
- redirect_uri: Tells Cognito where to send the user after they’ve logged in. This MUST be added in the app client, otherwise the request will be rejected.
Now enter the URL into your browser and you should be presented with a login form. Enter the info you received in your email to set a custom password.
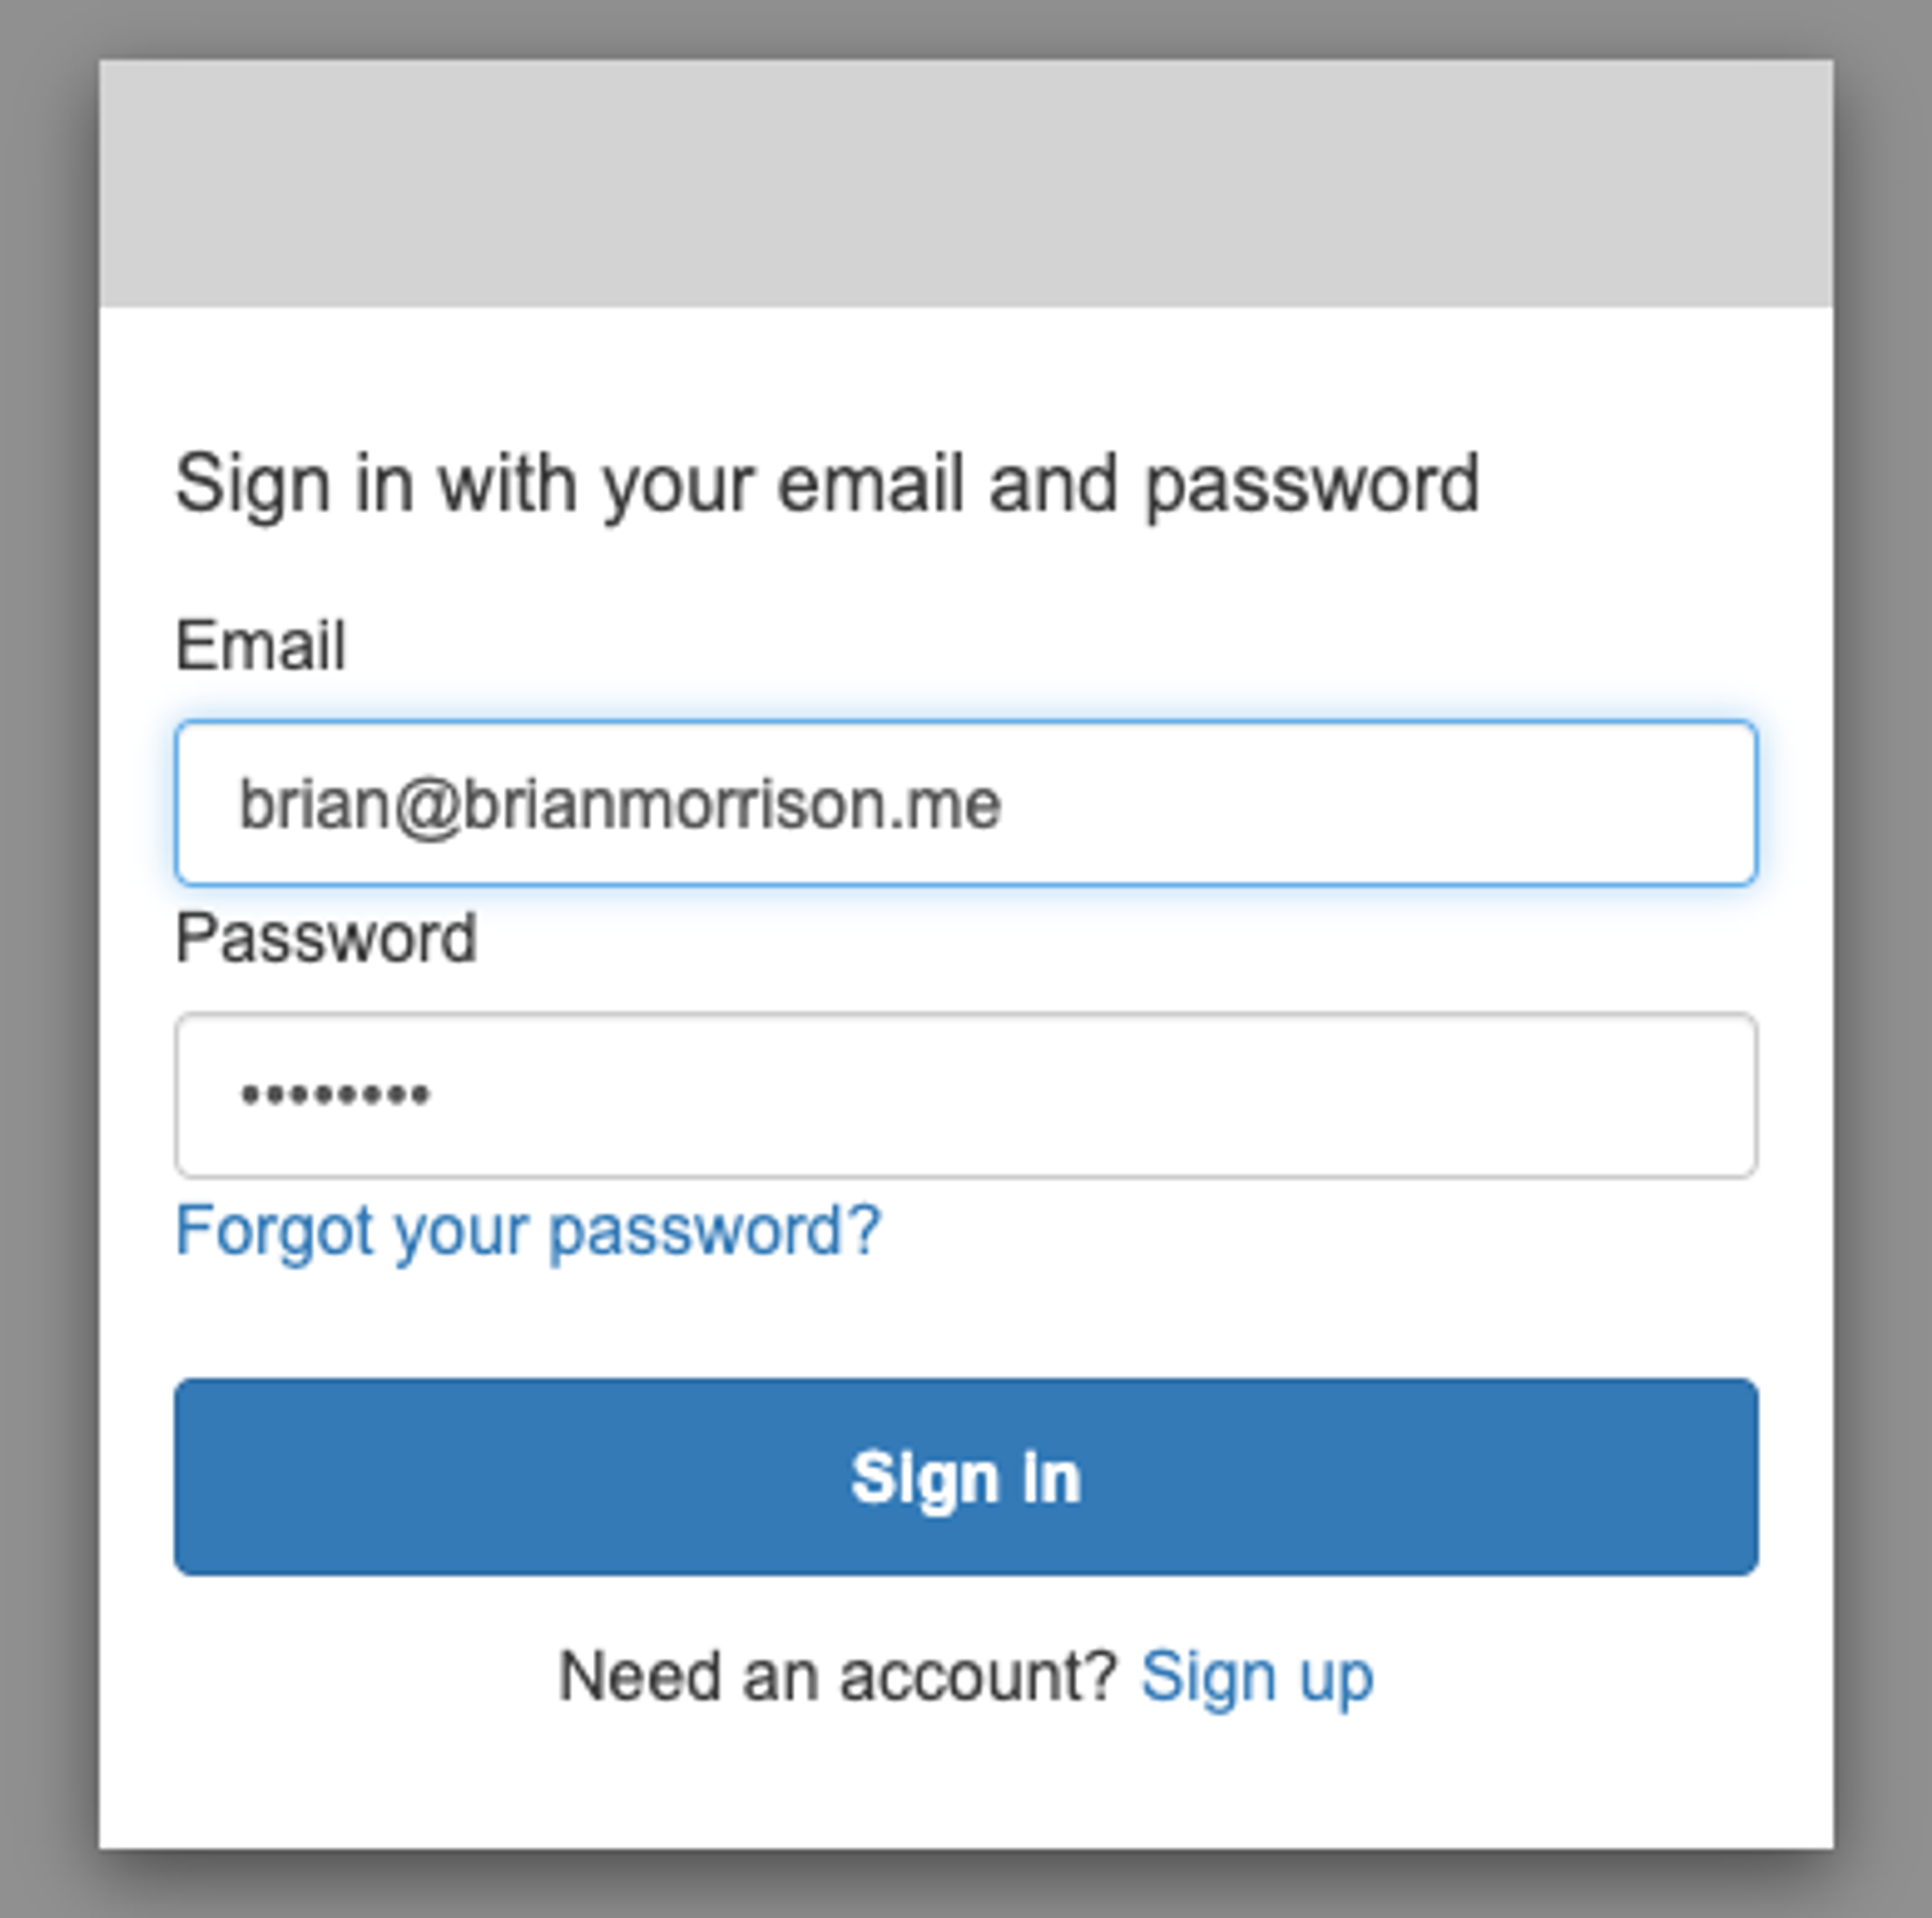
The default sign in form for Cognito user pools.
Once you set the password, you’ll be redirected to jwt.io with the Encoded & Decoded sections populated. The Encoded section contains the token that was generated from Congito, and the Decoded section shows information that the token contains. If you look in the Payload portion of the Decoded section, you can even see the email address and Cognito domain in there!
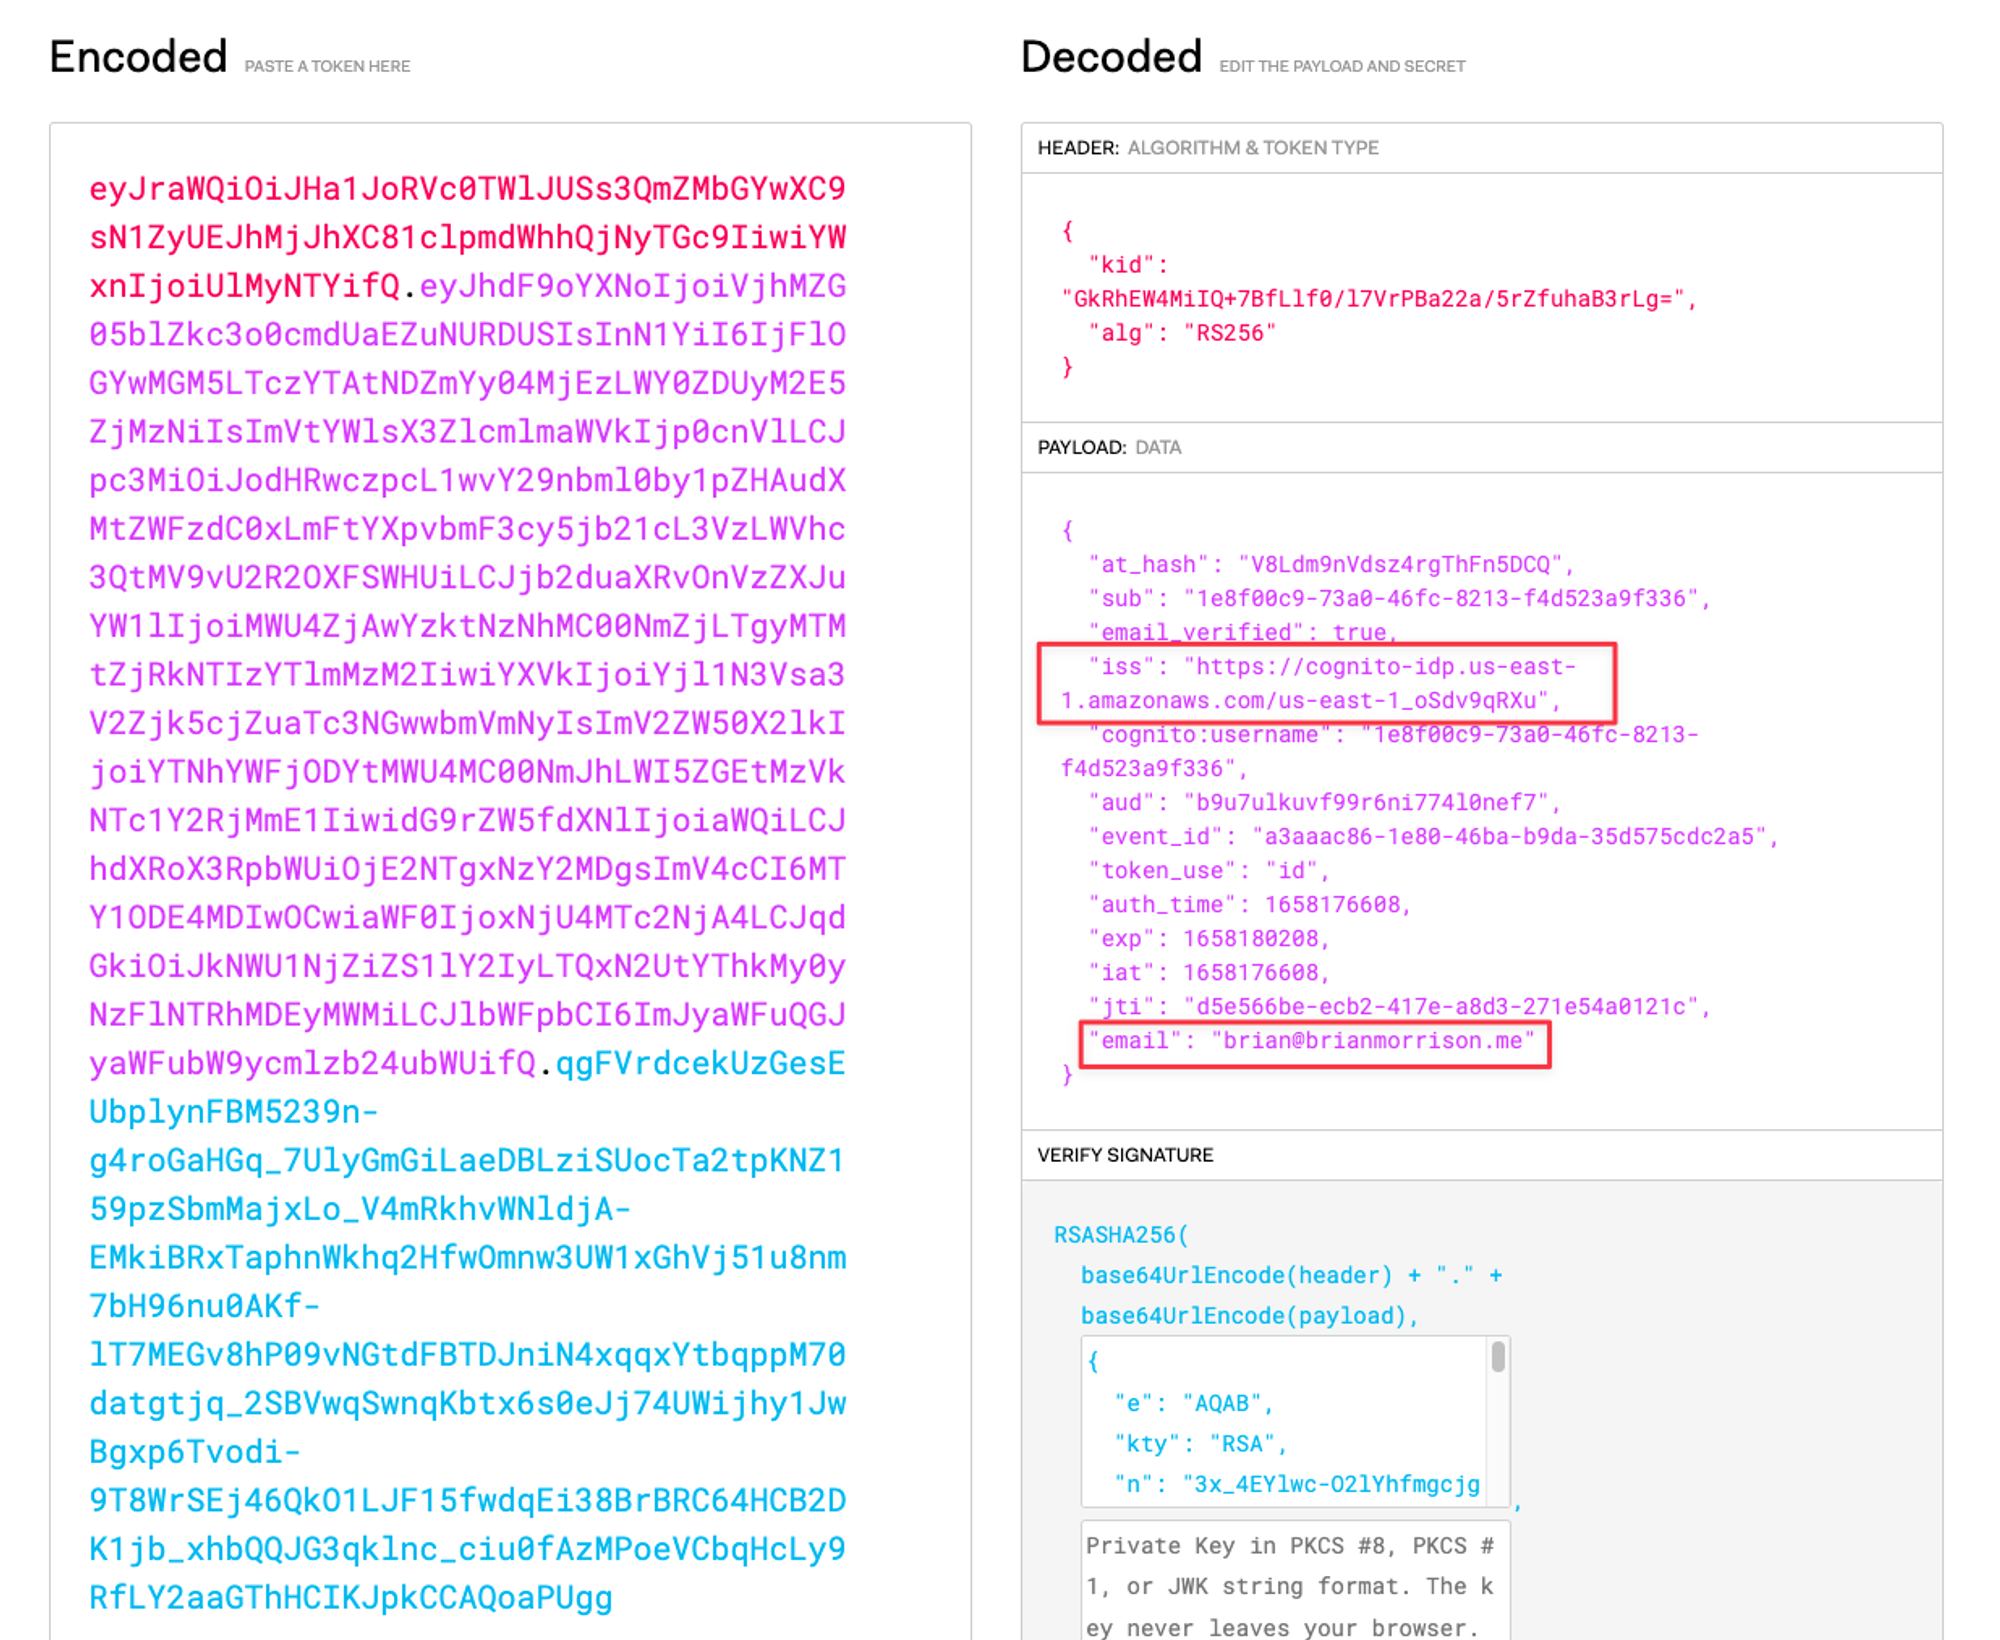
A screenshot of the token issued from Cognito in JWT.io.
So where did this come from? It’s actually in the URL. If you look at the hash values of the URL, you’ll have a few elements in there. Below is the URL that brought me to this page, with the various hash components on new lines for a better look.
- id_token: Contains information about the user (this is what’s displayed on jwt.io).
- access_token: Contains information about what the user is allowed to access.
- expires_in: The number of seconds until the tokens expire and new ones need to be requested.
- token_type: The scheme that should be used in the Authorization header of requests (we’ll see this shortly).
https://jwt.io/
#id_token=eyJraWQiOiJHa1JoRVc0TWlJUSs3QmZMbGYwXC9sN1ZyUEJhMjJhXC81clpmdWhhQjNyTGc9IiwiYWxnIjoiUlMyNTYifQ.eyJhdF9oYXNoIjoiVjhMZG05blZkc3o0cmdUaEZuNURDUSIsInN1YiI6IjFlOGYwMGM5LTczYTAtNDZmYy04MjEzLWY0ZDUyM2E5ZjMzNiIsImVtYWlsX3ZlcmlmaWVkIjp0cnVlLCJpc3MiOiJodHRwczpcL1wvY29nbml0by1pZHAudXMtZWFzdC0xLmFtYXpvbmF3cy5jb21cL3VzLWVhc3QtMV9vU2R2OXFSWHUiLCJjb2duaXRvOnVzZXJuYW1lIjoiMWU4ZjAwYzktNzNhMC00NmZjLTgyMTMtZjRkNTIzYTlmMzM2IiwiYXVkIjoiYjl1N3Vsa3V2Zjk5cjZuaTc3NGwwbmVmNyIsImV2ZW50X2lkIjoiYTNhYWFjODYtMWU4MC00NmJhLWI5ZGEtMzVkNTc1Y2RjMmE1IiwidG9rZW5fdXNlIjoiaWQiLCJhdXRoX3RpbWUiOjE2NTgxNzY2MDgsImV4cCI6MTY1ODE4MDIwOCwiaWF0IjoxNjU4MTc2NjA4LCJqdGkiOiJkNWU1NjZiZS1lY2IyLTQxN2UtYThkMy0yNzFlNTRhMDEyMWMiLCJlbWFpbCI6ImJyaWFuQGJyaWFubW9ycmlzb24ubWUifQ.qgFVrdcekUzGesEUbplynFBM5239n-g4roGaHGq_7UlyGmGiLaeDBLziSUocTa2tpKNZ159pzSbmMajxLo_V4mRkhvWNldjA-EMkiBRxTaphnWkhq2HfwOmnw3UW1xGhVj51u8nm7bH96nu0AKf-lT7MEGv8hP09vNGtdFBTDJniN4xqqxYtbqppM70datgtjq_2SBVwqSwnqKbtx6s0eJj74UWijhy1JwBgxp6Tvodi-9T8WrSEj46QkO1LJF15fwdqEi38BrBRC64HCB2DK1jb_xhbQQJG3qklnc_ciu0fAzMPoeVCbqHcLy9RfLY2aaGThHCIKJpkCCAQoaPUgg
&access_token=eyJraWQiOiJWQU5yeGMrQno5V1BRakxVXC9BTHozZzNsZXg5VHpmR0VXczJTbFhQTGhHST0iLCJhbGciOiJSUzI1NiJ9.eyJzdWIiOiIxZThmMDBjOS03M2EwLTQ2ZmMtODIxMy1mNGQ1MjNhOWYzMzYiLCJpc3MiOiJodHRwczpcL1wvY29nbml0by1pZHAudXMtZWFzdC0xLmFtYXpvbmF3cy5jb21cL3VzLWVhc3QtMV9vU2R2OXFSWHUiLCJ2ZXJzaW9uIjoyLCJjbGllbnRfaWQiOiJiOXU3dWxrdXZmOTlyNm5pNzc0bDBuZWY3IiwiZXZlbnRfaWQiOiJhM2FhYWM4Ni0xZTgwLTQ2YmEtYjlkYS0zNWQ1NzVjZGMyYTUiLCJ0b2tlbl91c2UiOiJhY2Nlc3MiLCJzY29wZSI6InBob25lIG9wZW5pZCBlbWFpbCIsImF1dGhfdGltZSI6MTY1ODE3NjYwOCwiZXhwIjoxNjU4MTgwMjA4LCJpYXQiOjE2NTgxNzY2MDgsImp0aSI6ImVlNmQ4ZDU2LTY0MzctNGY4Zi1hYWY5LWEzYmQyYzhmOWU1OSIsInVzZXJuYW1lIjoiMWU4ZjAwYzktNzNhMC00NmZjLTgyMTMtZjRkNTIzYTlmMzM2In0.QBhNNT1JQ3CbpU7ZBe7Yptpo0piuSA7T_24fo5ItKRcTM8h7OP9Puj7f6JI8ziLH2Z2cRx-1pqhsIyzeSooqCe5yLX8OM_xFo6J-66o-K6I7YMkE0JKcsEvxVsOuW7vDCfr_iY0cVvS5zJPCgrqr7Svp0Il0j22EdJhGso8uxFeaH8Rzm9JlUsxWIY0OvbIJugABjTMVxcczh3wyeovzjFU0HMVoJsA6v0Cse-SlI2LOe01BBiHGGG6-AlP7Ch5L_OIxNeoa1kDkuJaaB31n9N0UOqmcOlU8rf1qK2BPlUpqfSJDpiuCzWeVheiN5diha9NfTUQPwPx08W3jU_Tn5w
&expires_in=3600
&token_type=Bearer
What's next?
From here, I’d encourage you to explore how to validate these tokens using the language of your choice. My next entry in this series will cover exactly how to do this using API Gateway, and explore the claims using Go in AWS Lambda for building a serverless application.