This article kicks off the first in a series on how to host Vue apps using AWS services, and how to automate deployment with GitHub Actions. The only hard prerequisite from the AWS standpoint is that you have a free AWS account, but general familiarity with any of these services will certainly help.
The other things I'll assume you have installed are;
- VSCode
- NodeJS/NPM
- Vue CLI (more here if you need help)
Creating a Vue App
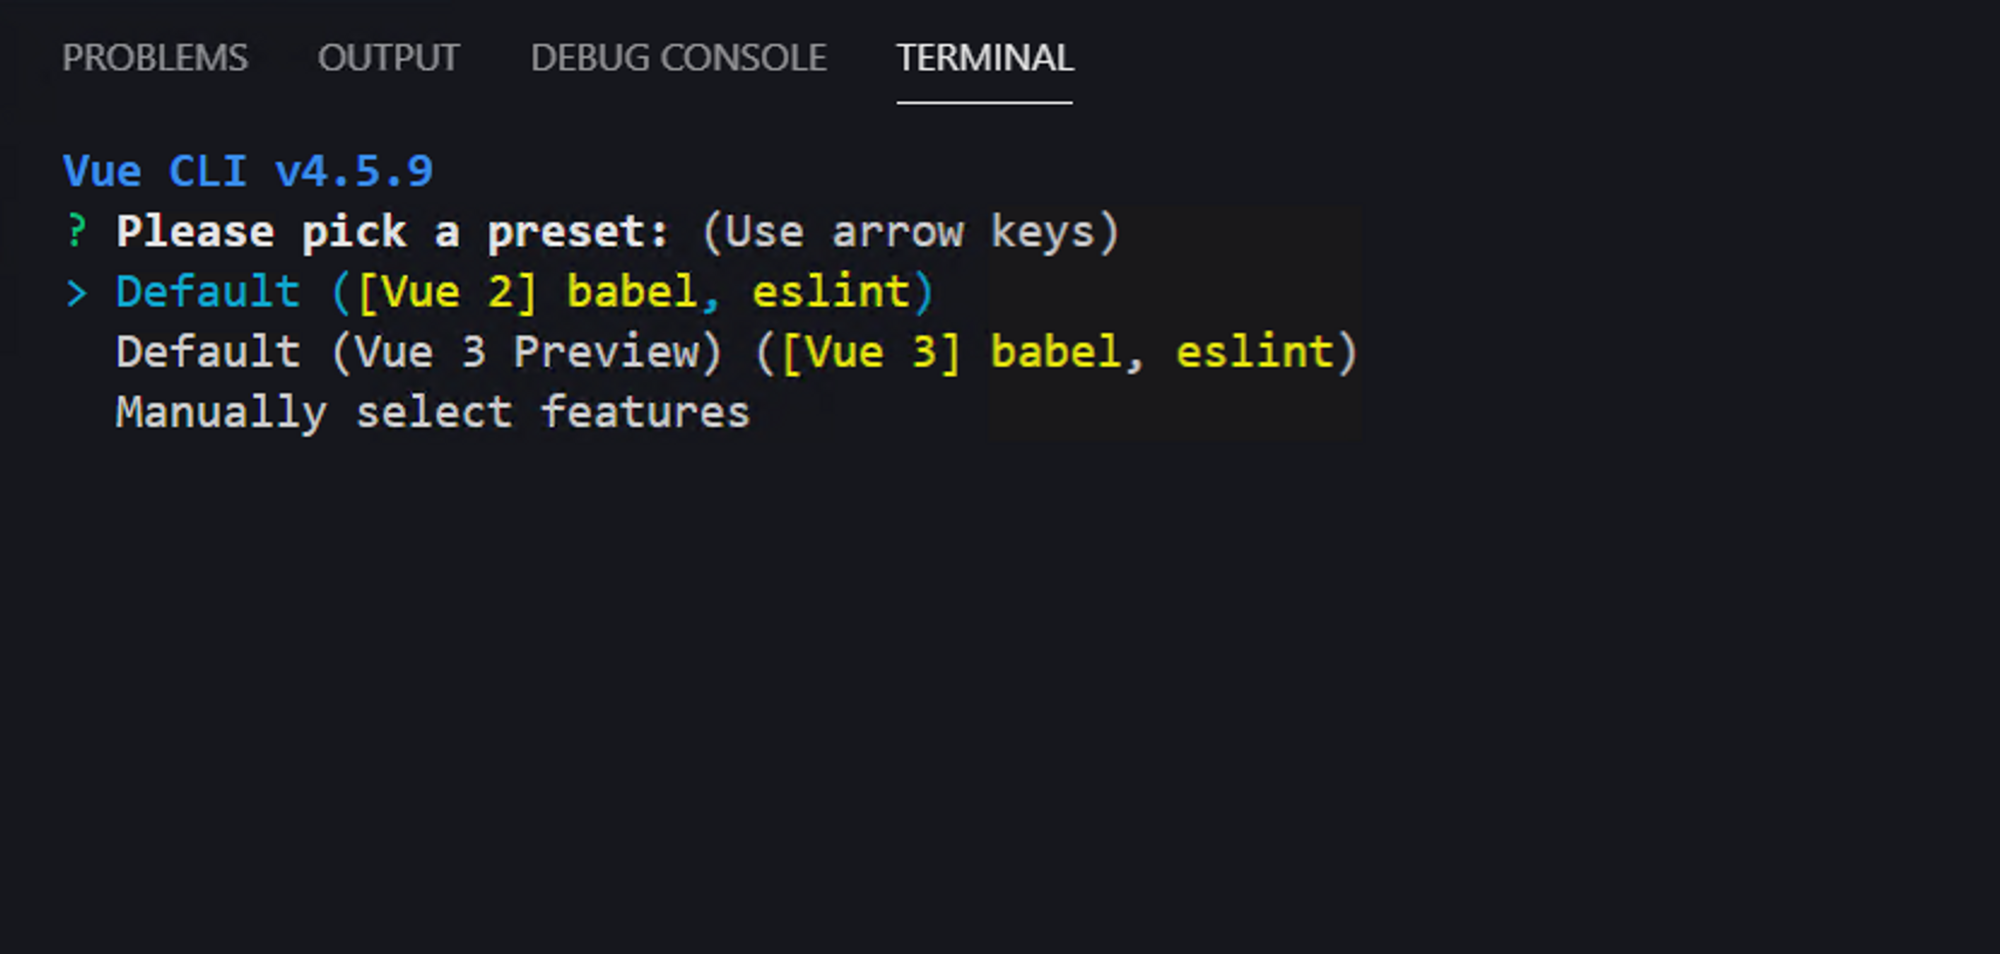
Lets start by creating a basic Vue app. Open a new folder in VSCode and issue vue create my-todo-app to bootstrap the app. You can select the default options with Vue 2.
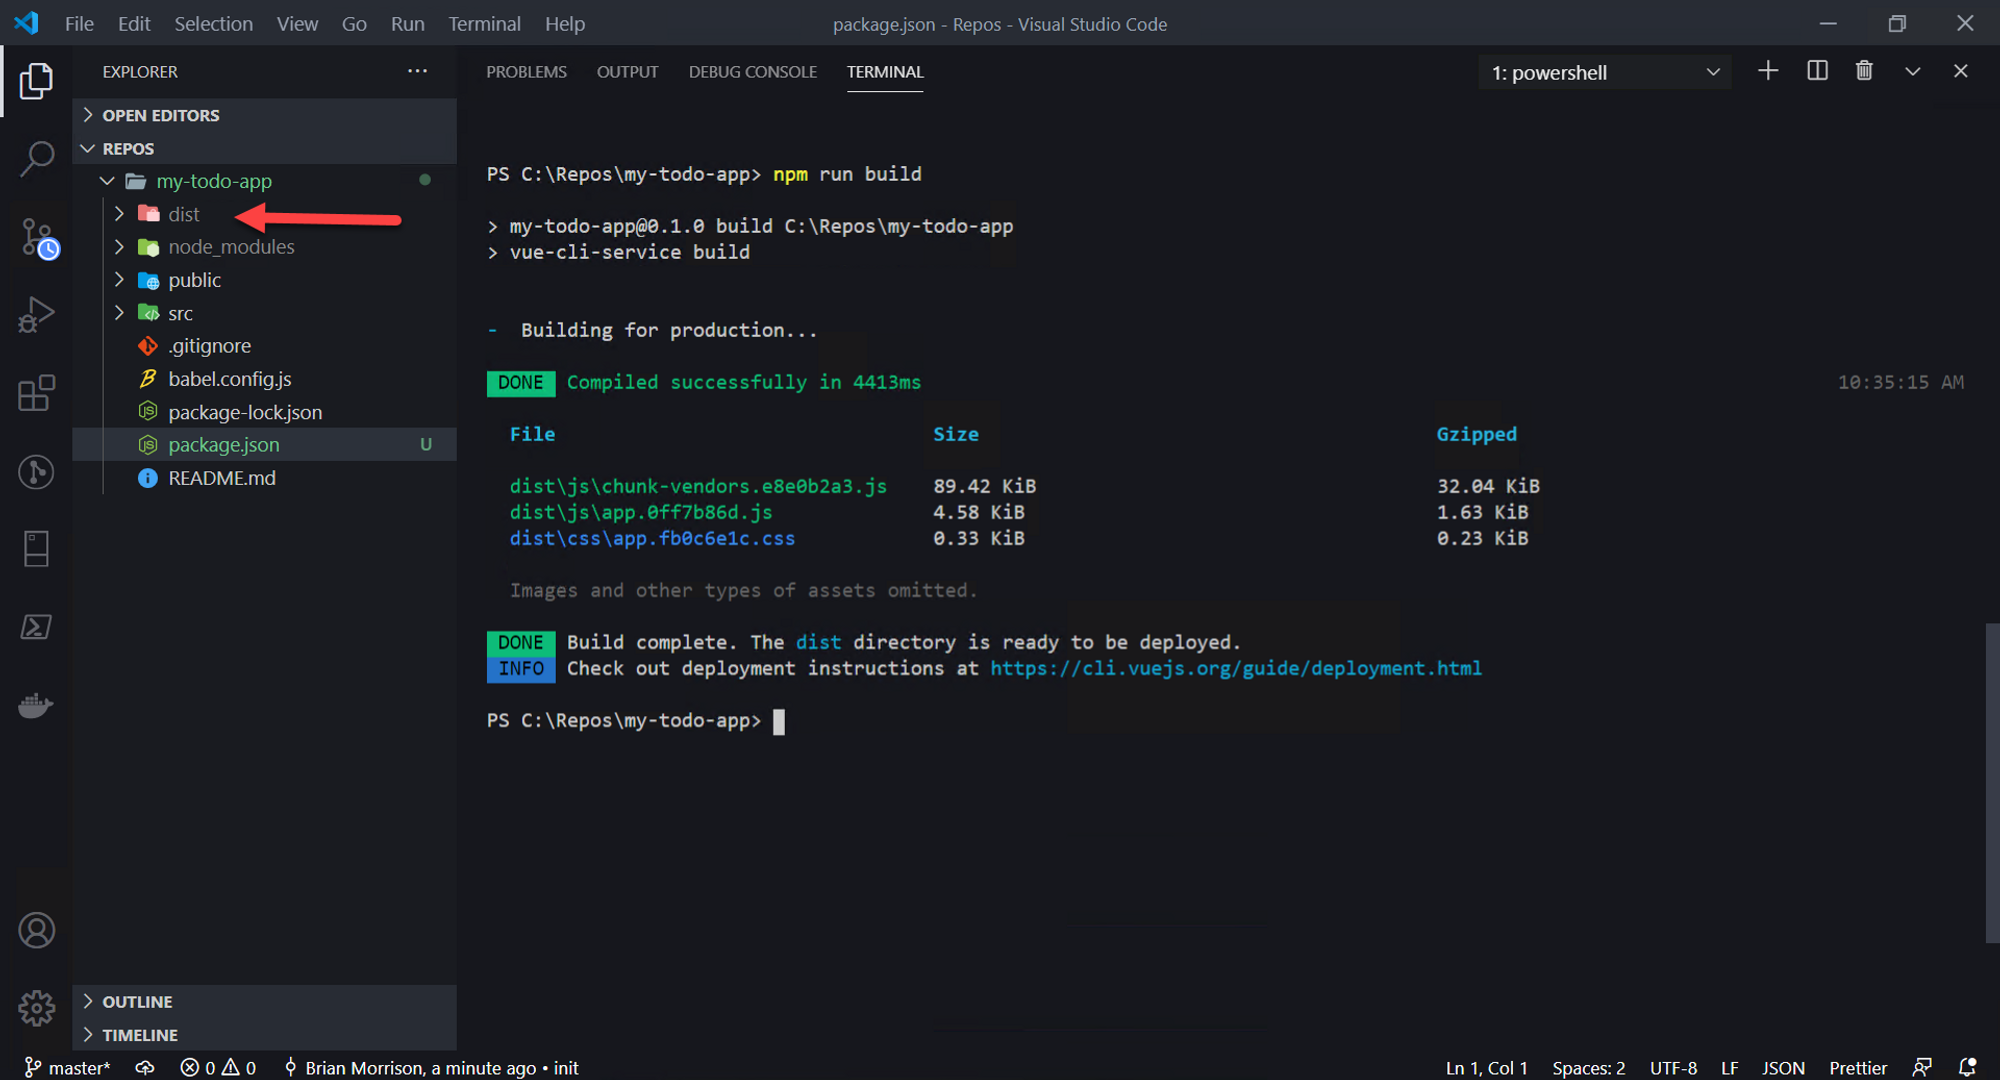
Once its done, lets issue the npm run build command to build the app into the dist folder.
Uploading to AWS S3
AWS S3 is what's called a BLOB storage service, which means its designed to hold files and other types of unstructured data. The easiest comparison is to your computers file system, although it has other functionality that makes it useful for storing files in the cloud. S3 will be the primary way we can host the files that make up our app.
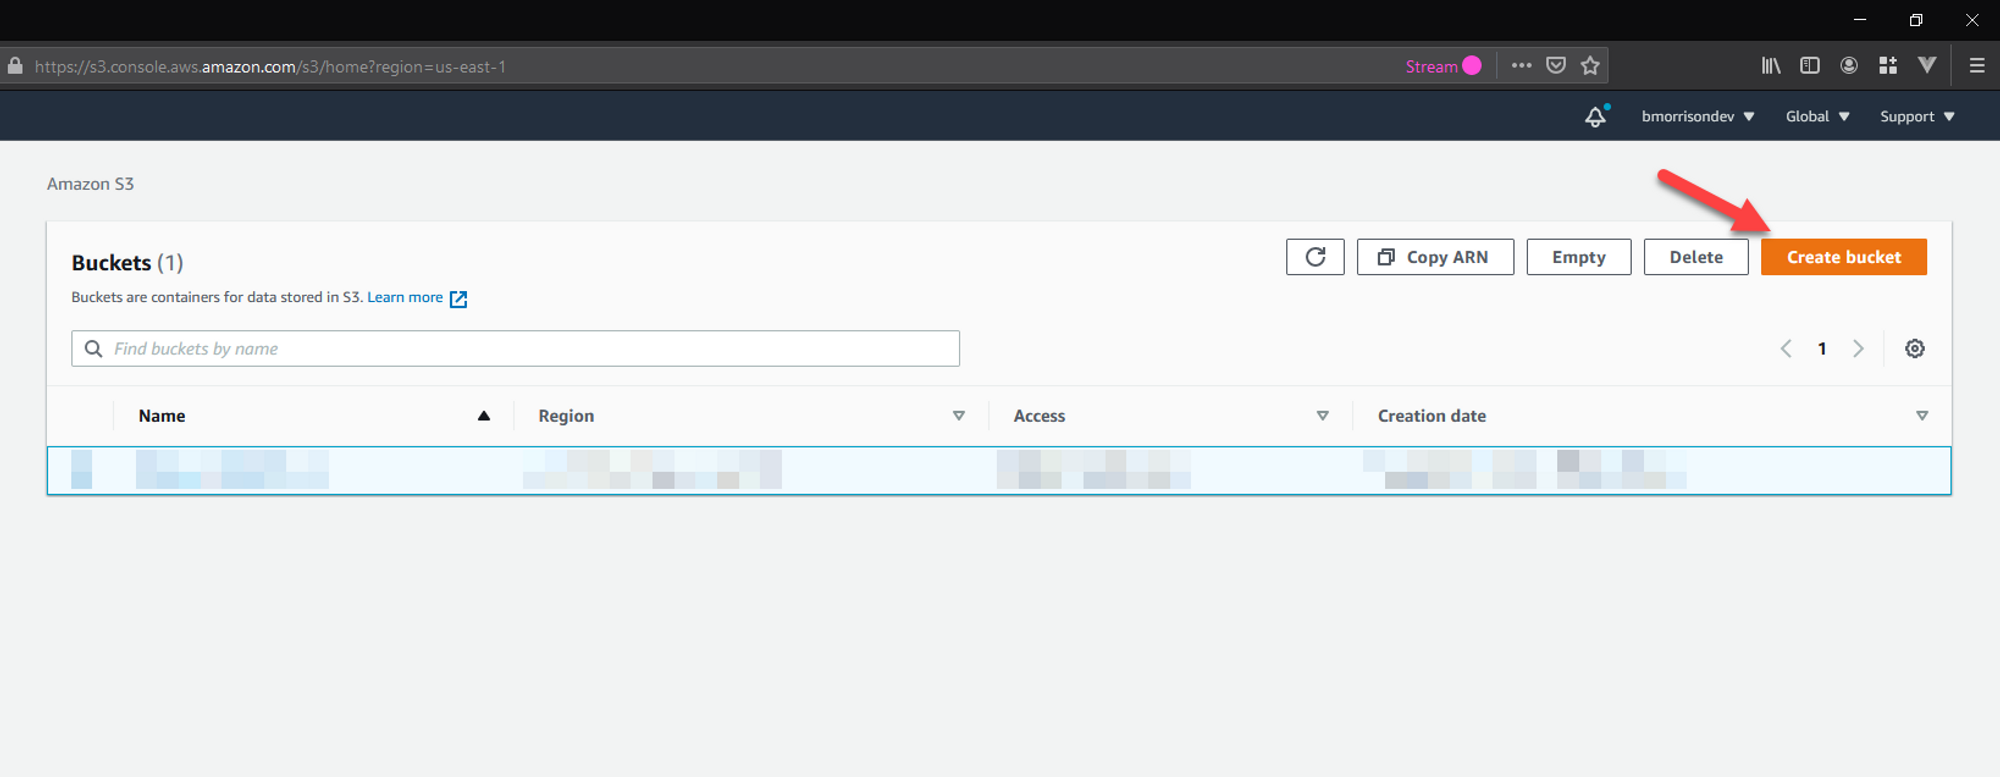
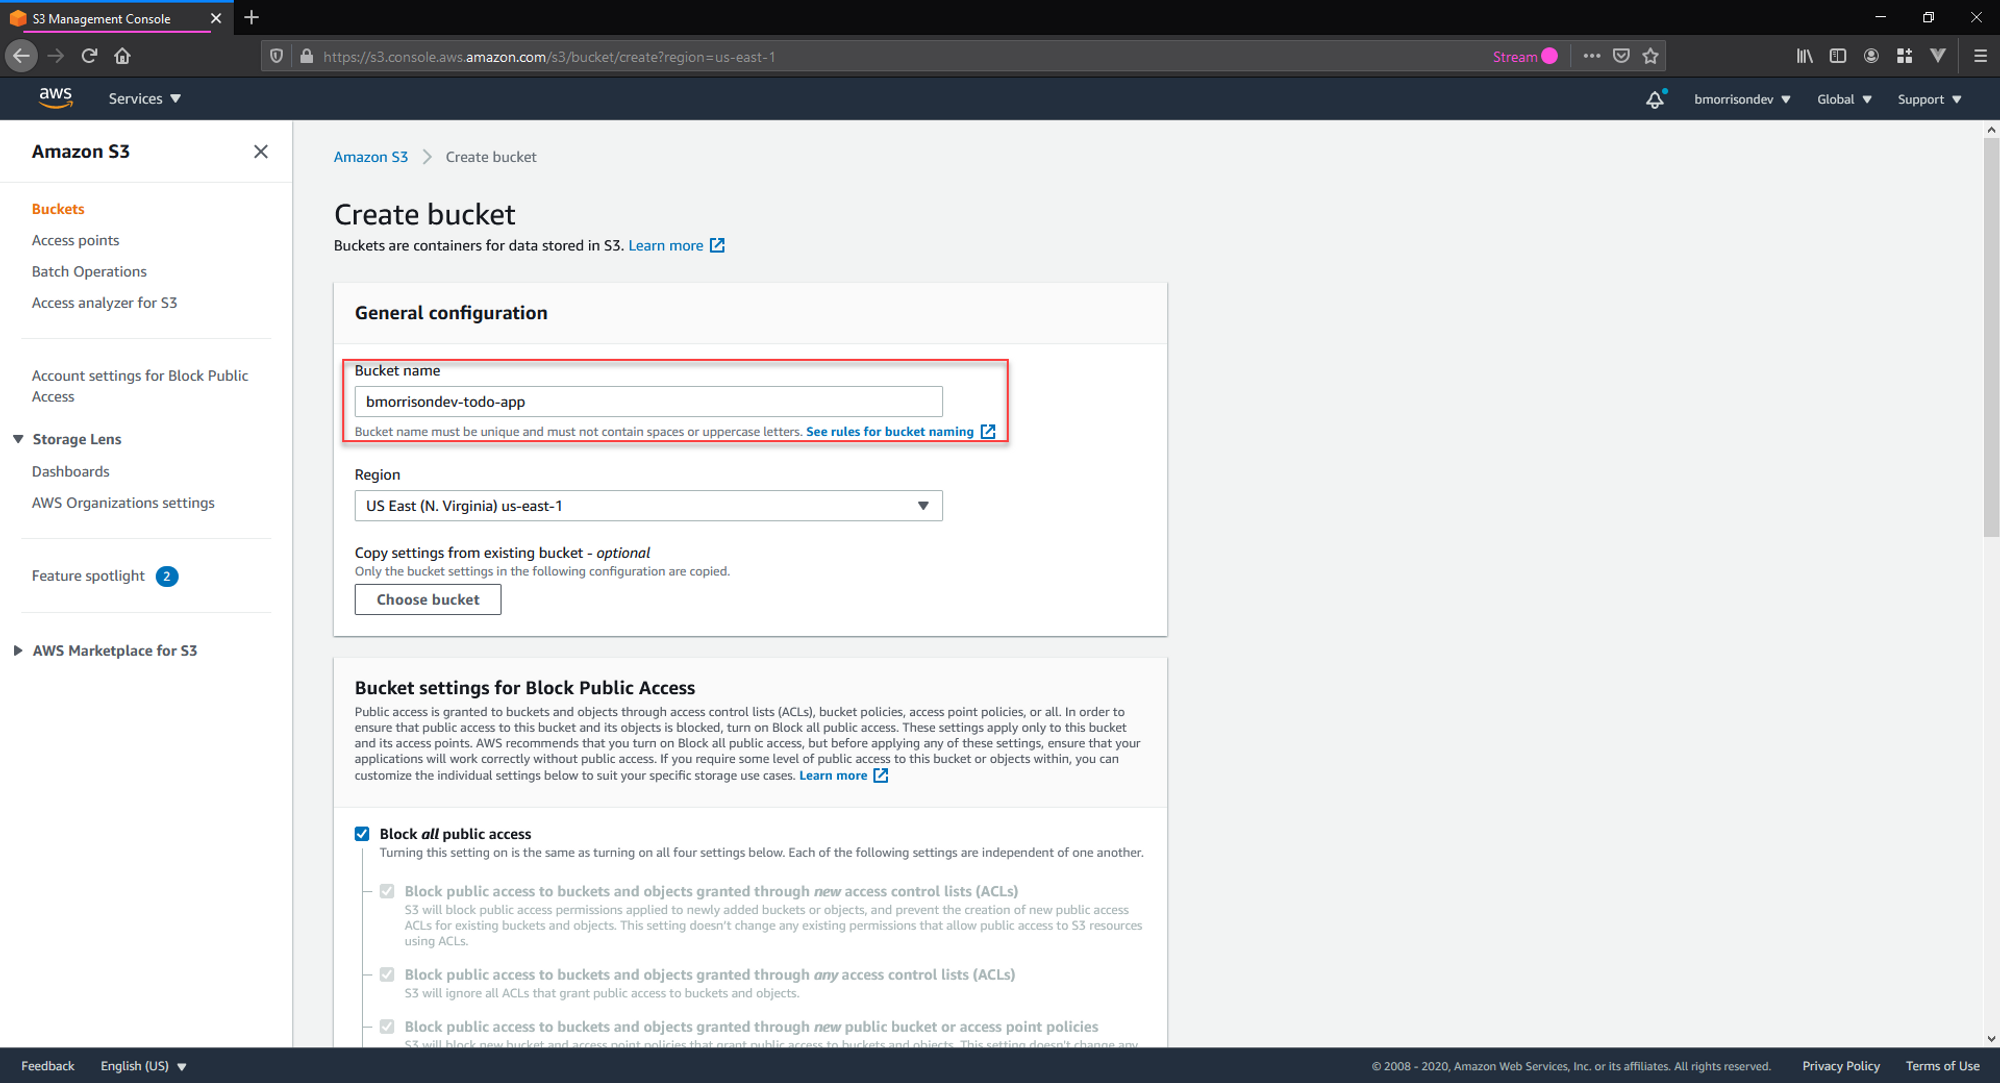
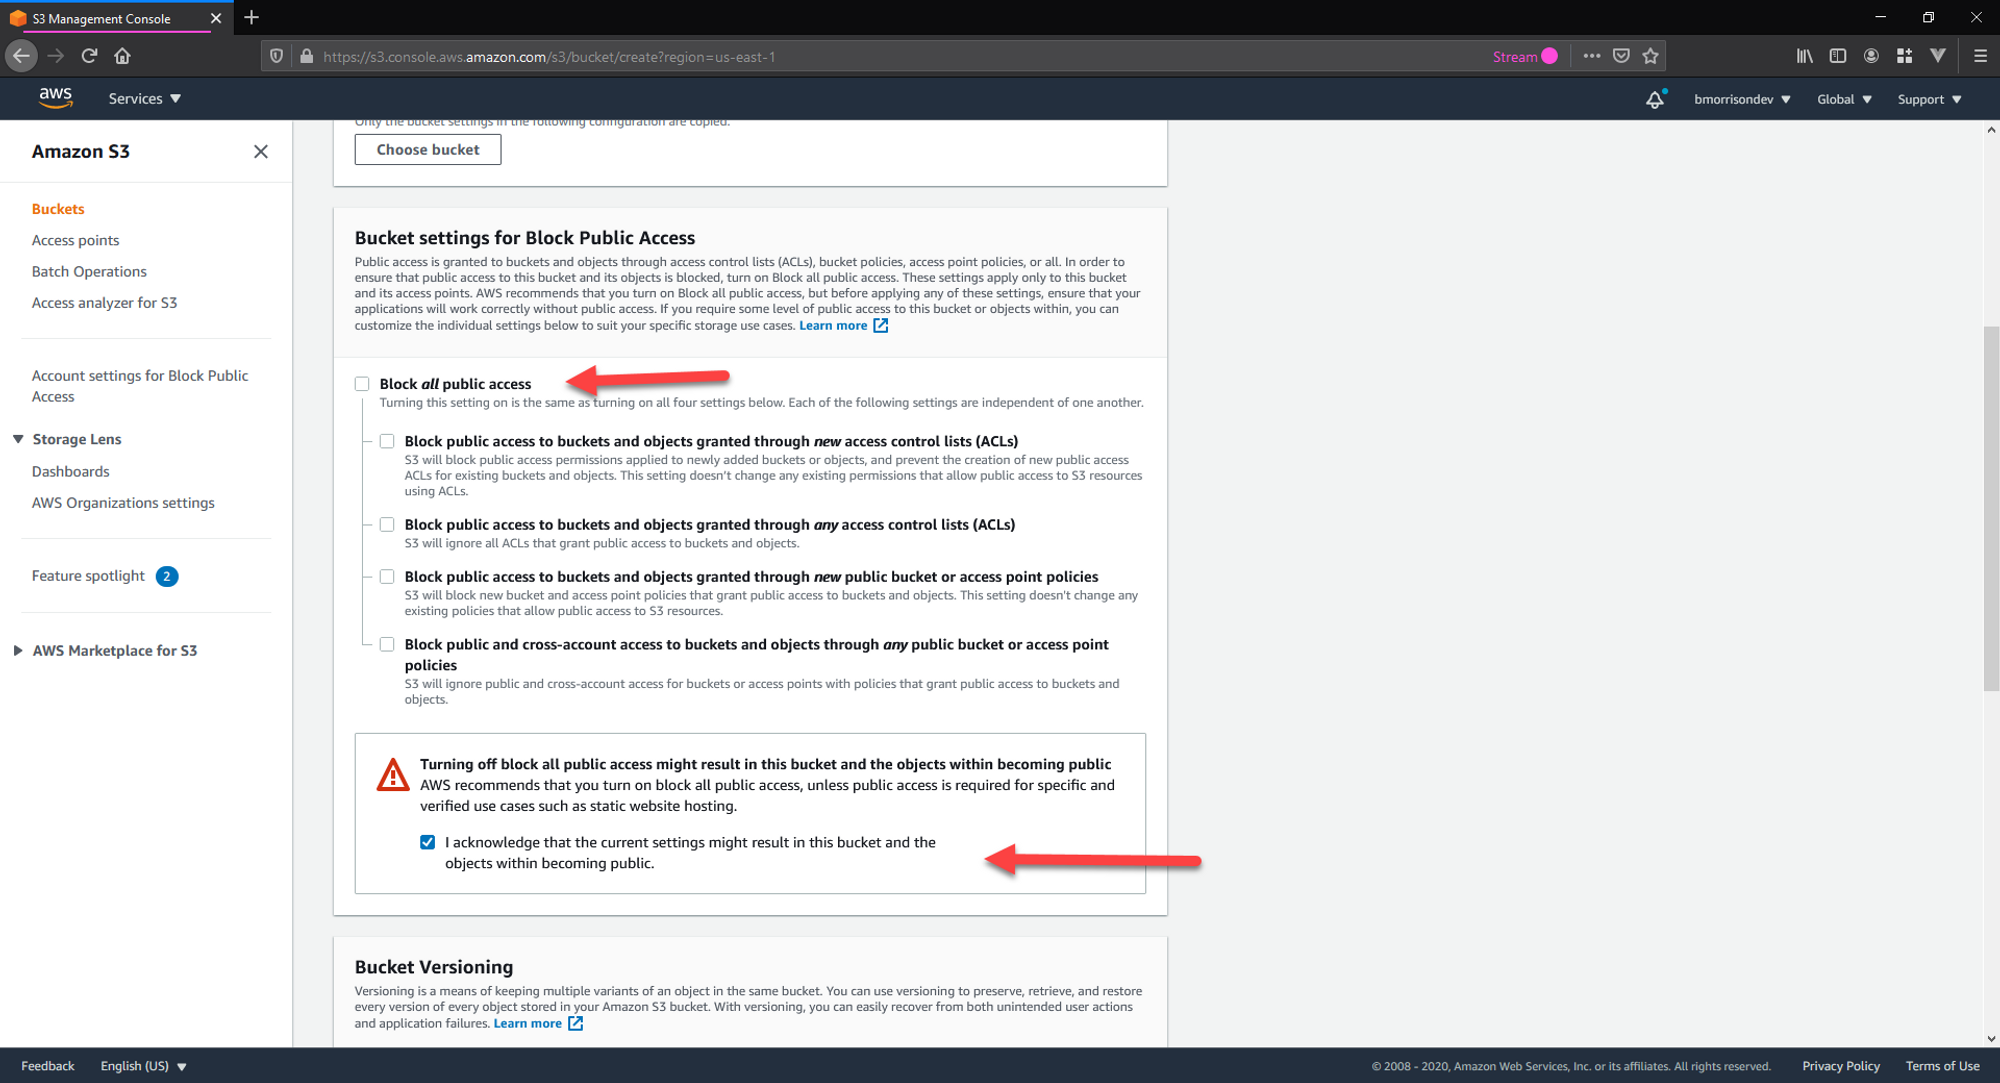
To start, head into the AWS console, then to S3, and create a bucket. Buckets in S3 are the top level storage container for the files. You'll need to name it something unique to your app, it cant share the same name as any other existing S3 buckets, even those in other accounts. You'll also want to make sure to check Public Access since our app will need to be publicly accessible.
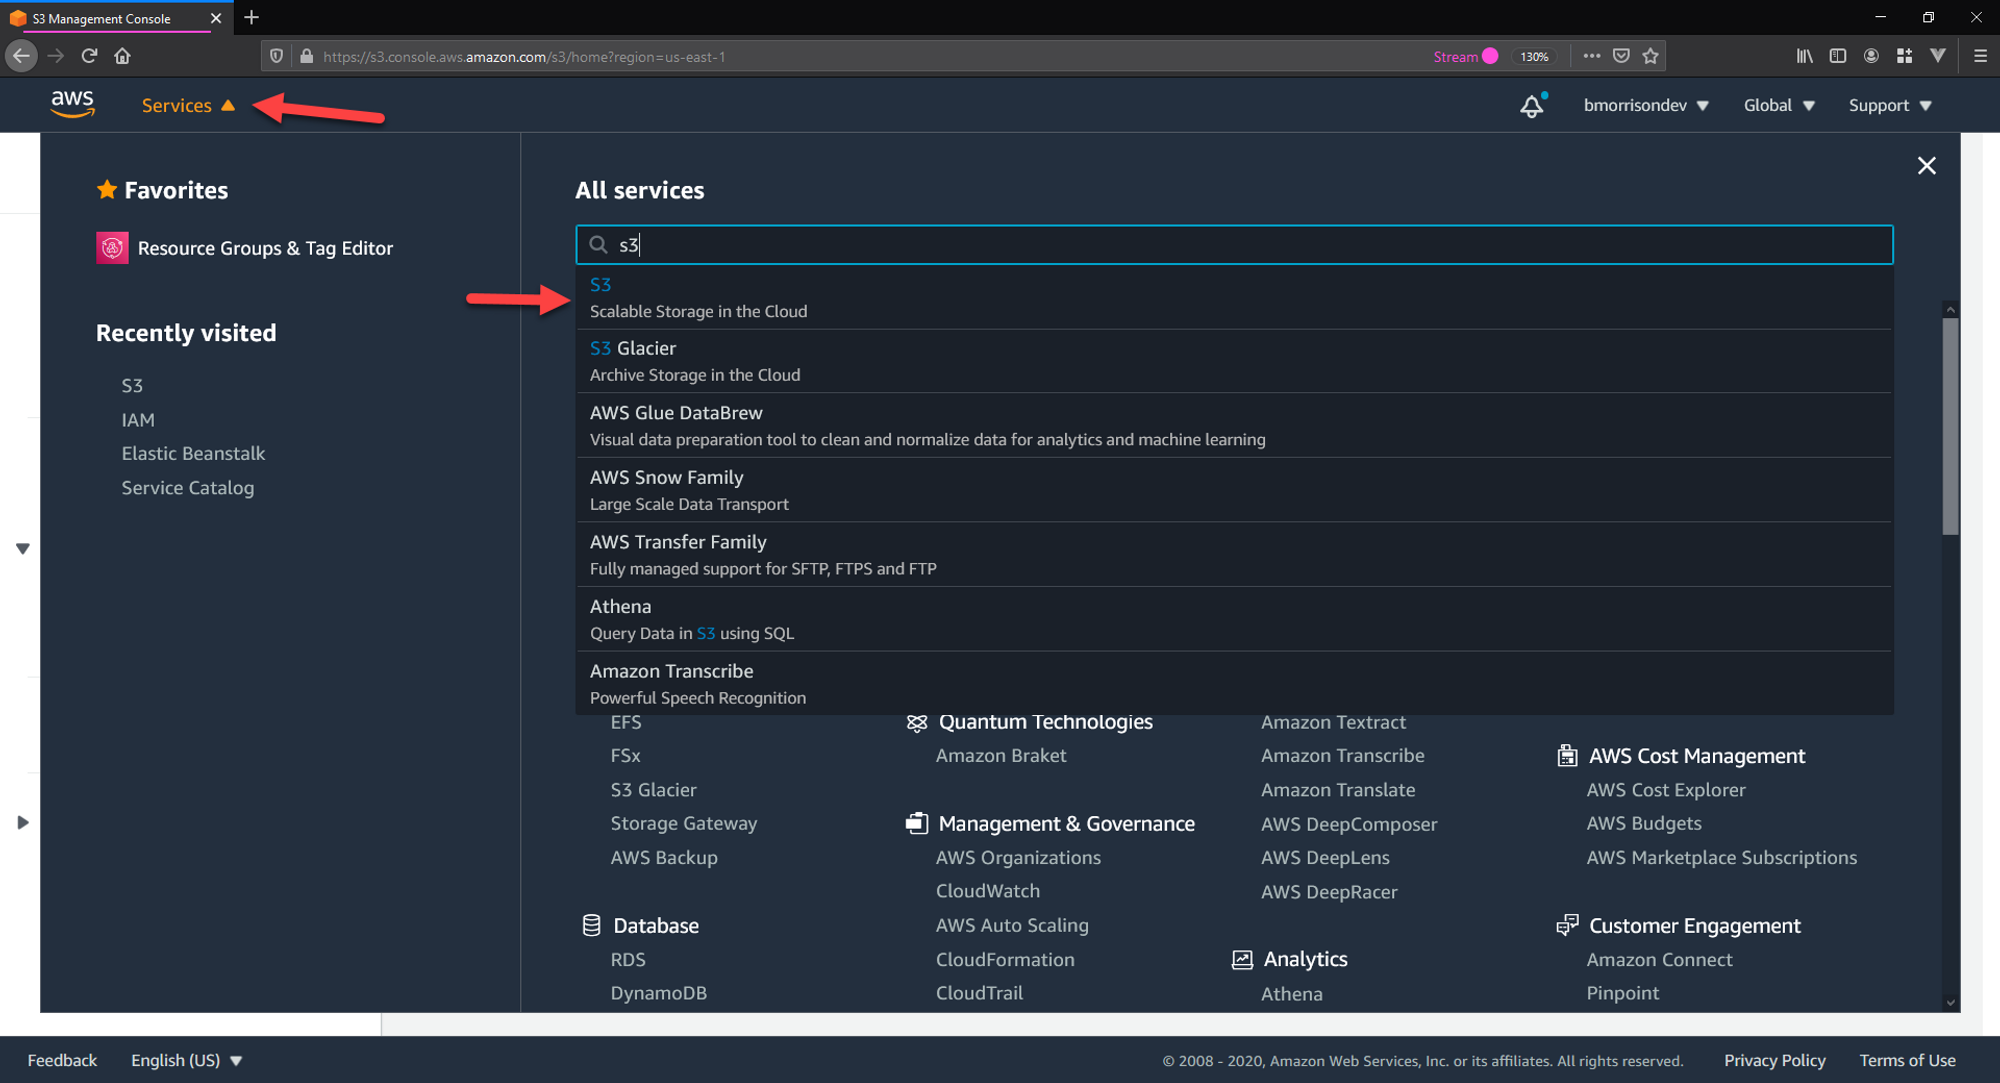
Open the S3 console by heading into the Services menu, searching for S3, then selecting it. Once there, click Create Bucket.
Set the unique name of the bucket, uncheck the box for disabling public access, acknowledge that change, then scroll to the bottom and click Create.
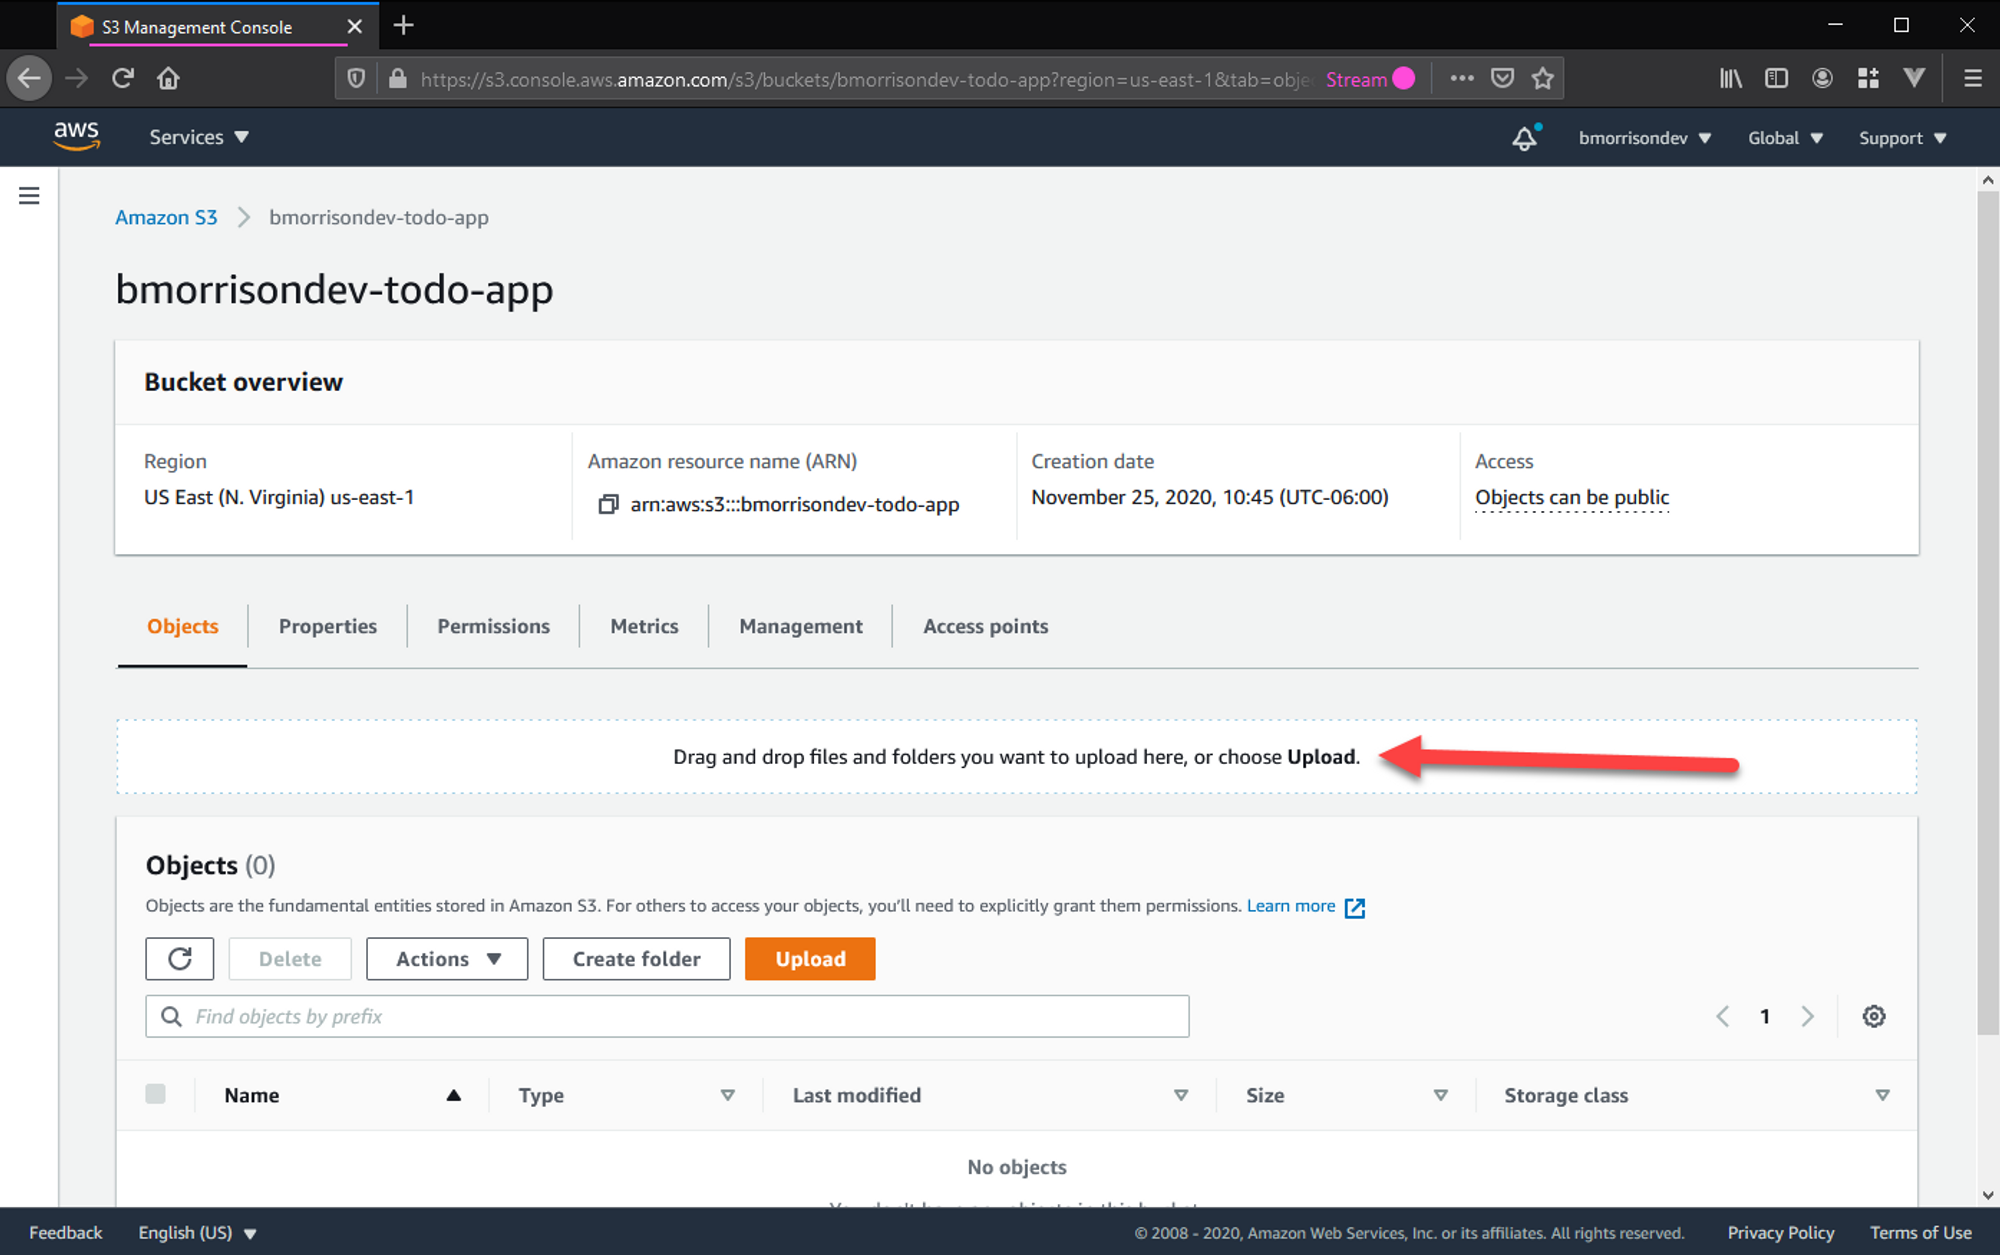
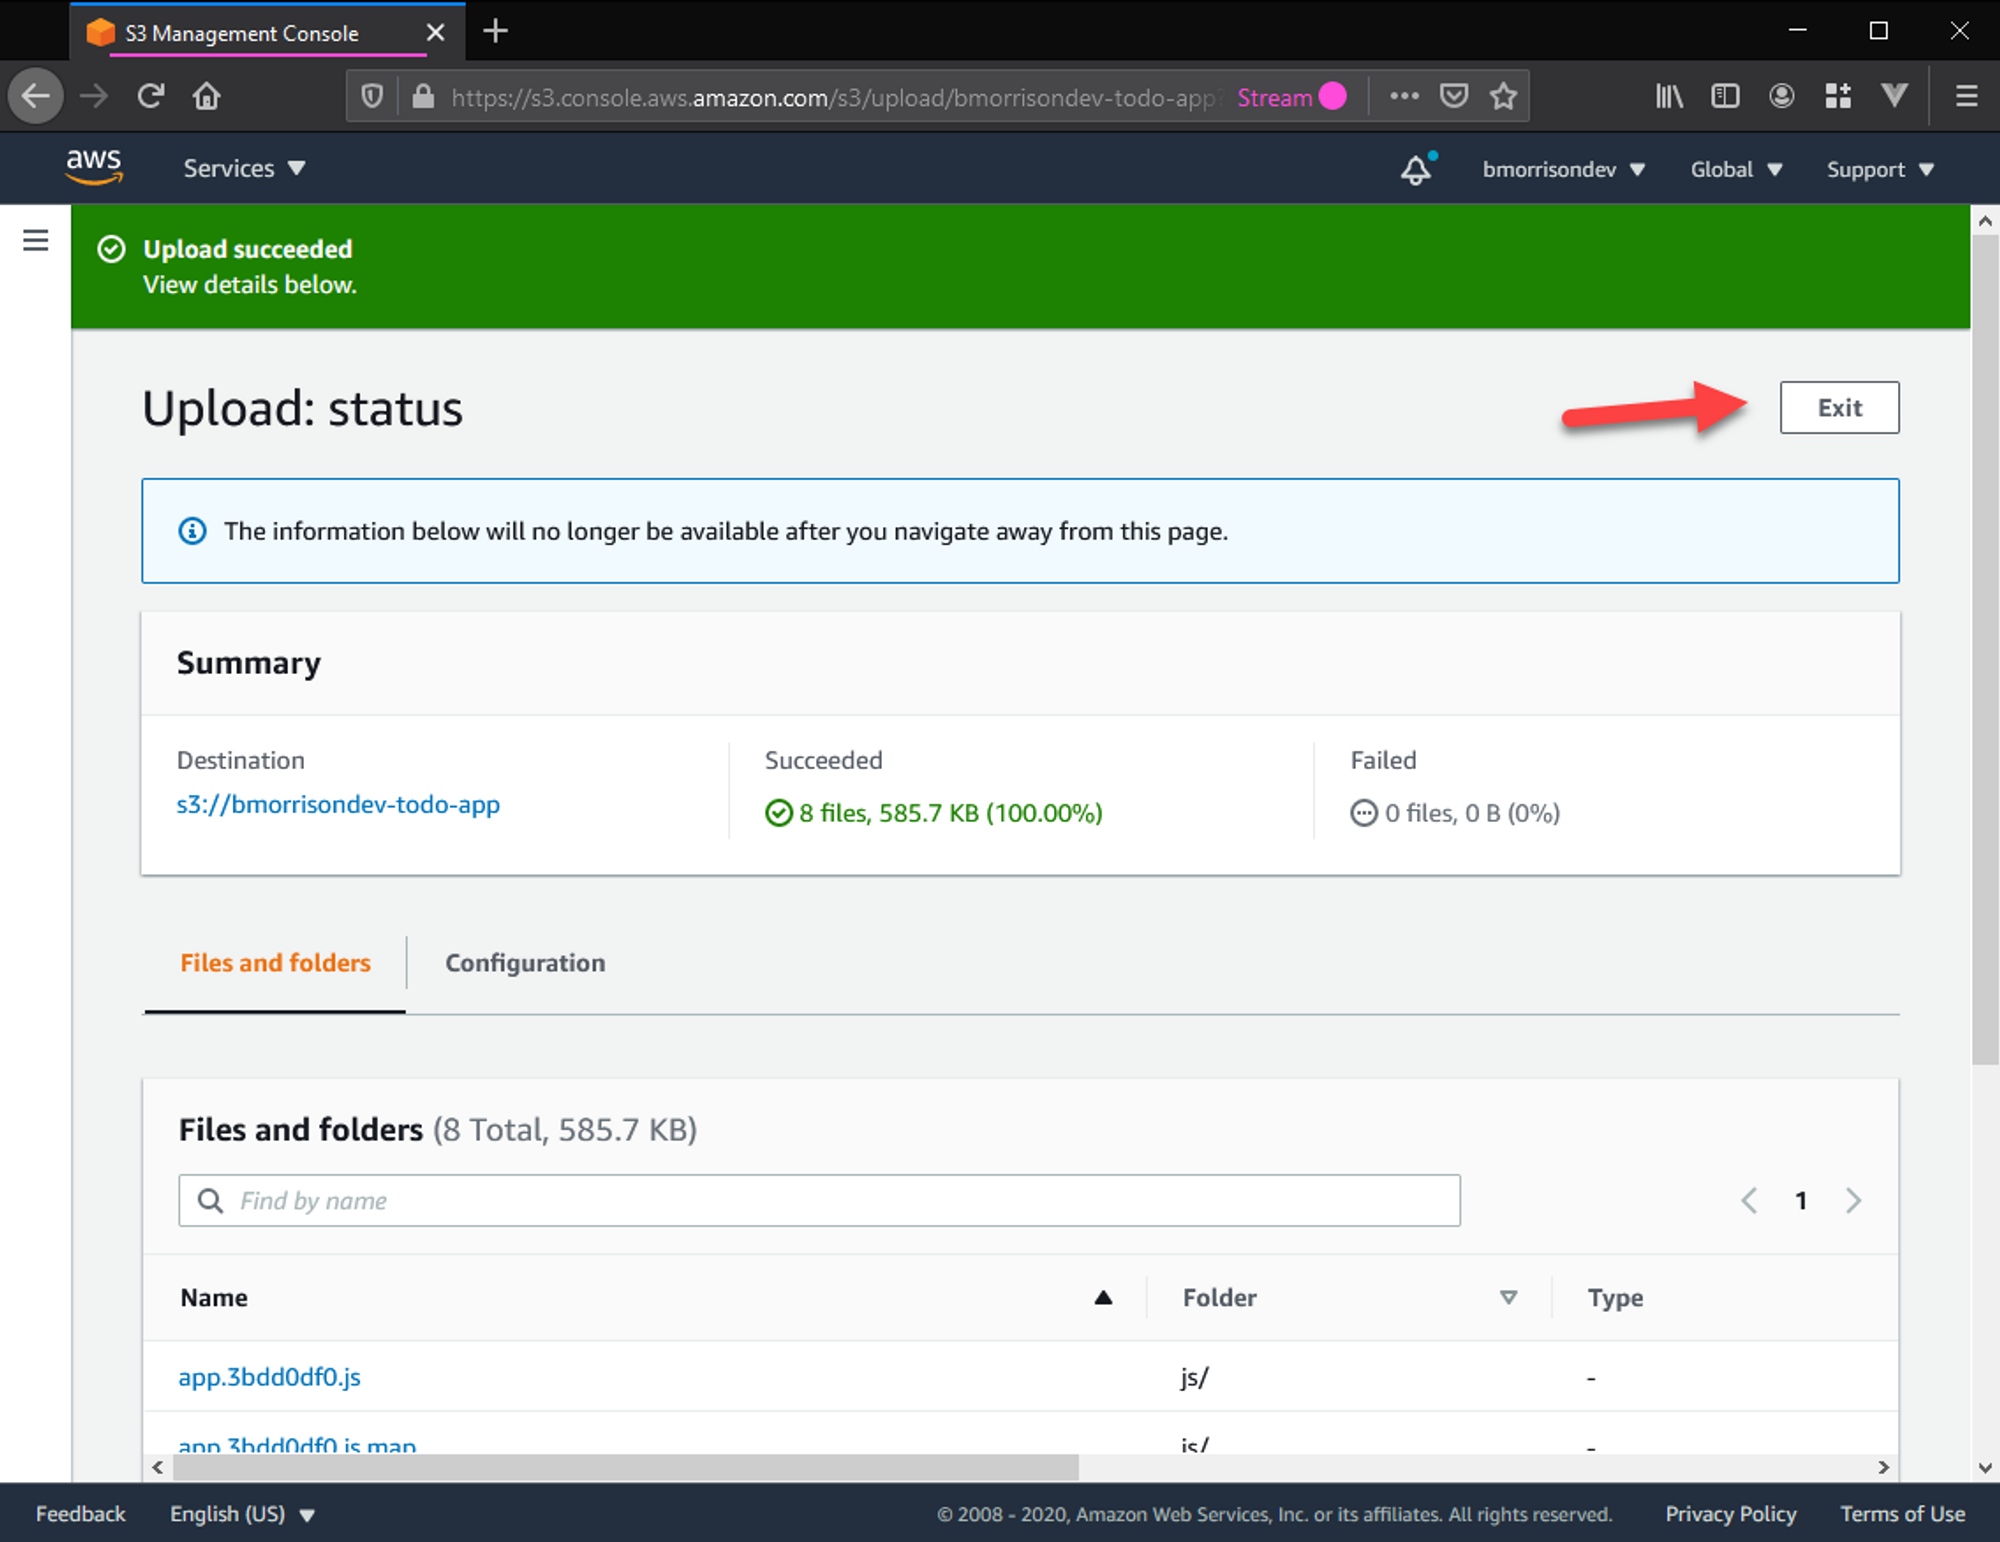
Once the bucket is created, open it by clicking the name of it. Now we need to upload our files. On your computer, open the dist folder that was created in the previous section and drag the contents of that folder onto the S3 console where it says Drag and drop files... to upload them.
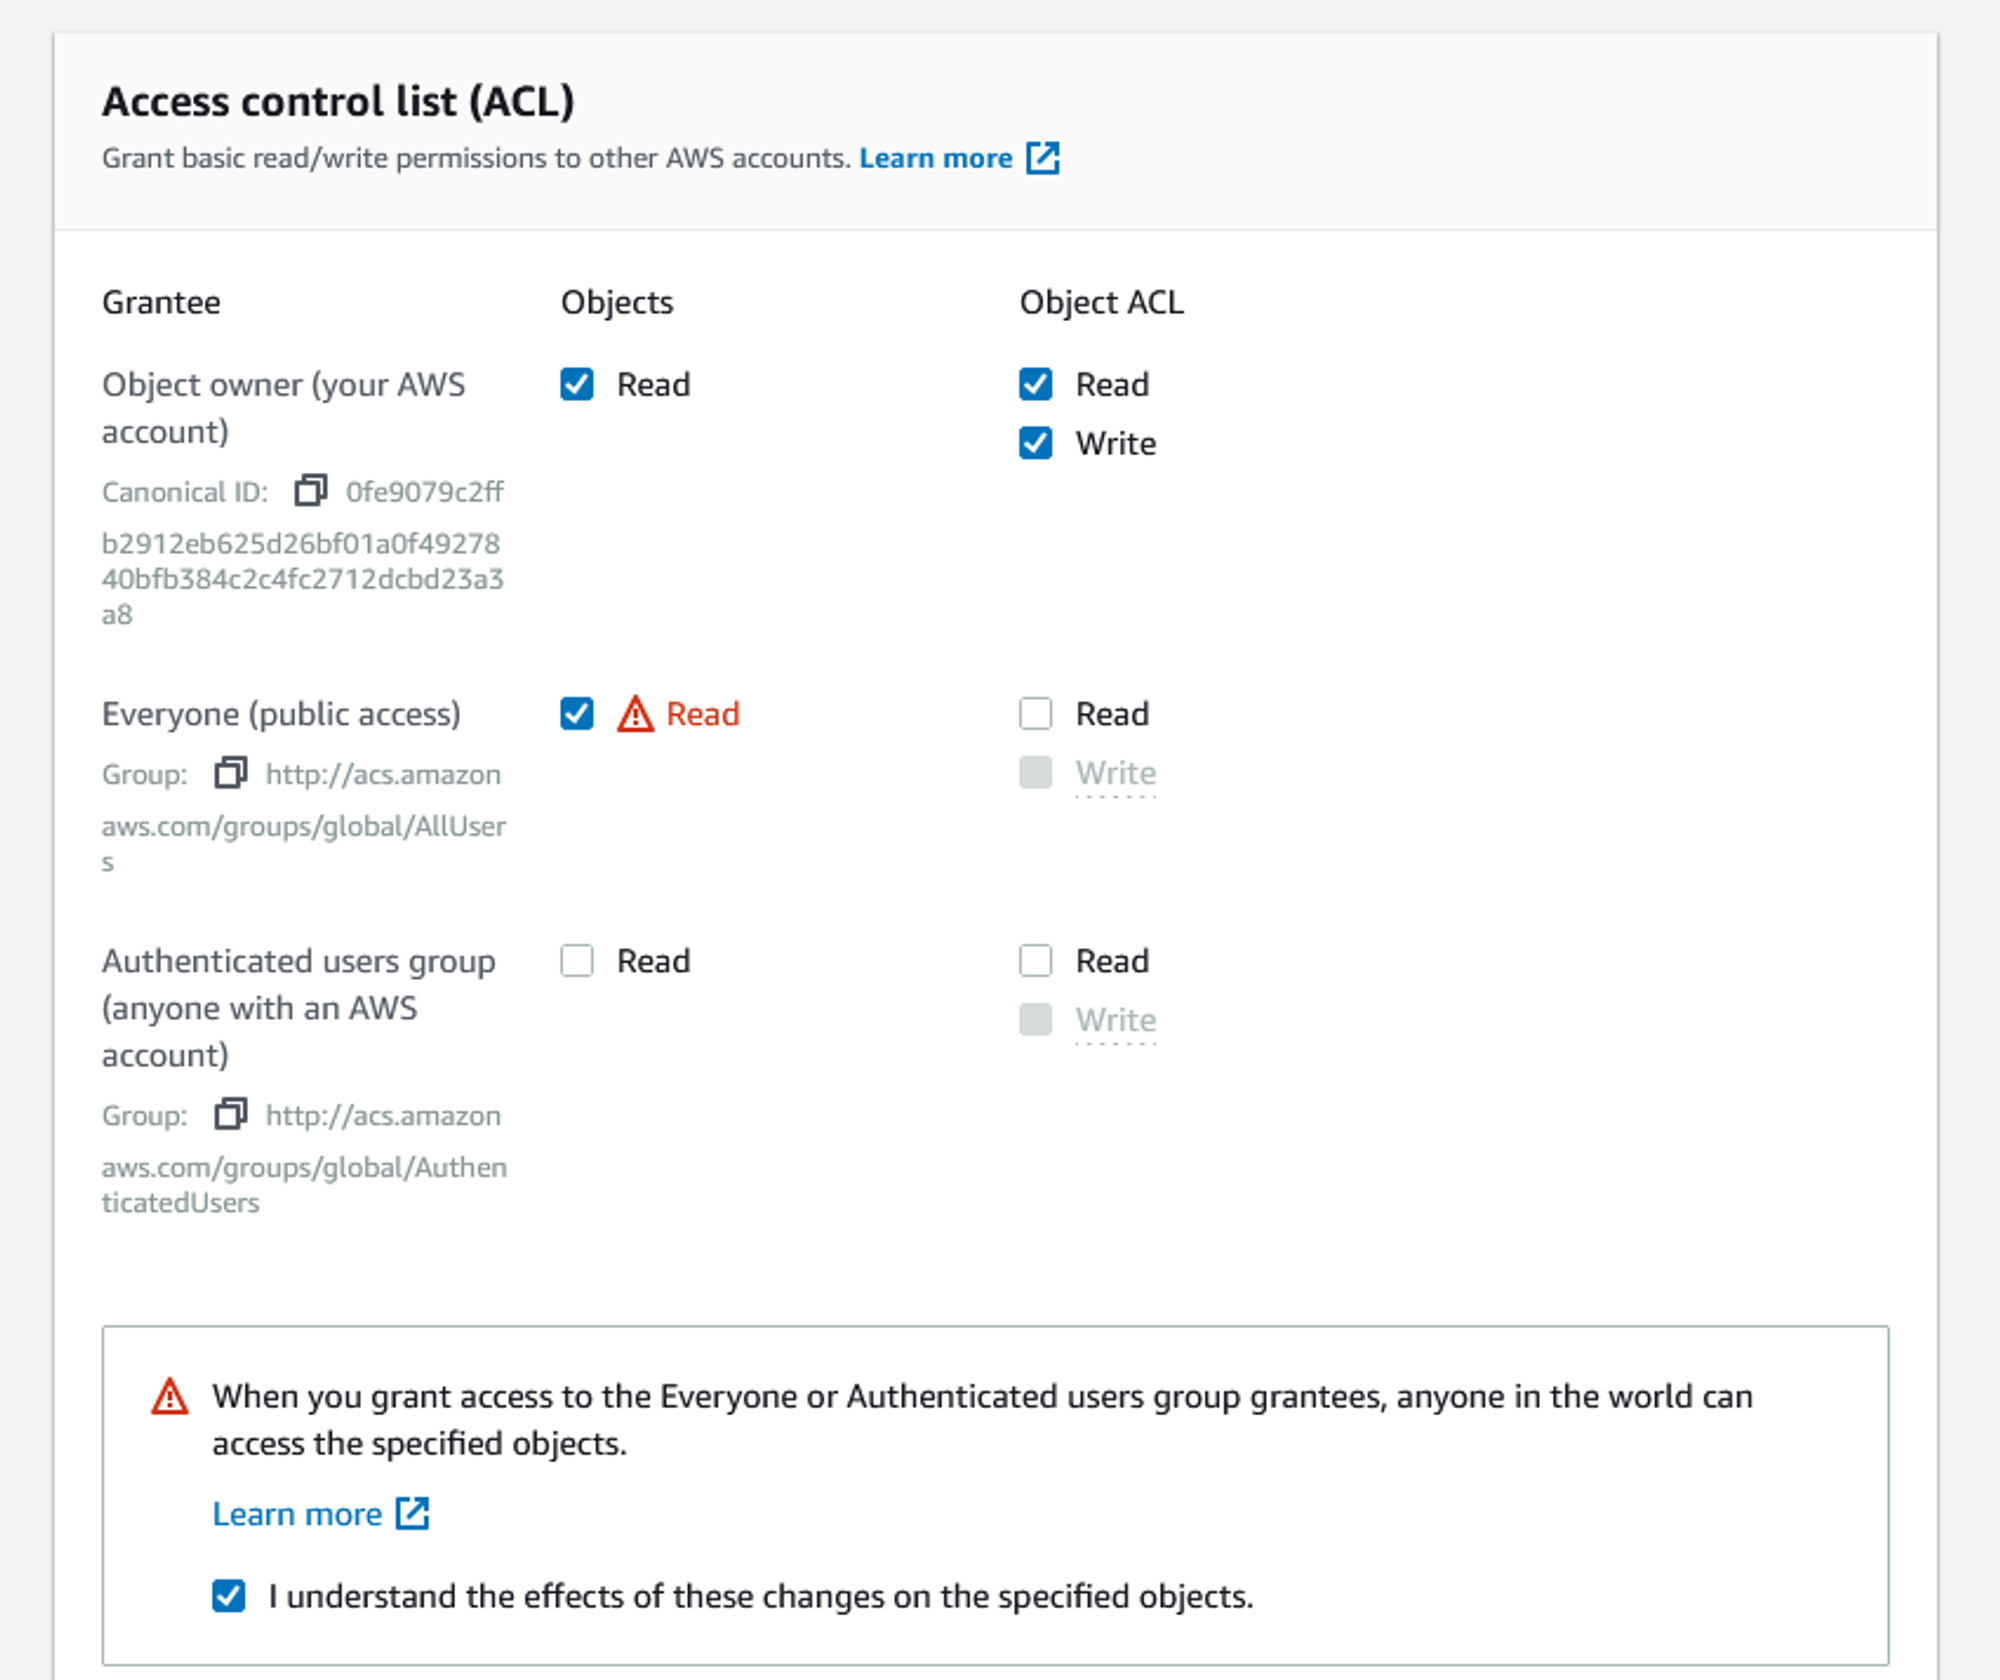
Once you do, you'll be presented with a new screen asking what to do with the files. Scroll down a bit and expand Additional upload options, then go to the Access control list, section. Enable Read access on objects for Everyone and confirm the warning below. then scroll to the button and click Upload. Once the upload is finished, click Exit in the upper right.
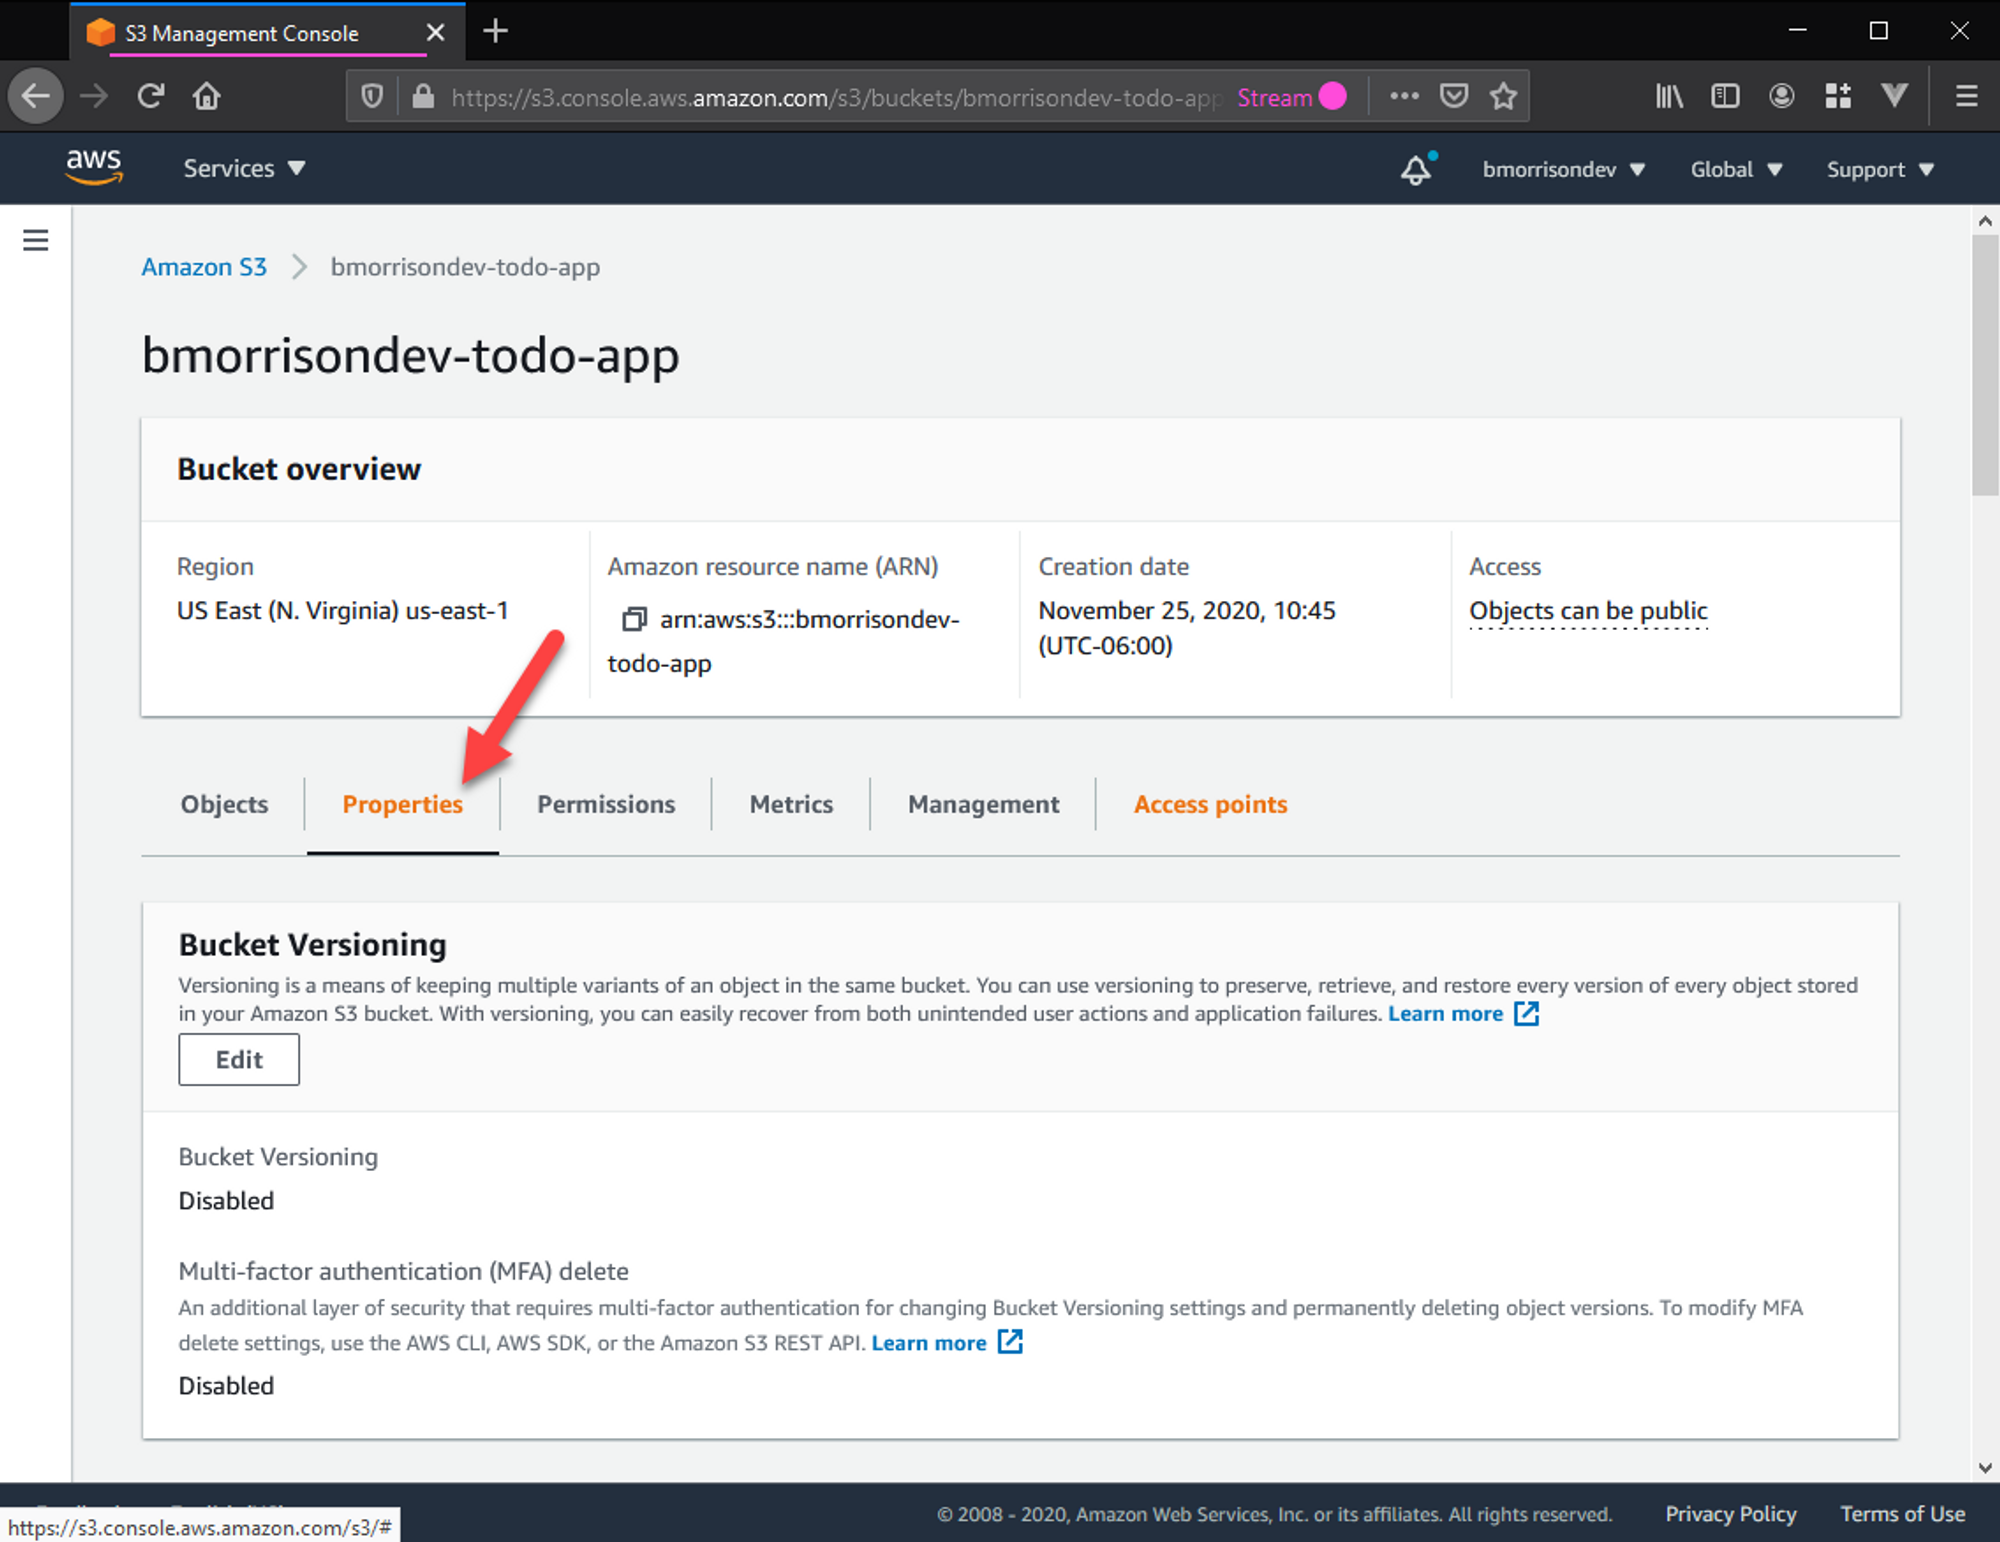
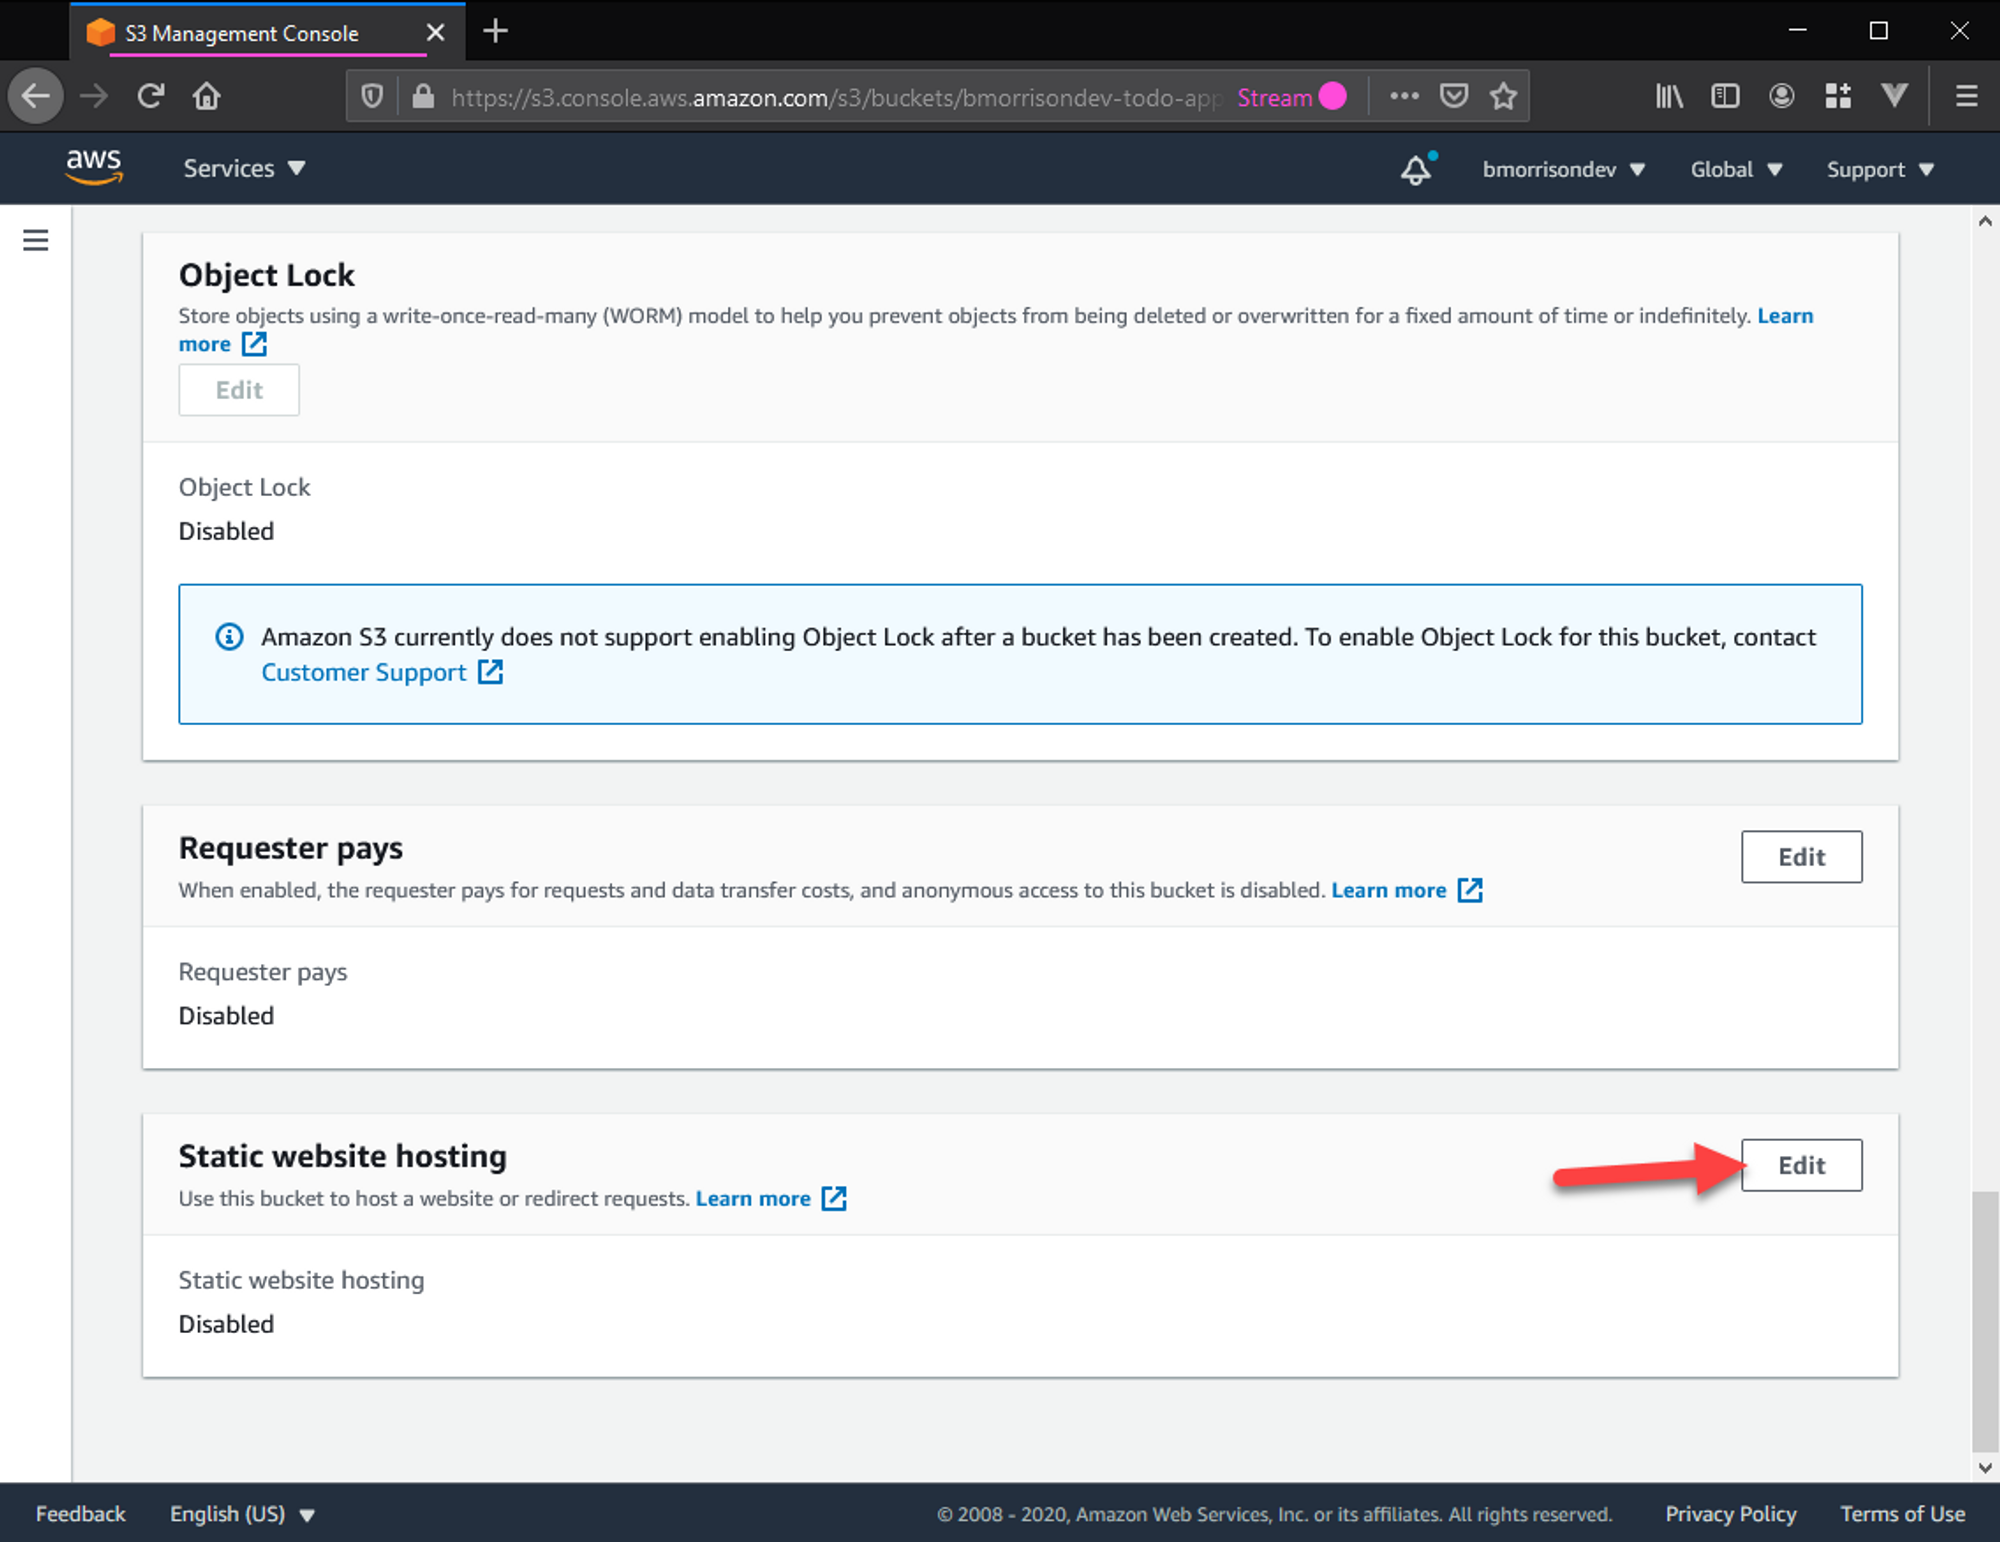
The last thing we need to do is enable the public website feature of S3. Do this by going into Properties, scroll to Static website hosting, click Edit, and Enable it. You'll need to specify the Index and Error documents. These can both be index.html and error.html respectively. Finally Save changes.
Back in the Properties tab, scroll to Static website hosting again. You'll be given a URL here that you can use to access your web app. Lets check it out.
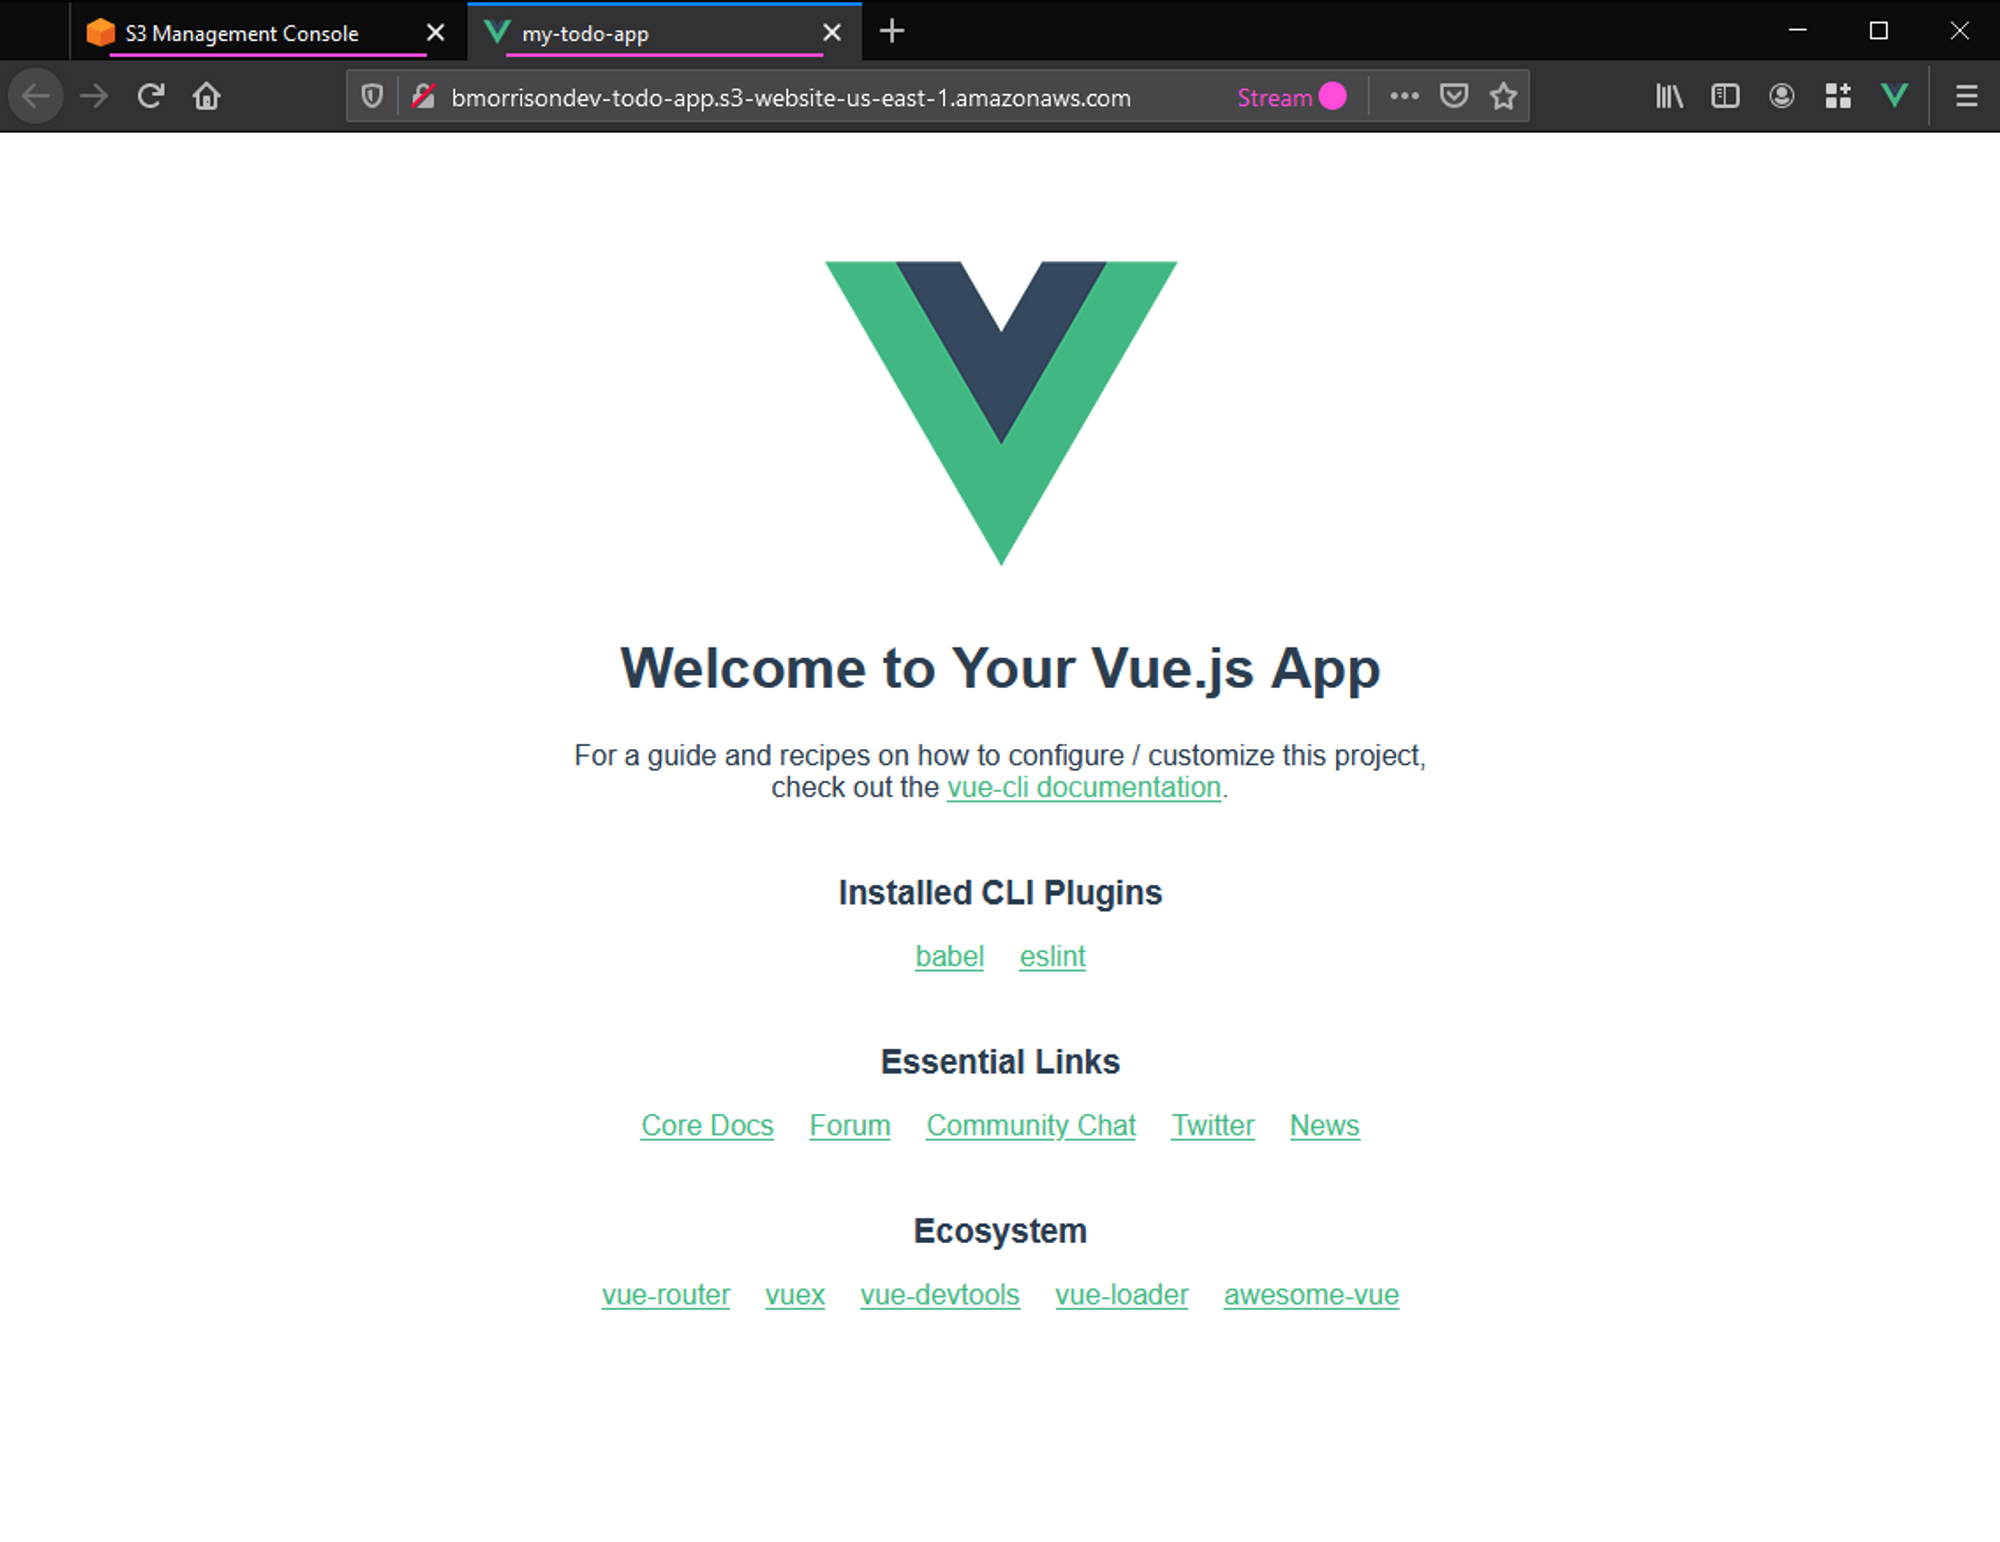
Success! In the next article, I'll cover how we can host our app in CloudFront using a custom domain.