This article kicks off the first in a series on how to use Git & GitHub. Understanding how to use Git is essential to any developer, and GitHub makes it easy and free to store your code in version control, a fancy term meaning you are taking snapshots of your code at certain points in time. This article assumes you have git installed on your computer already, but if not, click here to install it. Lets dive in!
Creating a Repository
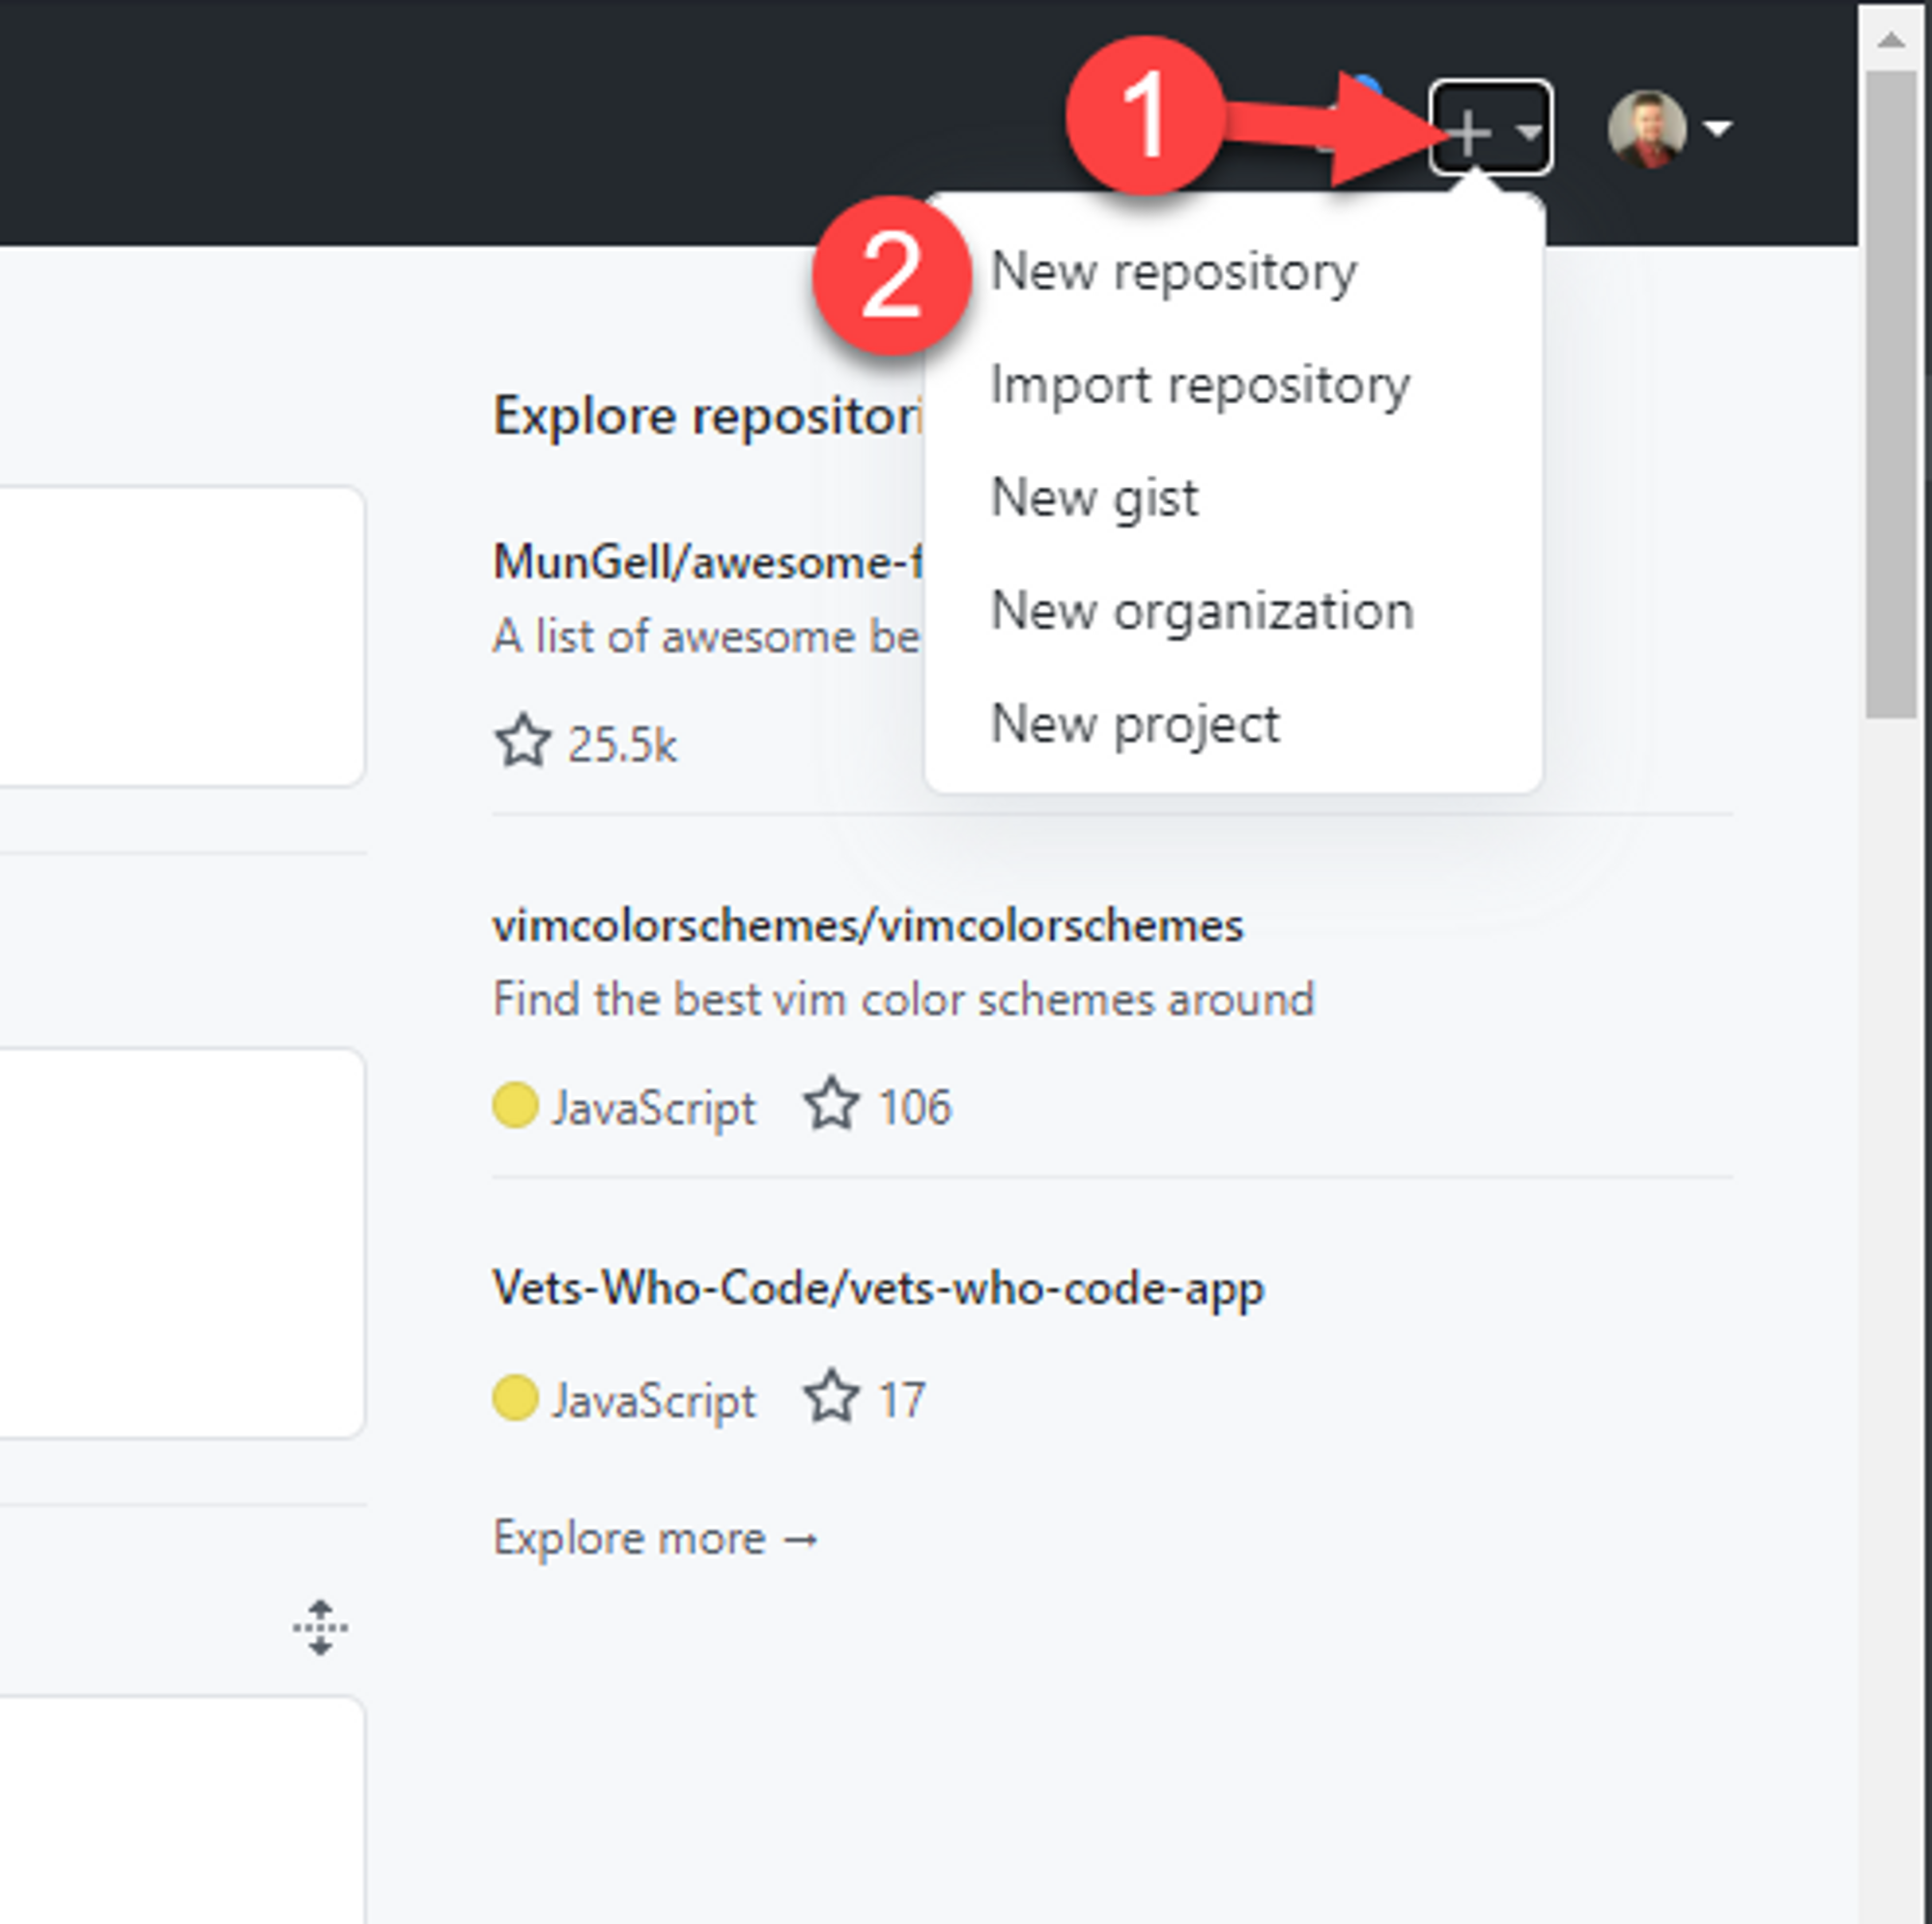
Repositories are like storage containers for your code. They separate your project from everyone else's on GitHub. To create a repository, log into GitHub and click the + button in the upper right and then New Repository.
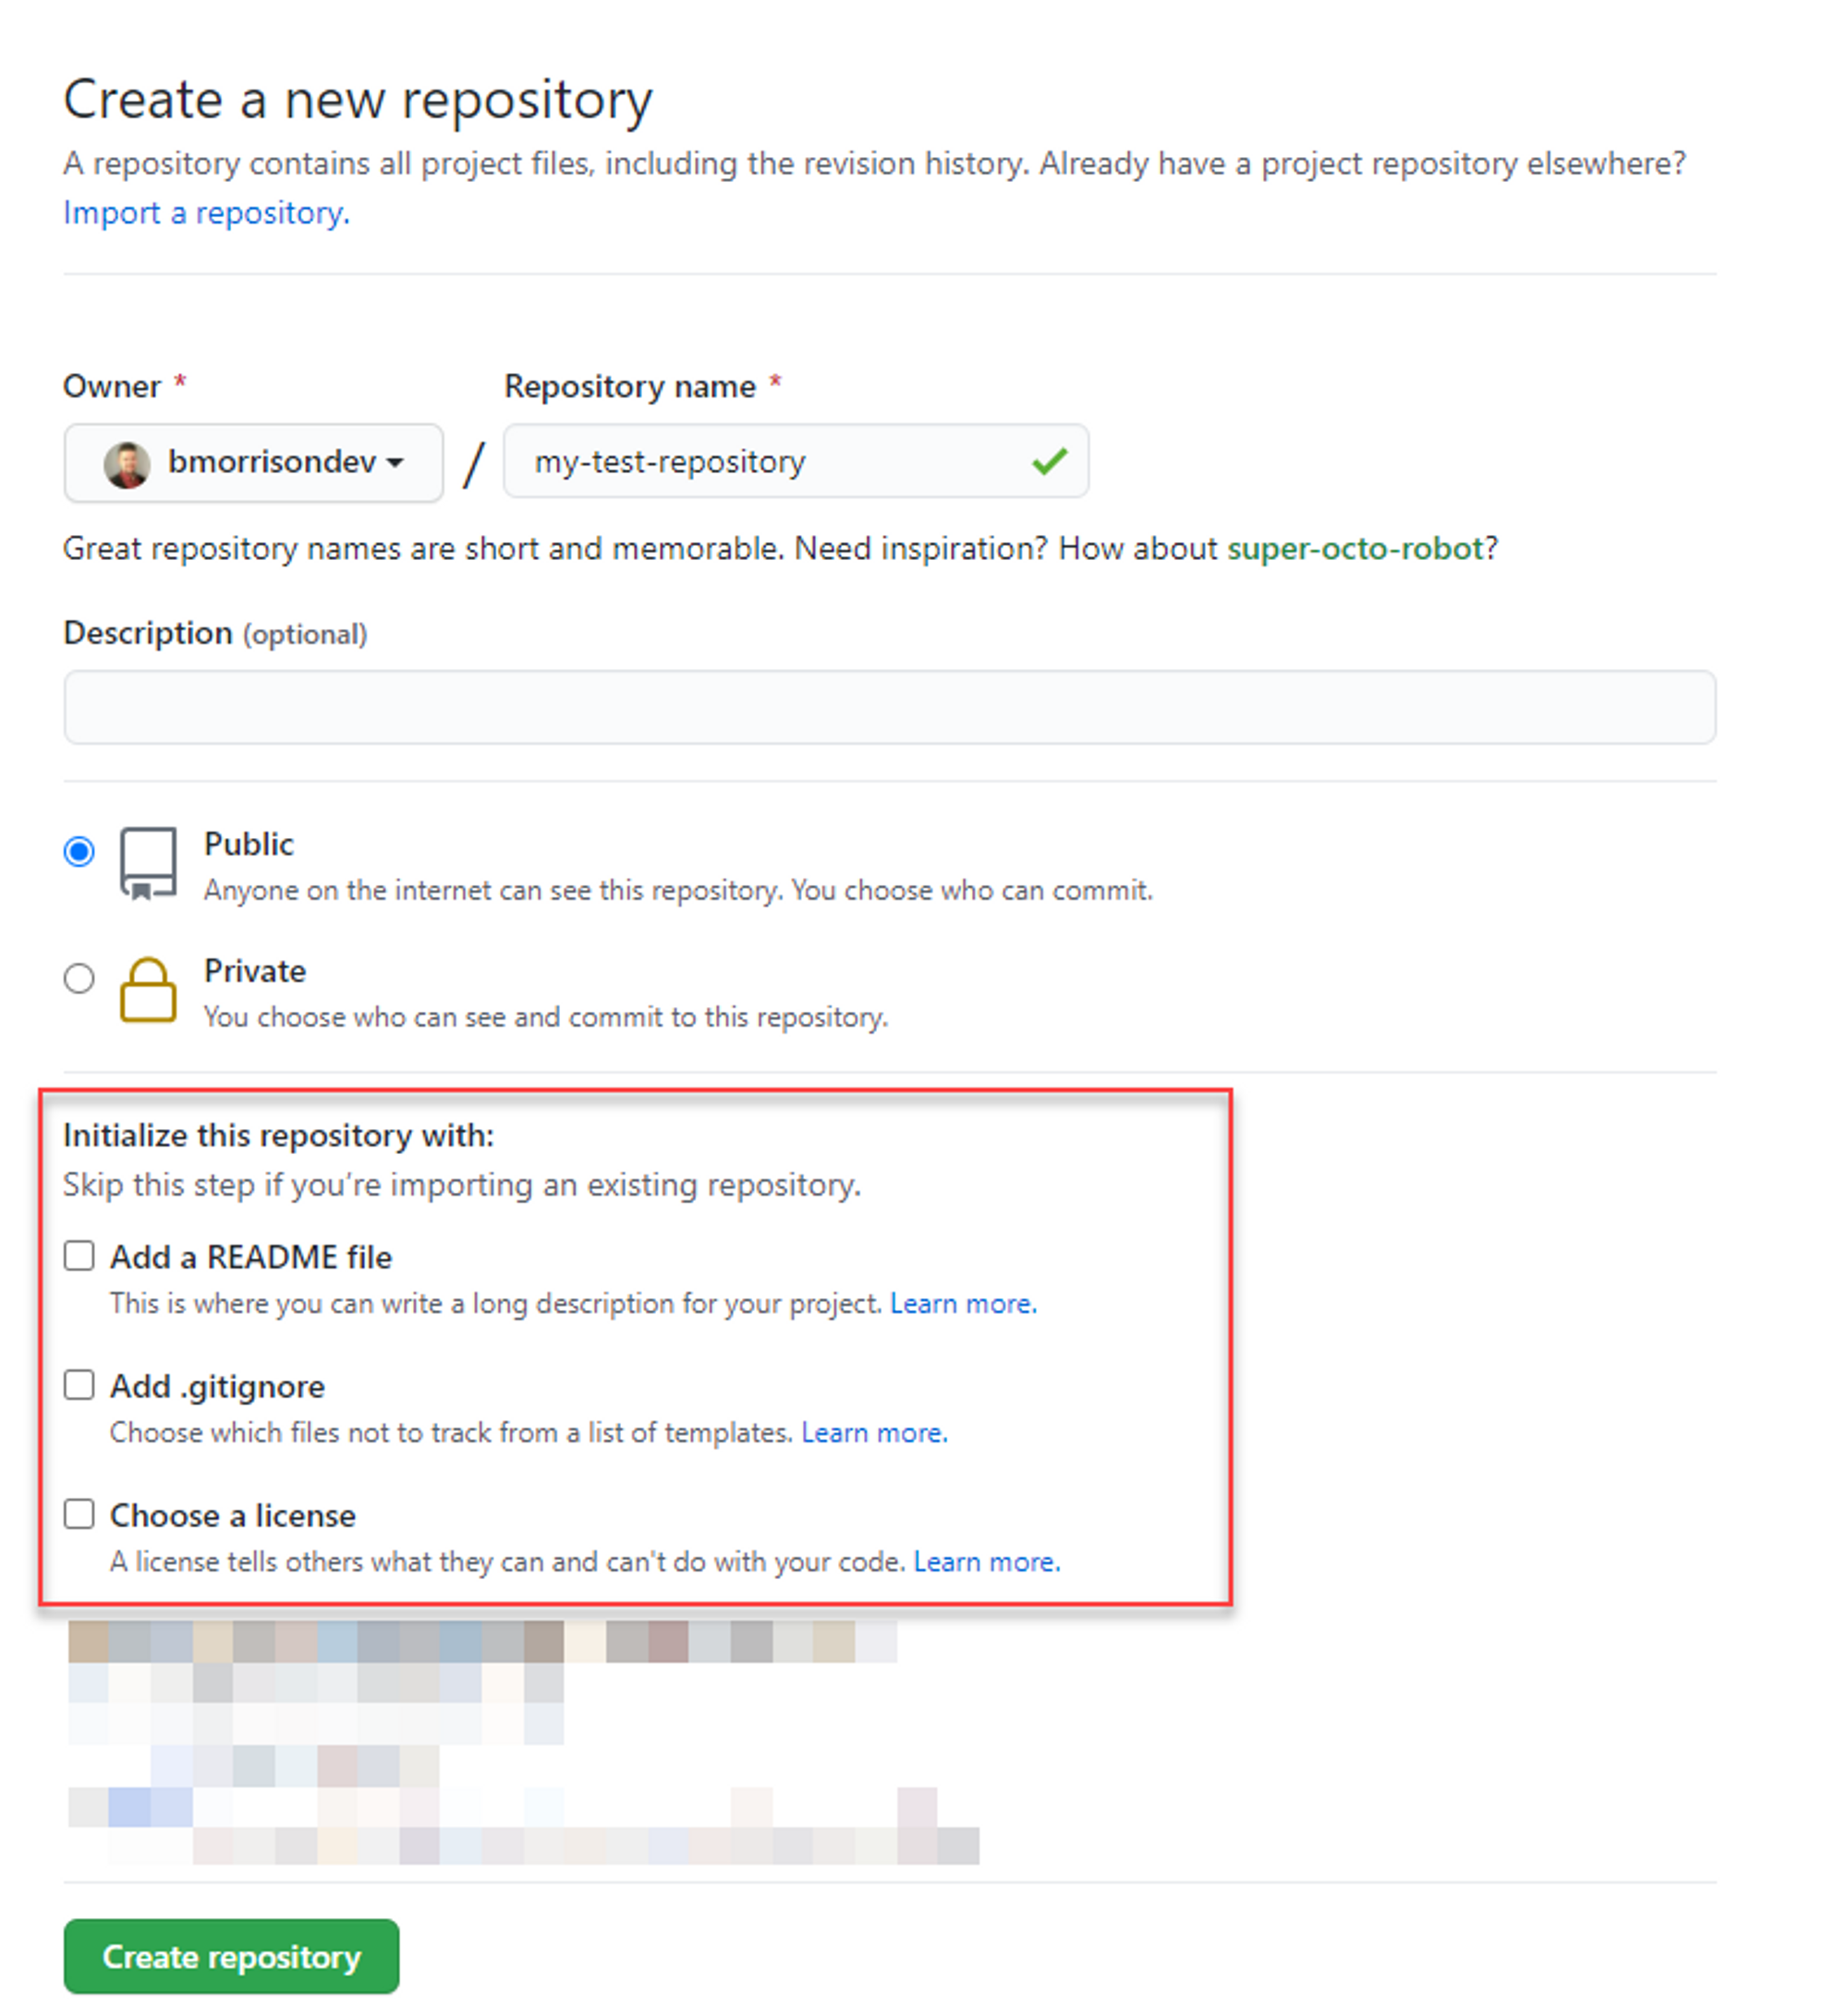
In the Create a new repository view, give your repository a name, all other fields are optional and are relatively self explanatory. One thing I wanted to call out is the options under Initialize this repository with: section. If any of these options are checked, you'll need to pull the repository before you are able to sync existing code with it. I personally never use these options, especially if I am looking to push an existing local repository up to GitHub as it could cause issues.
Syncing your Code to GitHub
There are three methods worth calling out when it comes to syncing code with GitHub; Cloning, Pulling, and Pushing.
Cloning
Cloning is what you'd do when you want to get an initial sync of code from GitHub to your workstation. It will pull down a copy of whatever code is currently in the repository. Using the example of the repository above, you should see a screen like this when the repository is finished. Note the URL that is used to clone the repo.
To clone the repository, open up the terminal on your computer and navigate to a folder where you want the code to be stored. The following command will do two things. Firstly, it will create a folder INSIDE your current folder that is the same name as the repository. Second, it will copy all of the code from GitHub into that folder it created.
git clone https://github.com/bmorrisondev/my-test-repository.gitIf this is the first time you are cloning from GitHub on your computer, your terminal will prompt you for your GitHub credentials. Otherwise it will use the account you previously signed in as.
You can also specify the folder if you want to by appending it to the end of the command. Git will then create the new folder with the name you specified. If I were to execute the following command in C:\Repos, all of my code will end up in C:\Repos\my-awesome-repo.
git clone https://github.com/bmorrisondev/my-test-repository.git my-awesome-repoPushing
Pushing is the process of pushing your list of new commits up to GitHub. Note that it is the commits that will be pushed, so you'll need to make sure to commit any code into your local repository before it will be pushed to GitHub.
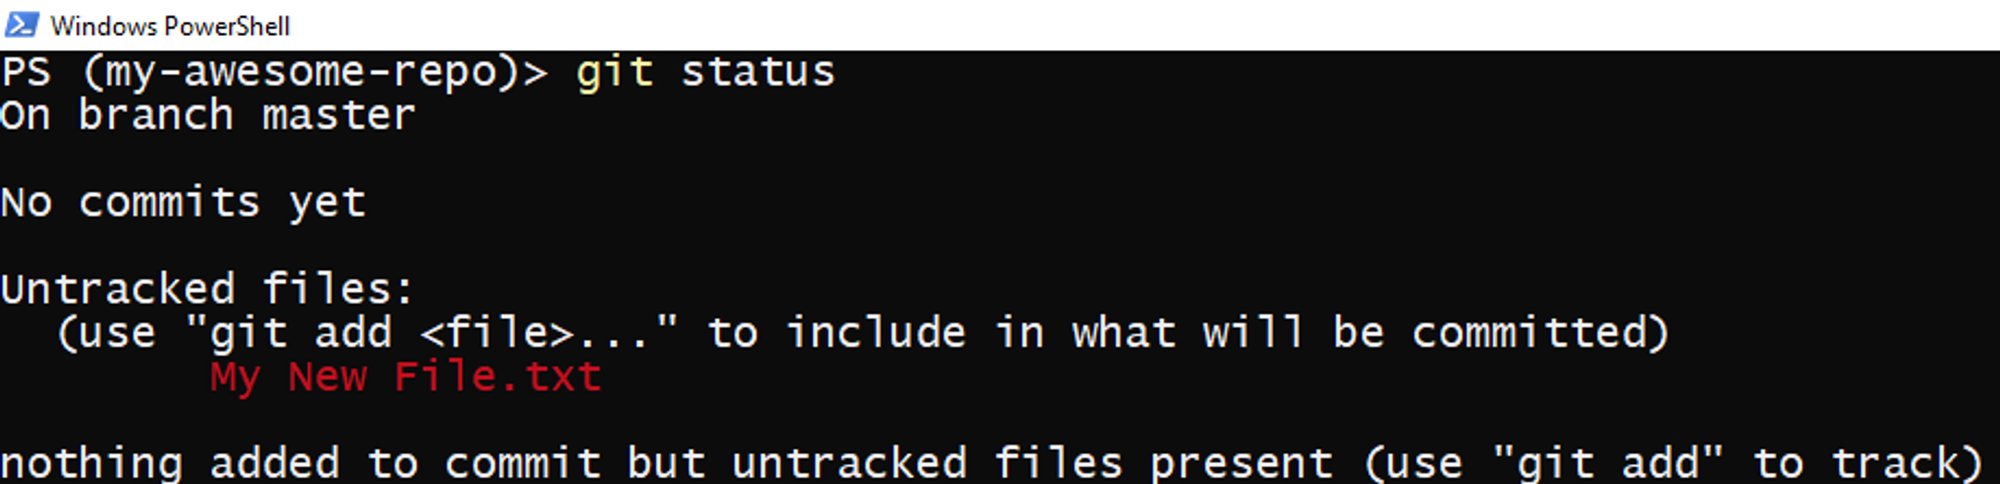
Lets add a file and commit it. I'm going to add a single file called My New File.txt. Then when I use git status, we can see the file is currently untracked.

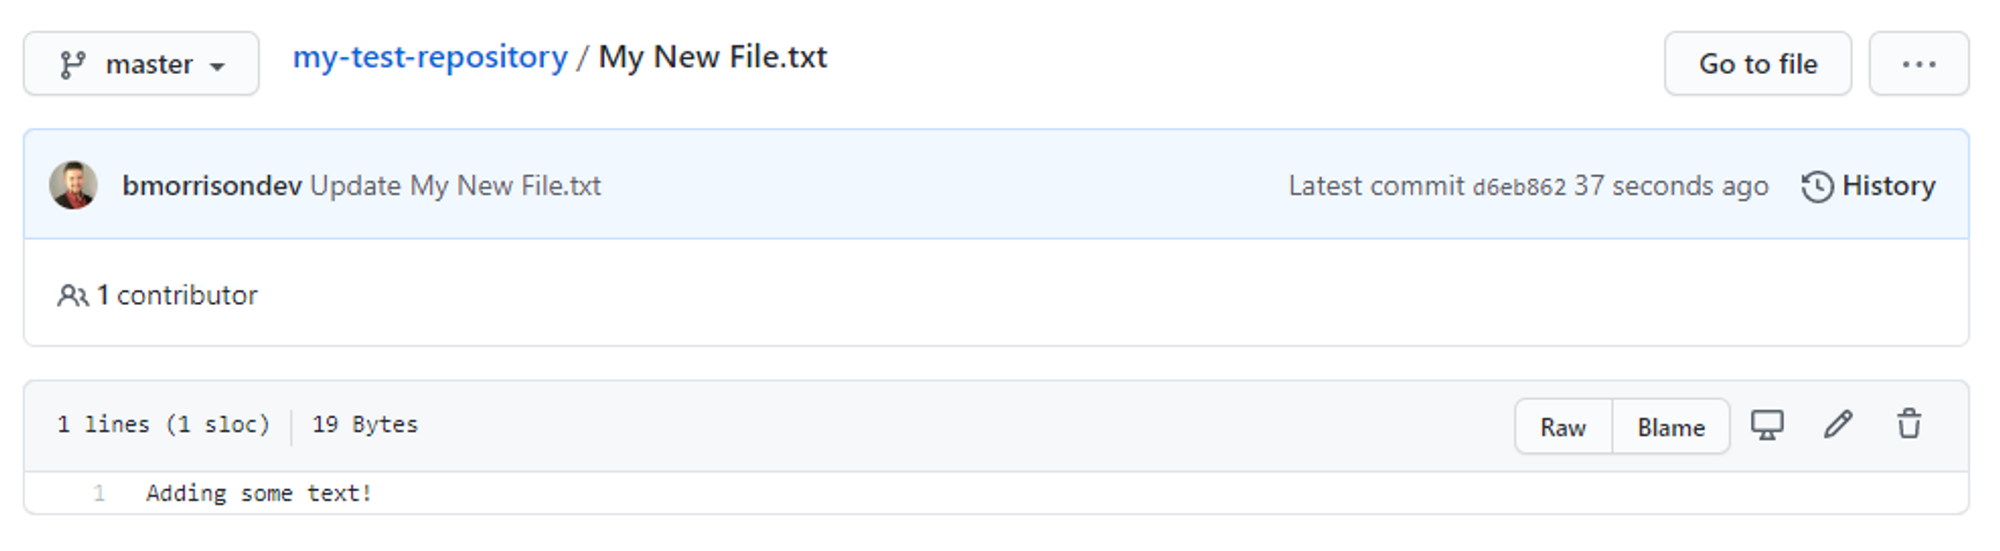
Lets commit the file with git add . followed by git commit -m "Your commit message".

Once the file is committed, we can push it up to GitHub. Git uses what's called a remote to inform it where it should be pushed to. You can see a list of remotes on your repository with git remote -v. If you've cloned a repo from GitHub, this will be setup automatically. We can issue the following command to push our changes to GitHub.
git push
Now if you are pushing existing code that was not cloned down, you'll need to set up the remote before you can push. To do this, have your terminal open in the same directory as your repository and issue the following commands, replace the repository URL with whatever your git URL is in GitHub.
# This command registers a remote called 'origin' with the git URL
git remote add origin https://github.com/username/reponame

# This command will push your code to the remote origin with the branch named 'branch_name'. Branch name is usually 'master' or 'main'.
# This will also configure your local repo to 'track' its current branch with 'branch_name'
git push --set-upstream origin branch_name

Pulling
Pulling is what you'll do when others (or you on another workstation) have pushed commits up to GitHub and you want to pull those new commits down into your local machine. Provided your remote is setup as discussed in the previous section, you can do this simply by issuing the command;
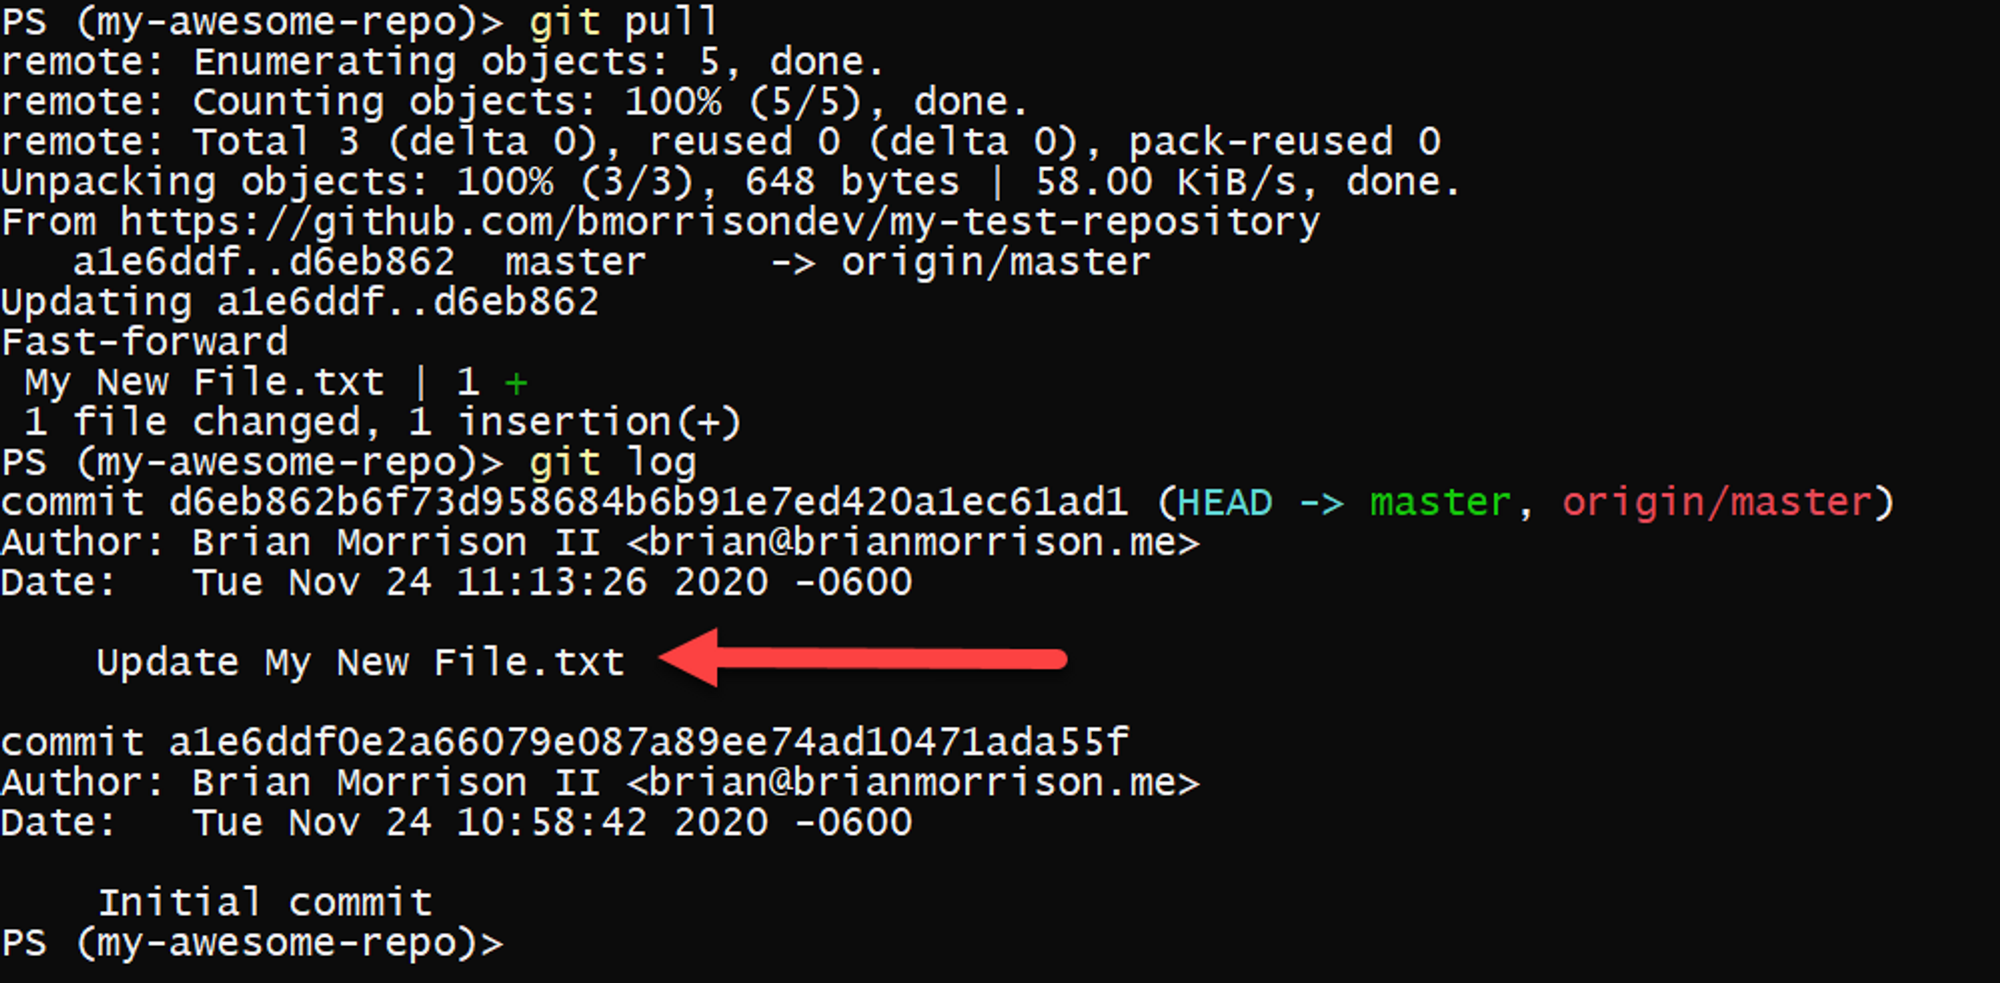
git pullIn this example, I made a change to the text file in my repository directly in GitHub, which is simply used to simulate changes being made somewhere other than your local workstation.
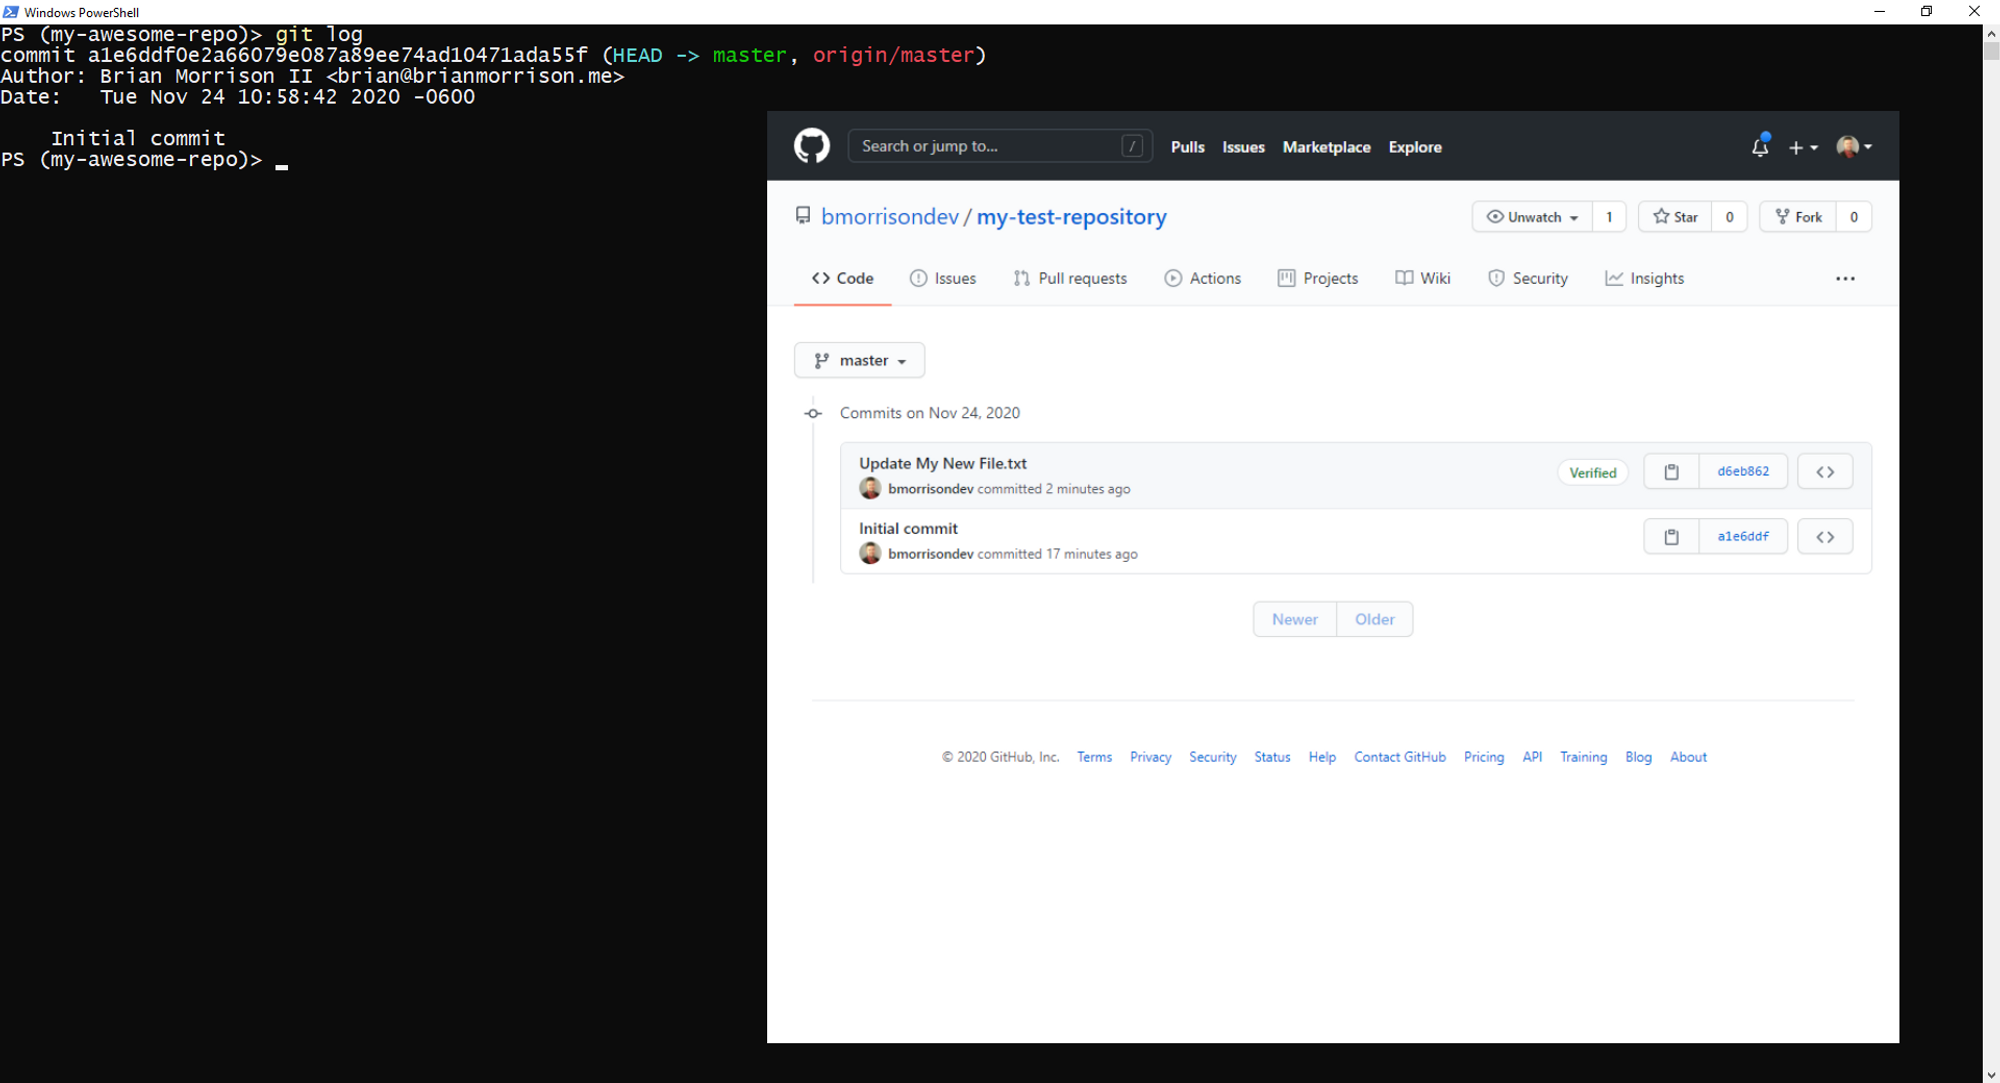
Now if I compare the commits in GitHub with the commits locally (using git log), you'll see there is one new commit in my GitHub repository that is not in my local repo.
Issuing git pull will bring those changes in as well as update the text file on my computer.
In the next article, I'll cover branching and how it works.