Now that we know how to send and receive data into our API. It’s time to store that data in case our API ever stops. To do this, I’m going to setup a DynamoDB table in AWS.
DynamoDB is a fully managed NoSQL database service in AWS. There is no underlying database hardware to setup or configure, you simply sign into AWS, create a table, and start storing your data.
Setting up the Table
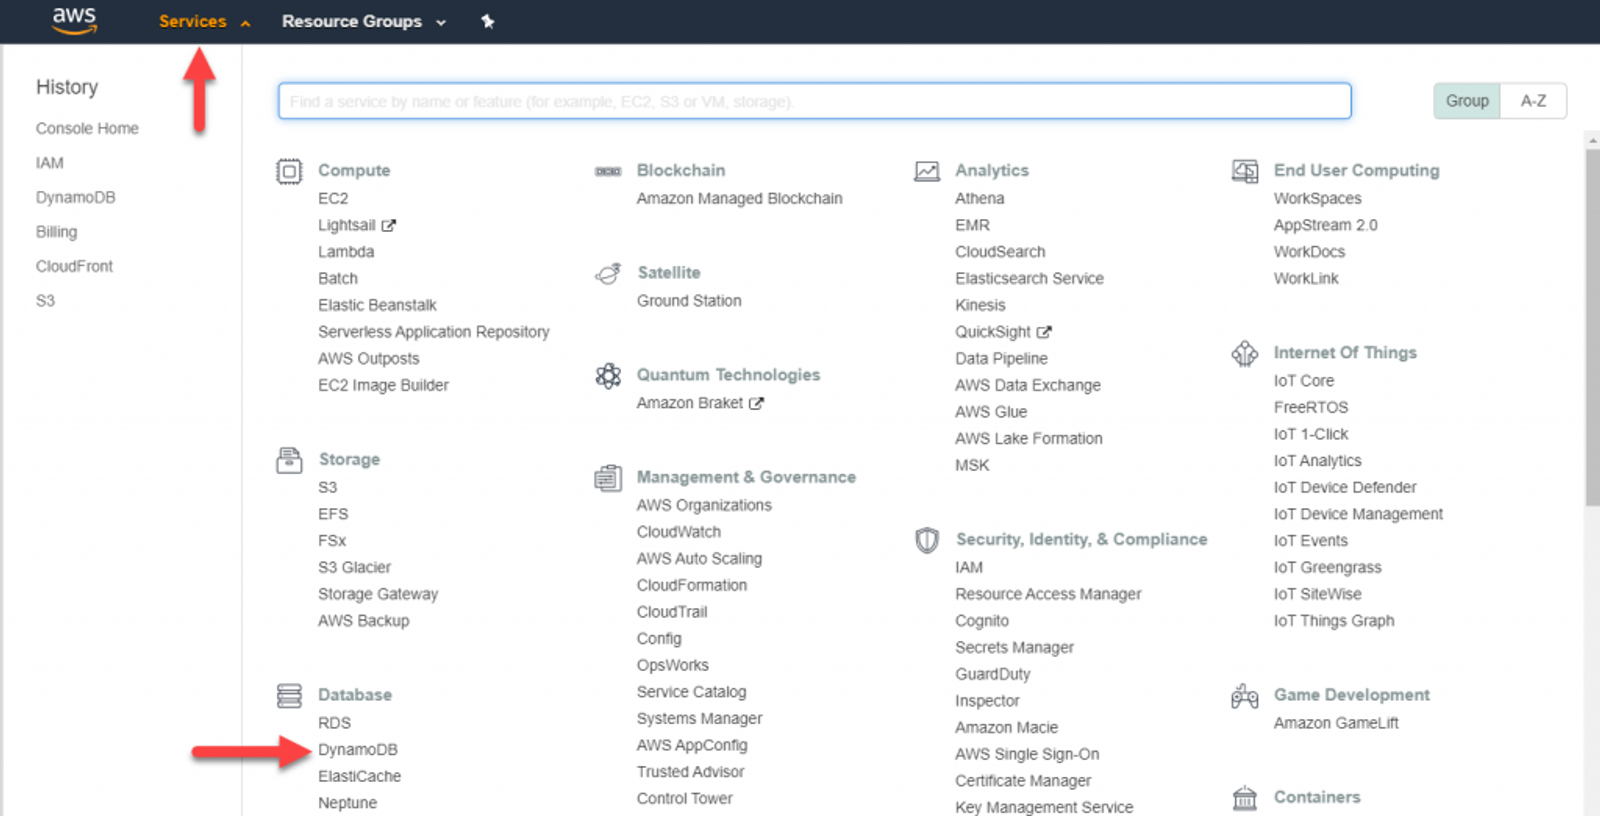
From the AWS Console, drop down Services then select DynamoDB under Database. If this is your first time accessing the DynamoDB service, you’ll be presented with an intro screen with a button that says Create table in the middle. If not, it will be towards the top of the screen. Regardless of where it is, go ahead and click that button.
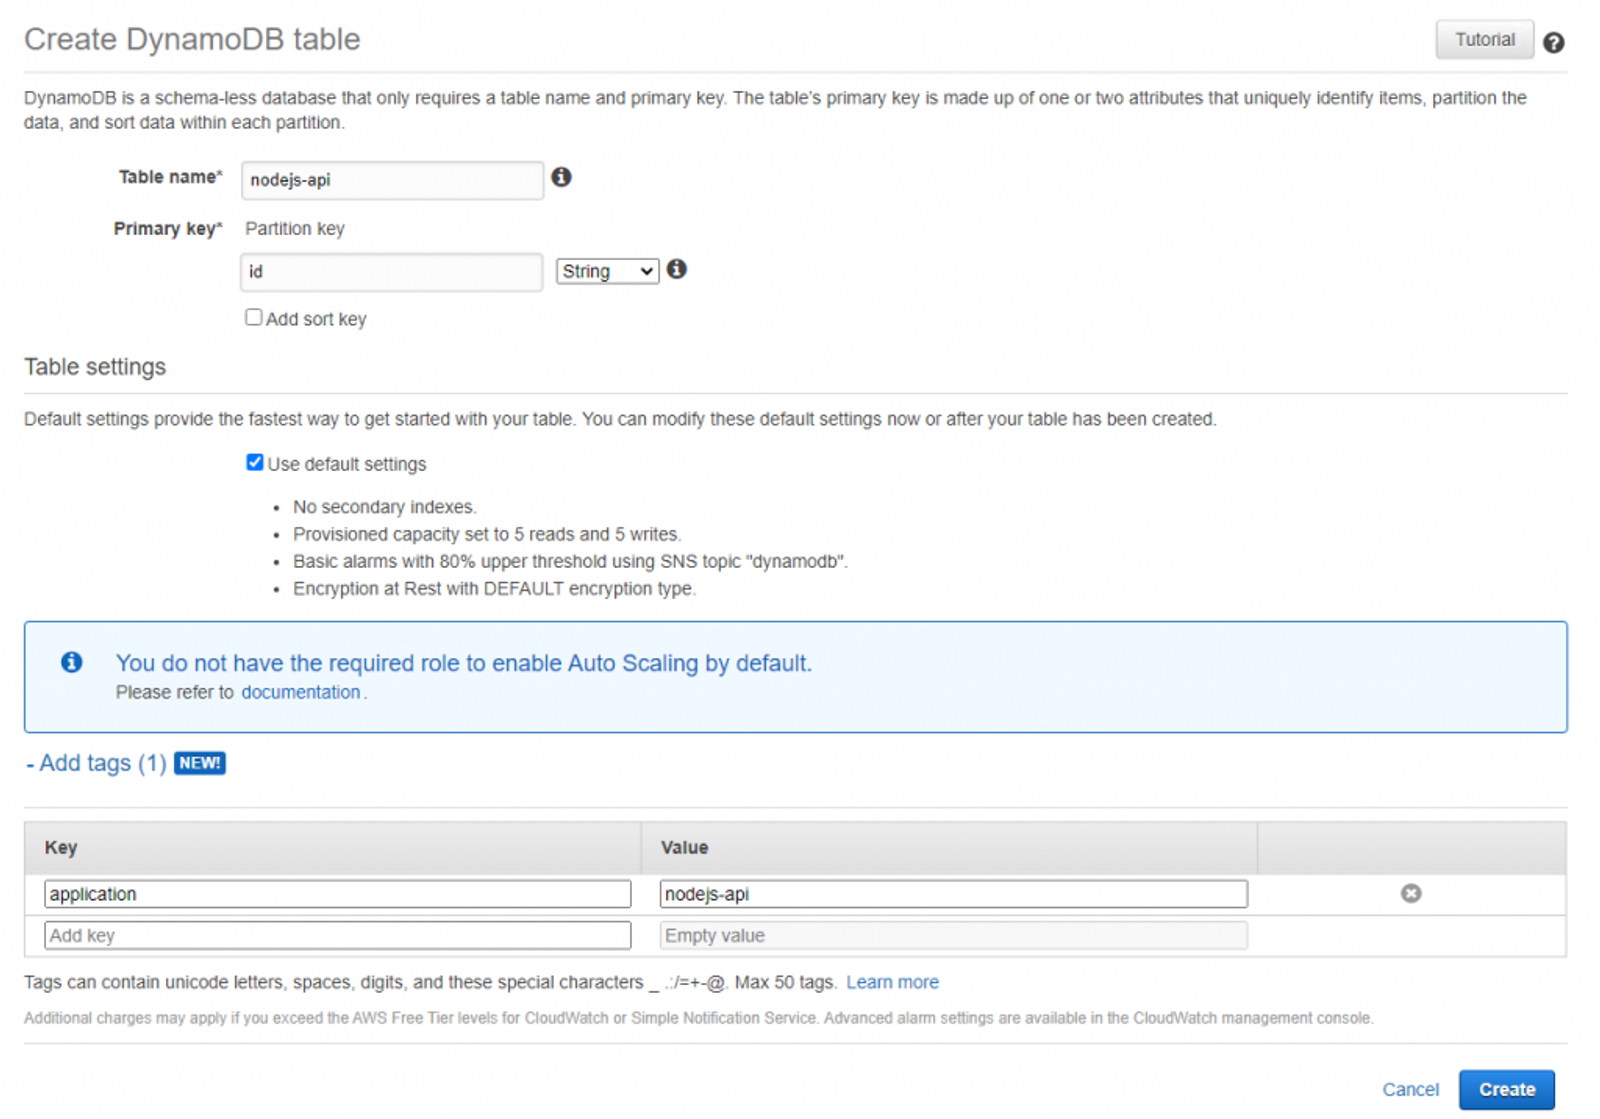
Specify the name for the table and a primary key. I chose ‘nodejs-api’ and ‘id’ respectively. I’m also going to create a tag called ‘application’ and set the value to ‘nodejs-api’. Tags can be used for organization in whatever way you see fit, but they are ultimately optional. Once done, click Create.
Creating the table should only take a few moments. Once it’s done, we’ll need to create the service account and assign the permissions to access the table.
Creating the Service Account
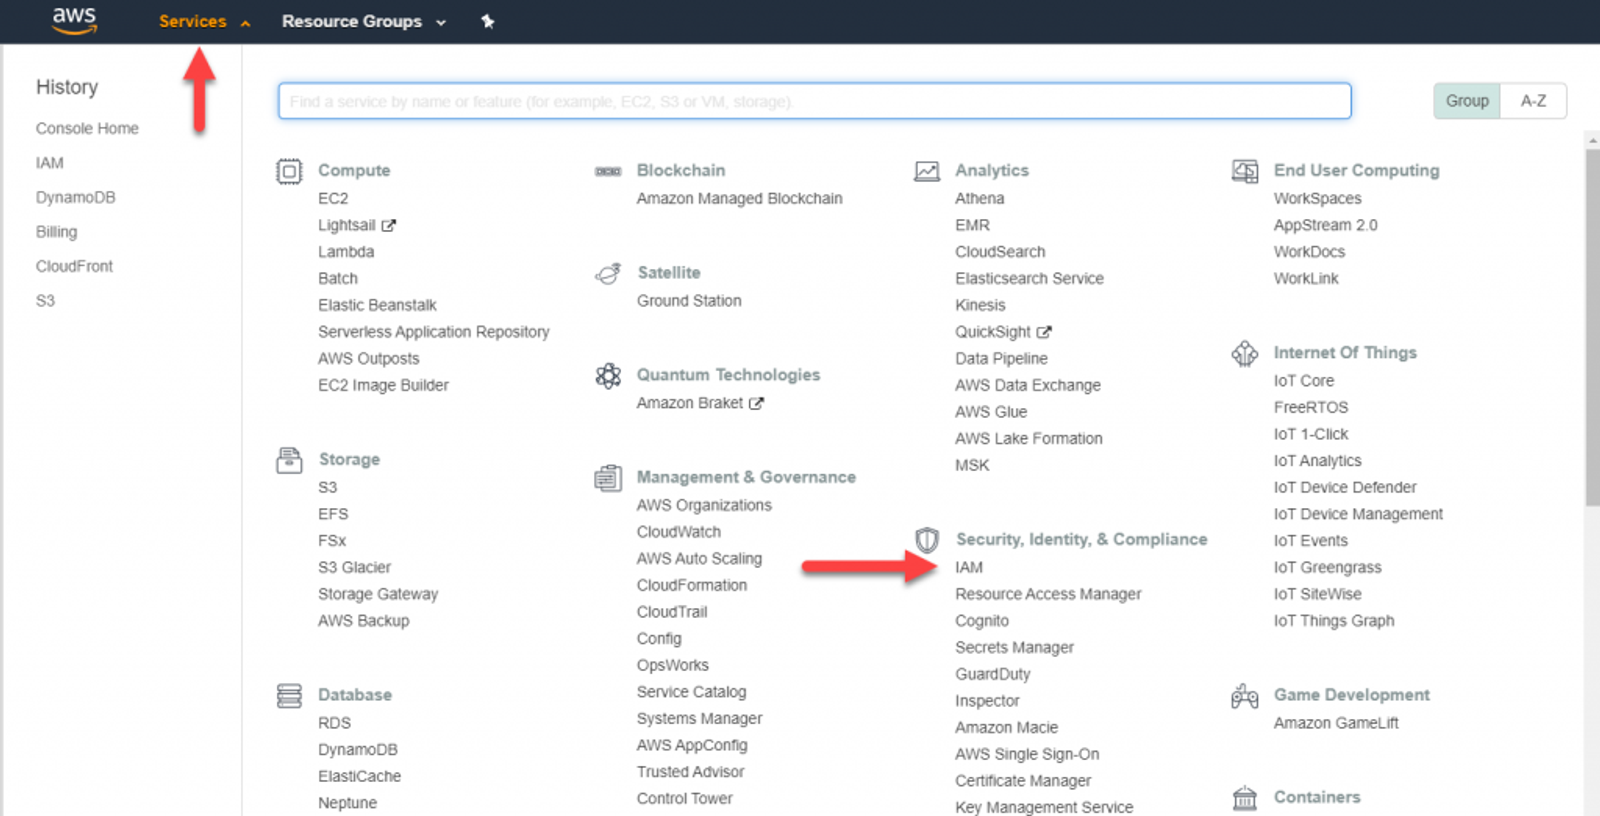
Now we need to setup an account we can use to connect to our DynamoDB Table. AWS technically doesn’t have a ‘Service Account’ (they are just standard user accounts) but I’ll be using the term since the account is ONLY going to be used to access our table we created. From the AWS console, drop down Service & select IAM under Security, Identity, & Compliance.
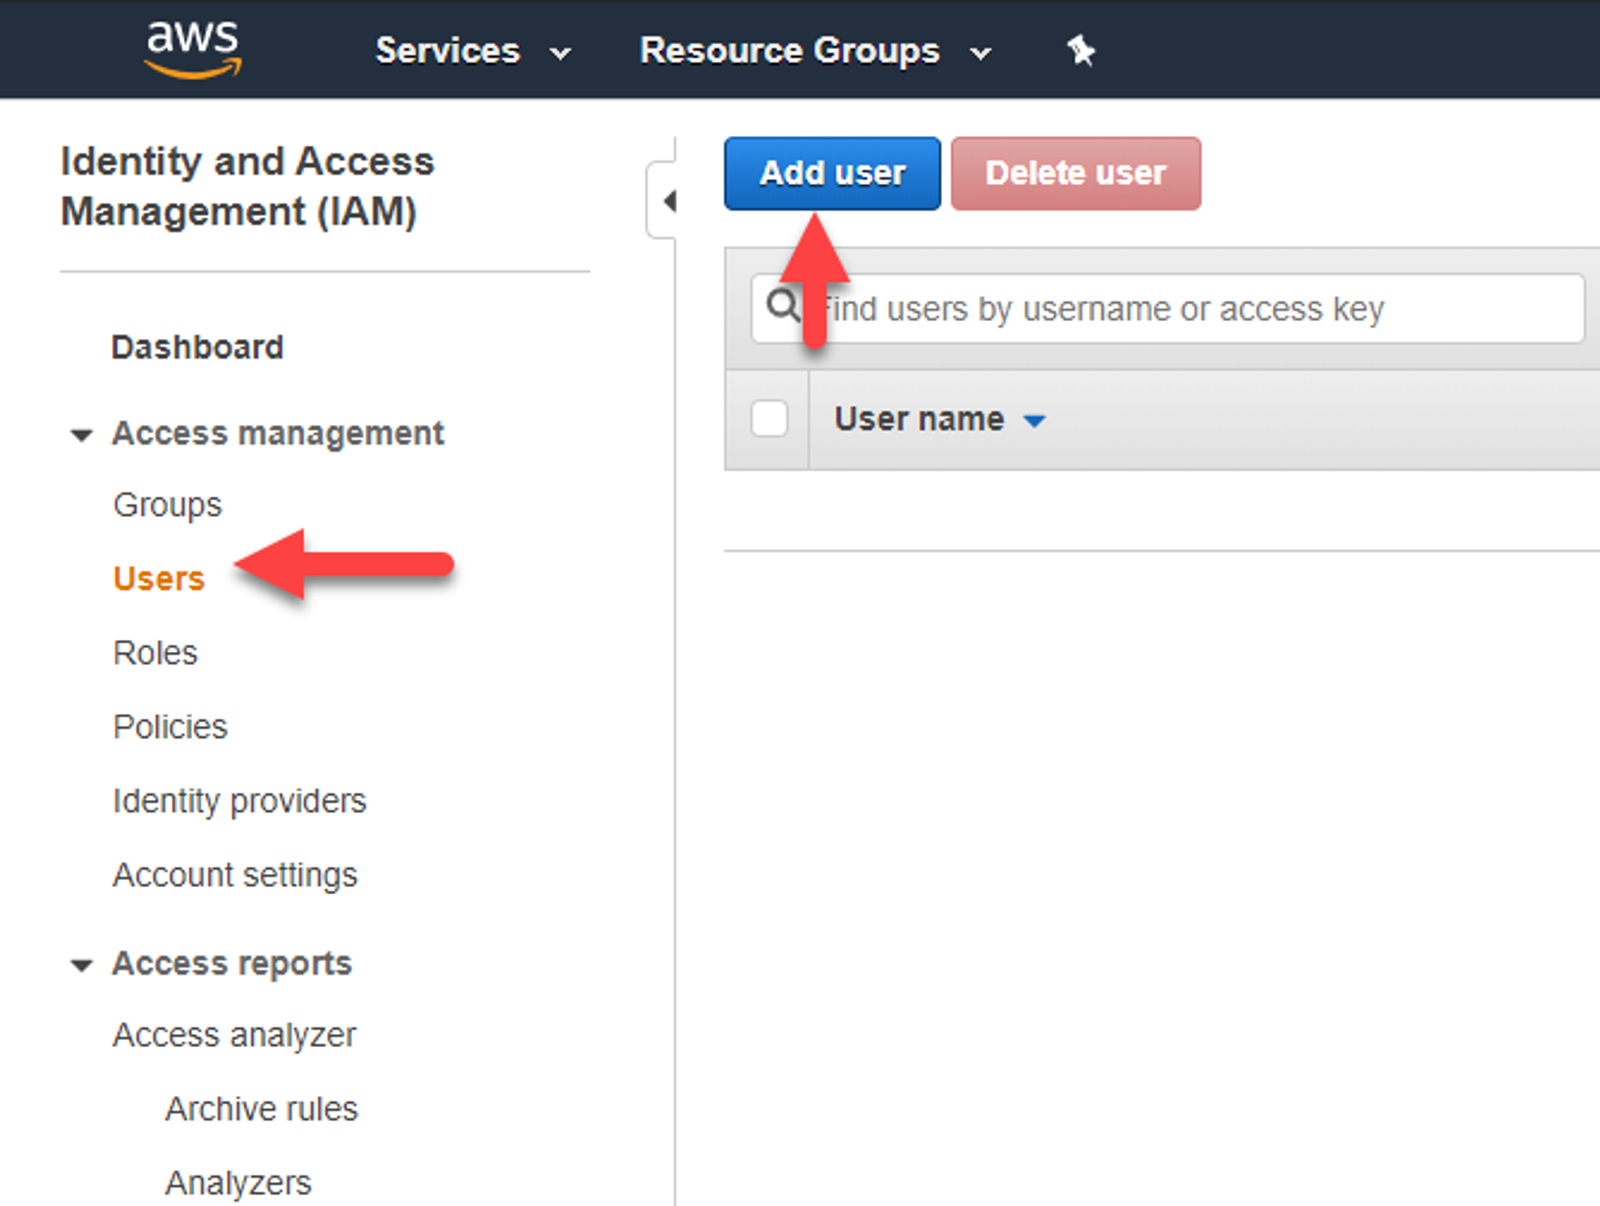
Select Users from the sidebar and then Add User. In the next screen, give your user a name. I used ‘nodejsApiSvc’ in this example. Make sure you check Programmatic access & leave AWS Management Console access unchecked. Click Next:Permissions.


It’s generally best practice to assign permissions to a group and add users to those groups so they receive the proper permissions. HOWEVER, since this isn’t a standard user, I’m going to assign the policy directly to the user. So click on Attach existing policies directly and then Create policy.
Under Service, search for DyanmoDB and select it. In the Actions section, check all boxes under the Access Level. We’re going to give our bot full permissions to the table we just created. Finally, we’ll need to specify the resource (which is our table) we want this policy to access.

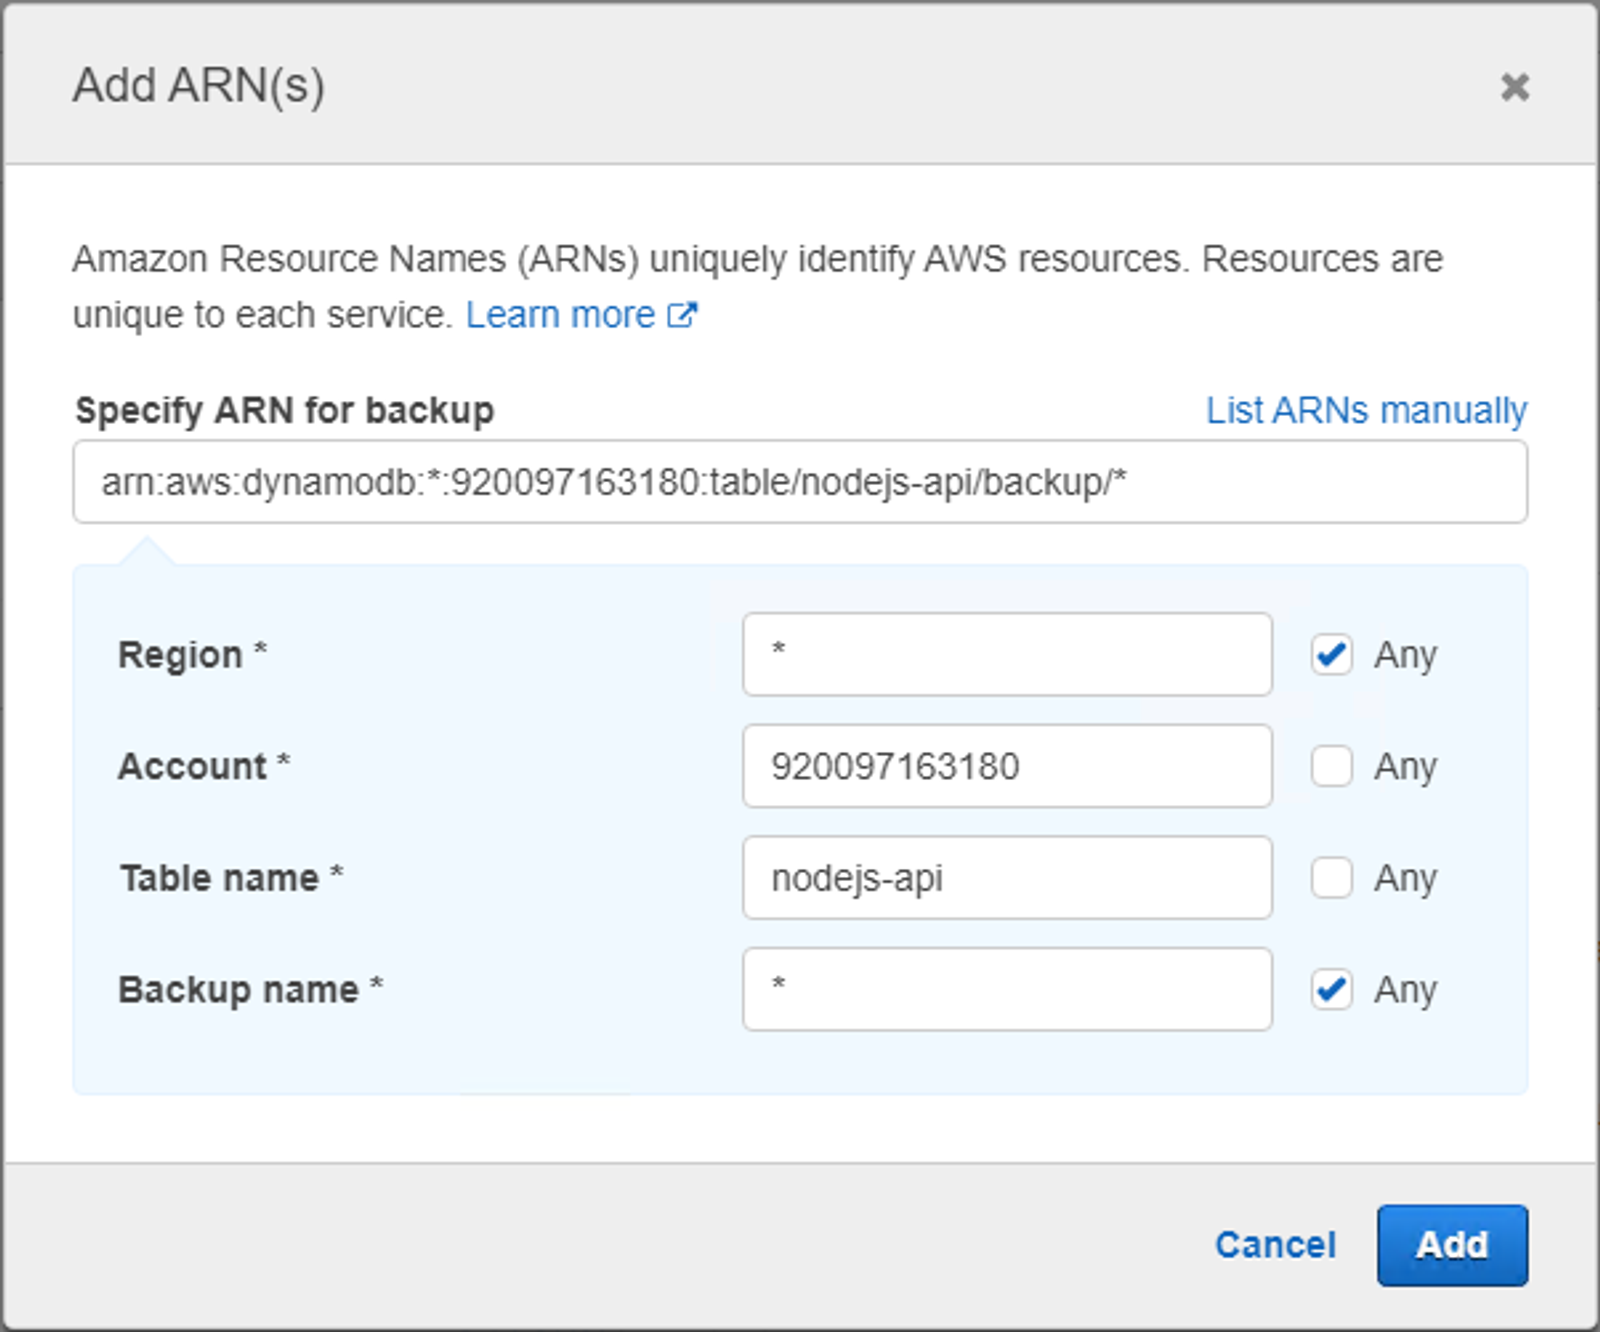
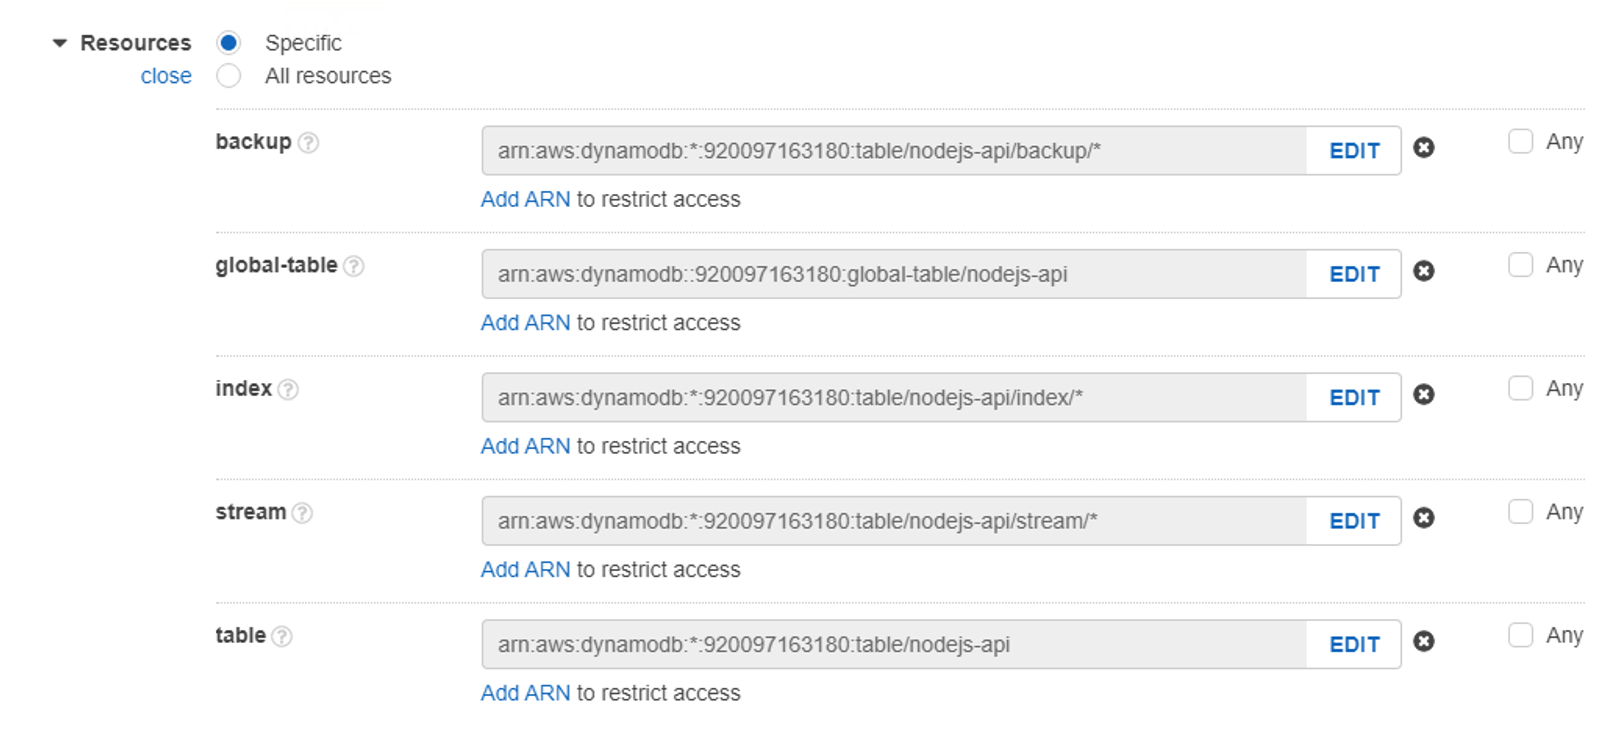
For each of the 5 items listed under Resources, click on Add ARN and populate the table name with the name of the DynamoDB table you created earlier, leave the account number as is, and set the other fields to ‘*’. Your resources should look something like this, albeit with a different account number.
Once finished, click Review Policy, then give your policy a name.
Quick Tip: Naming custom IAM policies in AWS with an underscore (_) in the beginning will bring them to the top of the list 😉
I’ll name mine `_nodejsApiPolicy`. Add a description if desired and click Create policy. Once completed, you can close this tab and head back to the tab we were using to create the user. Click the refresh button on screen to refresh the policies and select the newly created policy. Then click Next: Tags.

I’m going to tag this user just as I did the DynamoDB table.

Click Next: Review, then Create user. Once the user is created, copy the Access key ID and Secret access key for the user into another file. NOTE: You cannot get these values again, so make sure to take them down now otherwise you’ll need to create another set of keys. Once done, go ahead and click Close.
Setting up your API
Now we need to setup our API to connect to DynamoDB. I’m going to start by installing two packages into our project;
- `dotenv` – Used to work with environment variables, which we’ll use to store our keys for debugging
- `aws-sdk` – Used to talk to AWS
Install them both by opening a terminal and issuing the command `npm install dotenv aws-sdk`. Once thats done, create a new file called .env. Add the service account keys into the file like so.
AWS_ACCESS_KEY_ID = "your_key"
AWS_SECRET_ACCESS_KEY = "your_key_secret"
AWS_DEFAULT_REGION = "us-east-1"
Next, add the following line into your index.js file to import the .env variables into your application. After this, any of the variables can be accessed throughout your application by using process.env.MY_DOTENV_KEY.
require('dotenv').config();Finally, if you have your project setup in a git repository (which you should), add .env into your .gitignore file so it doesn’t save with the repository.
Storing Data
Now lets update our POST /books method handler to send our data into DynamoDB instead of into the in memory array we did last time. First, add the following code towards the top of your files, after your require statements.
const AWS = require('aws-sdk');
// Update our AWS Connection Details
AWS.config.update({
  region: process.env.AWS_DEFAULT_REGION,
  accessKeyId: process.env.AWS_ACCESS_KEY_ID,
  secretAccessKey: process.env.AWS_SECRET_ACCESS_KEY
})
// Create the service used to connect to DynamoDB
const docClient = new AWS.DynamoDB.DocumentClient();
Then, update your POST handler to be like the following snippet. Note the comments which explain what each of the lines are doing.
// Define a post method which will be used to accept data into the API
router.post('/', async (req, res) => {
  // Setup the parameters required to save to Dynamo
  const params = {
    TableName: 'nodejs-api',
    Item: {
      // Use Date.now().toString() just to generate a unique value
      id: Date.now().toString(),
      // `info` is used to save the actual data
      info: req.body
    }
  };

  docClient.put(params, (error) => {
    if (!error) {
      // Send a status of 201, which means an item was created
      res.status(201).send();
    } else {
      // If there was an error, send a 500 (Internal Server Error) along with the error
      res.status(500).send('Unable to save record, err' + error);
    }
  });
});
Now lets test with Postman.
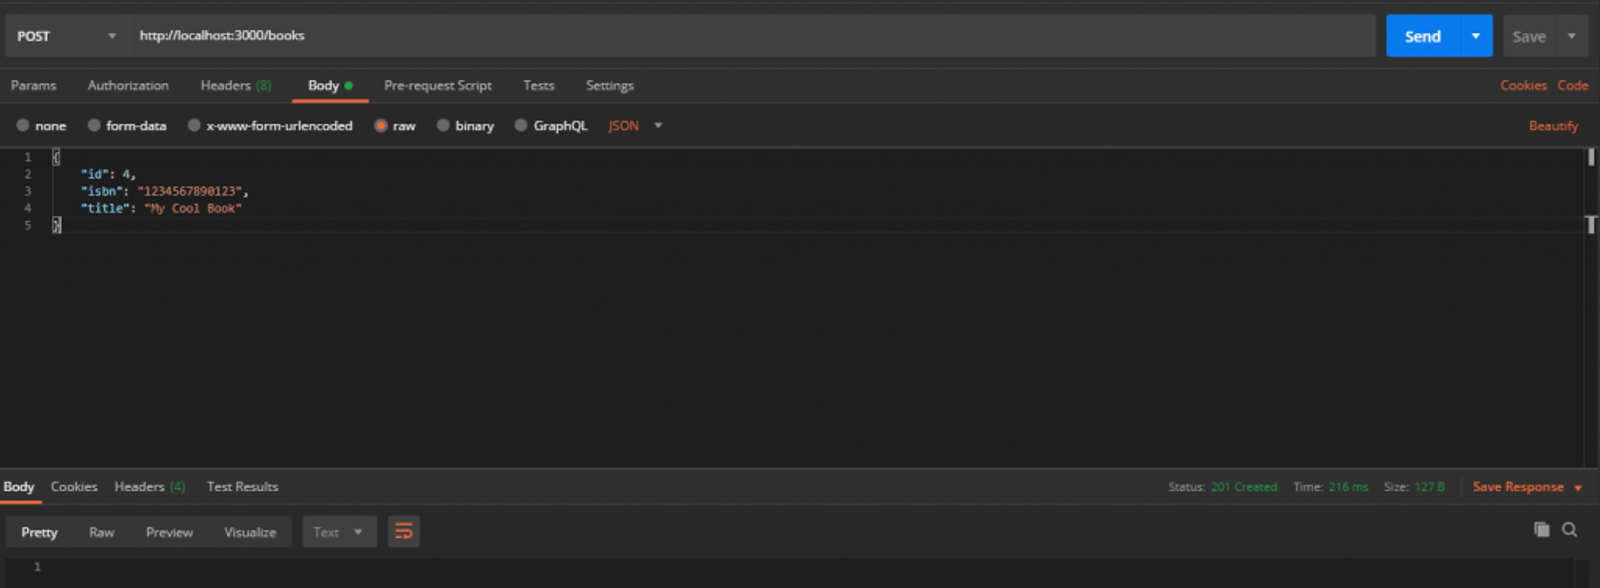
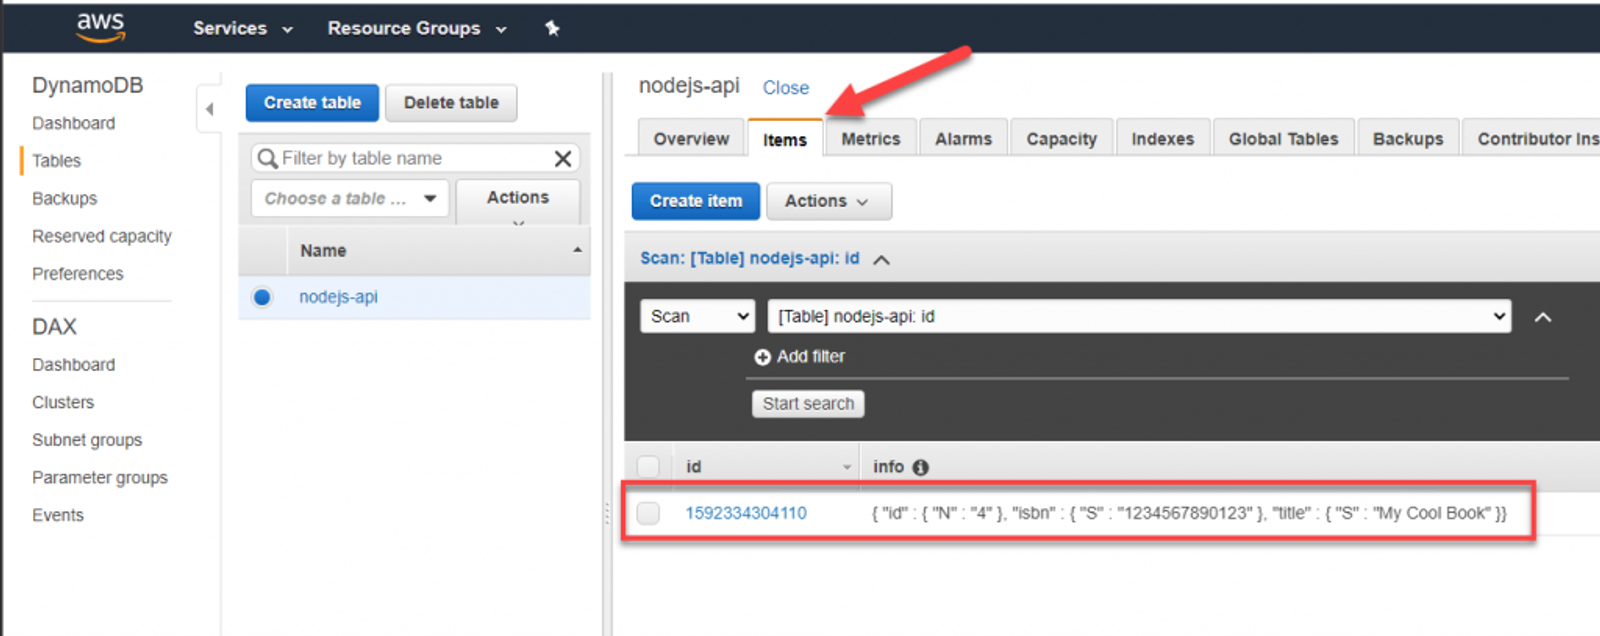
Provided you got a 200 response, lets head back into AWS and check to see that the data we sent made it there. You can see your items by going to DynamoDB, selecting the table you created, and clicking the Items tab.
Great! Now that we have some data in AWS. Let’s update our GET /books method handler to query the data from AWS instead of our in memory data.
router.get('/:id?', async (req, res) => {
  // Placing the params here since we may add filters to it
  const params = {
    TableName: 'nodejs-api'
  };

  let responseData;

  // Setup any filters that come in
  if (req.params.id) {
    // params.Key is used to filter based on the primary key of the table
    params.Key = {
      id: req.params.id
    }
  } else {
    if (req.query.id) {
      params.Key = {
        id: req.query.id
      }
    }
  }

  if (!params.Key) {
    // If there are no params, scan the table and return all records
    responseData = await docClient.scan(params).promise()
  } else {
    // Otherwise use the filted version, which is less costly
    responseData = await docClient.get(params).promise()
  }

  // Finally, return the data
  res.json(responseData)
});
Note: While this article covers the general concepts of connecting with and using DynamoDB, I would warn against using a scan operation unless absolutely necessary. Scans return every record in the database, which can become costly if your database grows in size. To learn more, here is a link to the official documentation from AWS: https://docs.aws.amazon.com/amazondynamodb/latest/developerguide/Introduction.html
Again, lets test with Postman. For the sake of showing the filtering working. I added a couple more books using the POST command from earlier.
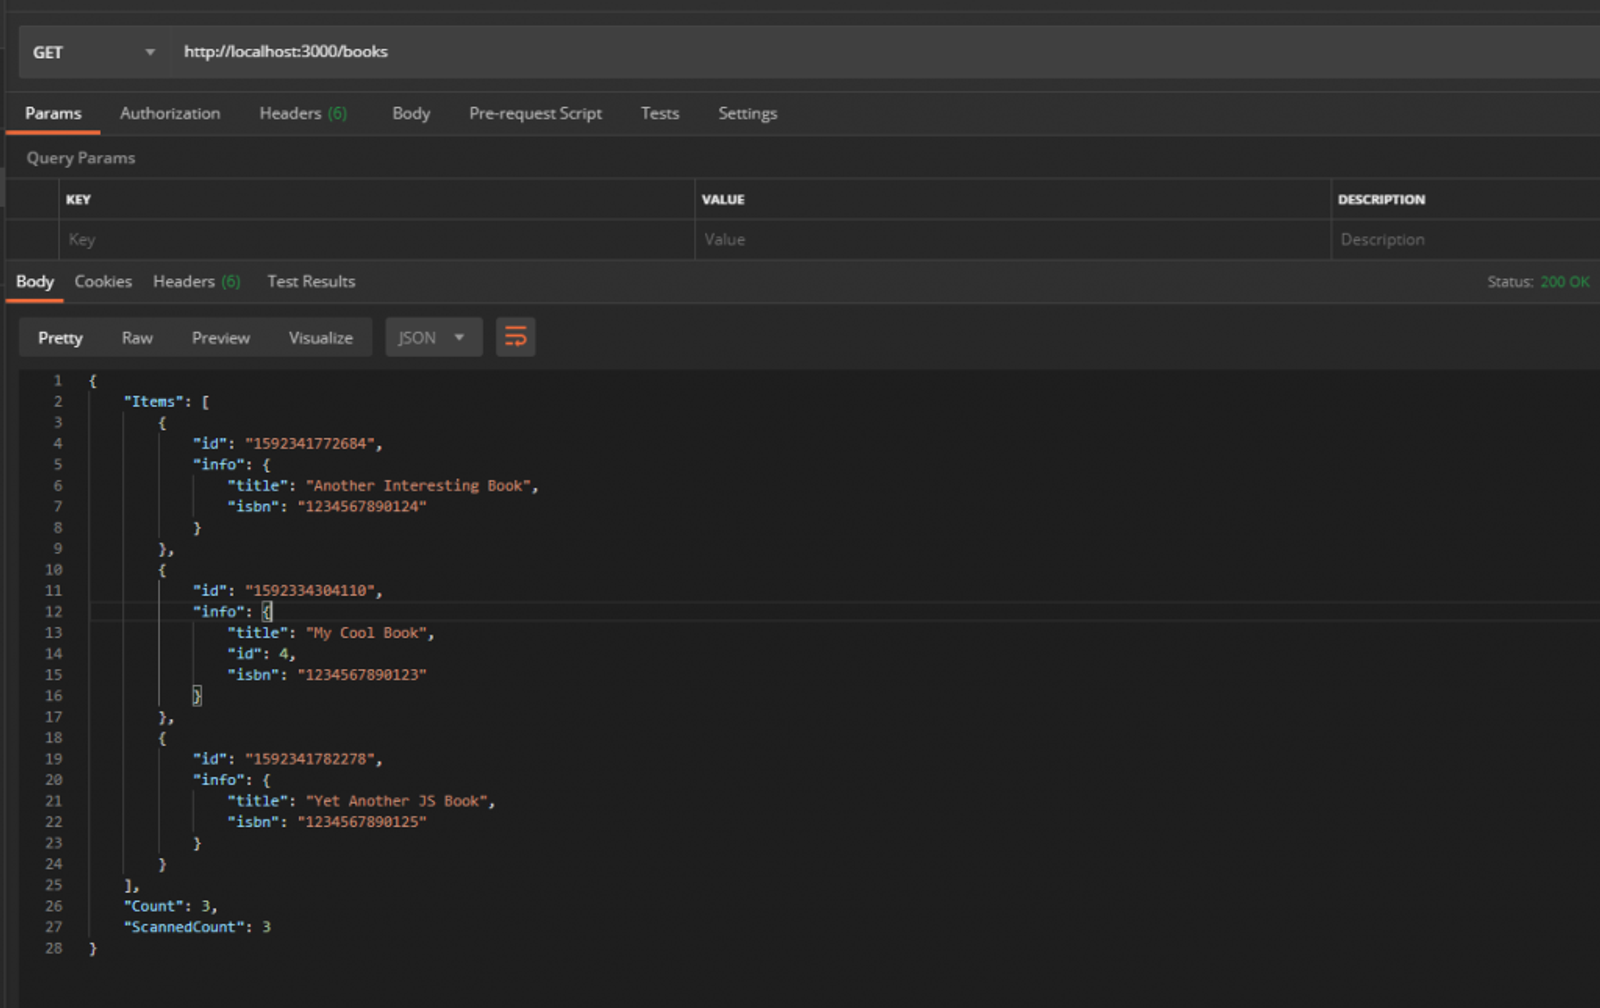
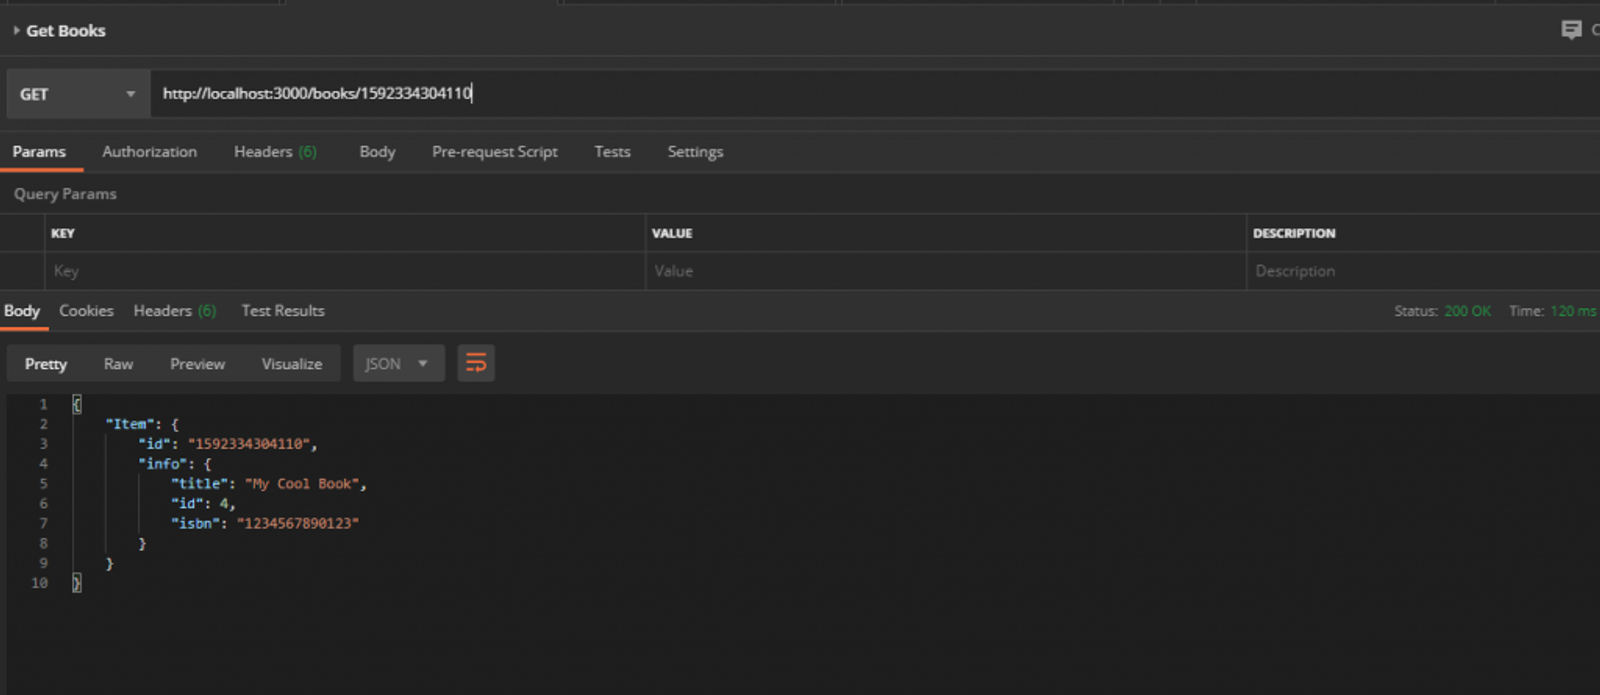
Awesome! Now any time we send data to our API, it will persist regardless of how many times we stop and start it. My next article will cover request validation for data coming into our books API.