Over the course of the series, we’ve focused on creating a well designed and robust API with features like reading & writing to a database, validating data input, and authentication. But our API does no good running on our computer. We’re going to change that today by deploying our code into AWS using Elastic Beanstalk.
Elastic Beanstalk (EB for short) provides a streamlined way for you to simply upload a copy of your code and let AWS handle the heavy lifting when it comes to provisioning resources and keeping your code running.
Preparing our Code
Before we can deploy to EB, we need to add another NPM script. EB will call `npm start` to start the API. Update your packages.json‘s script section to look like this.
"scripts": {
    "start": "node index.js",
    "dev": "nodemon index.js"
  },
Next, use an archive tool to zip up your folder for EB. Make sure that all your files are at the root of the archive. A common mistake is to zip the folder, which will place a nested folder in your archive. EB won’t know what to do with that.
Setup Elastic Beanstalk
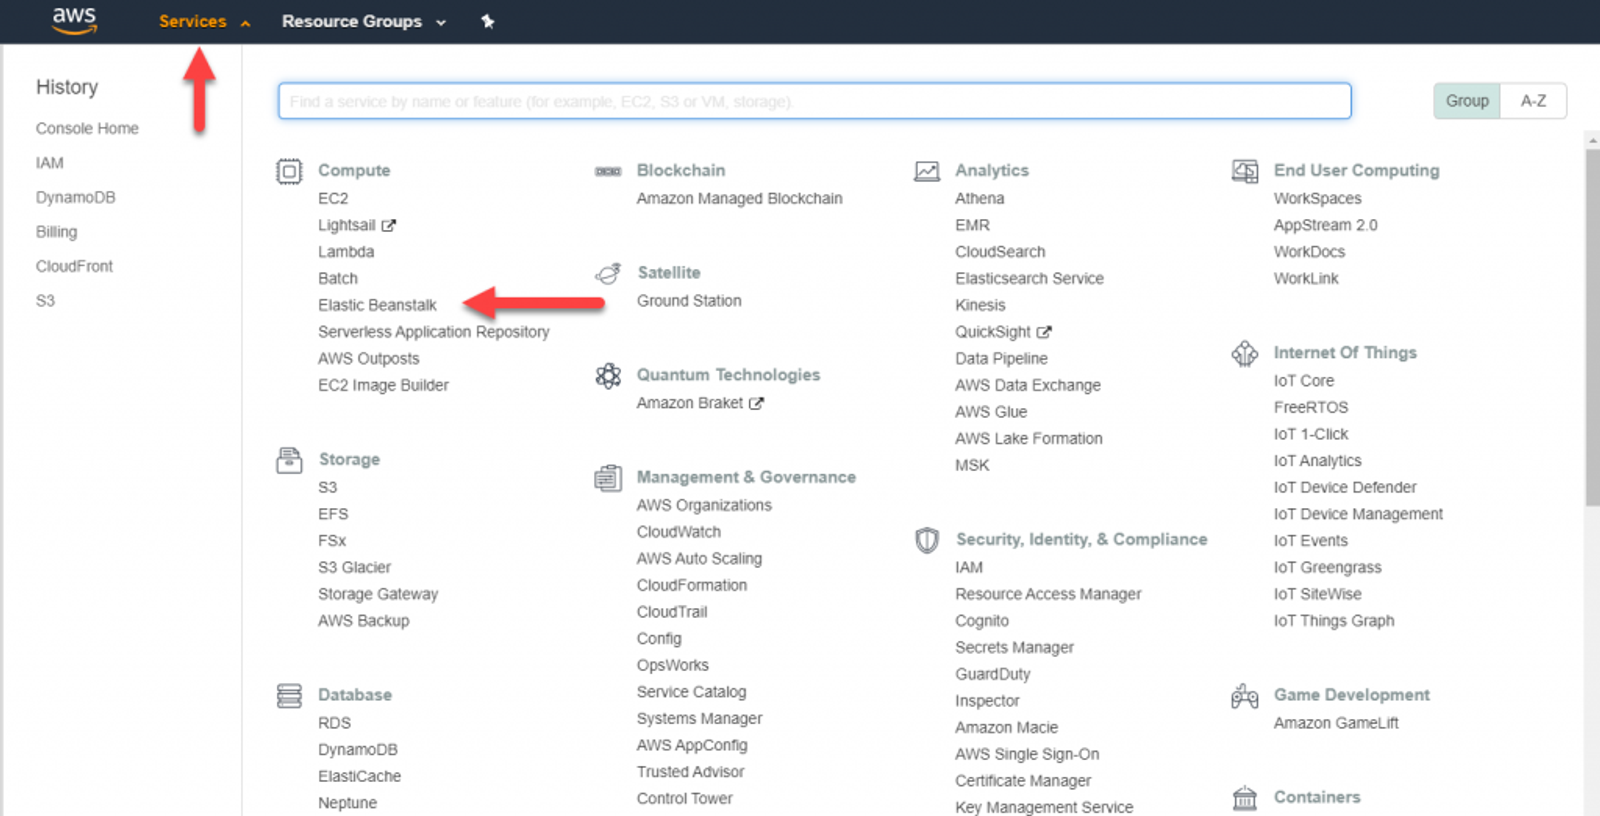
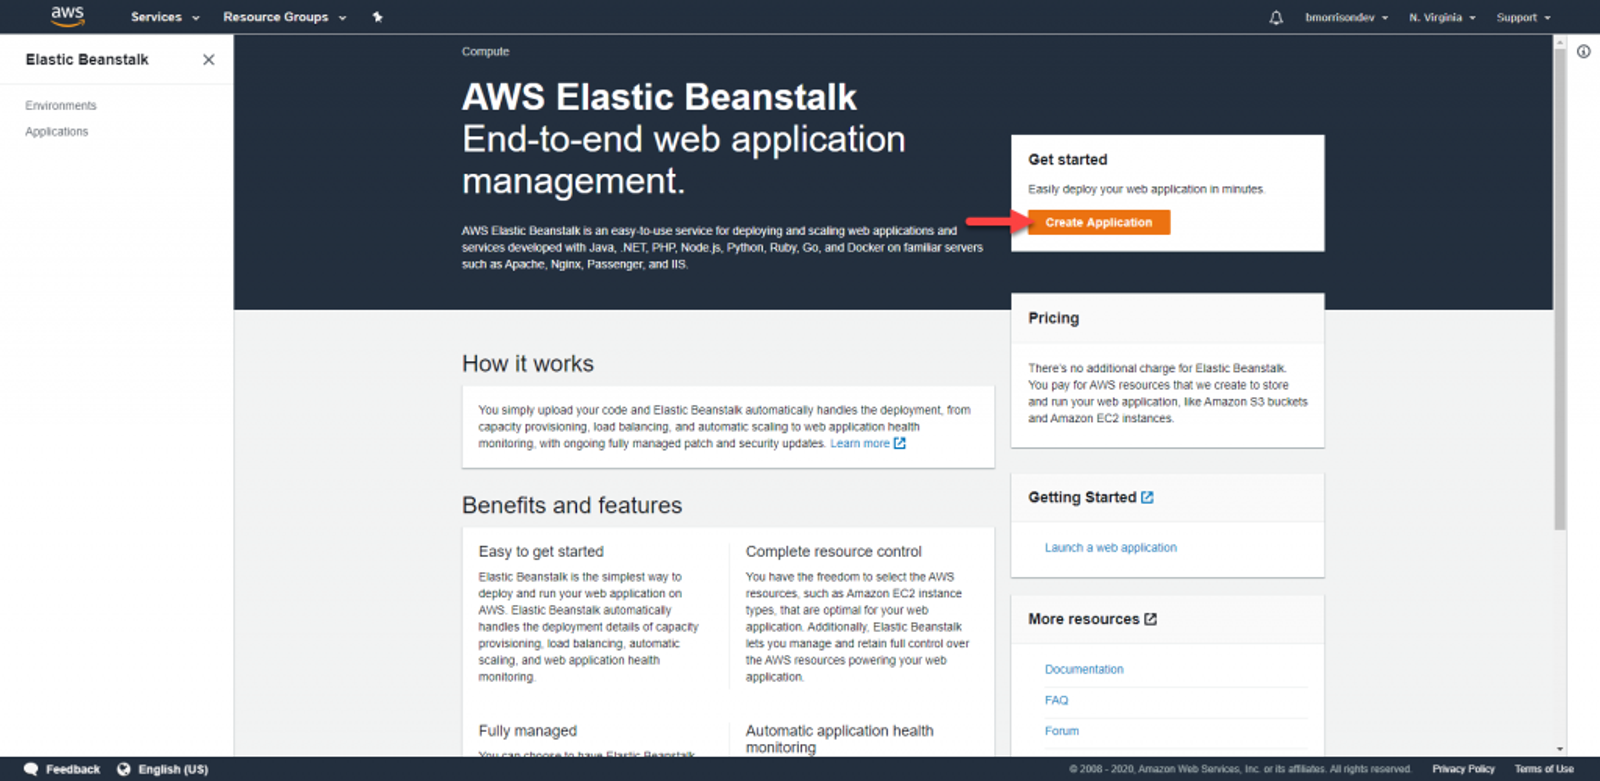
From the AWS Console, click on Services, then Elastic Beanstalk under Compute. Once there, click on Create Application.
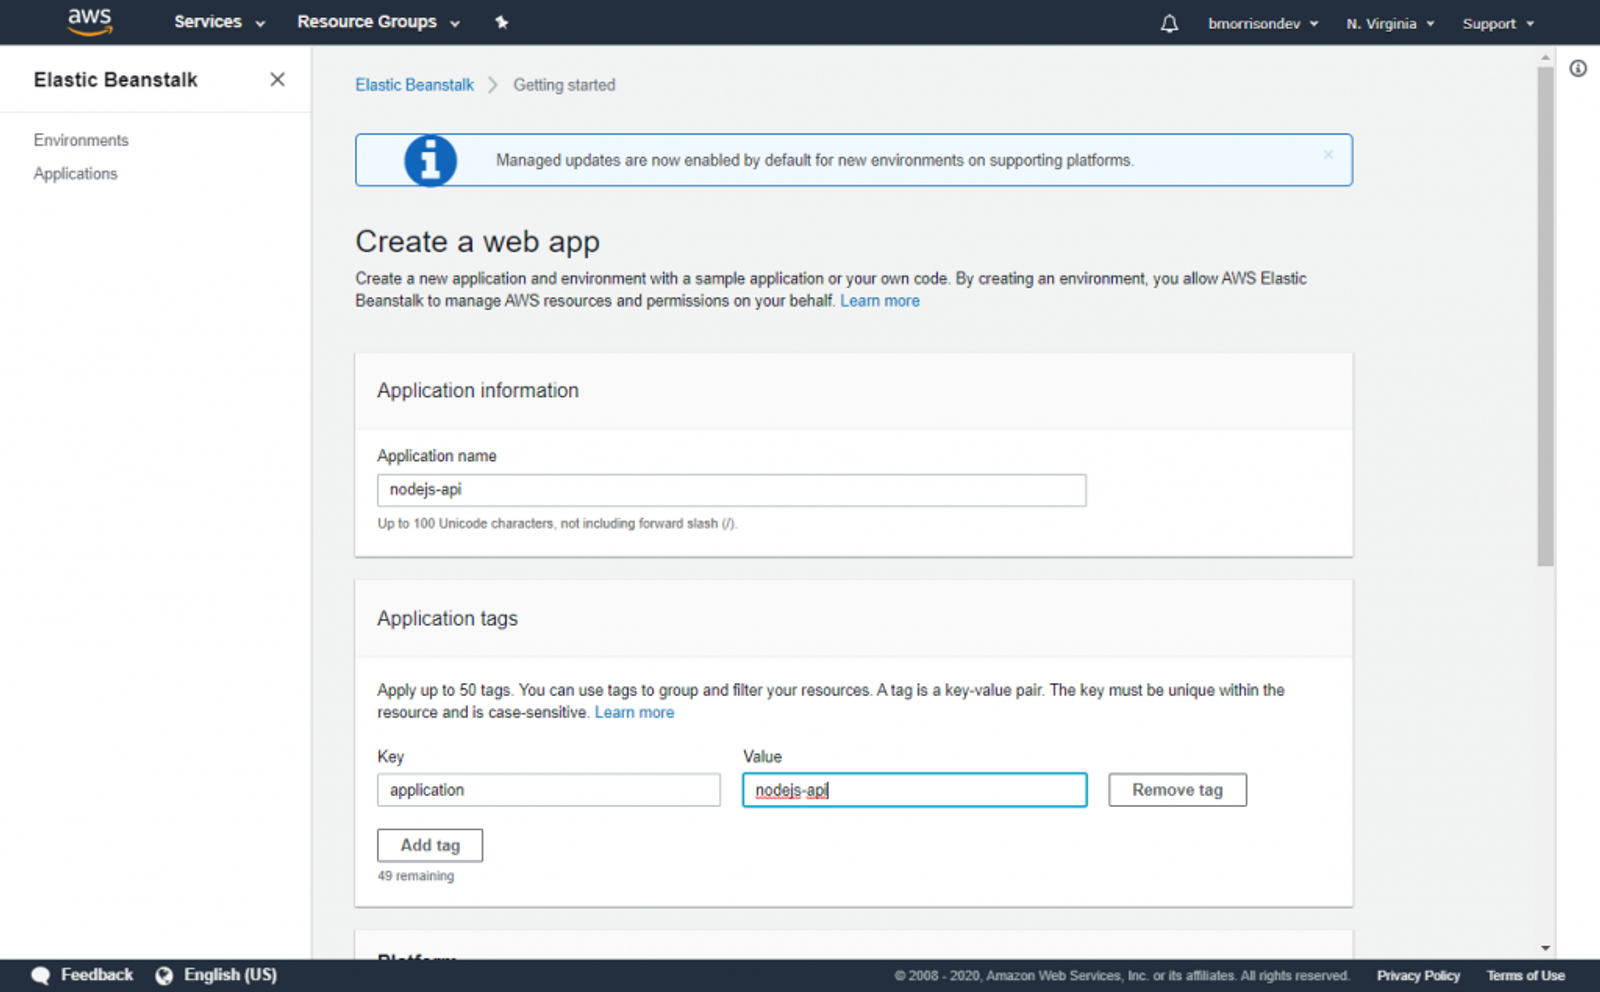
I’ll be naming the application ‘nodejs-api’ and giving it the ‘application’ tag of ‘nodejs-api’ just to keep things organized.
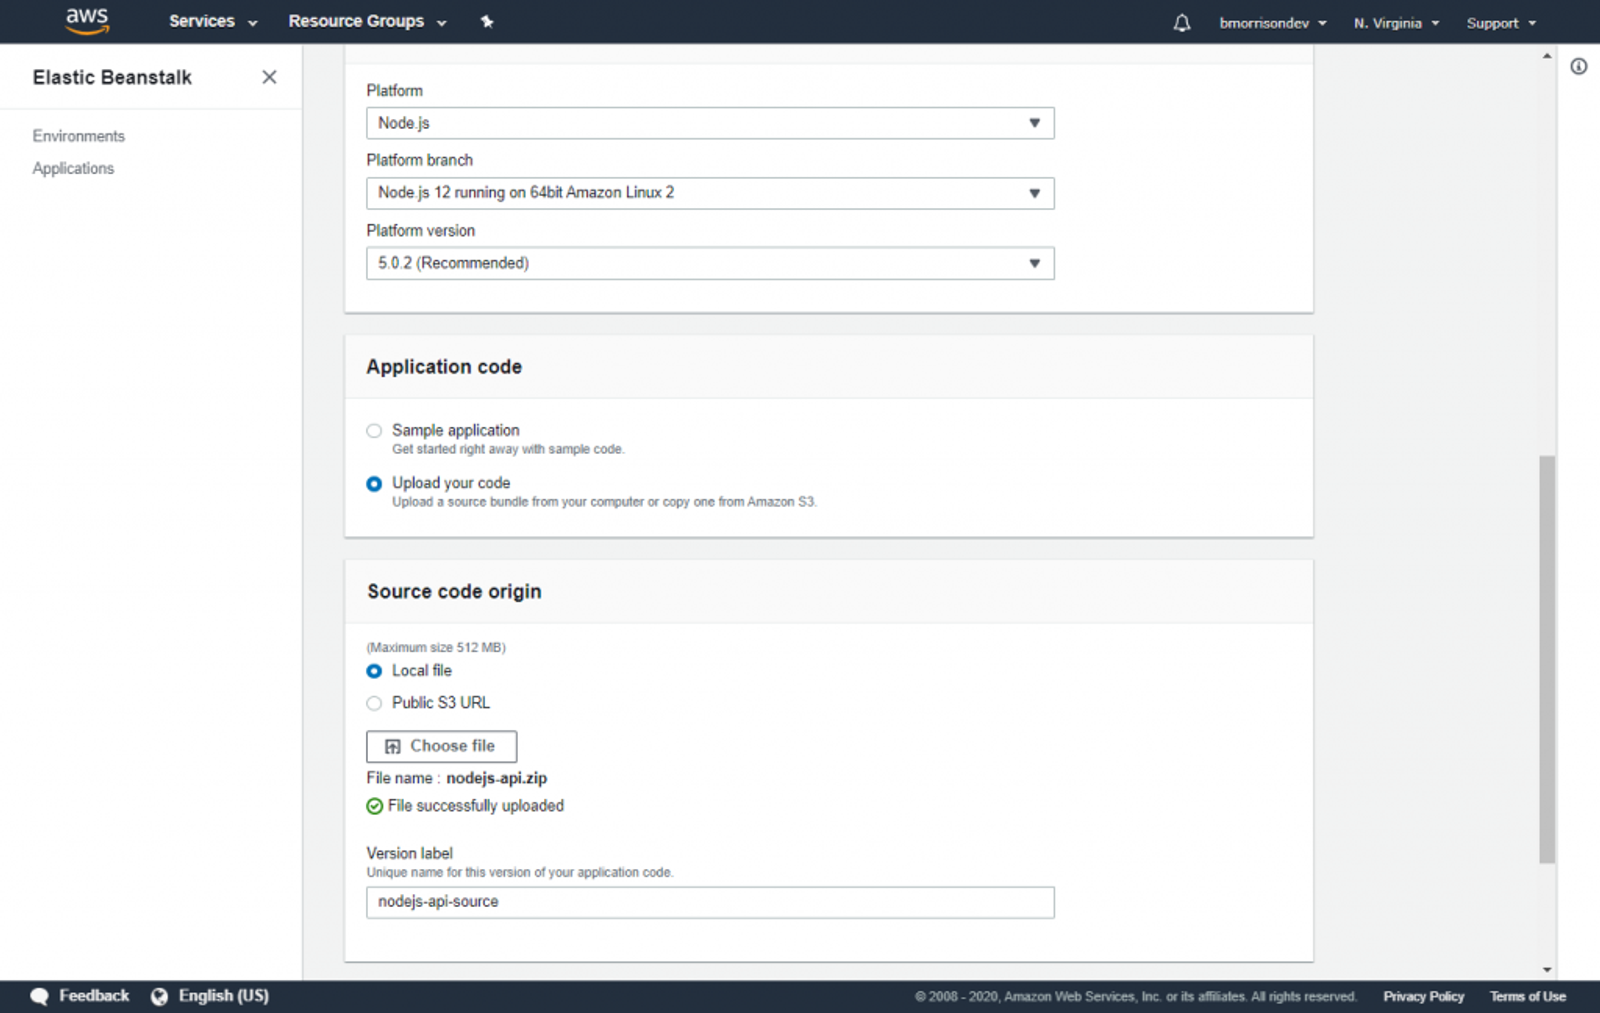
Under Platform. Select Node.js, you can Platform branch and version as their defaults. Under Application code, select Upload your code. In the Source code origin section, you’ll need to upload the zipped copy of your code. The version label can be left as is for now.
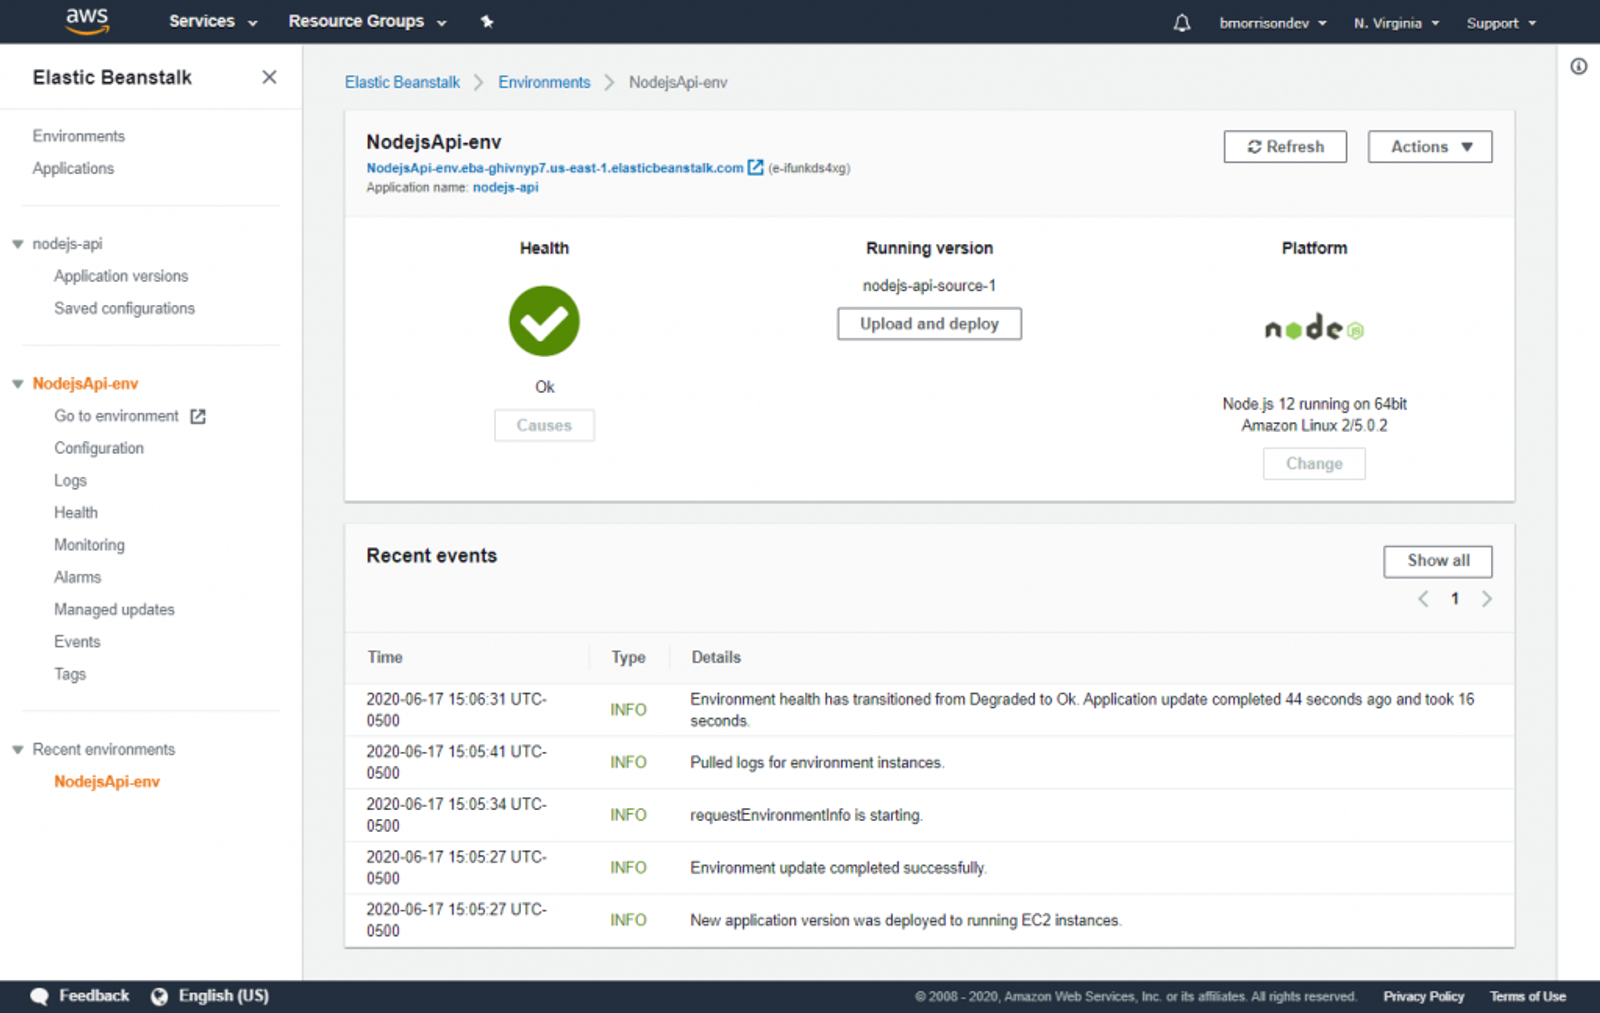
Once done, click Create application. You’ll then be taken to a screen where you can monitor the deployment. After that, if all succeeded, you’ll be presented with a screen like this to show the status of your application.
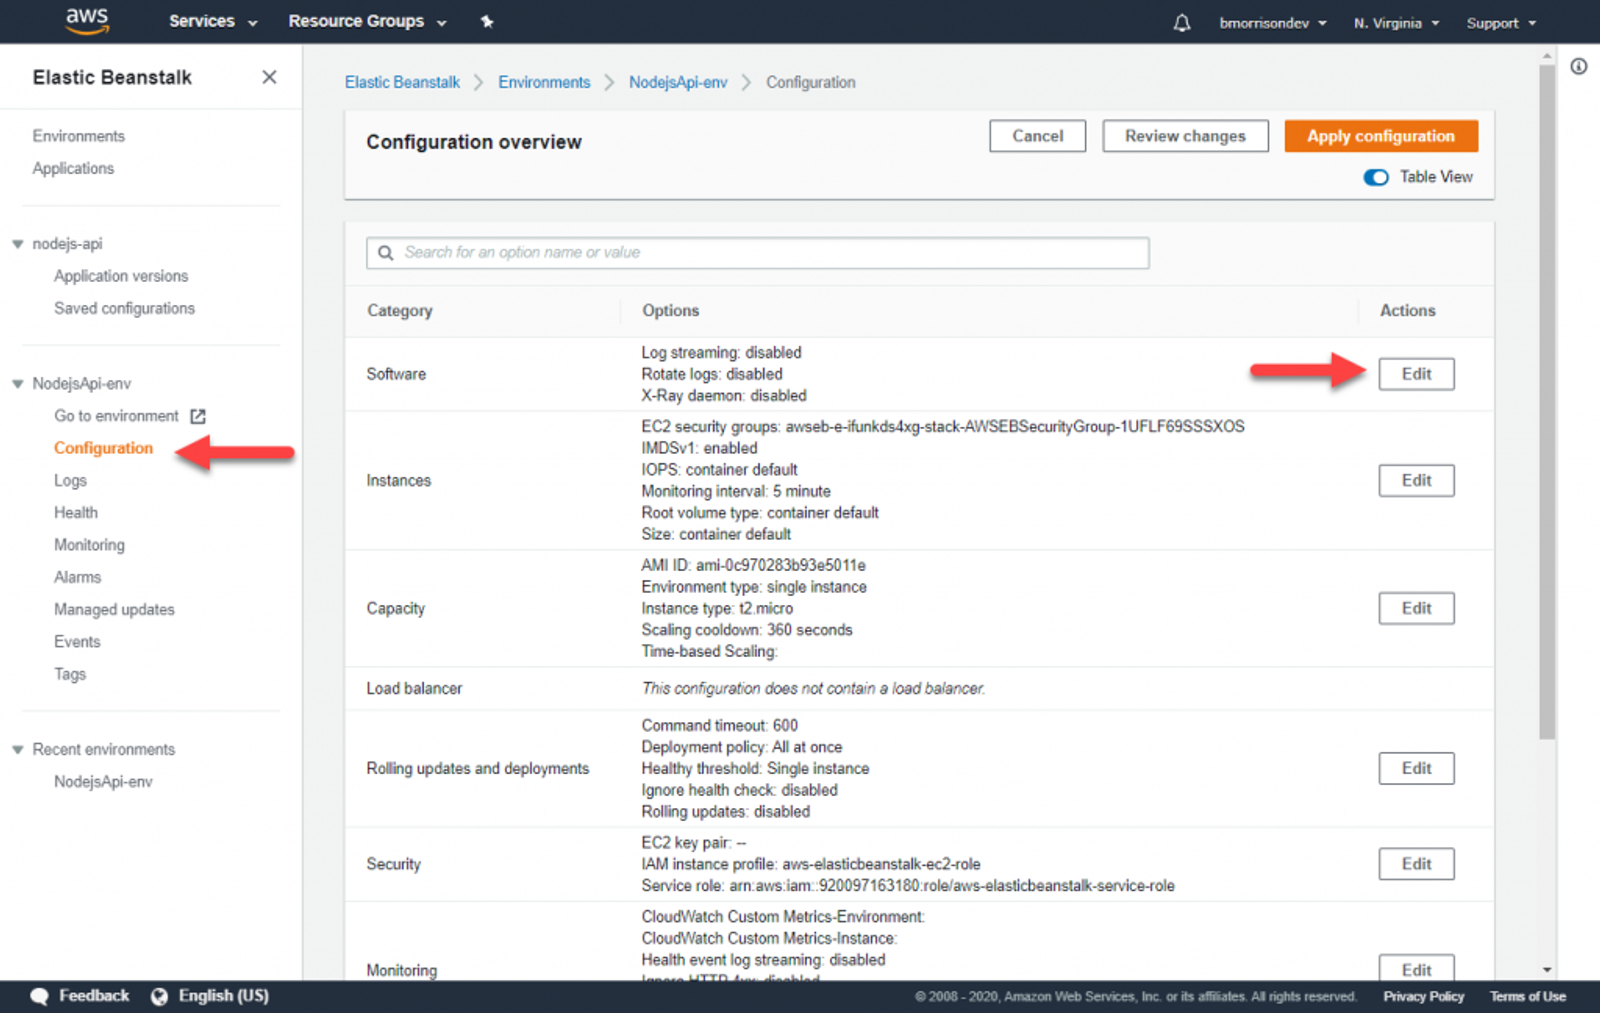
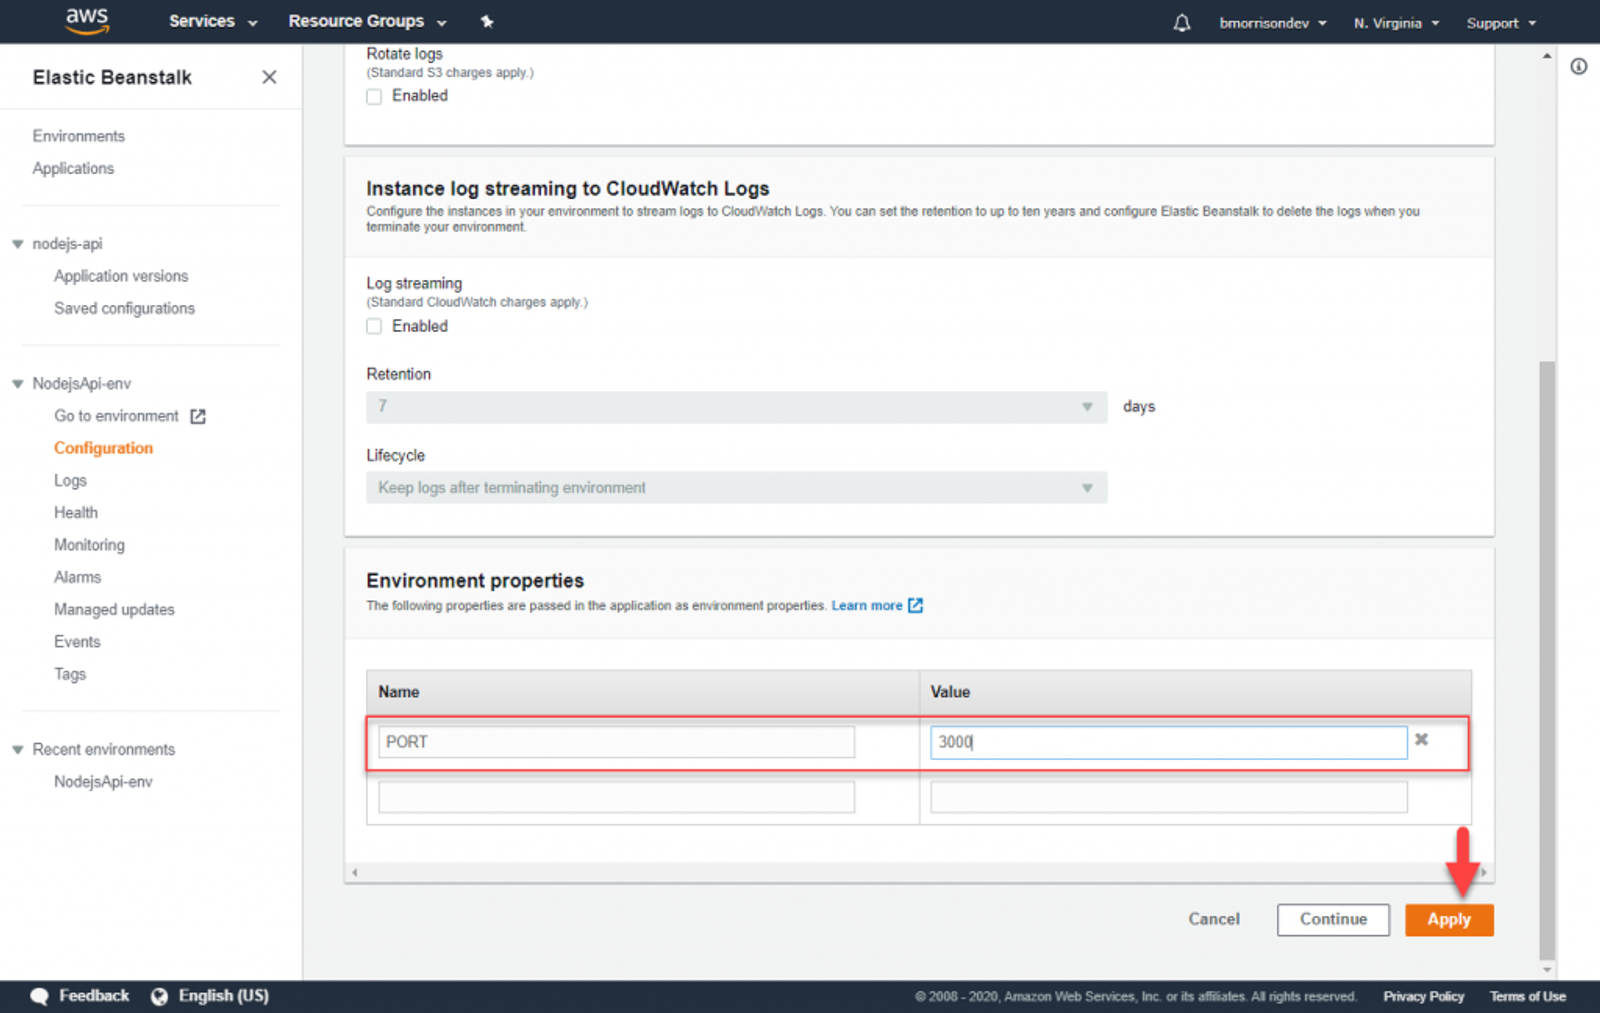
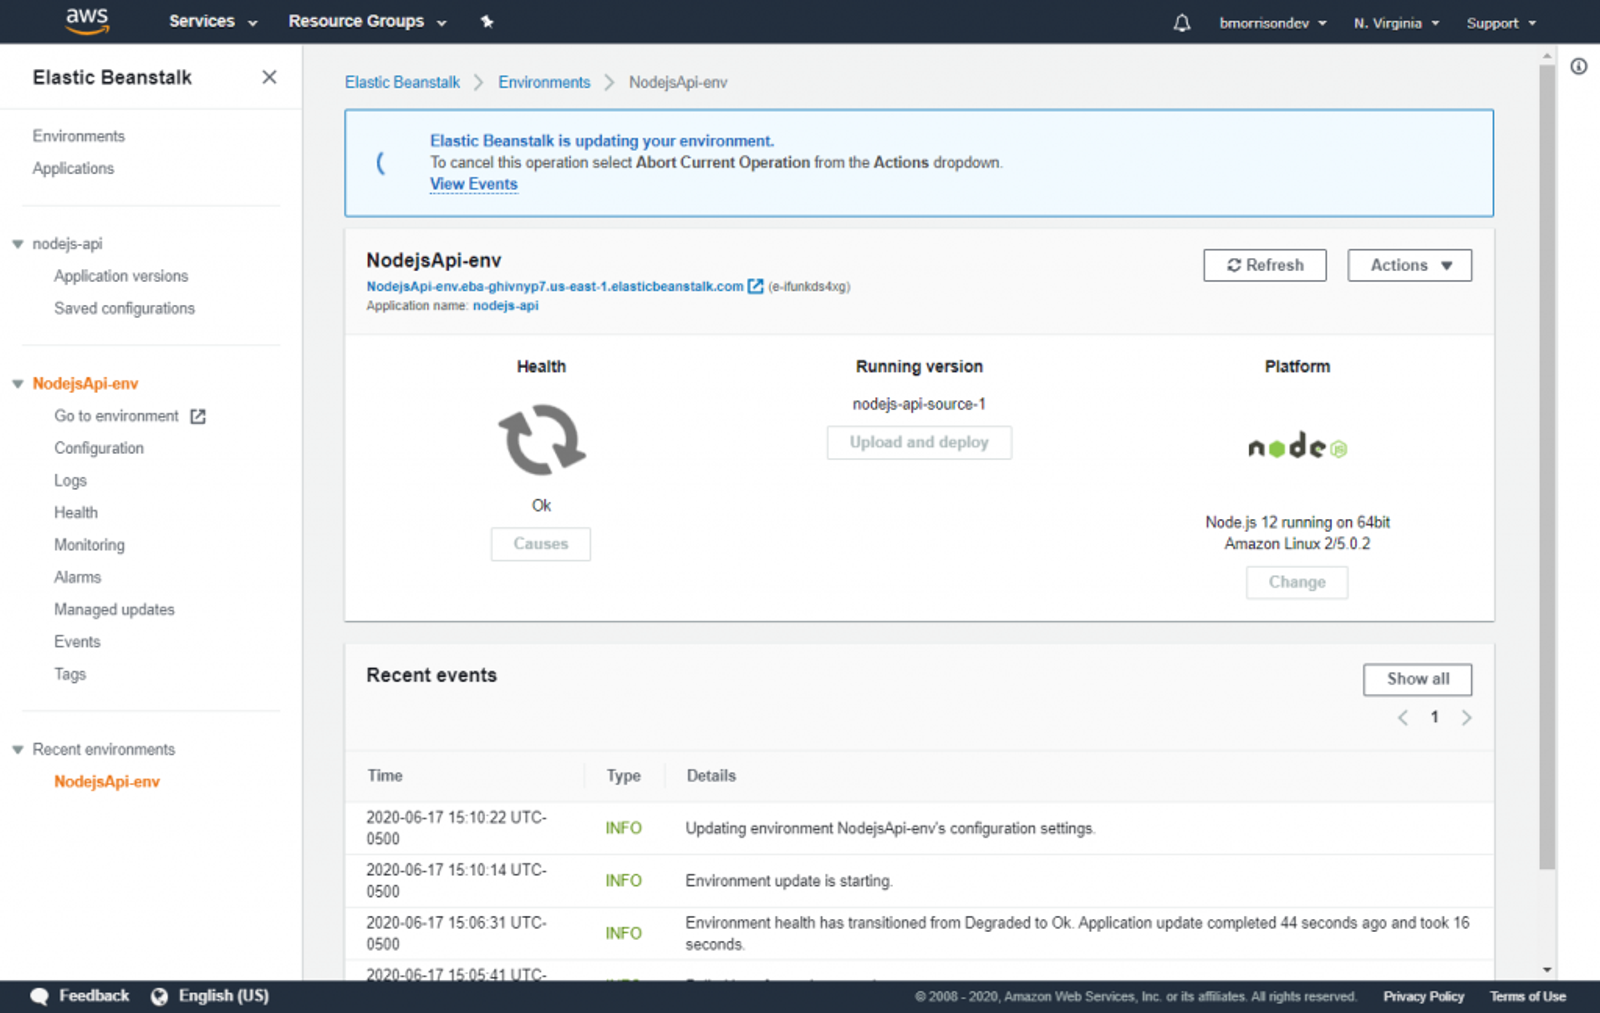
We need to tweak one setting here. By default, EB spins up a VM (called an EC2 instance in AWS) with an Nginx reverse proxy forwarding traffic from port 80 to 8080. Since the API we built is running on port 3000, we need to tell EB to look at that port instead of 8080. Go into Configuration, then Edit under Software. From there, scroll to the bottom and add an Environment Property of PORT with a value of 3000. Click Apply and EB will reload your instance with the new settings.
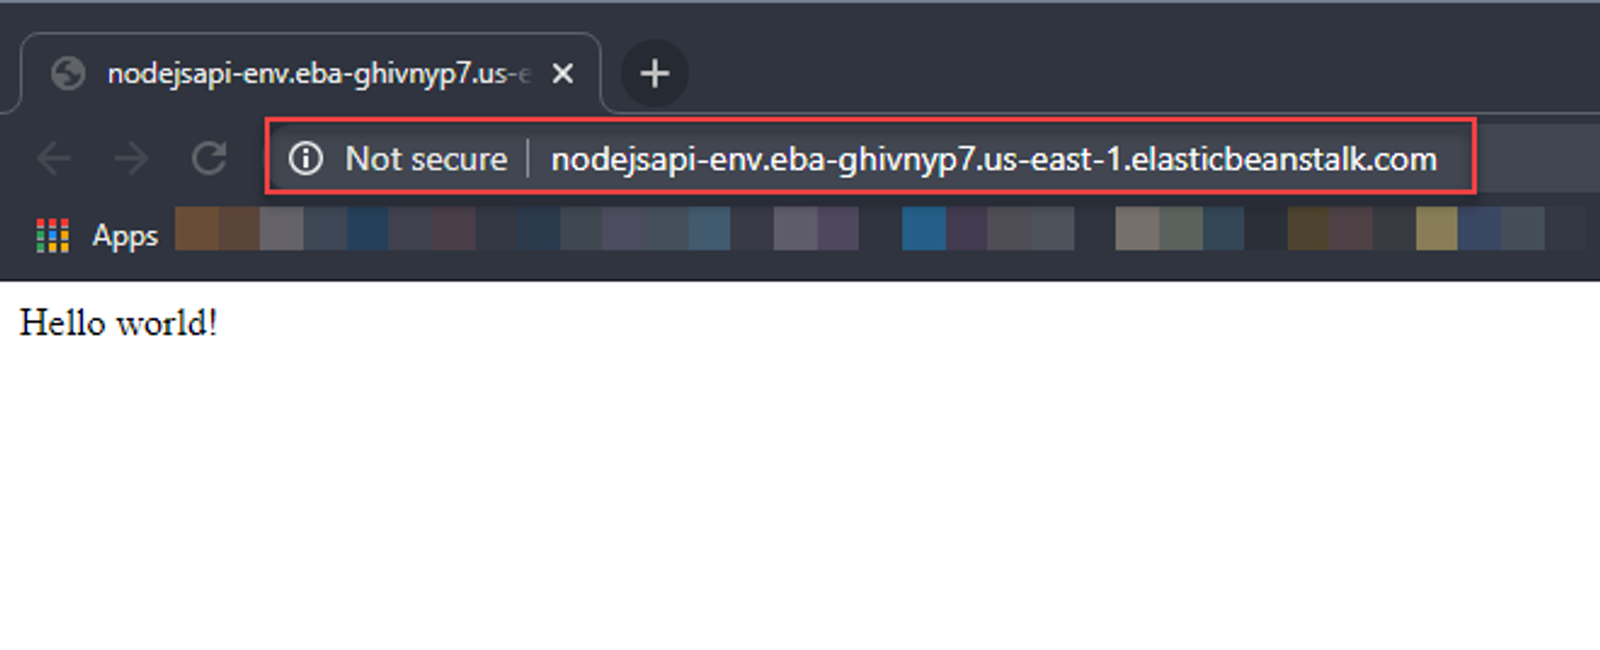
Once finished, click Go to environment on the left. You should see your Hello World! message. Grab the URL from the address bar as that’s the URL for your API in AWS.
Testing with Postman Environments
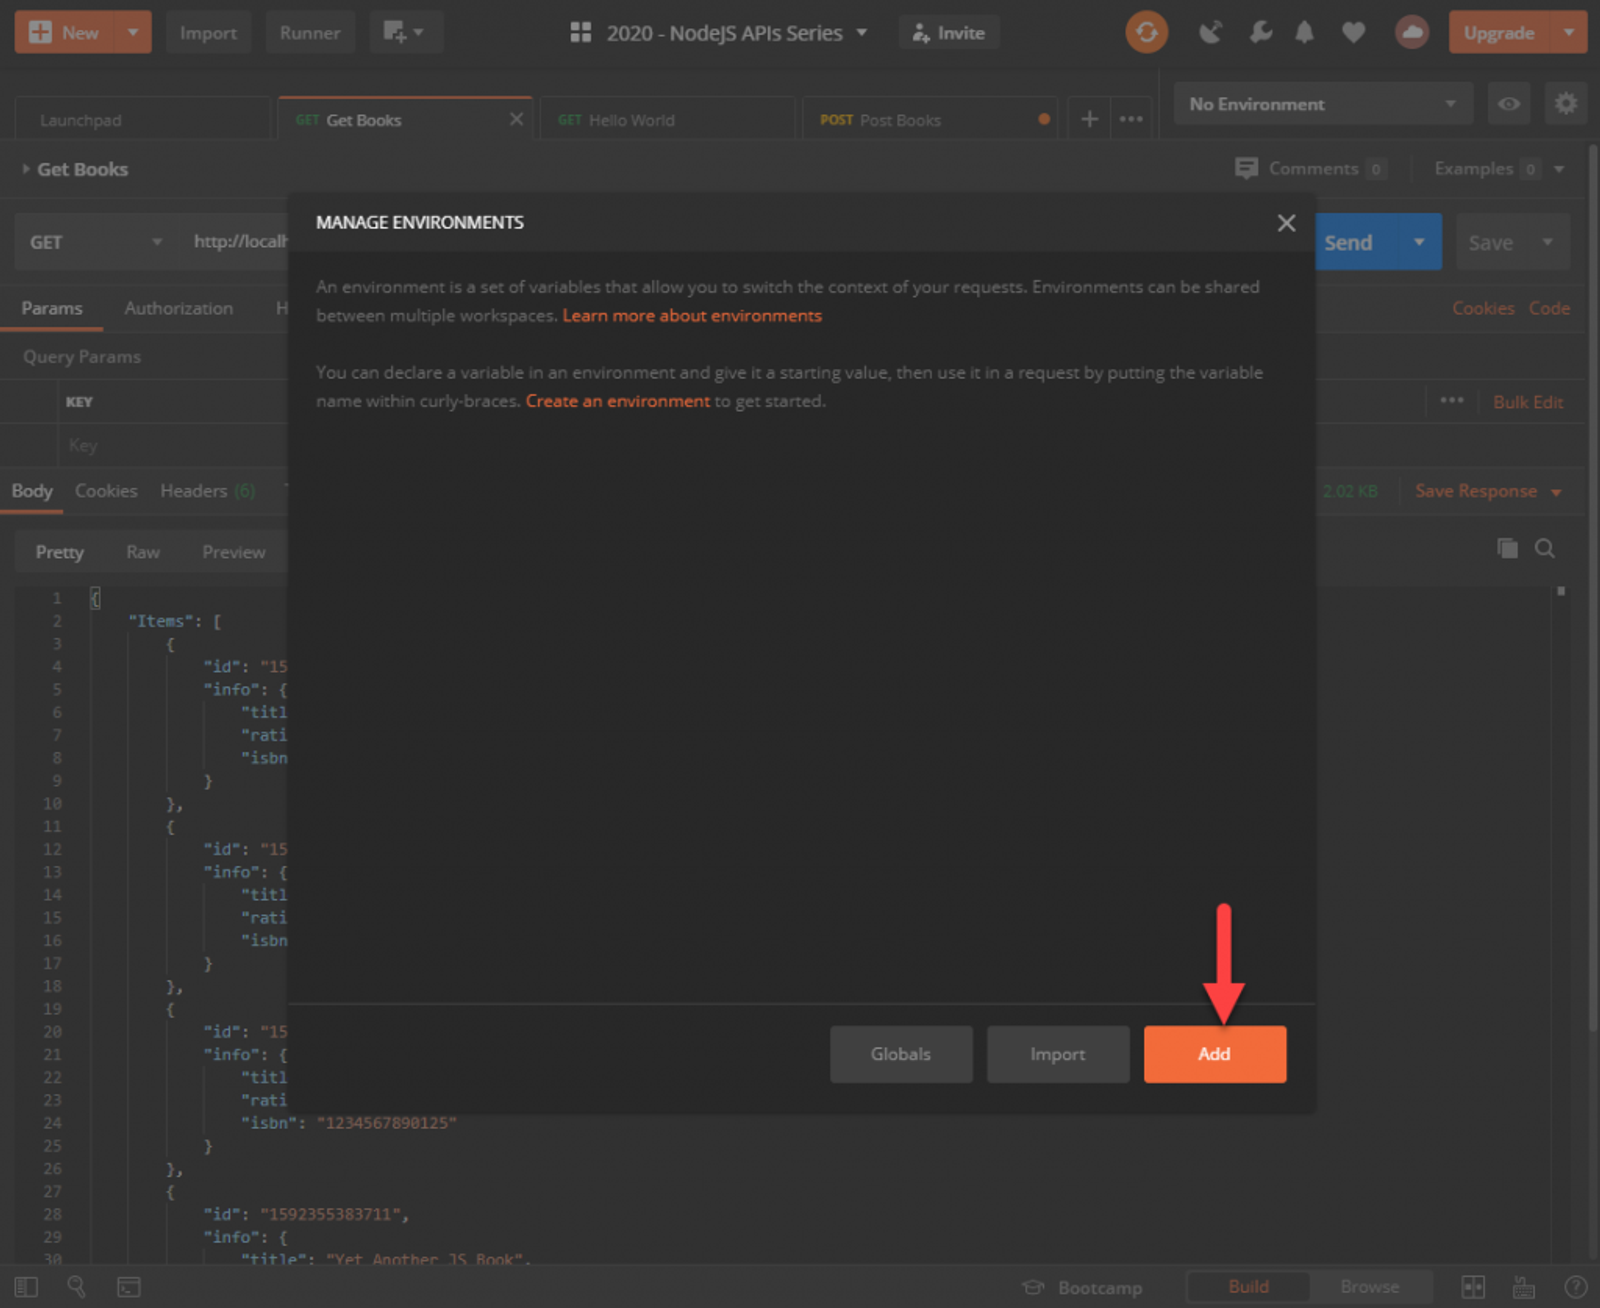
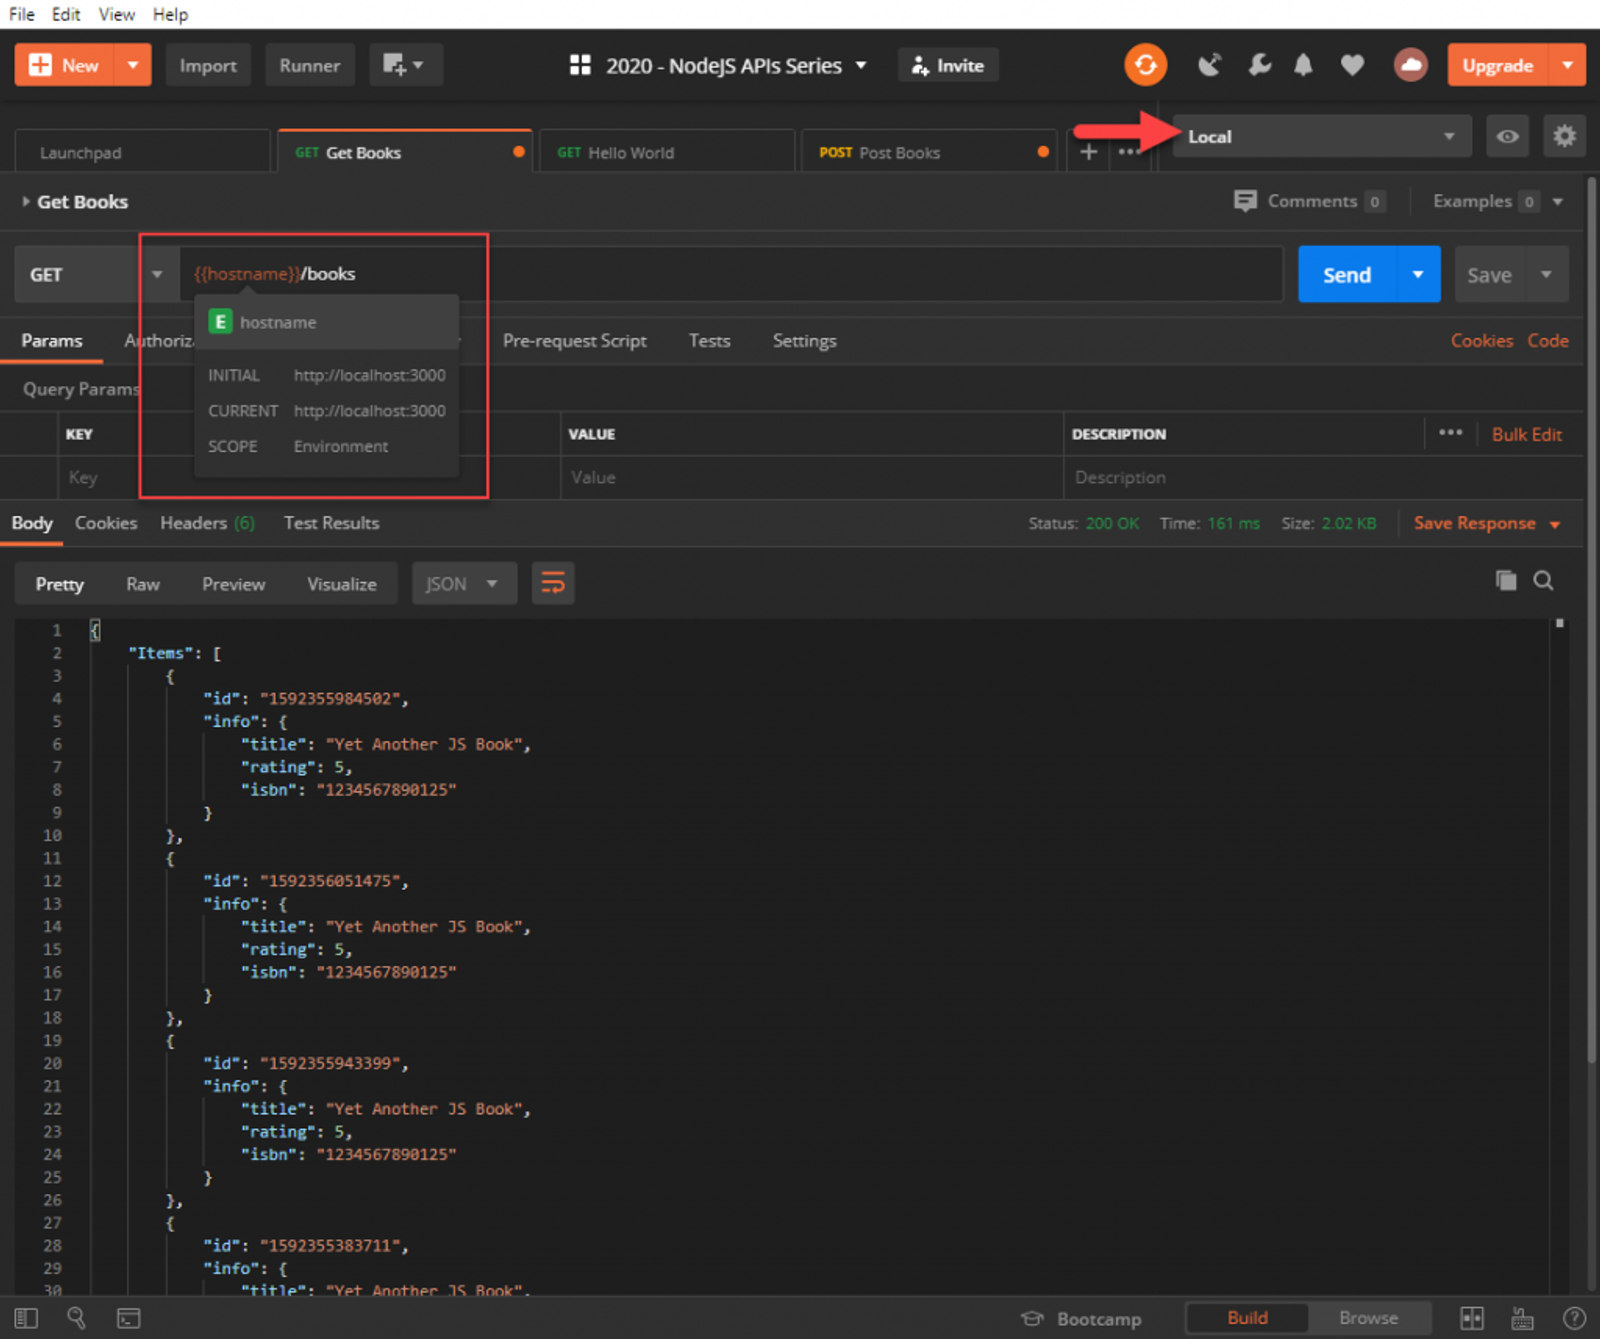
Remember back in the first article where I said I’d be exploring environments in Postman? Well here it is! Environments let you quickly swap settings in Postman without changing every little setting in a request. Any environment variable can be referenced throughout the app by using a double curly bracket notation (Ie; {{hostname}}).
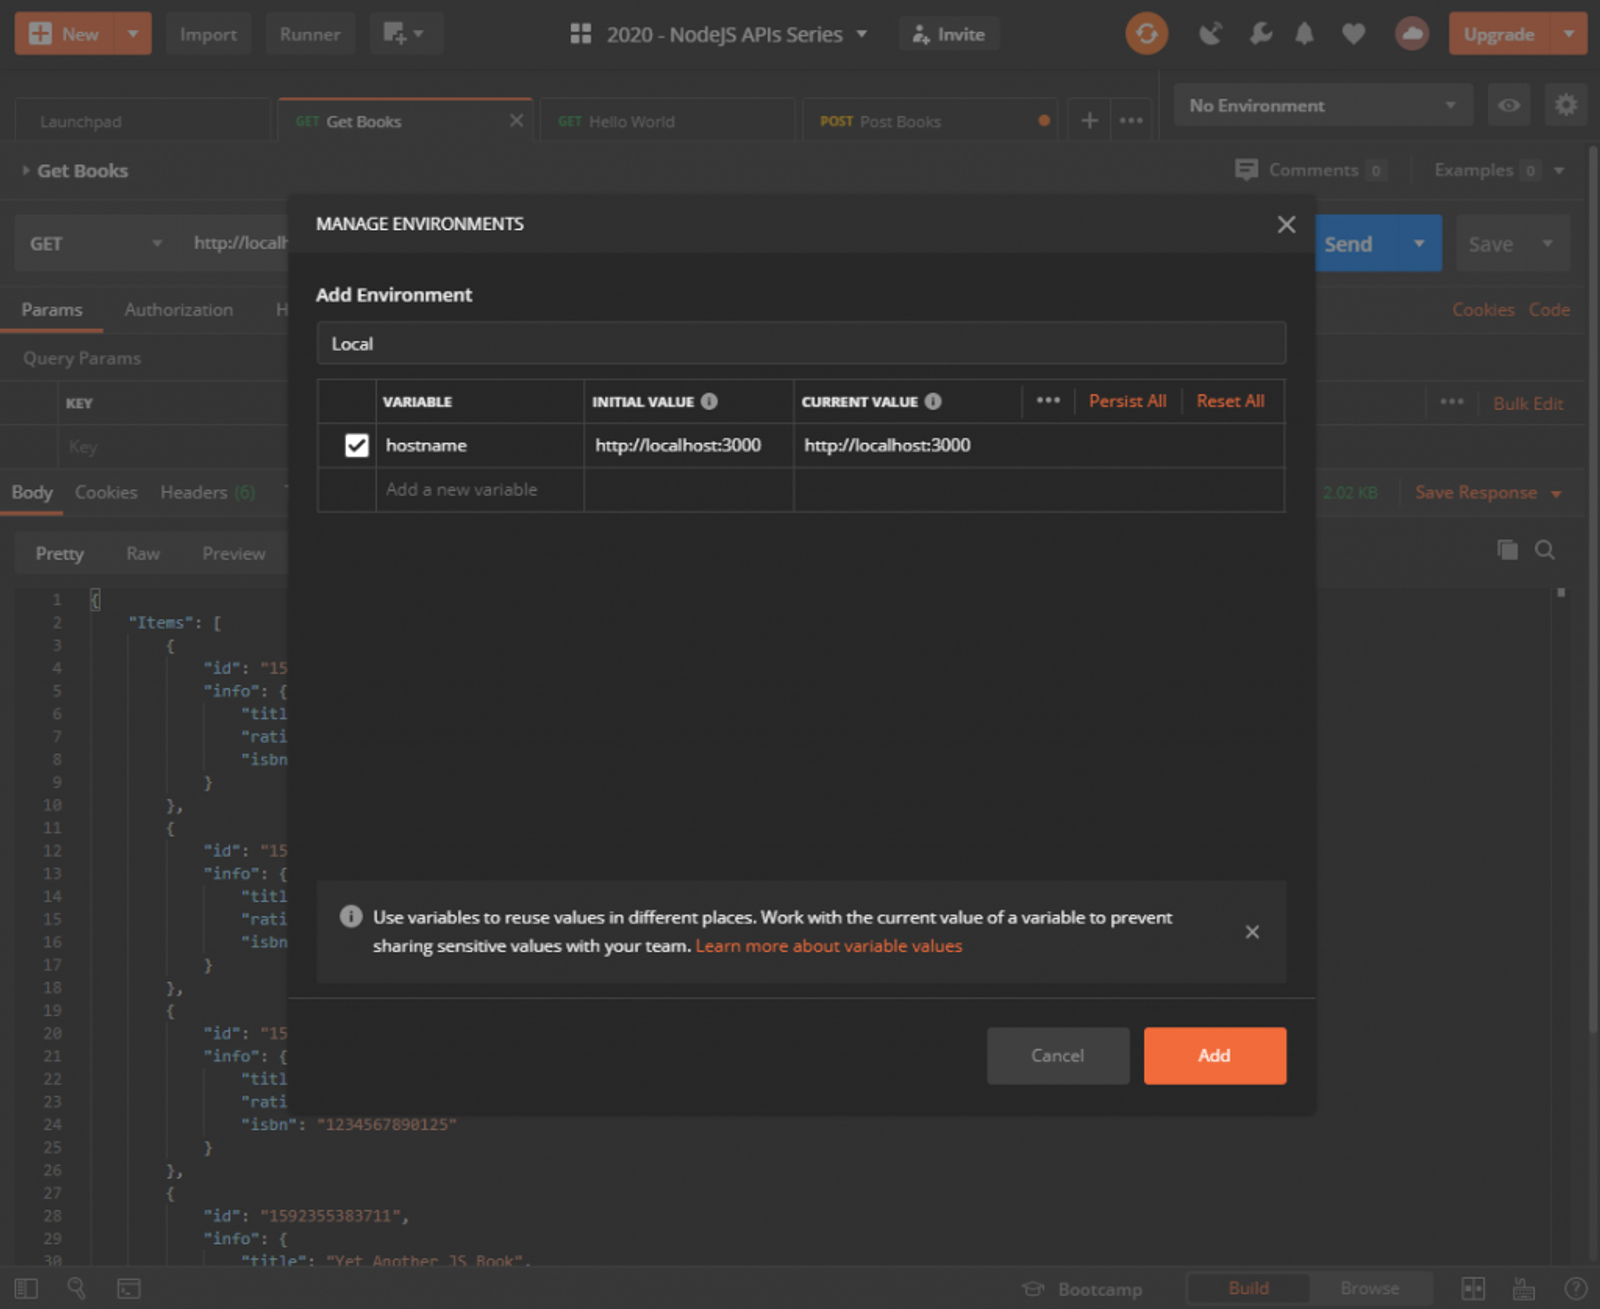
In Postman, click the gear in the Environments Area and then Add to add an environment. First create an environment called Local, add a hostname variable and set the value to `http://localhost:3000`

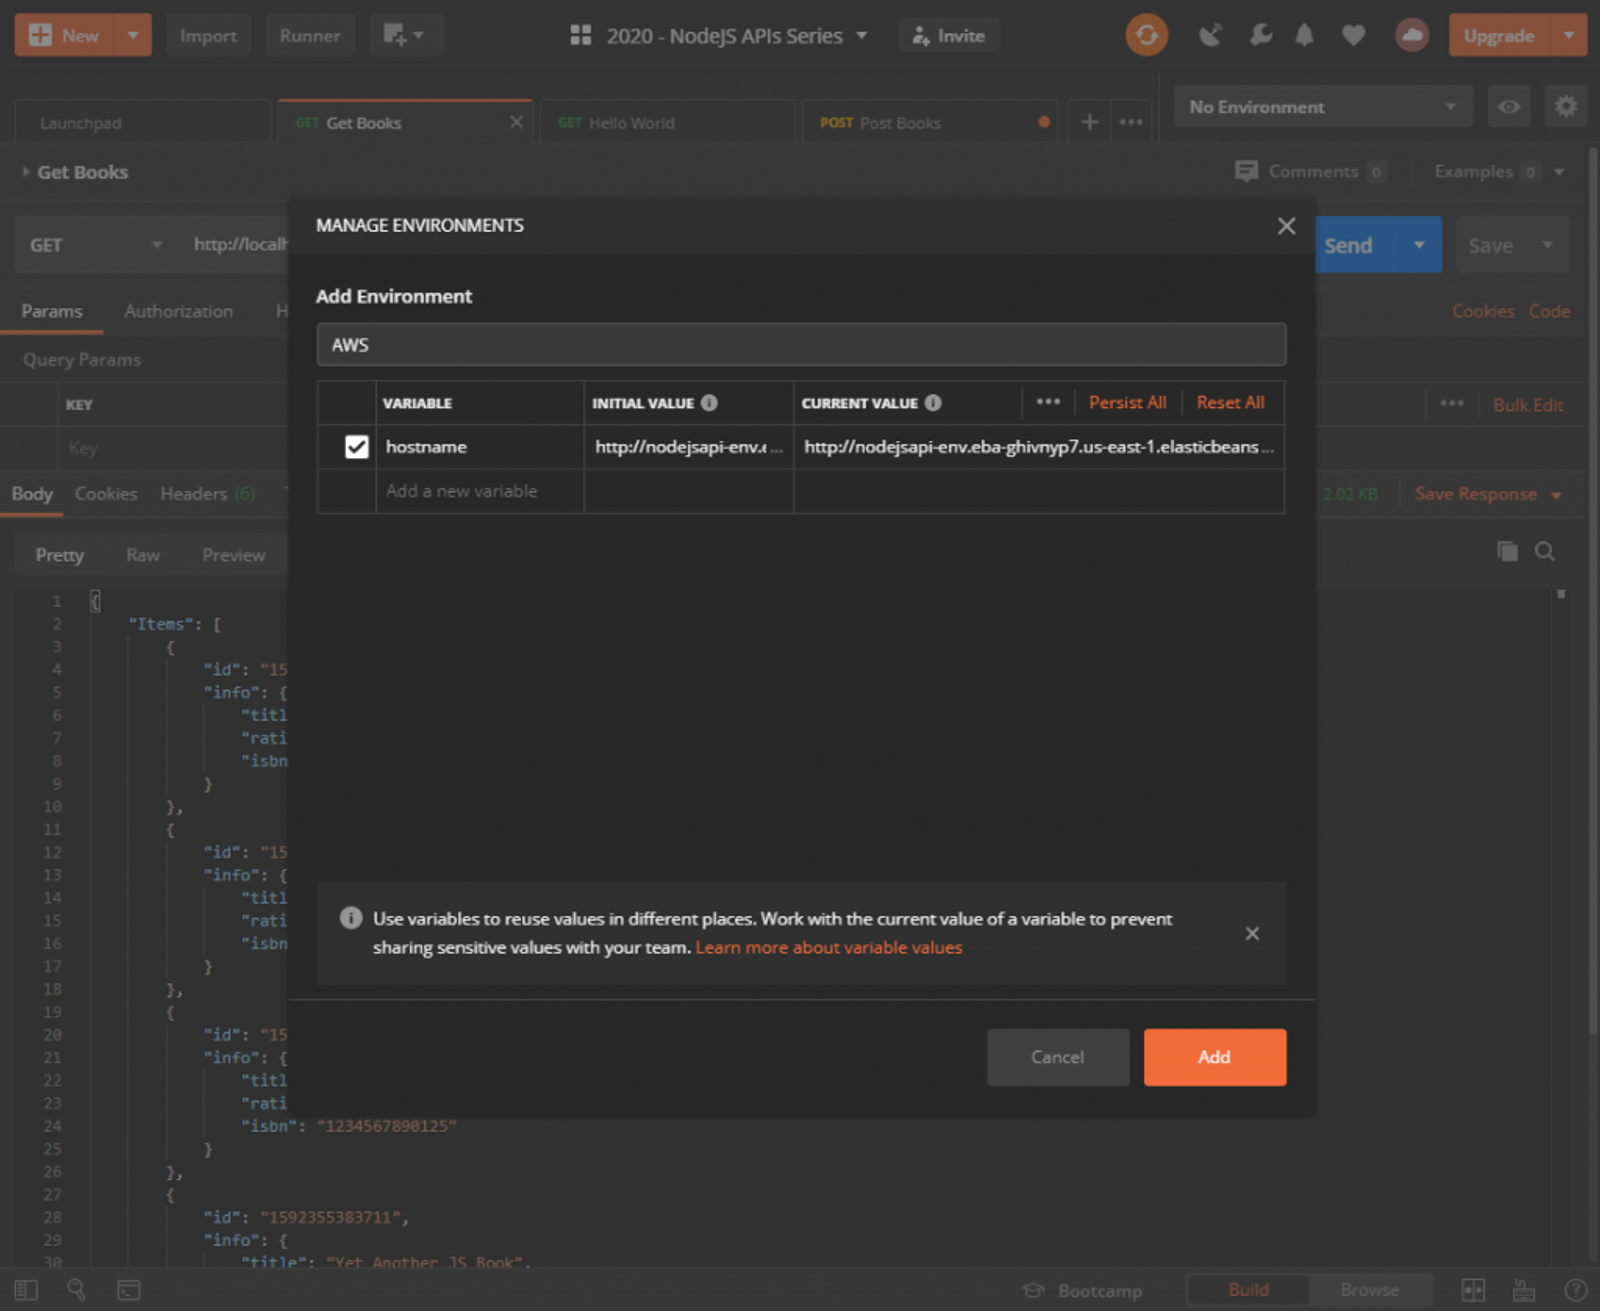
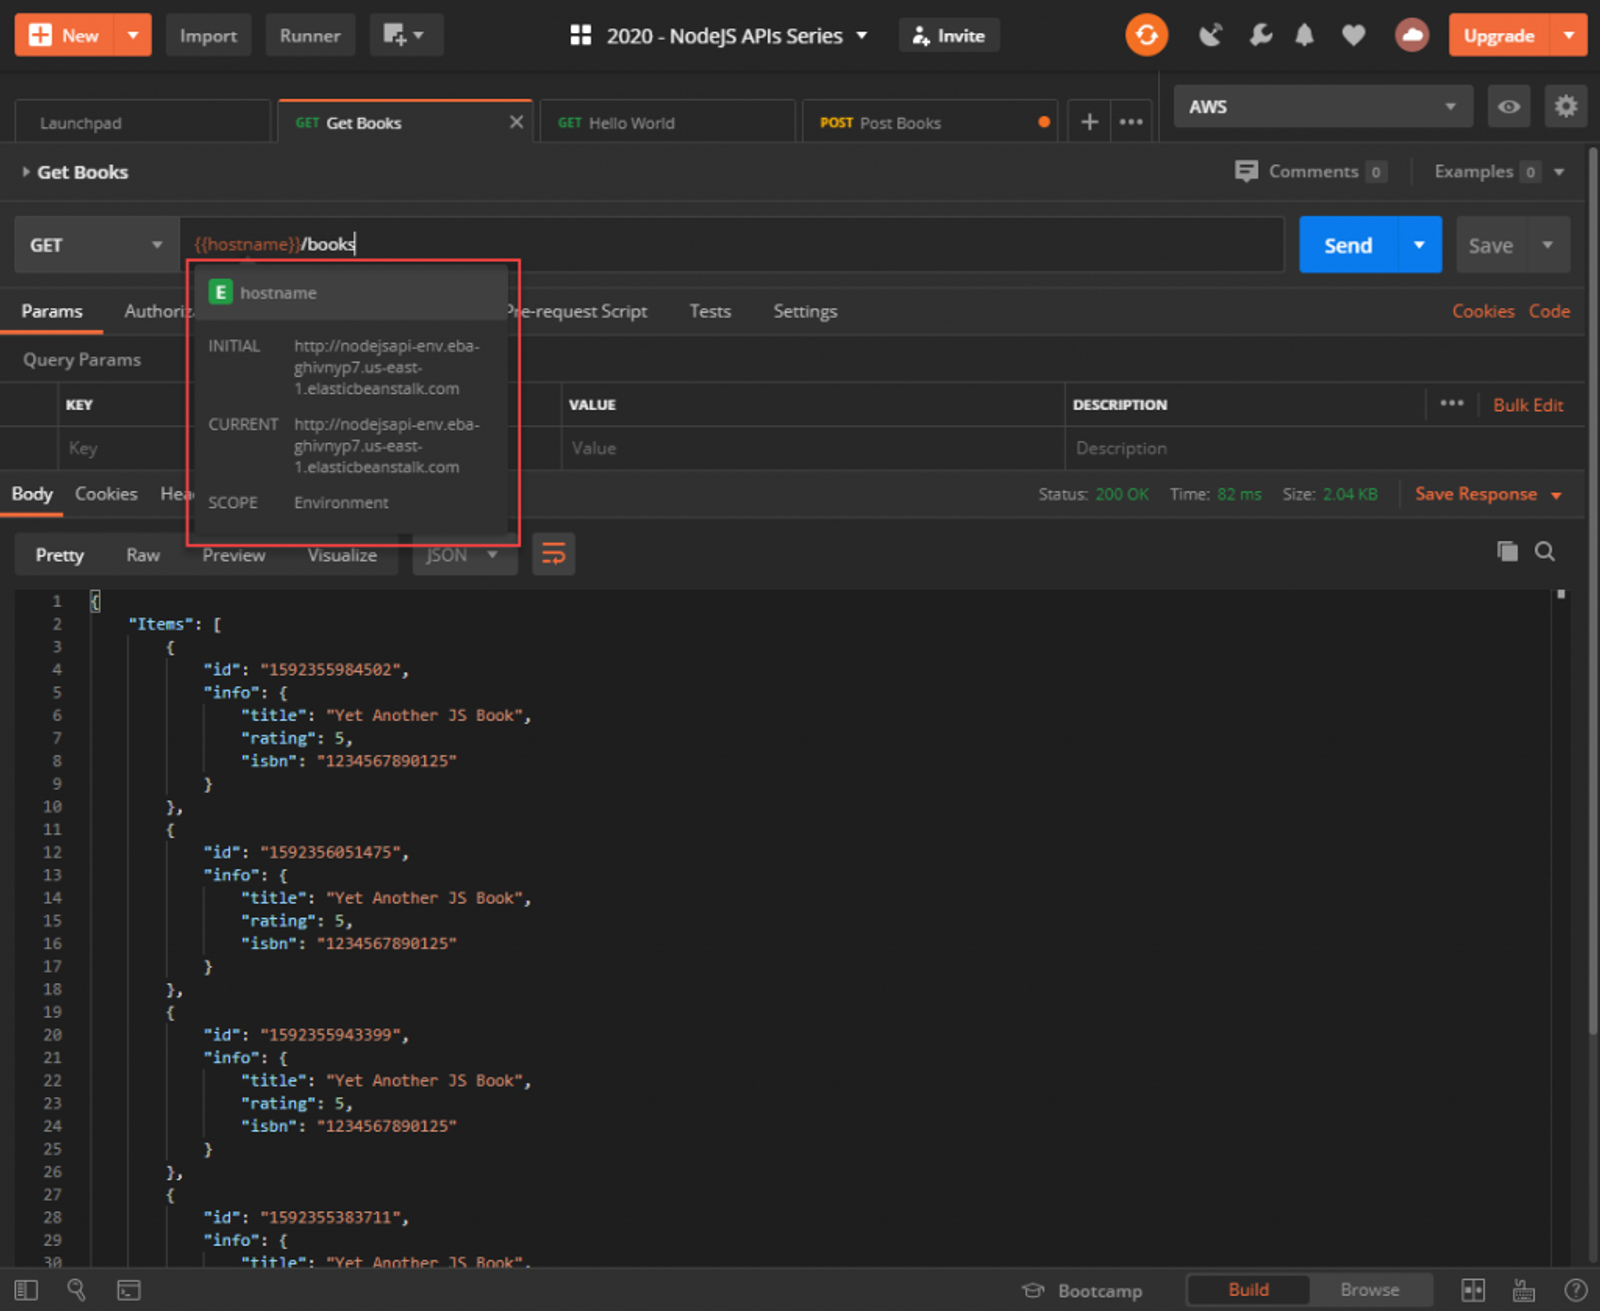
Next, add another environment called AWS and set the hostname variable with the value you pulled from the previous section. Make sure there is no trailing slash otherwise you might run into issues when testing.
Now in your GET /books request, replace http://localhost:3000 with {{hostname}}. Drop down where it says No environment and select Local first. You’ll notice now when you mouse over the {{hostname}} in the address bar that it will show you what its set to.
Now select AWS and the variable will change.
A word of caution: while we did deploy the API to AWS, we didn’t add any any security to the request, so technically if someone was capturing network traffic, they could get the token from the request. I’d encourage you to explore adding HTTPs to the API using an Elastic Load Balancer or API Gateway, but that’s beyond the scope of this article.
This article concludes the Coding NodeJS API series. If you have any questions, please feel free to hop into my Discord at https://fullstack.chat to discuss. Happy coding! 😁