Some time ago, I decided to put a tools directory in the source repo for my website. I didn’t really want to let Netlify redeploy my site each time I modified a script in there, and I already knew how to deploy to Netlify manually, so I figure why not let GitHub Actions handle it for me? I could write my own workflows to publish on my own terms and have much more control over the process. Here’s how it works.
Create PAT and get the Site ID
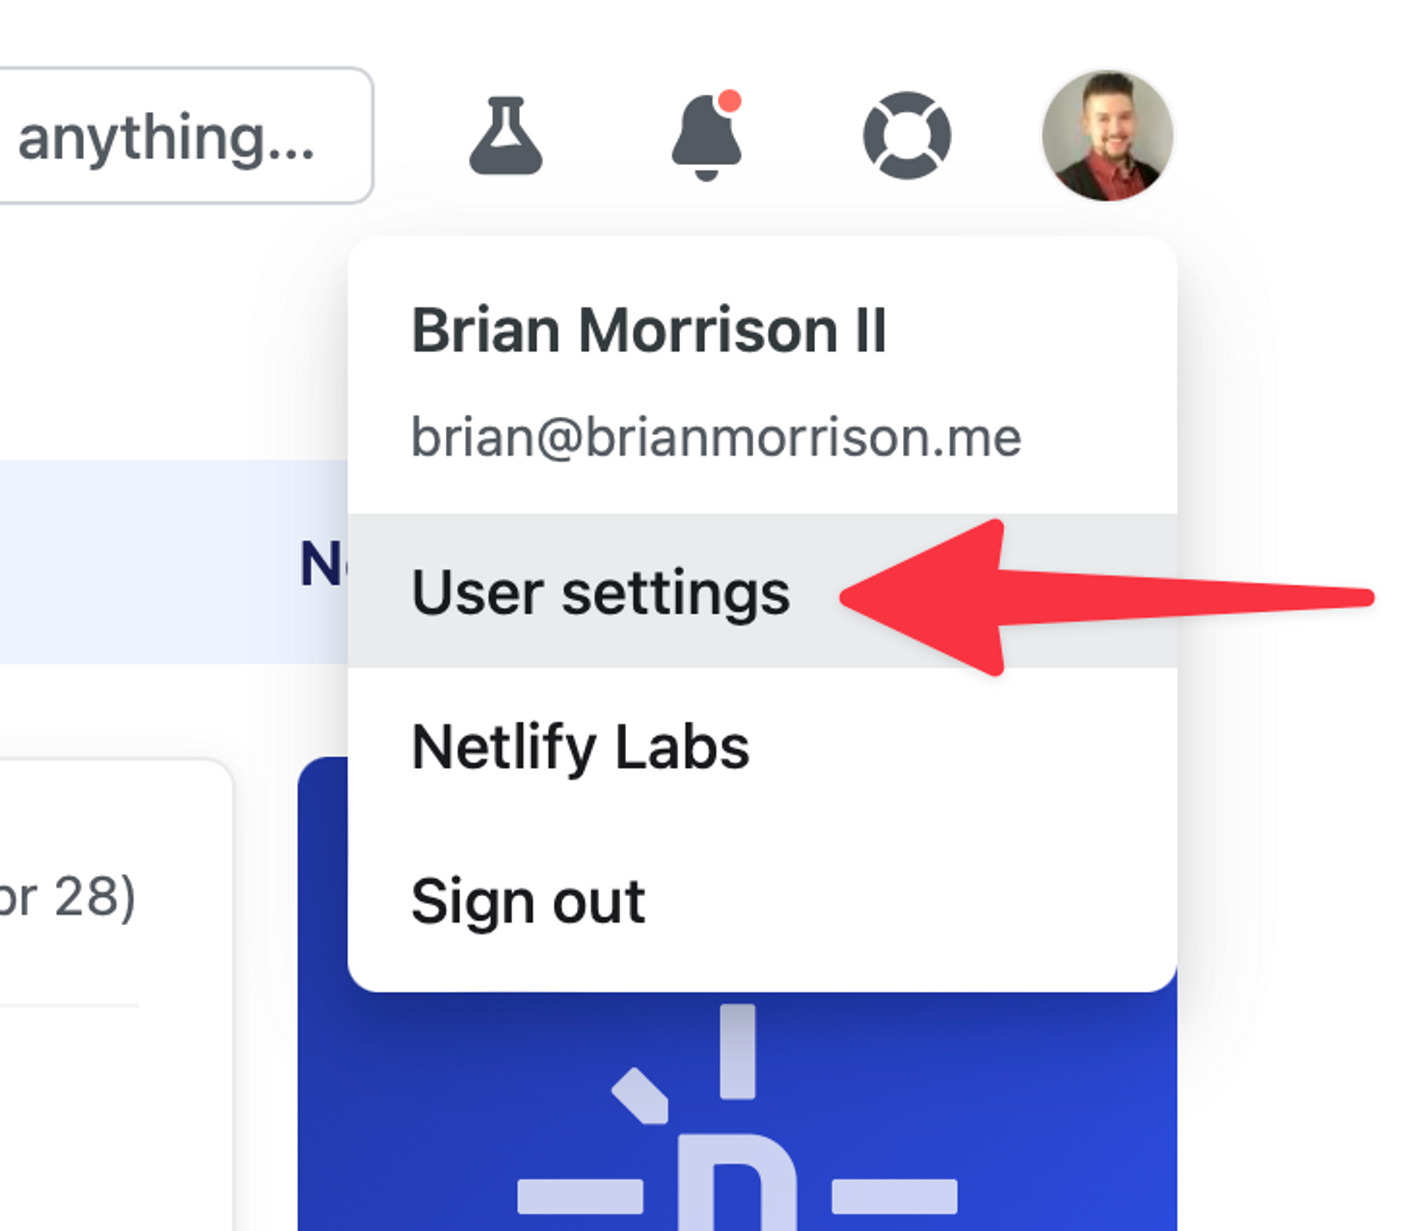
Before you can build a workflow, you’ll need some info from Netlify. The first thing is a personal access token that is used to authenticate with the service. To get this, log into Netlify, click your profile in the upper right and go to User settings.
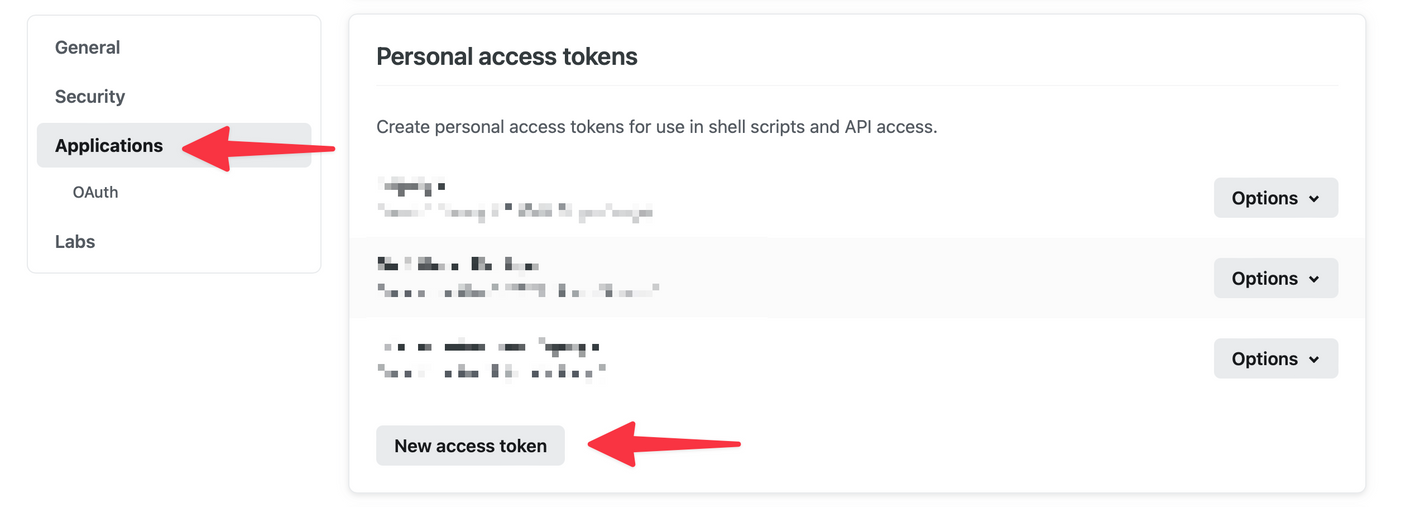
Next go to Settings, then Applications. Click New access token.
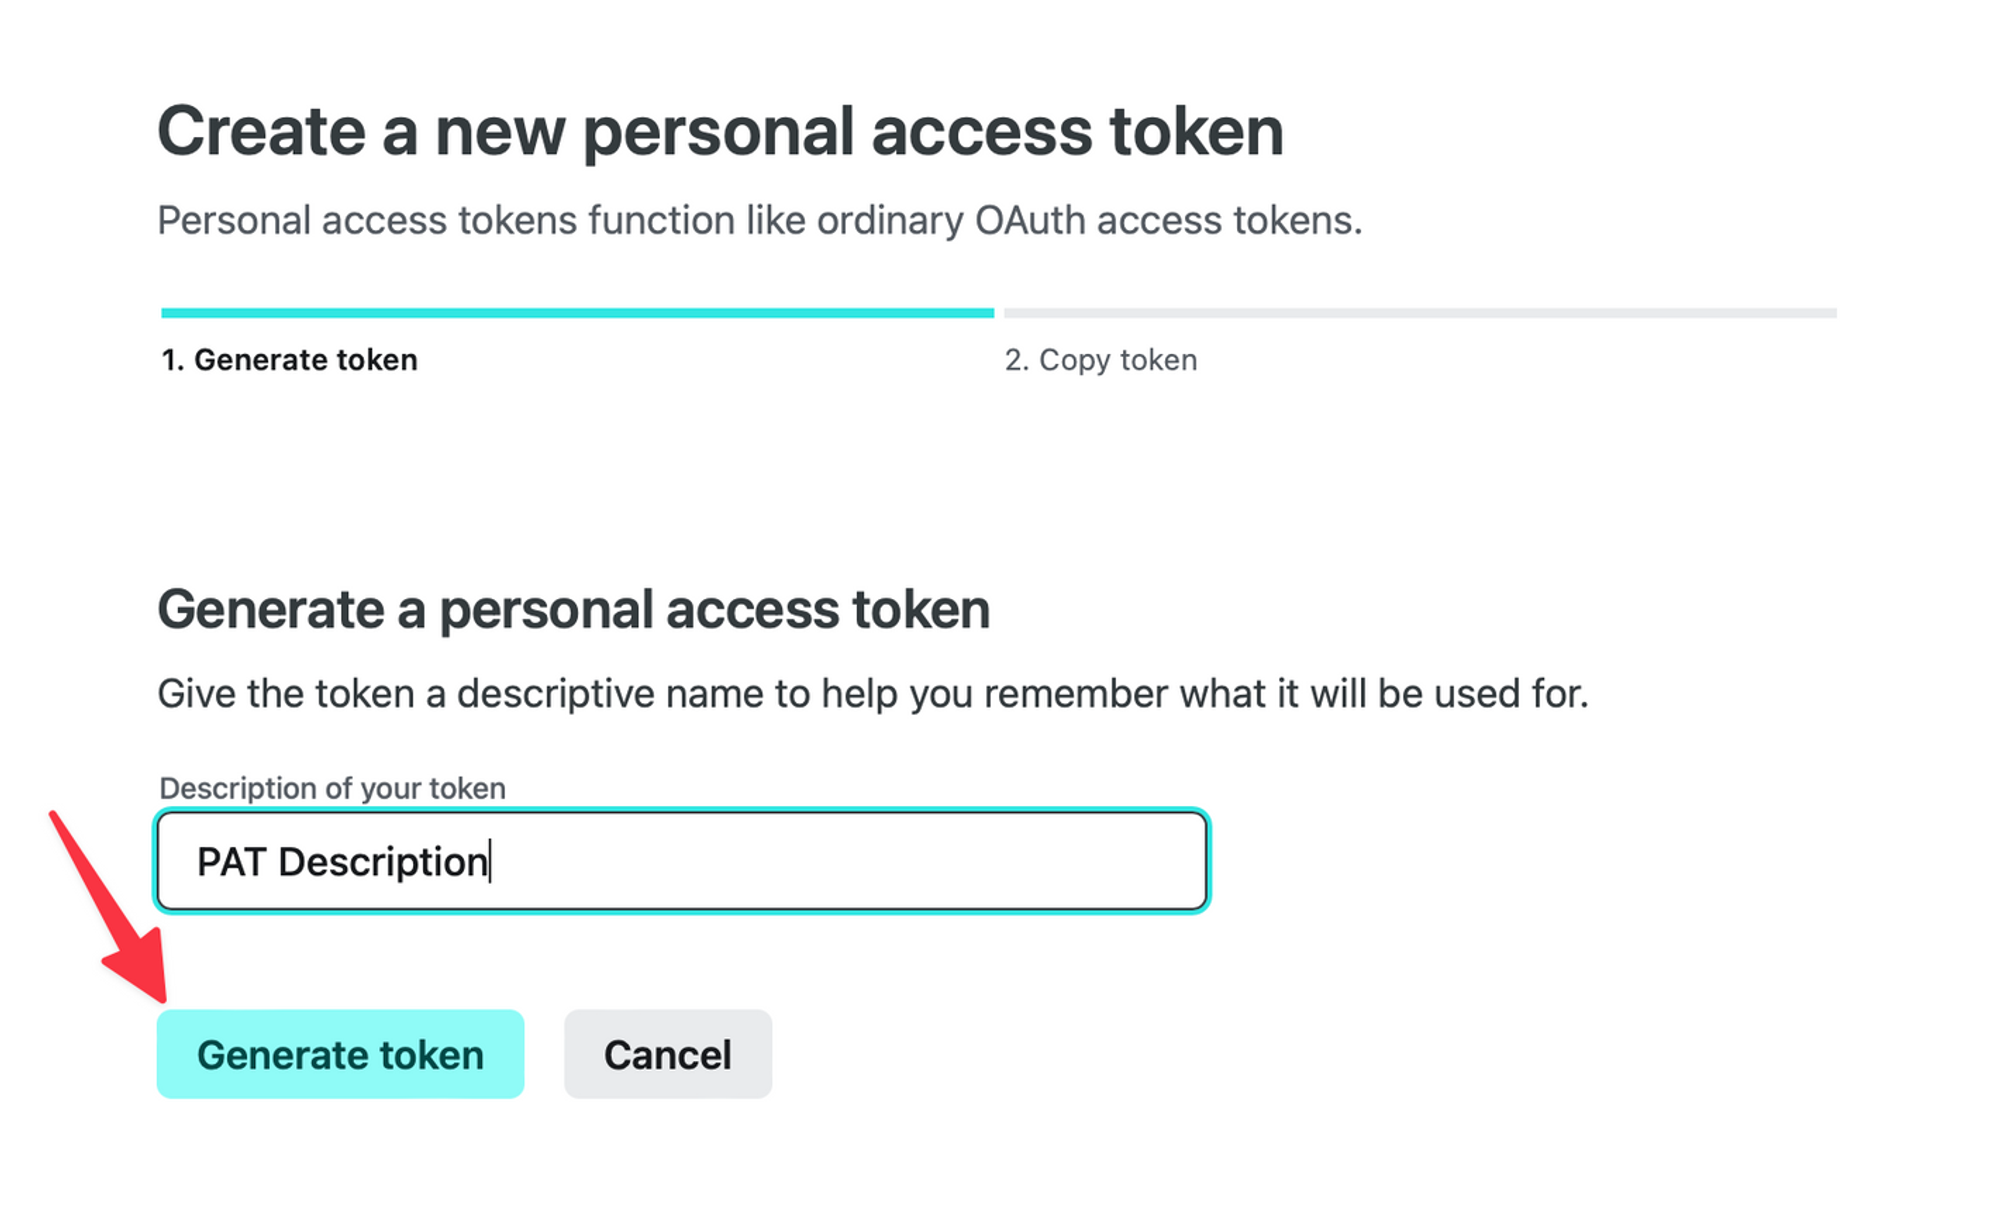
Finally, give your token a name and click Generate token. You’ll be presented with the token. Copy it before you leave this screen as you wont be able to see it again.
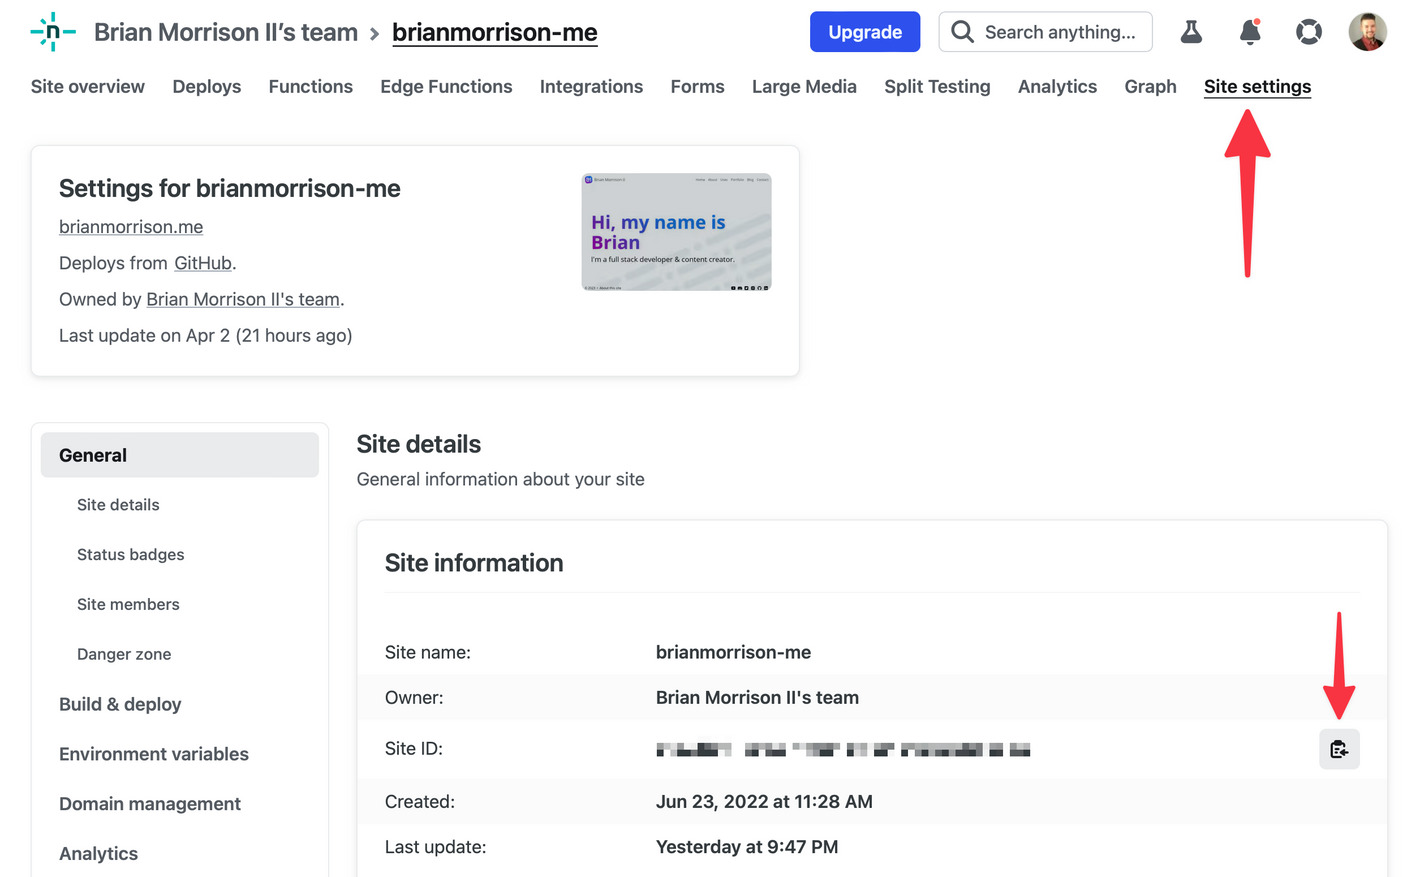
Next you’ll need to grab the Site ID of the site you want to deploy. This assumes you already have a site configured. To get it, open the site and find the Site settings tab. The Site ID will be on the first screen in the Site information section. Copy this value for later.
Setup actions secrets
Next up, we need to add the two values above into the repositories Action secrets. This prevents you from having to save them into the code of the repo. To do this, open the repo in GitHub. Then click Settings, then Secrets and variables, then Actions.
In that view, click New repository secret.
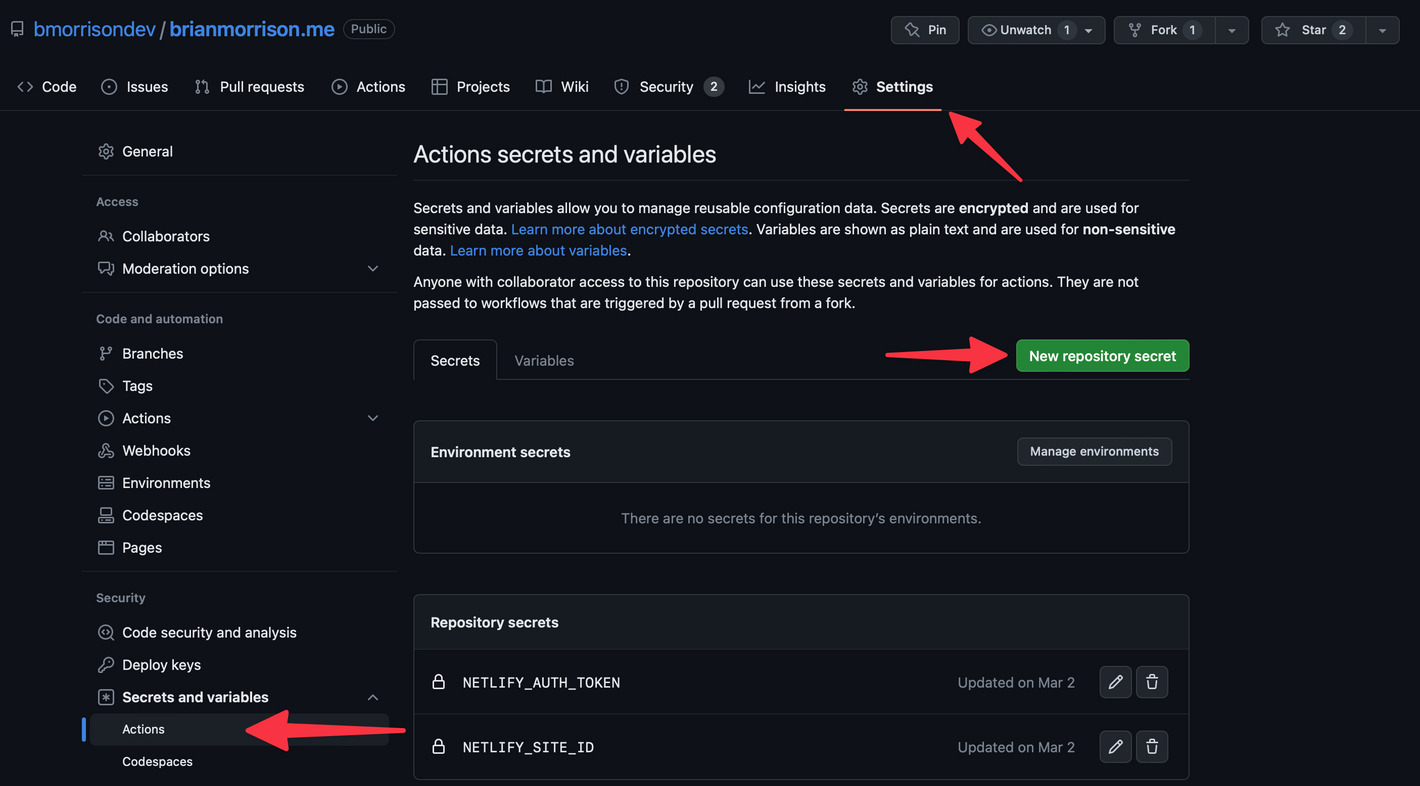
You’ll be adding two secrets:
NETLIFY_AUTH_TOKENThe personal access token you created earlier.NETLIFY_SITE_IDThe Site ID from earlier.
Build the action
To create the action, create a new file in your repo named .github/workflows/deploy-prod.yaml and add the following contents:
name: Deploy prod

on:
  workflow_dispatch:
  push:
    branches:
      - main

jobs:
  deploy:
    runs-on: ubuntu-latest
    steps:
      - uses: actions/checkout@v3
      - uses: actions/setup-node@v3
        with:
          node-version: 18
      - name: Install Netlify CLI
        run: npm install -g netlify-cli
      - name: Install deps
        run: npm install
      - name: Deploy
        run: npm run deploy:prod
        env:
          NETLIFY_AUTH_TOKEN: ${{ secrets.NETLIFY_AUTH_TOKEN }}
          NETLIFY_SITE_ID: ${{ secrets.NETLIFY_SITE_ID }}
This action will build and deploy the production version of your website whenever any commits are pushed to the mainbranch of your repo. This will occur on standard pushes or when pull requests are merged if you prefer that flow.
You can also configure a second action to publish to an alternate branch. For instance I also have .github/workflows/deploy-dev.yaml to deploy changes made to the dev branch into Netlify branch URL. This allows me to test my changes before I merge changes into the production branch:
name: Deploy dev

on:
  workflow_dispatch:
  push:
    branches:
      - dev

jobs:
  deploy:
    runs-on: ubuntu-latest
    steps:
      - uses: actions/checkout@v3
      - uses: actions/setup-node@v3
        with:
          node-version: 18
      - name: Install Netlify CLI
        run: npm install -g netlify-cli
      - name: Install deps
        run: npm install
      - name: Build
        run: netlify build
        env:
          NETLIFY_AUTH_TOKEN: ${{ secrets.NETLIFY_AUTH_TOKEN }}
          NETLIFY_SITE_ID: ${{ secrets.NETLIFY_SITE_ID }}
      - name: Deploy
        run: netlify deploy --alias dev # this adds a 'dev--' prefix to my URL for testing
        env:
          NETLIFY_AUTH_TOKEN: ${{ secrets.NETLIFY_AUTH_TOKEN }}
          NETLIFY_SITE_ID: ${{ secrets.NETLIFY_SITE_ID }}
Notice how much of the workflow is the same, with the exception of the branch trigger and the --alias set on the Deploy step.