In the previous article, we setup WordPress with the WPGraphQL plugin to easily connect Gridsome to it. In this article, I'll cover how to create a Blog Index page, as well as a template to show our post content.
Creating a Blog Index
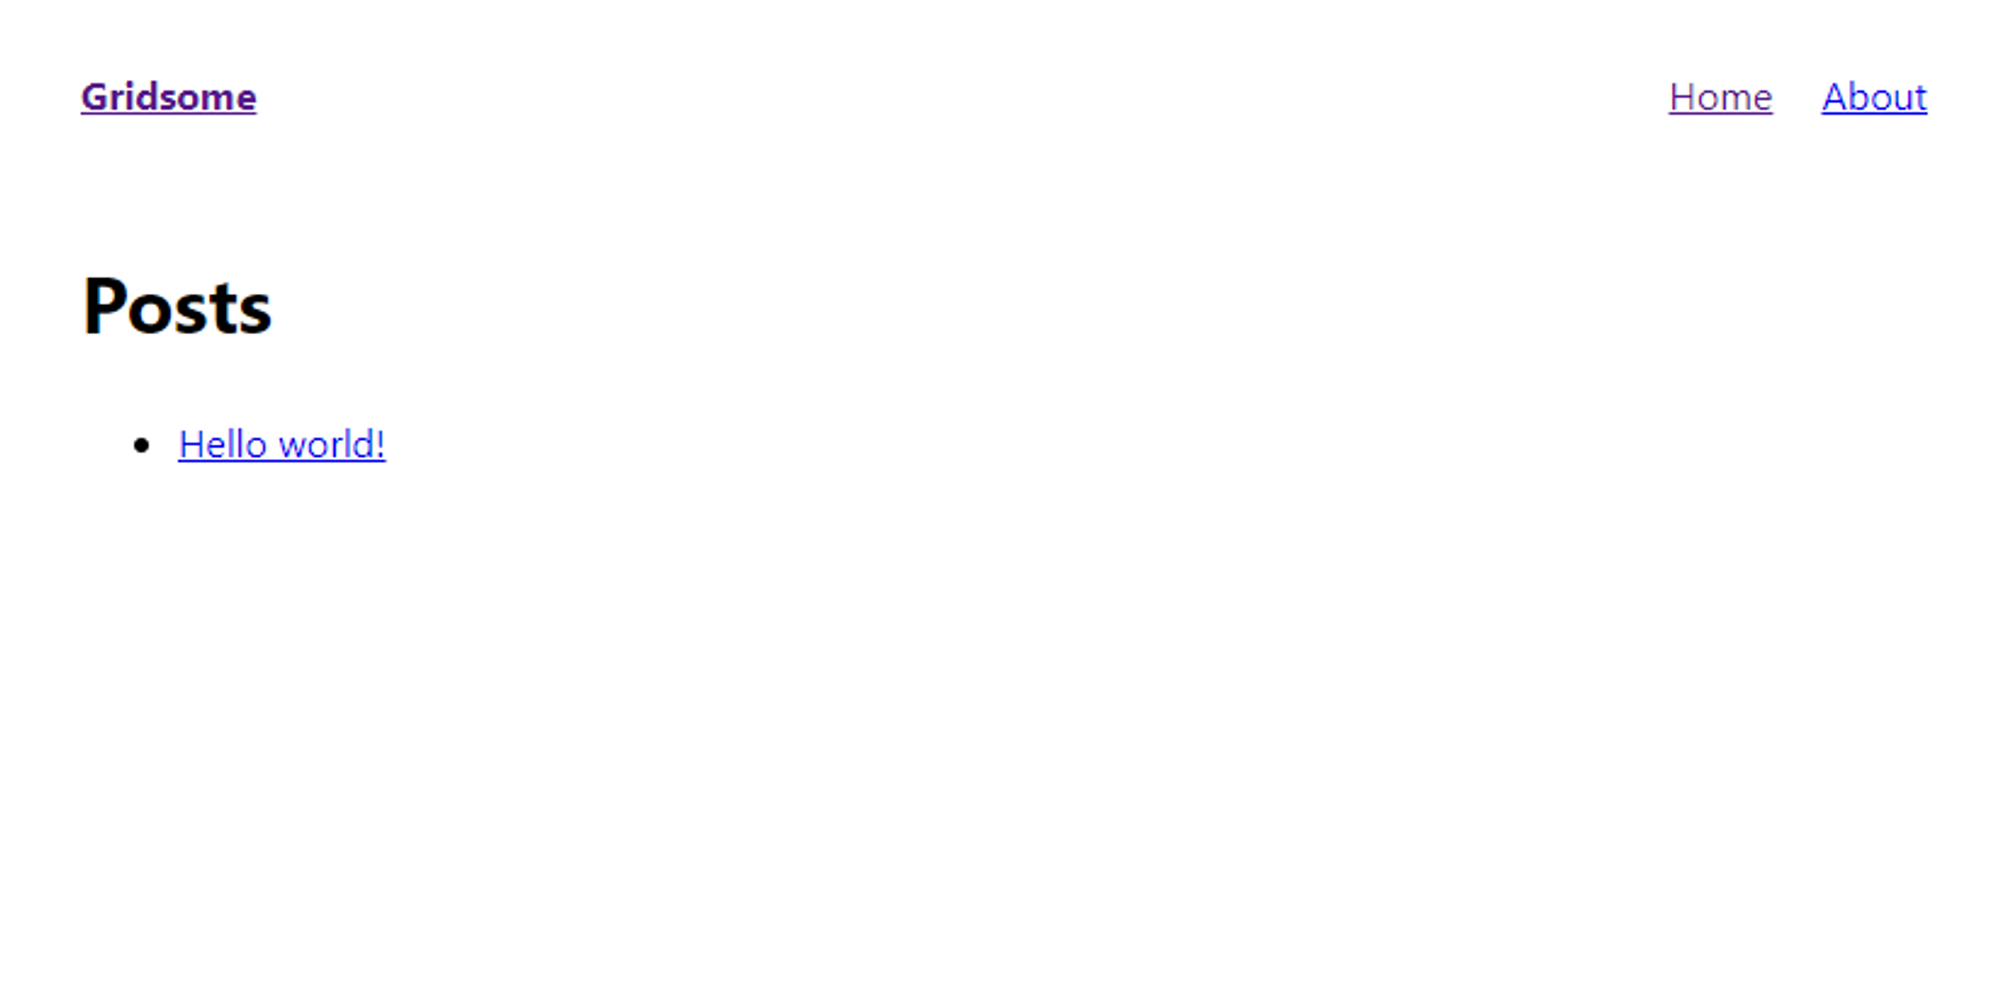
The blog index will simply be a list of our posts. Inside the pages directory of the project, create a new file called Blog.vue and add the following to it. If you've been following along with the series, we're basically repurposing the code we added to Index.vue in the previous article. The only thing we've added is the slug in the query, we're going to use this to link to the post page itself.
<template>
  <Layout>
    <h1>Posts</h1>
    <ul>
      <li v-for="{ node } in $static.posts.edges" :key="node.id">
        <router-link :to="/blog/${node.slug}">{{ node.title }}</router-link> </li> </ul> </Layout> </template> <static-query> { posts { edges { node { id title content slug } } } } </static-query> <script> export default { metaInfo: { title: 'Blog' } } </script>
Note how we used the
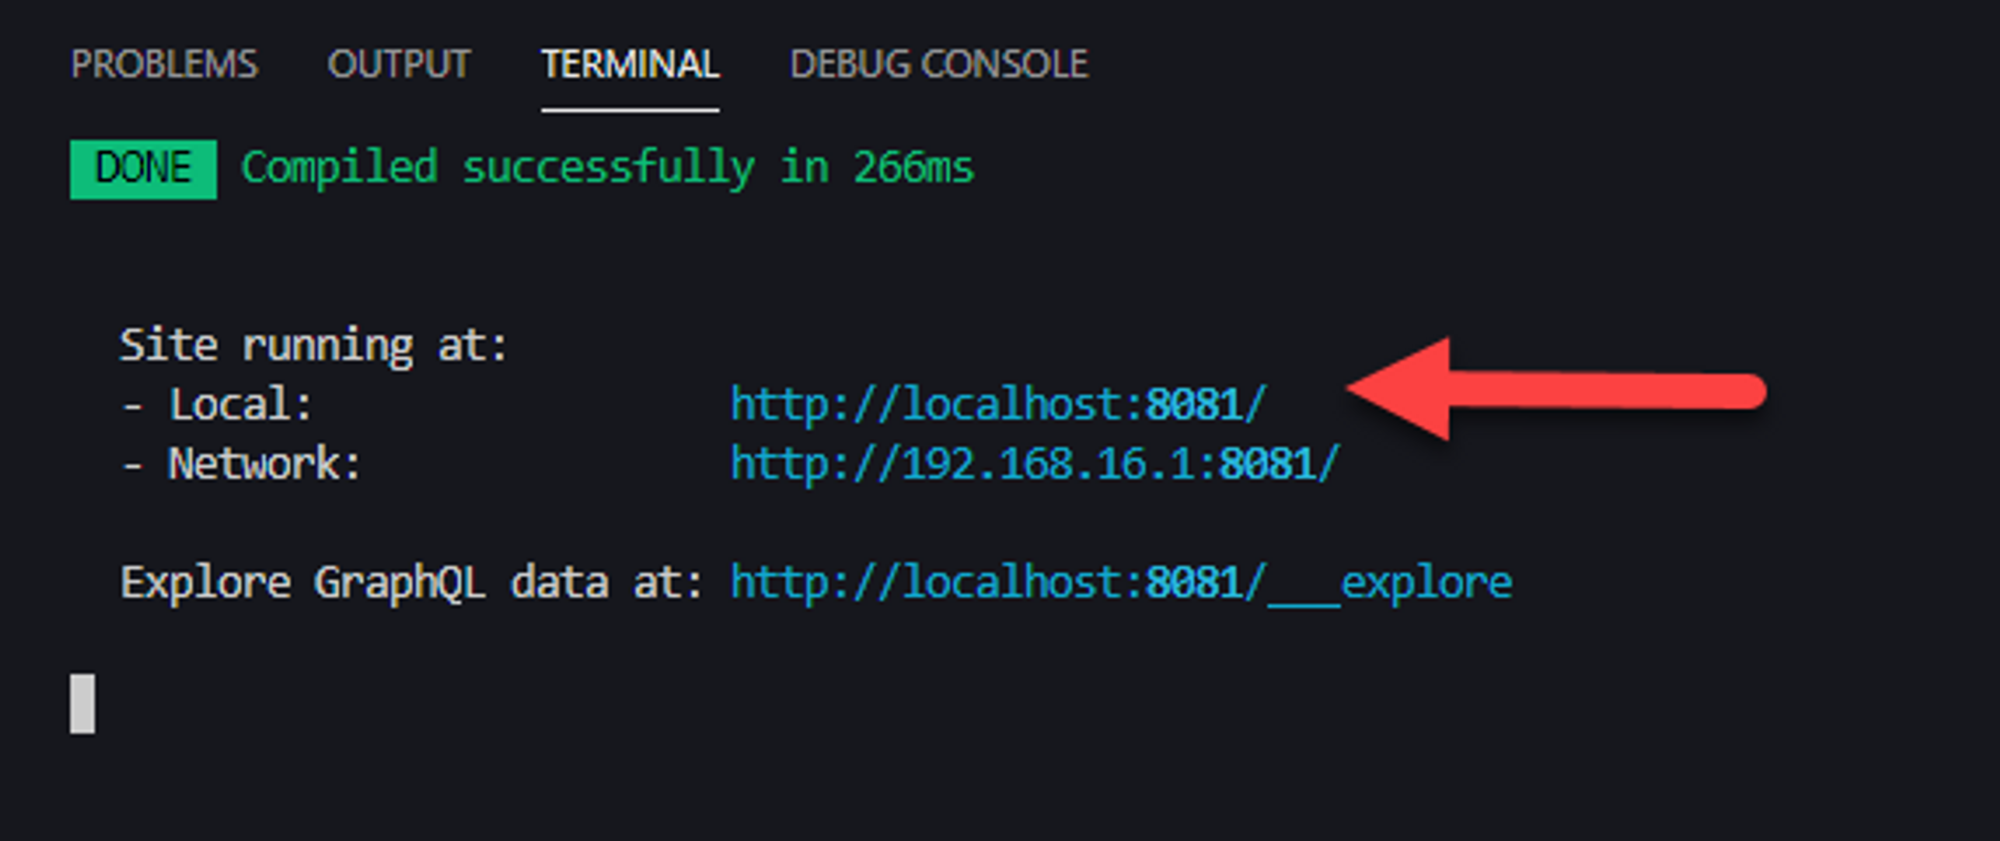
Now start up your project with npm run develop and enter the URL displayed in your terminal, and add the /blog path to the end. Gridsome will use the file name to determine the best path to use to access the file.
Now if you try and click on the link, it wont work. We need to setup the template that will be used to generate the pages dynamically. Lets do that now.
Creating a Post Template
Create a new file in the templates directory called Post.vue. Add the following content to it.
<template>
  <Layout>
    <h1 v-html="$context.title"></h1>
    <div v-html="$context.content"></div>
  </Layout>
</template>

<script>
export default {
  metaInfo: function () {
    return {
      title: this.$context.title
    }
  }
}
</script>
$context is a special object used by the build process to inject data into the template. We can setup Gridsome to generate posts for us in gridsome.server.js, so lets head there now. You'll notice there are a few template functions setup here, but we aren't going to use them the way that they are. You can safely replace the content of this file with the following.
// gridsome.server.js
module.exports = function (api) {
  api.createPages(async ({ graphql, createPage }) => {
    // Setup our query to get the WordPress data
    const query = `{
      posts {
        edges {
          node {
            title
            slug
            content
          }
        }
      }
    }`

    // Execute the query
    const queryResult = await graphql(query)

    // Pull the data from the query into a variable thats easier to work with
    let posts = queryResult.data.posts.edges.map(edge => edge.node)

    console.log('posts', JSON.stringify(posts))

    // For each post, generate a page using the context & template we created
    posts.forEach(p => {
      createPage({
        path:/blog/${p.slug}, component: './src/templates/Post.vue', context: { title: p.title, content: p.content } }) }) }) }
I've commented this code to describe what it is doing. In a nutshell, its querying the Gridsome data layer to generate the HTML using the template we just created.
Now Gridsome will hot-reload many changes made to it, but since generating pages using templates is done at build time, you'll need to restart your process before you can see the changes. Once you've done so, try clicking that link in the blog index.
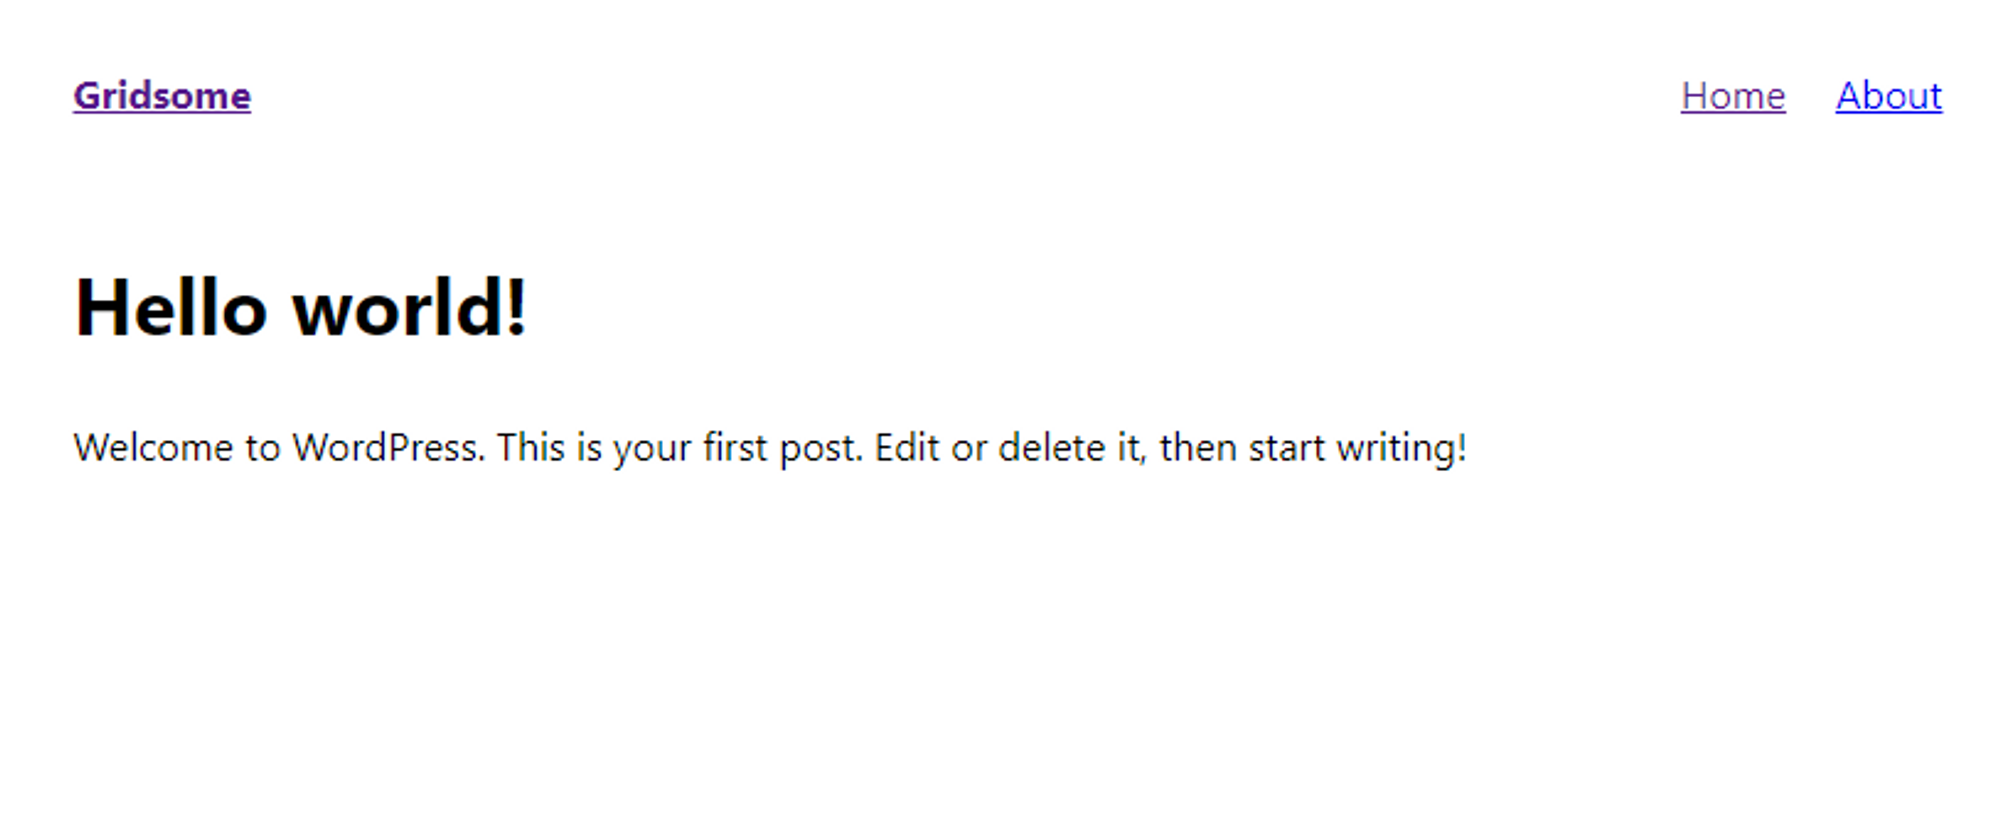
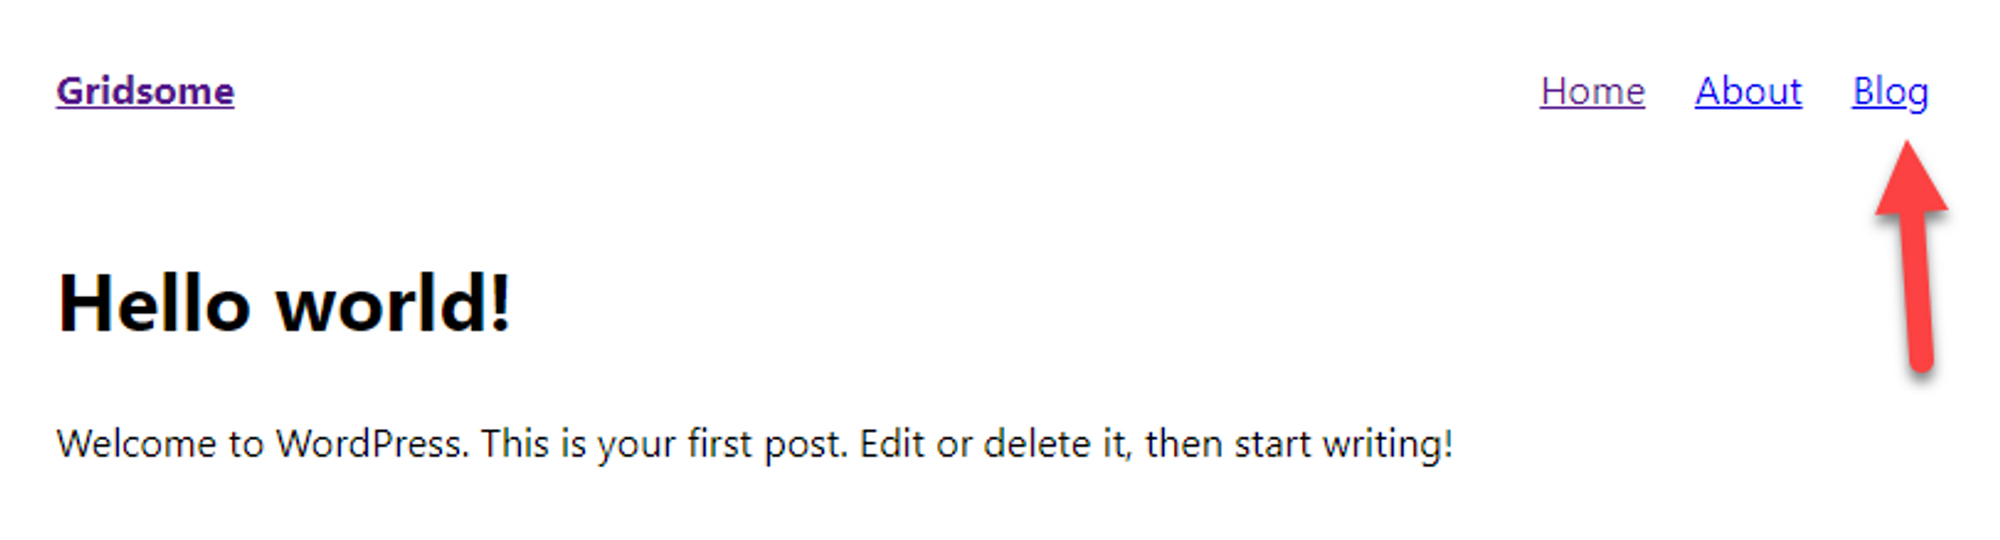
And there is our WordPress data displayed as static HTML using Gridsome! Once last minor change we're going to make is to that menu in the upper right. Gridsome uses Vue components as layouts to keep things consistent, and that menu is setup in layouts/Default.vue, so open that file and add another line under the About link like so.
<template>
  <div class="layout">
    <header class="header">
      <strong>
        <g-link to="/">{{ $static.metadata.siteName }}</g-link>
      </strong>
      <nav class="nav">
        <g-link class="nav__link" to="/">Home</g-link>
        <g-link class="nav__link" to="/about/">About</g-link>
        <g-link class="nav__link" to="/blog/">Blog</g-link> <!-- Here -->
      </nav>
    </header>
    <slot/>
  </div>
</template>
In my next article, I'll cover how to use WP Custom Post Types and Advanced Custom Fields to create a fully customized schema to use WordPress to store more data than just posts or pages.
Happy coding! 😎