WordPress is one of the most popular website frameworks used today, and it probably isn't going away any time soon. Last I checked, nearly 1/3 websites are built using WordPress! One of the major shortcomings of WordPress though is that without the use of speed optimization plugins, WordPress sites can be slow unless they are on relatively powerful hardware. Even still I've found these plugins don't work well without quite a bit of configuration & tweaking.
Well one of the best ways to address this (in my opinion) is to use one of the many static site generator (or SSG) frameworks to generate a website using WordPress's API for the data source. This honestly gives you the best of both worlds, the complete flexibility of designing and building your site how you want, all while using WordPress's polished CMS for writing content.
Prerequisites
You'll need the following before you can follow along;
- A WordPress instance (I'll be using one running on my computer)
- VSCode
- NodeJS & Gridsome CLI
Installing the WPGraphQL Plugin
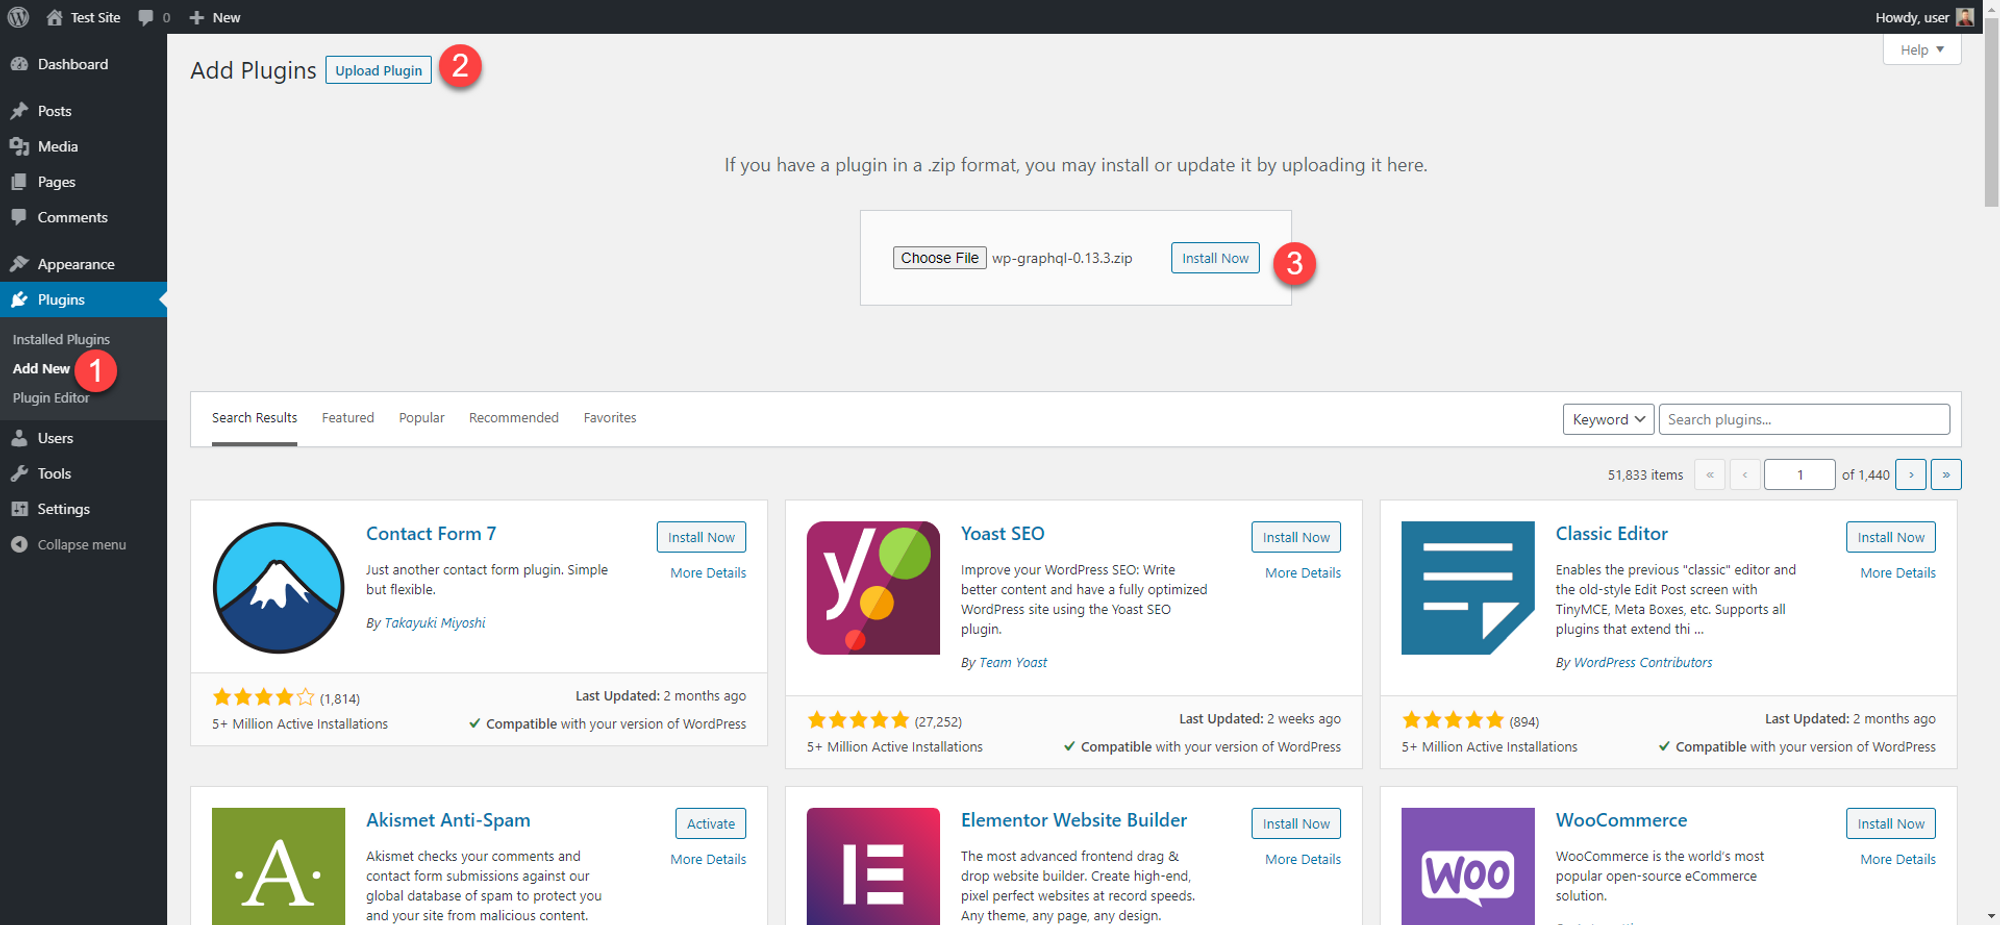
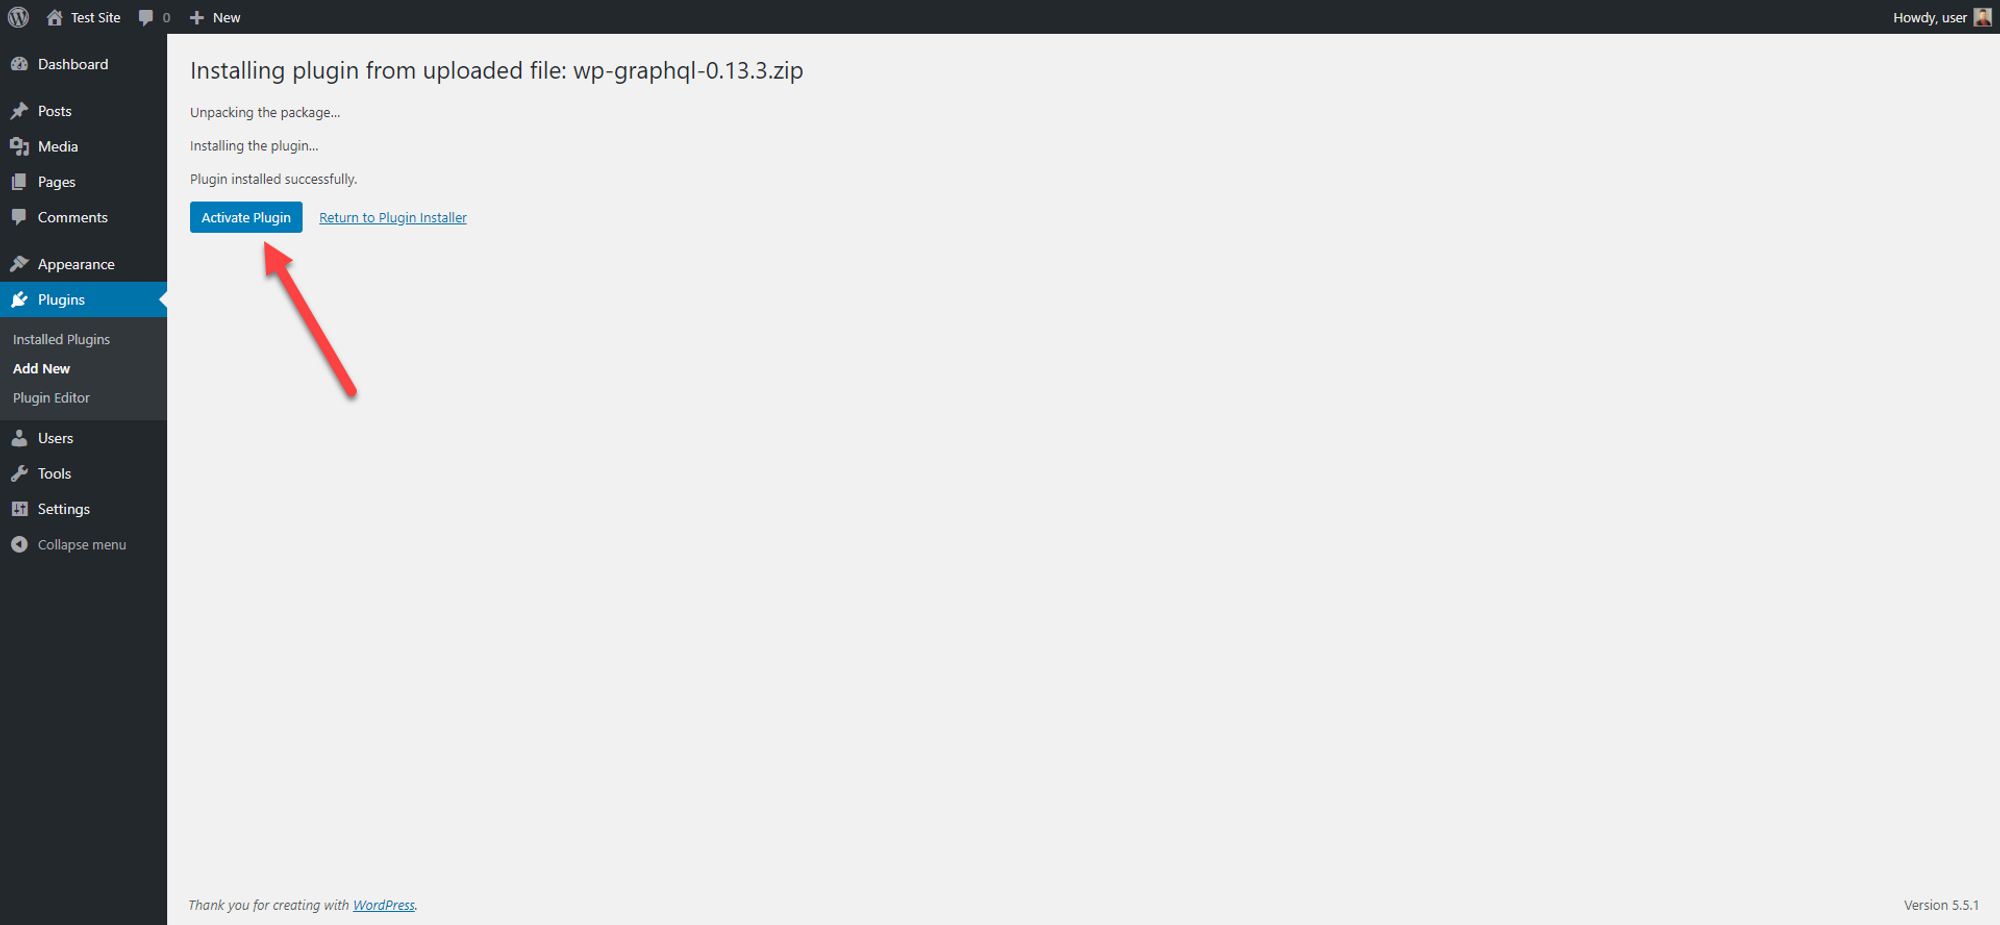
We could just use the built in REST API, but the WPGraphQL plugin presents a GraphQL query endpoint that can be easily used with Gridsome to query for data. Unfortunately this plugin is not in the common plugin repository, so you'll need to install it manually. Head over to https://github.com/wp-graphql/wp-graphql/releases and download the latest release. Once its done downloading, head into your WordPress admin and upload the plugin. Once its done, make sure to activate it too.
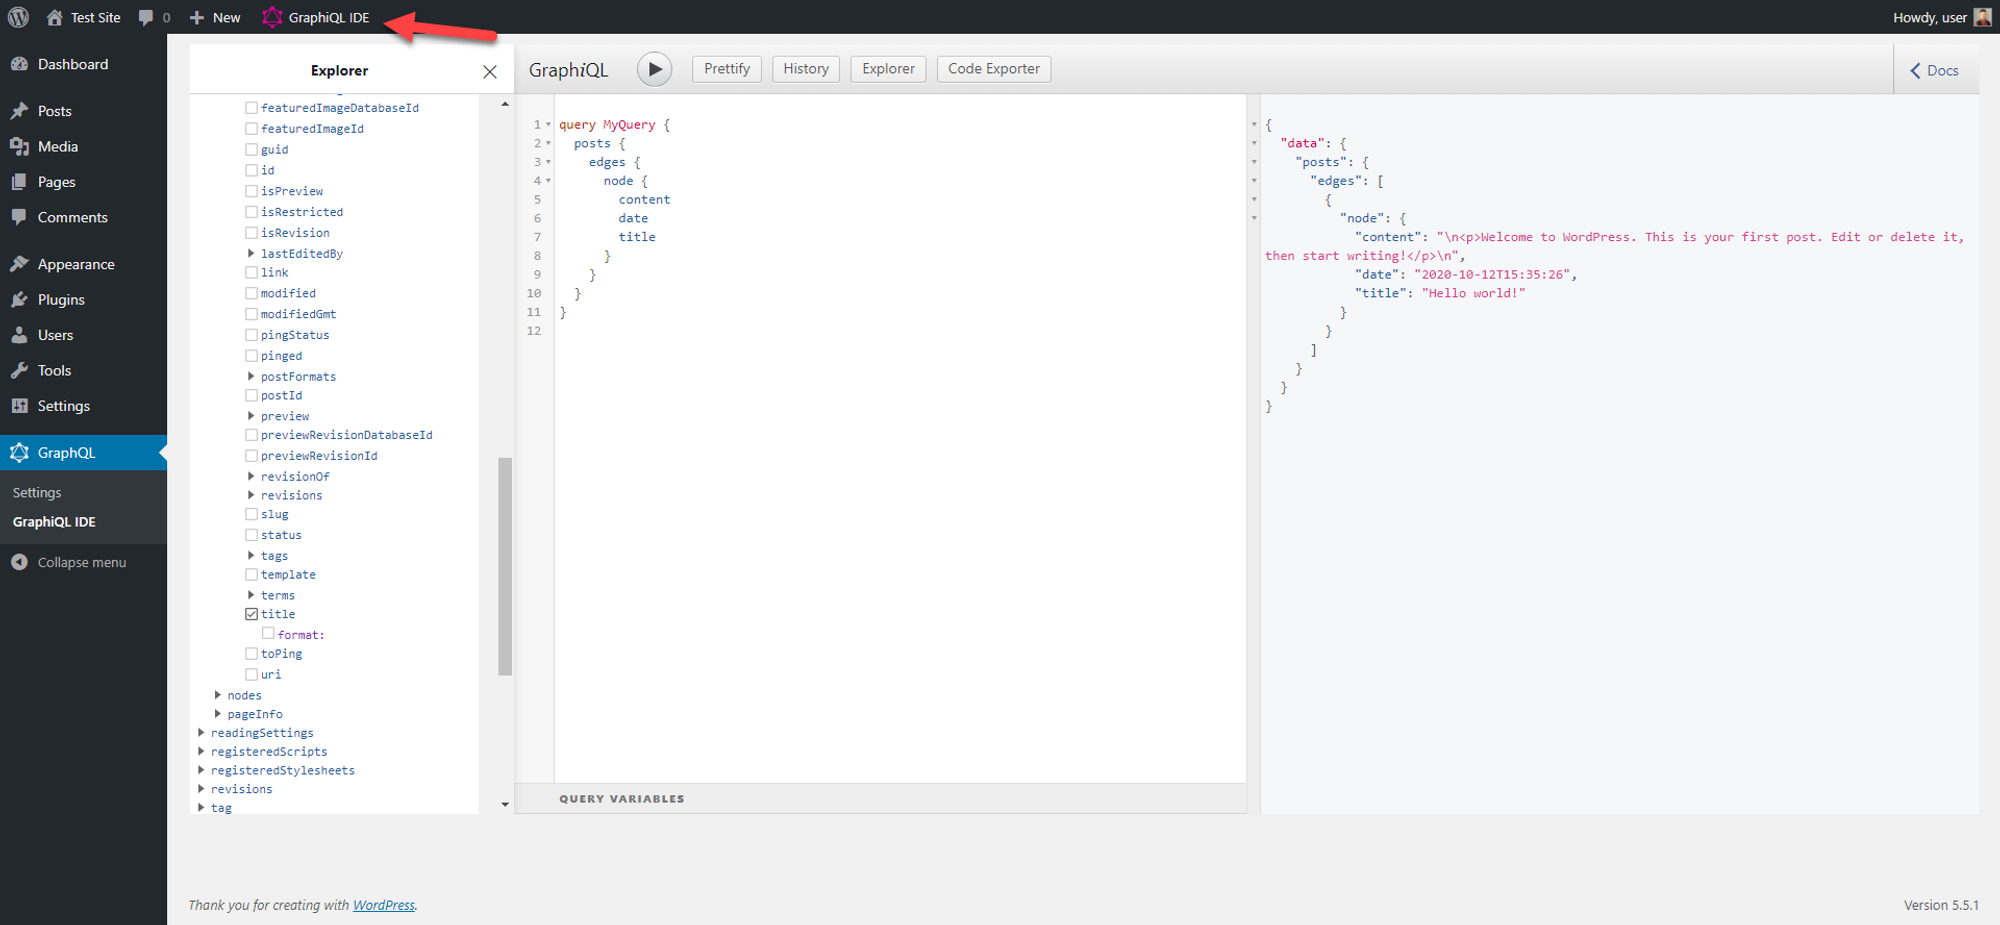
After the plugin has been uploaded & activated, you'll see a new link on the top bar called GraphiQL IDE. You can use this to build and test queries against WordPress
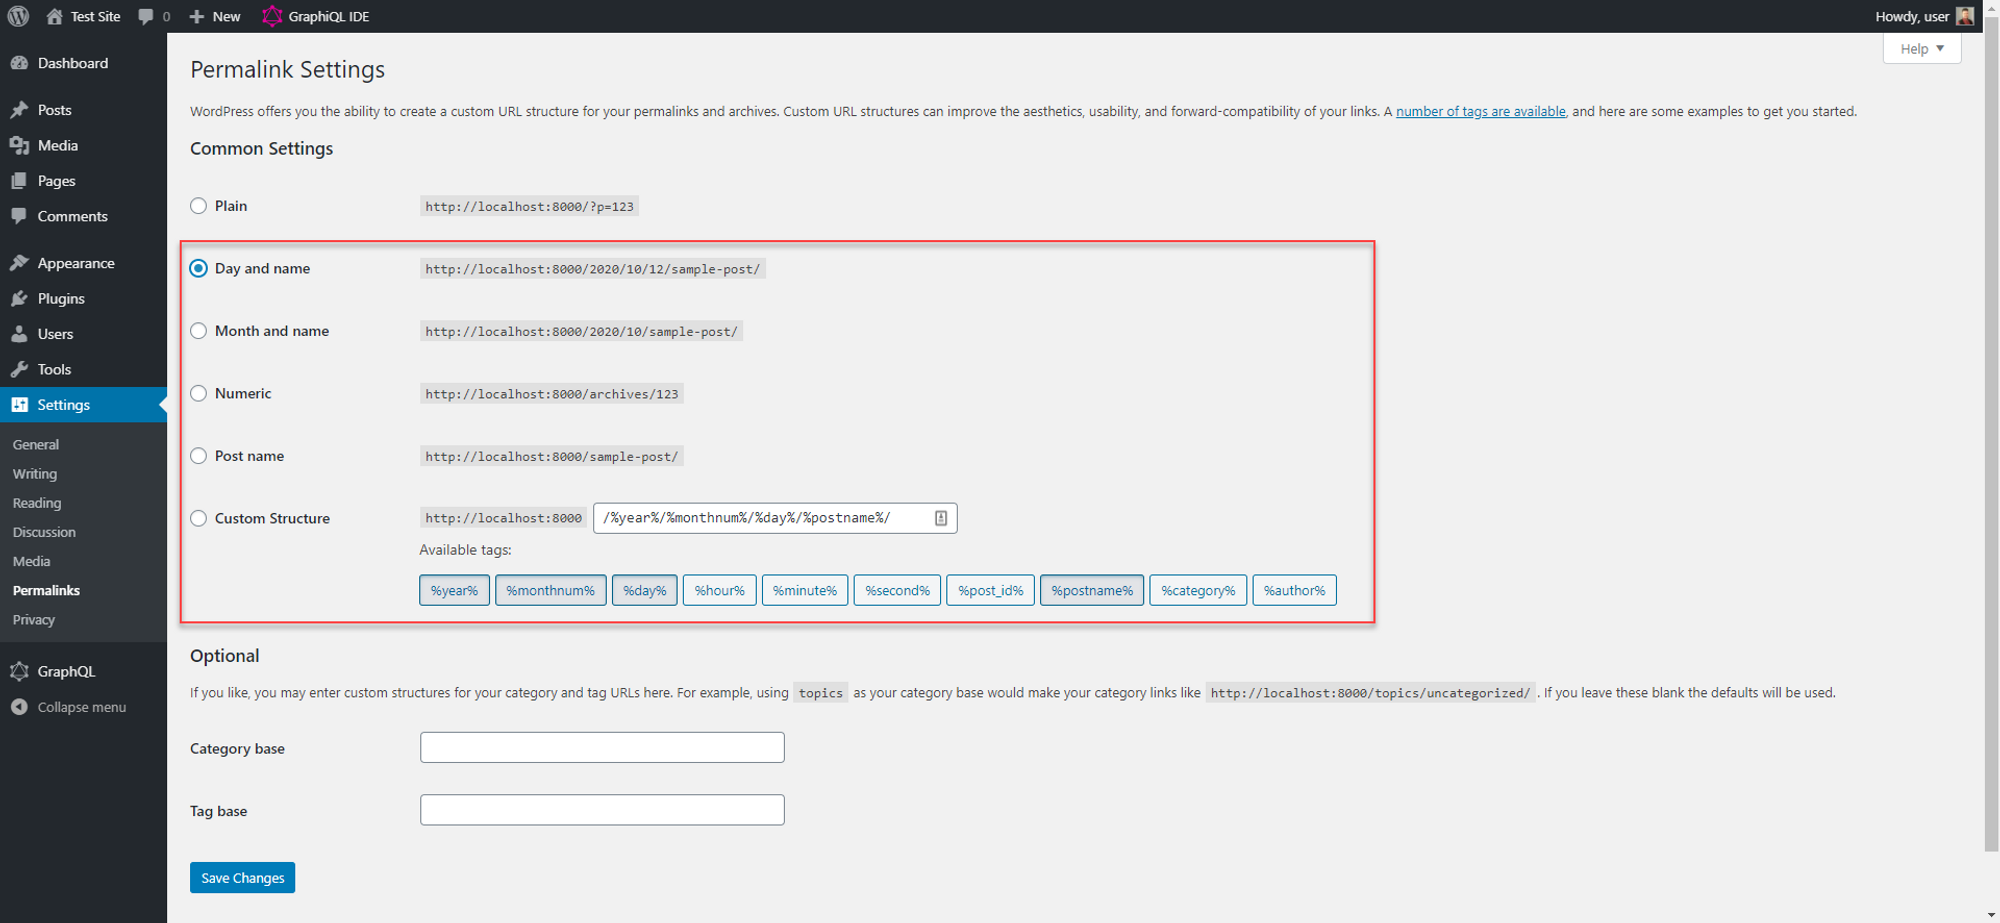
If you dont already have permalinks configured, you'll need to do that before proceeding. Selecting anything other than Plain should do the trick. I personally like Day and name, so thats what I chose here.
Connecting Gridsome
Lets start with a clean site. Create a new Gridsome site with gridsome create . Then install the gridsome-source-graphql plugin with npm install gridsome-source-graphql. Lets then add the following into the pluginsarray in gridsome.config.js. Replace the URL with whatever your site is, but its important that the /graphql remains.
{
  use: "gridsome-source-graphql",
  options: {
    url: "http://localhost:8000/graphql",
    fieldName: "wpGraphQl",
    typeName: "wpGraphQl"
  }
}
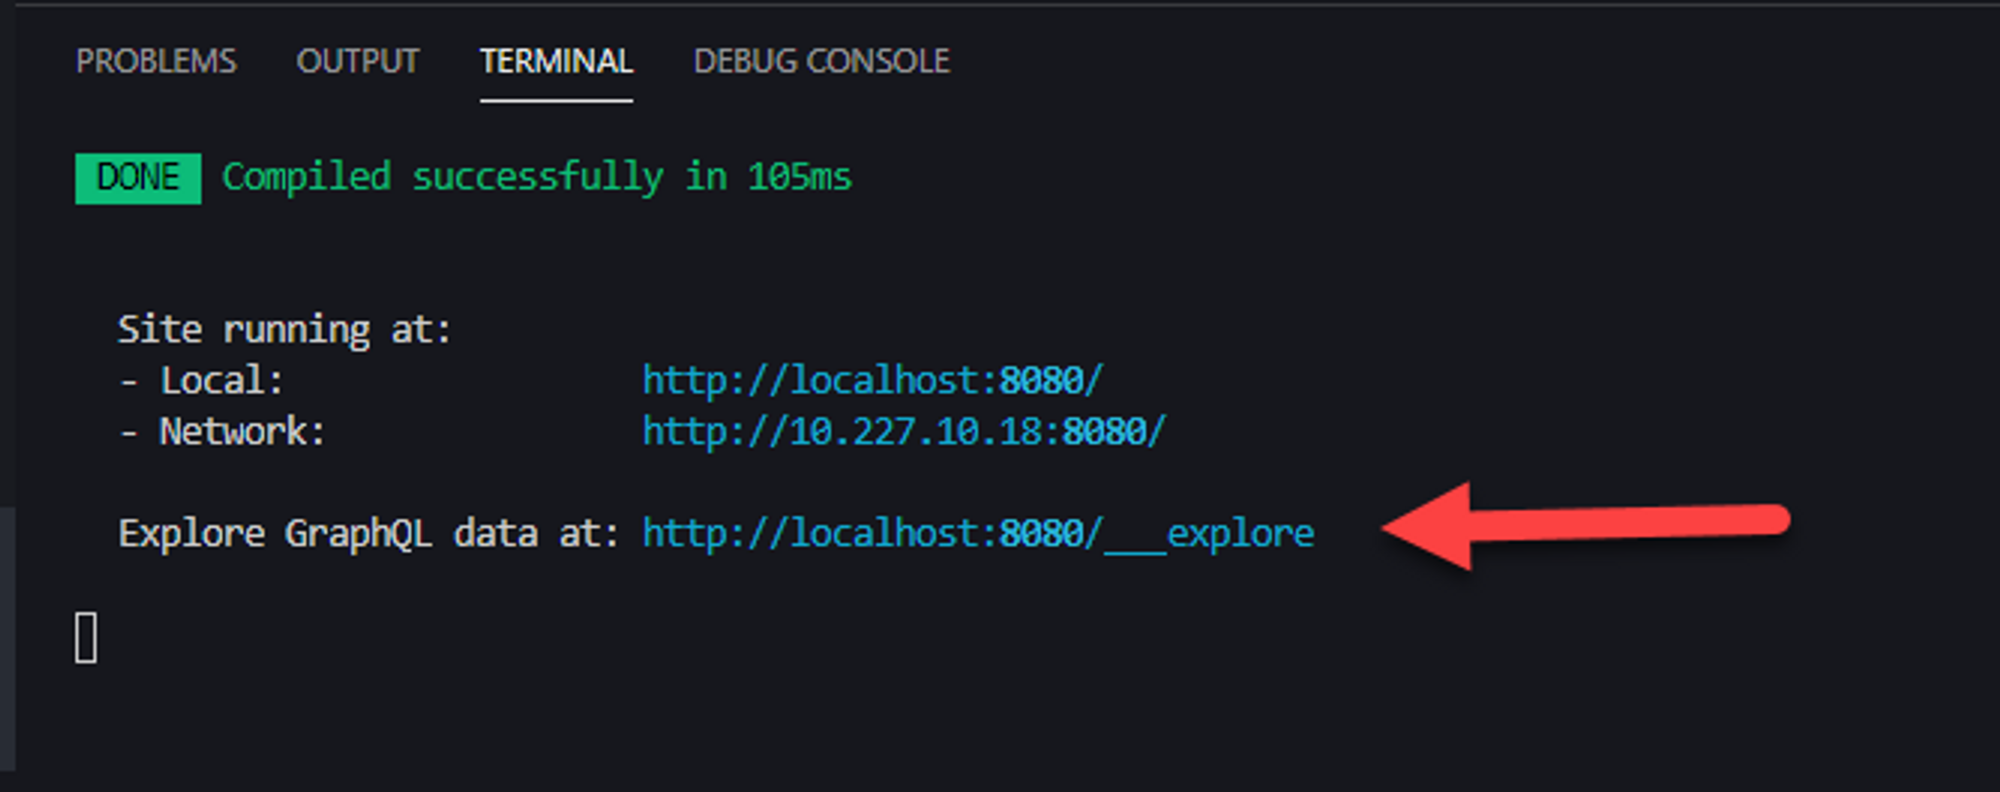
Now lets make sure our Gridsome site is talking to WordPress correctly. Start your site with npm run develop and head to the Explore GraphQL data URL shown in the terminal.
Lets run a query and make sure we get back our WordPress data.
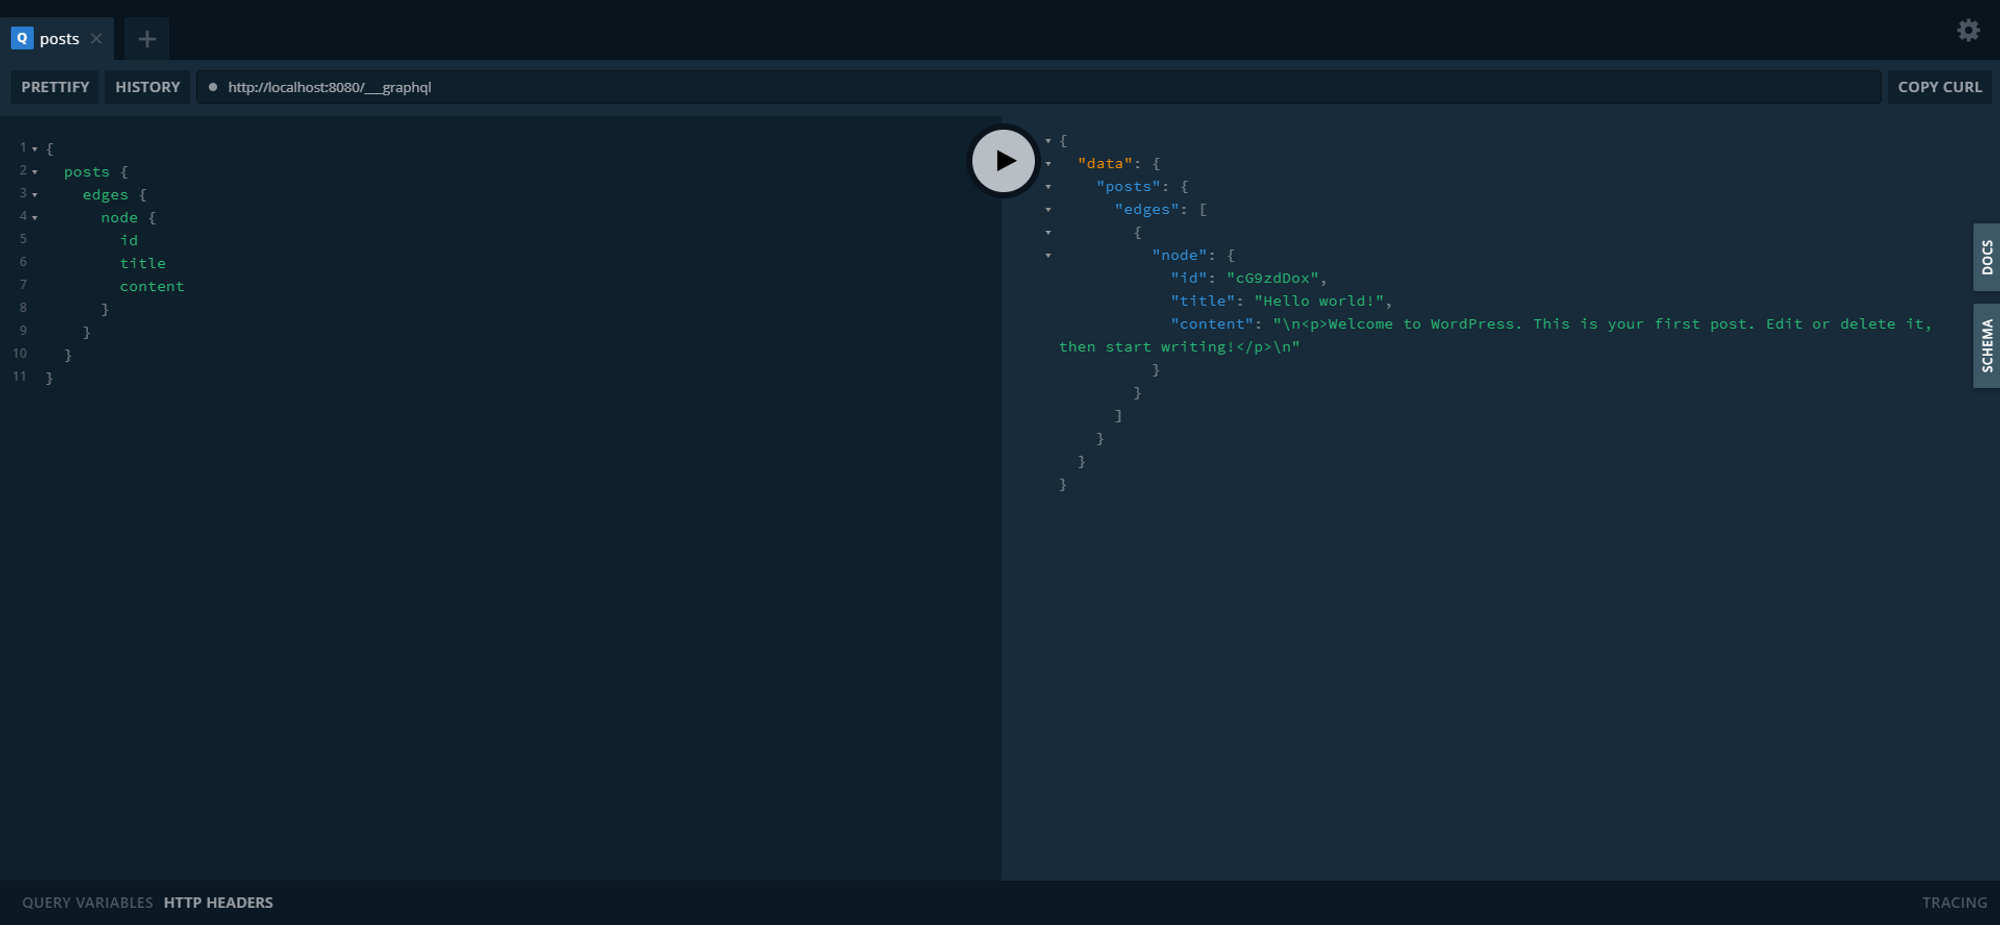
Great. Now update our Index.vue to display the data. Open the file and add a static query between the template and script sections. This will fetch our posts and the id, title, and content fields of each one.
<static-query>
{
  posts {
    edges {
      node {
        id
        title
        content
      }
    }
  }
}
</static-query>
Now in the template section, add the following HTML just before the closing tag.
<p>
  <h1>Posts</h1>
  <ul>
    <li v-for="{ node } in $static.posts.edges" :key="node.id">
      {{ node.title }}
    </li>
  </ul>
</p>
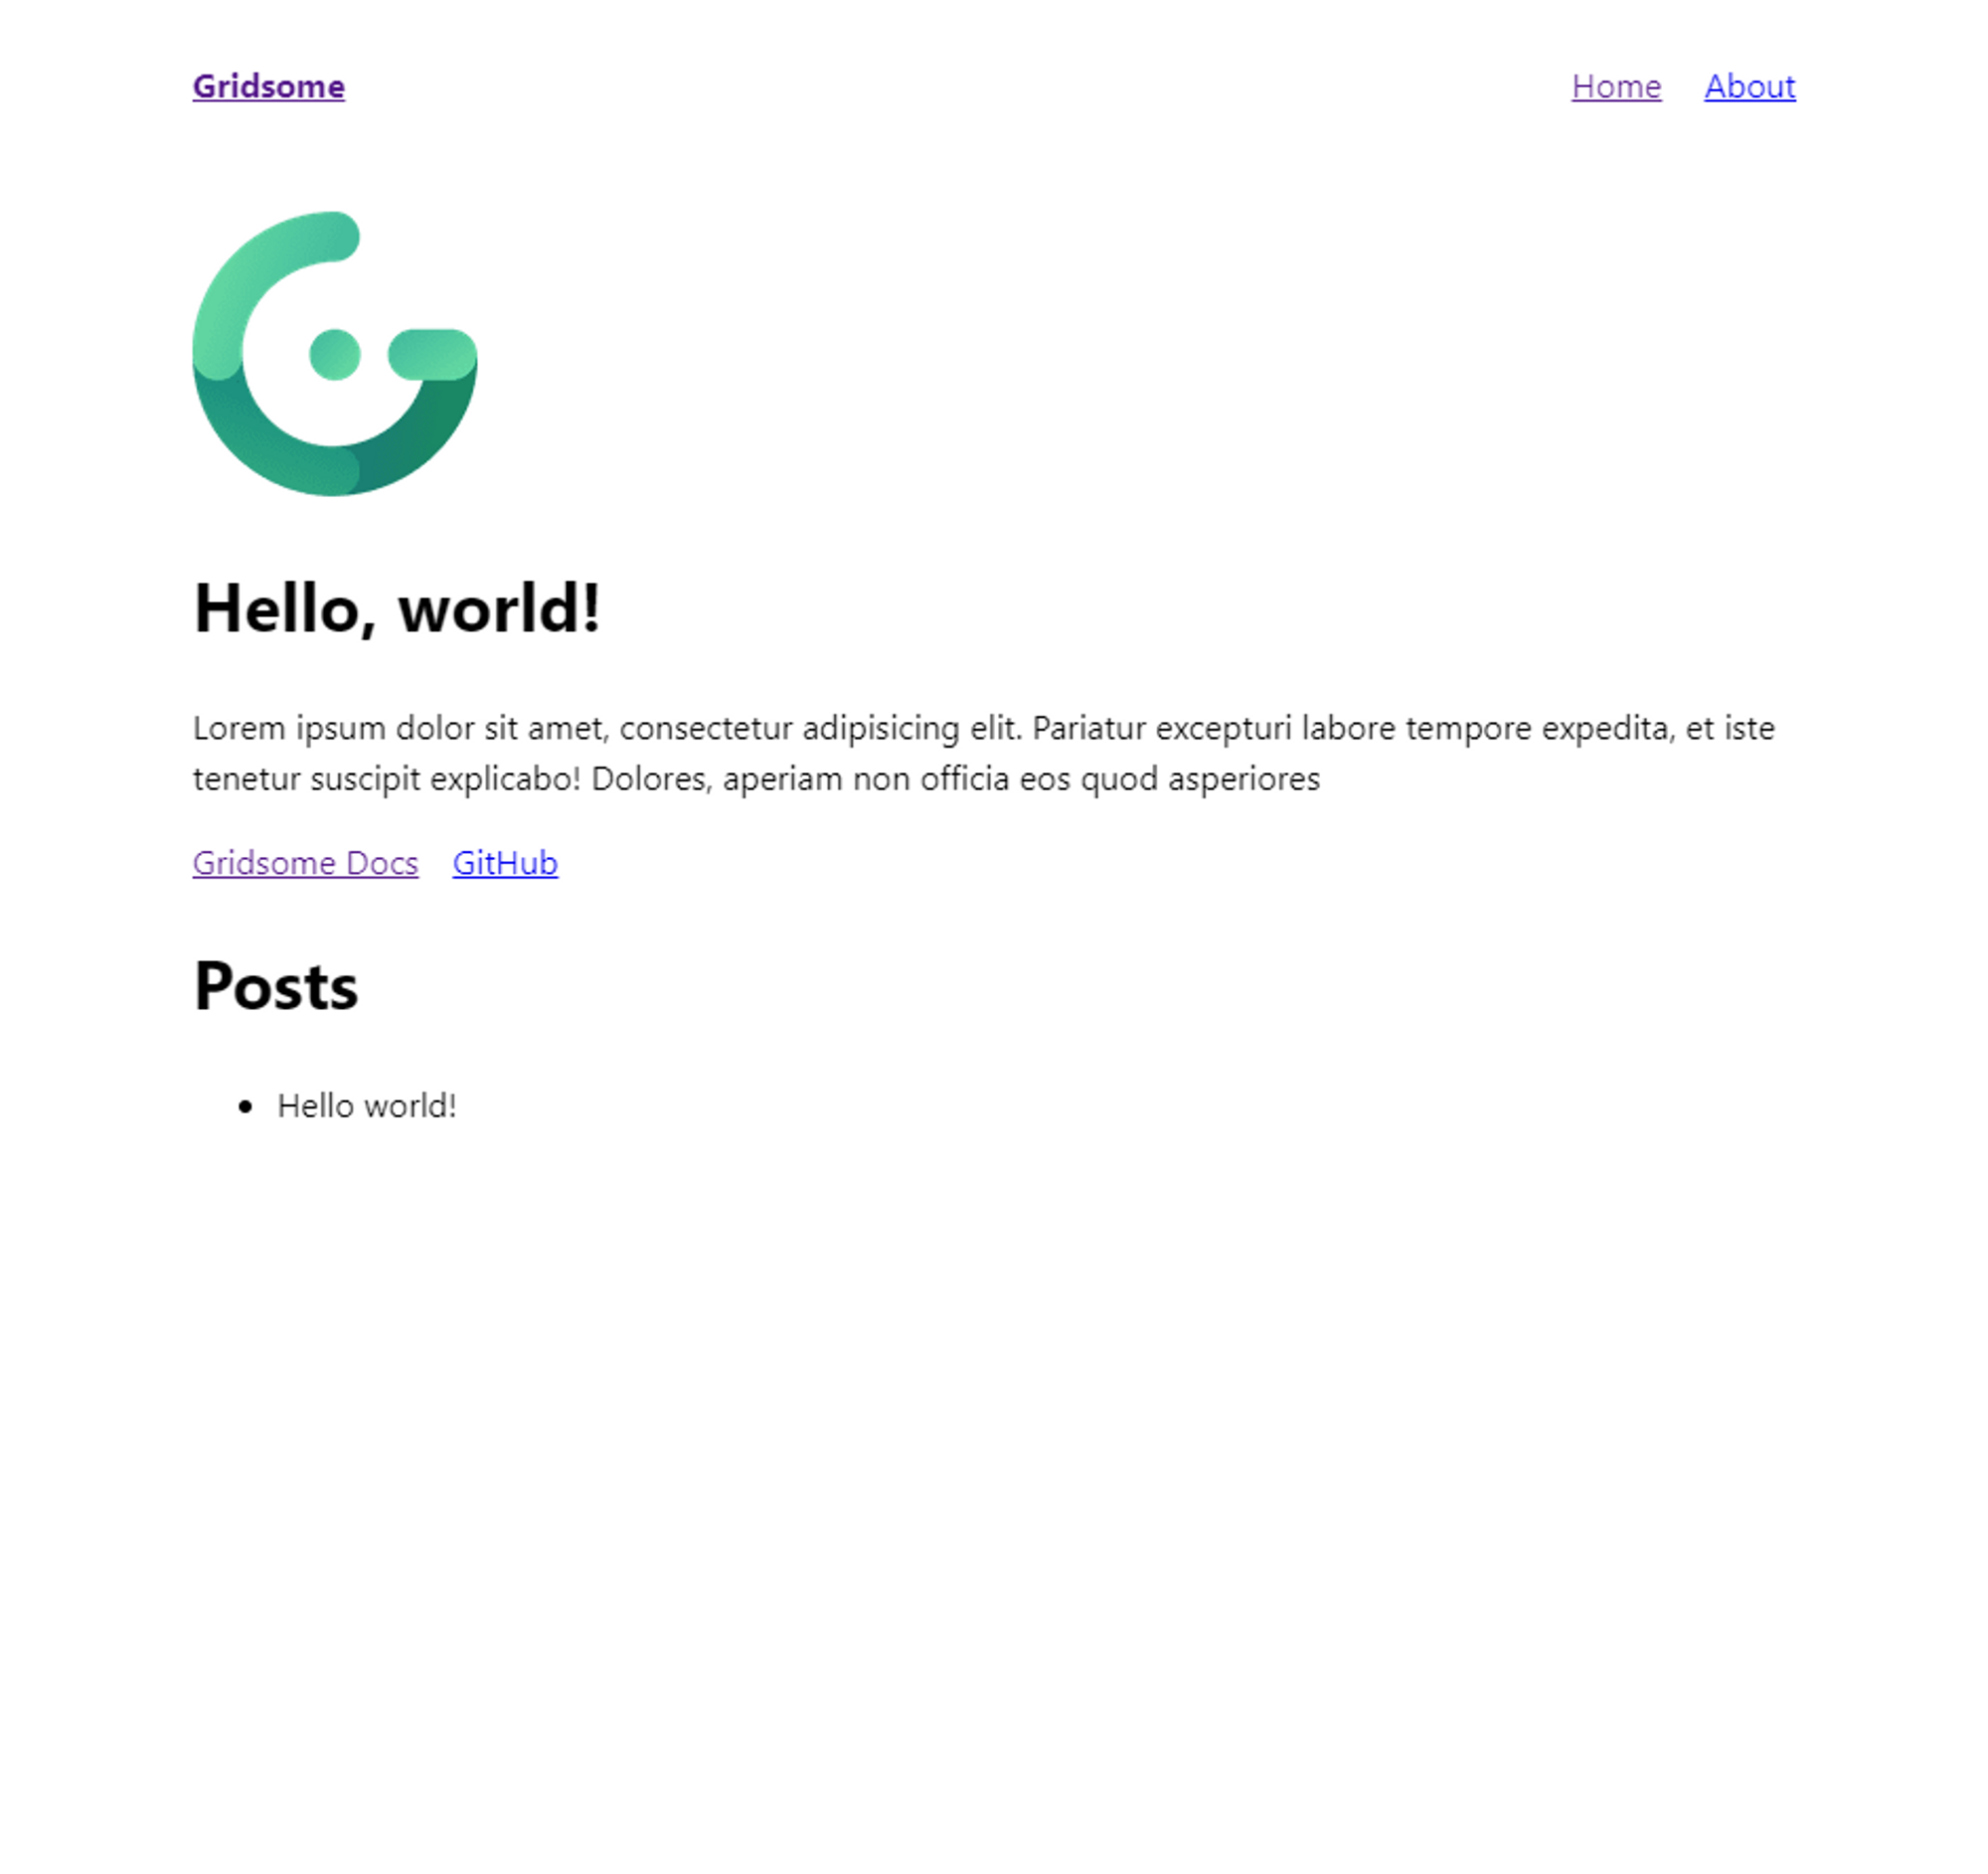
Once you save, Gridsome will automatically rebuild the site. So head to http://localhost:8080 in your browser to see the site. You should see a list of posts (up to 10 by default) listed.
In the next part of this article, I'll outline how to use this data along with page templates to create the actual post pages.