Welcome to June’s series: Building Discord Bots. In this article I’ll outline how to get your very own Discord bot setup and responding to messages.
Discord Bots are used every day by thousands of servers all over the world. They are used for all sorts of things such as creating registrations forms, integrating with third party APIs, and working with voice. In this series, I’ll be covering some of the basic things you’ll need to know to create your own Discord bot to do whatever you need!
Register with Discord
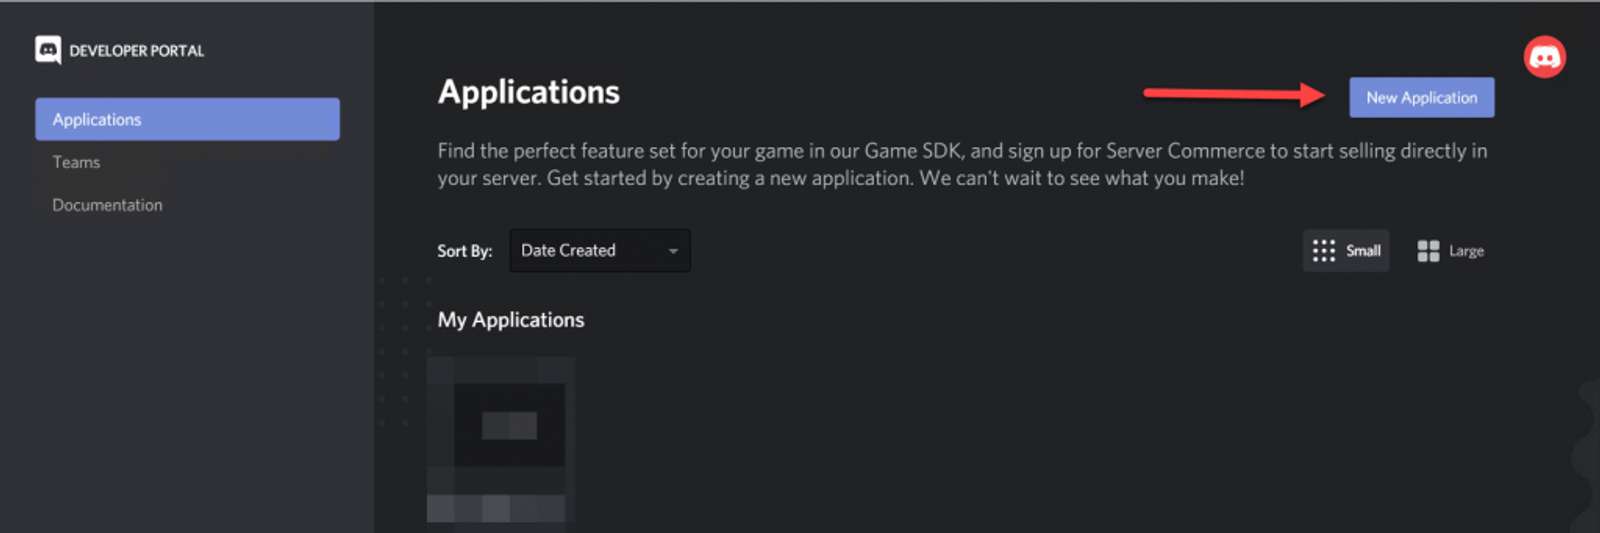
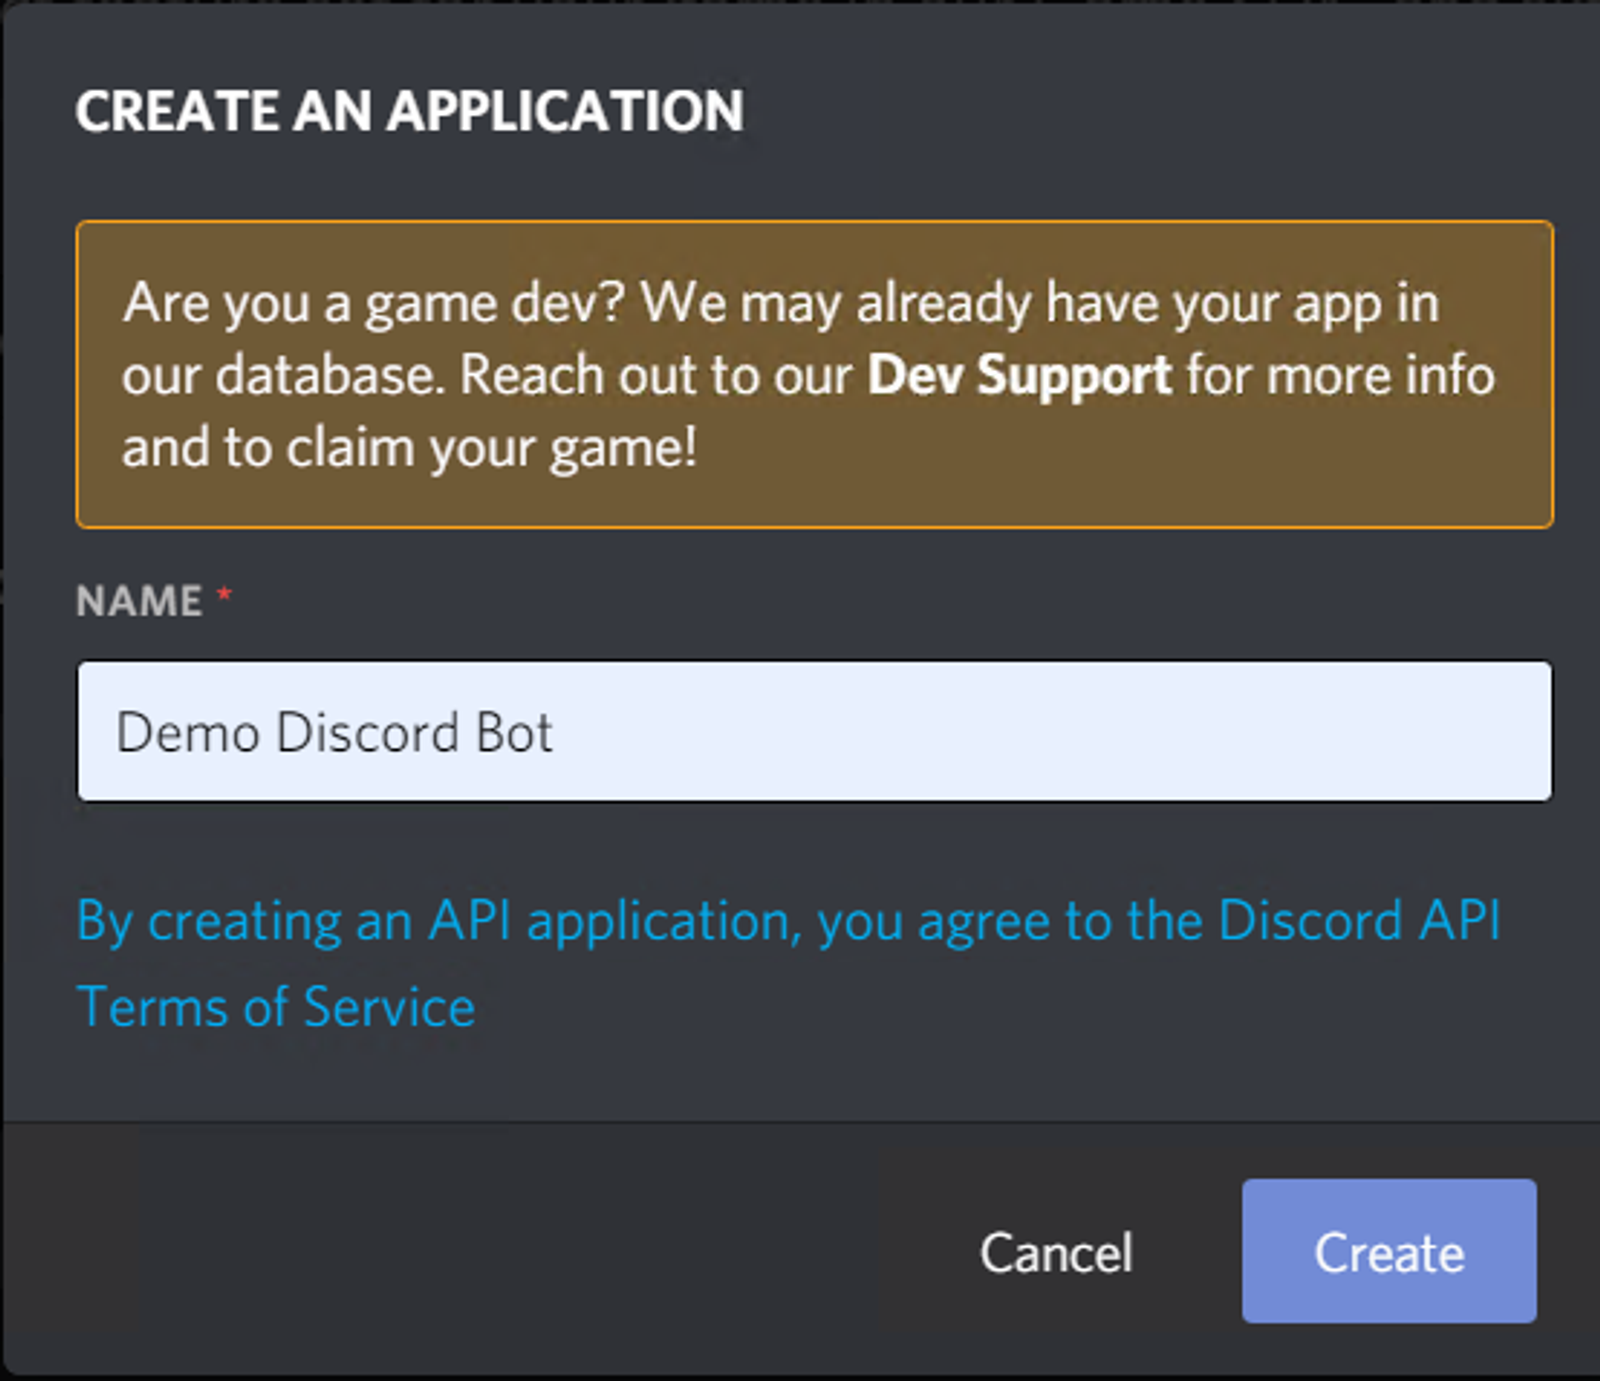
The first thing you need to do is register your bot with Discord. Head over to their developer portal (https://discordapp.com/developers) and create a new application by clicking New Application in the upper right and give your application a name.
Once you do that, add the bot capabilities to your application by going to the Bot tab and clicking Add Bot. Copy the token and save it for later. Then head over to the OAuth2 tab, check the Bot box under Scopes, and the Administrator box under Bot Permissions. Then copy the link and put it into your browser to add the bot to your server.
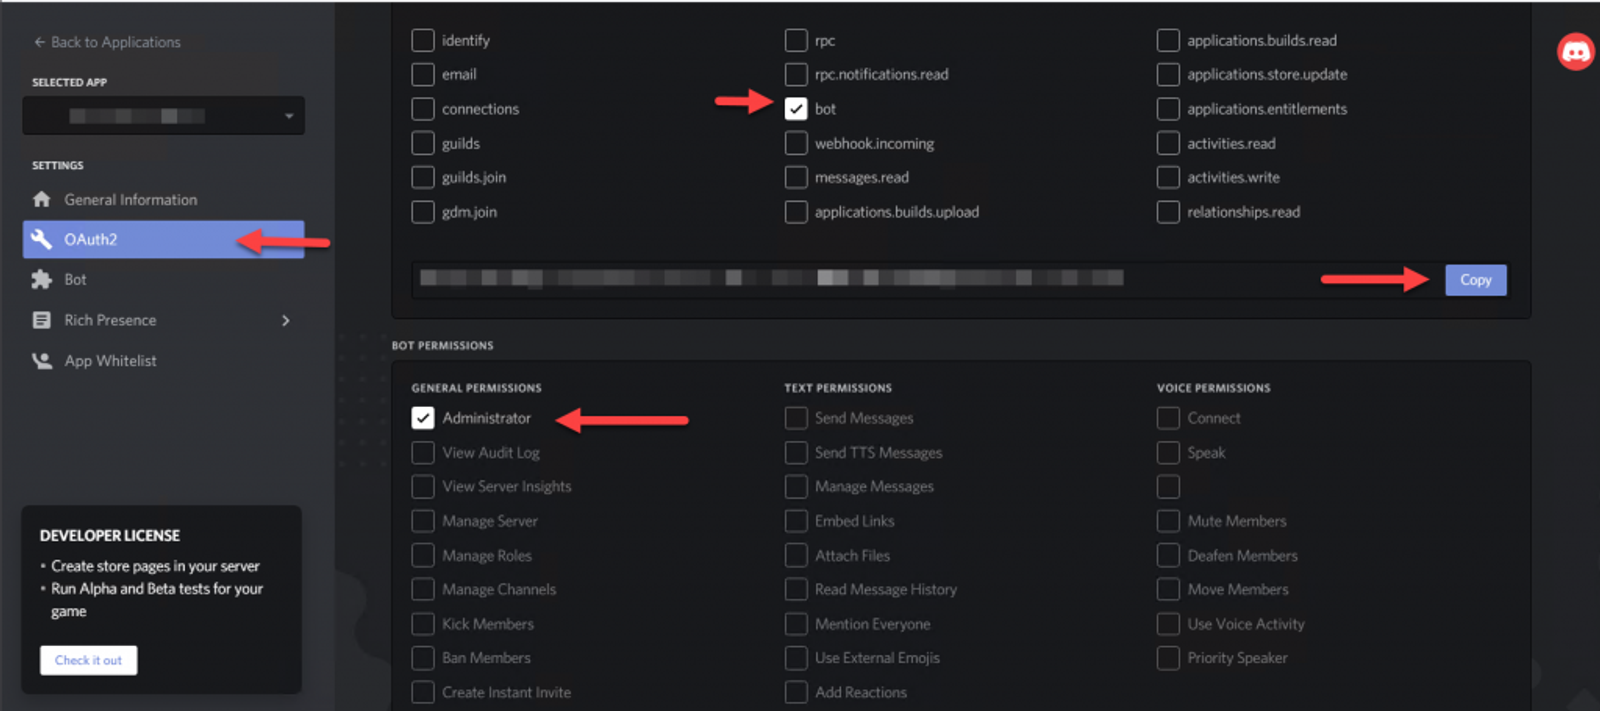
A few notes:
- We’re setting the bot up as an Administrator for this tutorial only. You should only add the permissions your bot actually needs to operate within a server.
- Also, you can only register a bot with servers that you administer. Luckily, Servers are free, so create one if you don’t already own one.
Setting Up Your Environment
My preferred IDE is VSCode so I’ll be using that in this series but you can use whatever IDE you prefer. First create a new folder on your computer and initialize it with npm init -y which will accept all the defaults. Then install the discord.js library with npm install discord.js. Create index.js and add the following code to the file. I’ve commented each block to explain what exactly it does.
    // Import discord.js and create the client
    const Discord = require('discord.js')
    const client = new Discord.Client();

    // Register an event so that when the bot is ready, it will log a messsage to the terminal
    client.on('ready', () => {
      console.log(`Logged in as ${client.user.tag}!`);
    })

    // Register an event to handle incoming messages
    client.on('message', async msg => {

      // Check if the message starts with '!hello' and respond with 'world!' if it does.
      if(msg.content.startsWith("!hello")) {
        msg.reply("world!")
      }
    })

    // client.login logs the bot in and sets it up for use. You'll enter your token here.
    client.login('your_token_here');
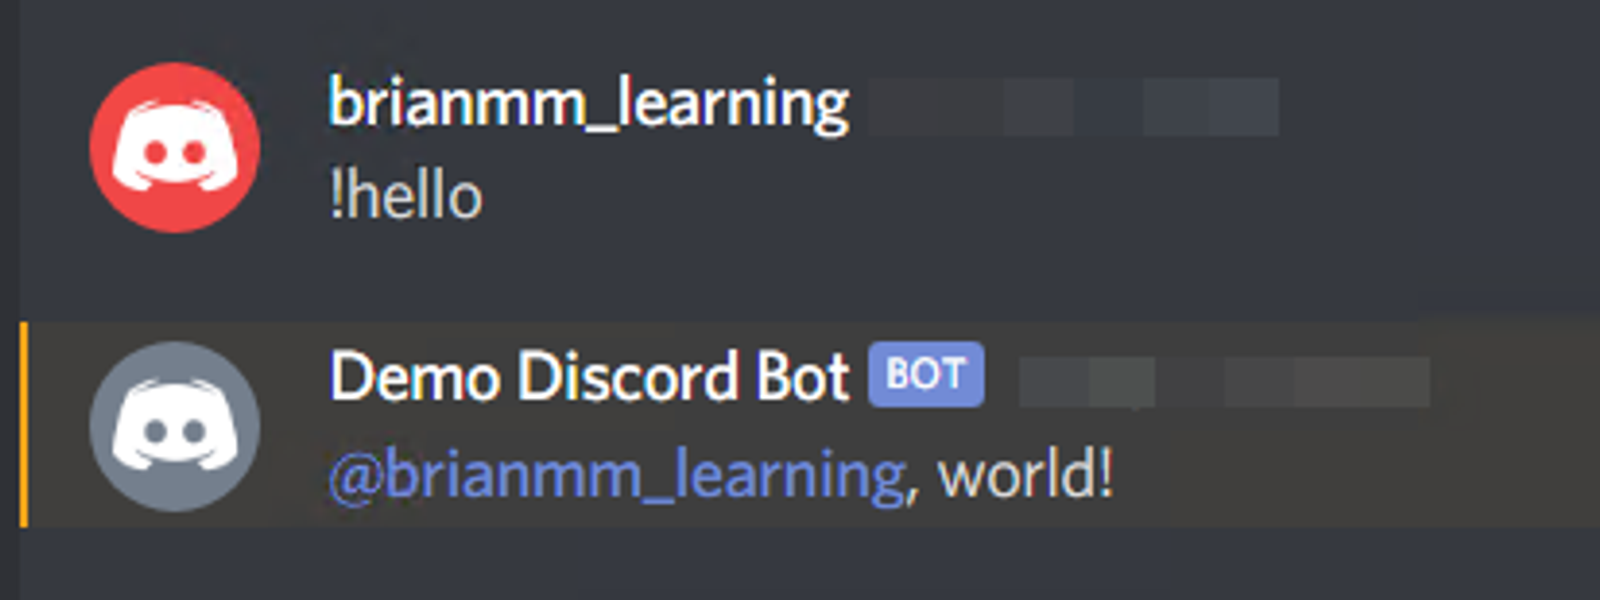
Testing your Bot
Now we’ll want to test to make sure our bot is running and responding to applications. The first indicator that things are working is in your terminal, you should see a message that the bot is running & signed in. You can also look on the sidebar of Discord to see that the bot is Online. And finally, drop a message into the general channel with `!hello` and your bot should respond.
A Warning about How Bots Work
Bots will monitor all channels of your server they have permissions to monitor. This powerful but can cause some issues. This is why we’re going to want to prevent our bot from responding to other bots (including itself), so add the following line to the beginning of the message handler. This will prevent this exact scenario;
    // Import discord.js and create the client
    const Discord = require('discord.js')
    const client = new Discord.Client();

    // Register an event so that when the bot is ready, it will log a messsage to the terminal
    client.on('ready', () => {
      console.log(`Logged in as ${client.user.tag}!`);
    })

    // Register an event to handle incoming messages
    client.on('message', async msg => {
      // This block will prevent the bot from responding to itself and other bots
      if(msg.author.bot) {
        return
      }

      // Check if the message starts with '!hello' and respond with 'world!' if it does.
      if(msg.content.startsWith("!hello")) {
        msg.reply("world!")
      }
    })

    // client.login logs the bot in and sets it up for use. You'll enter your token here.
    client.login('your_token_here');
Congratulations! You now have your every own Discord bot. I’ll be expanding on this bot over the next few weeks.