In this article, I'm going to cover how you can setup GitHub Actions to automatically deploy changes to AWS using S3 & CloudFront. To follow along, check out the other articles in the series located at the bottom of this page.
Setting up a Deploy Account in AWS
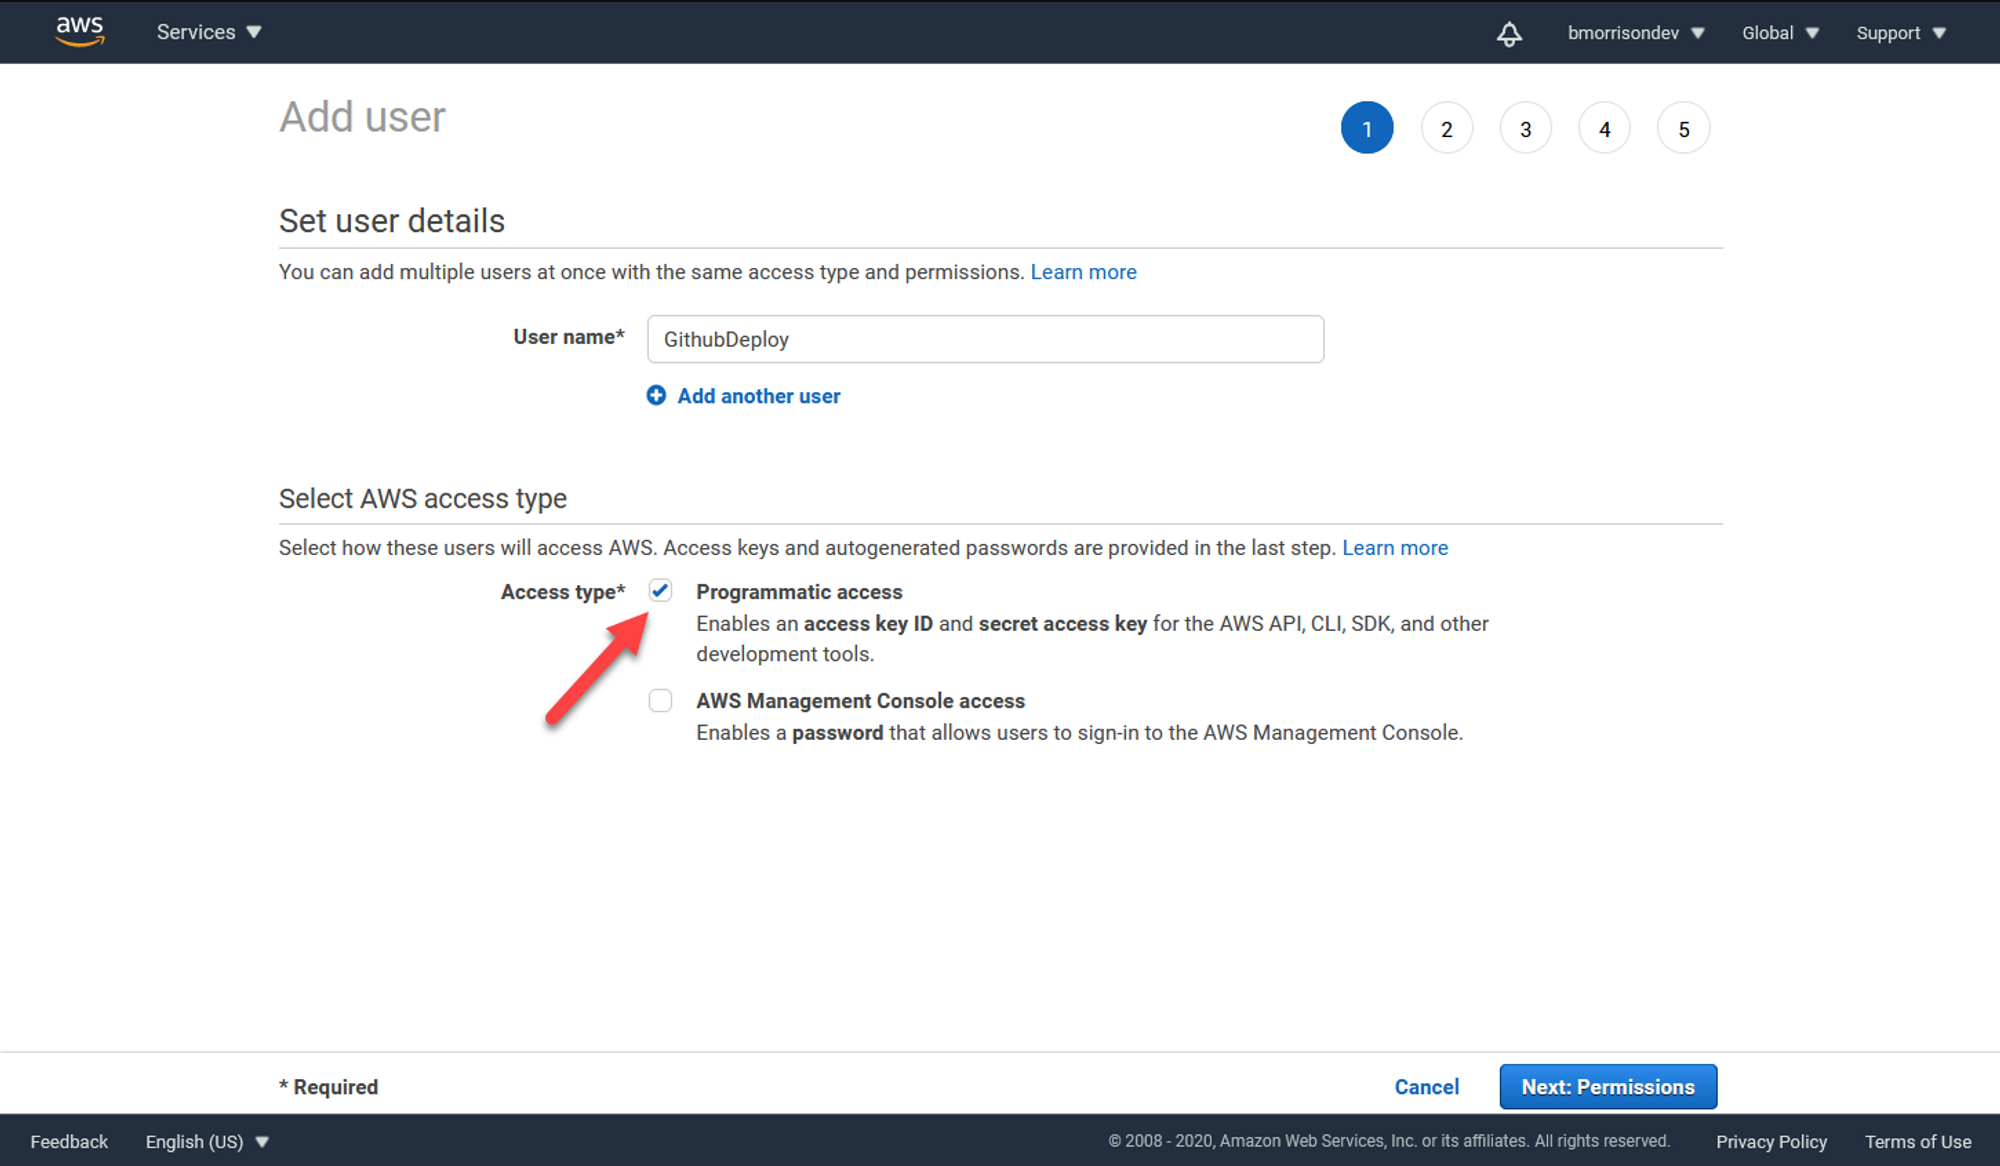
Before we can setup the Action, we need to setup an account in AWS to allow us to deploy our code. In AWS, head to IAM and create a new user. I named my user GithubDeploy, but you can name yours whatever you prefer. We need to make sure Programmatic access is selected before continuing.
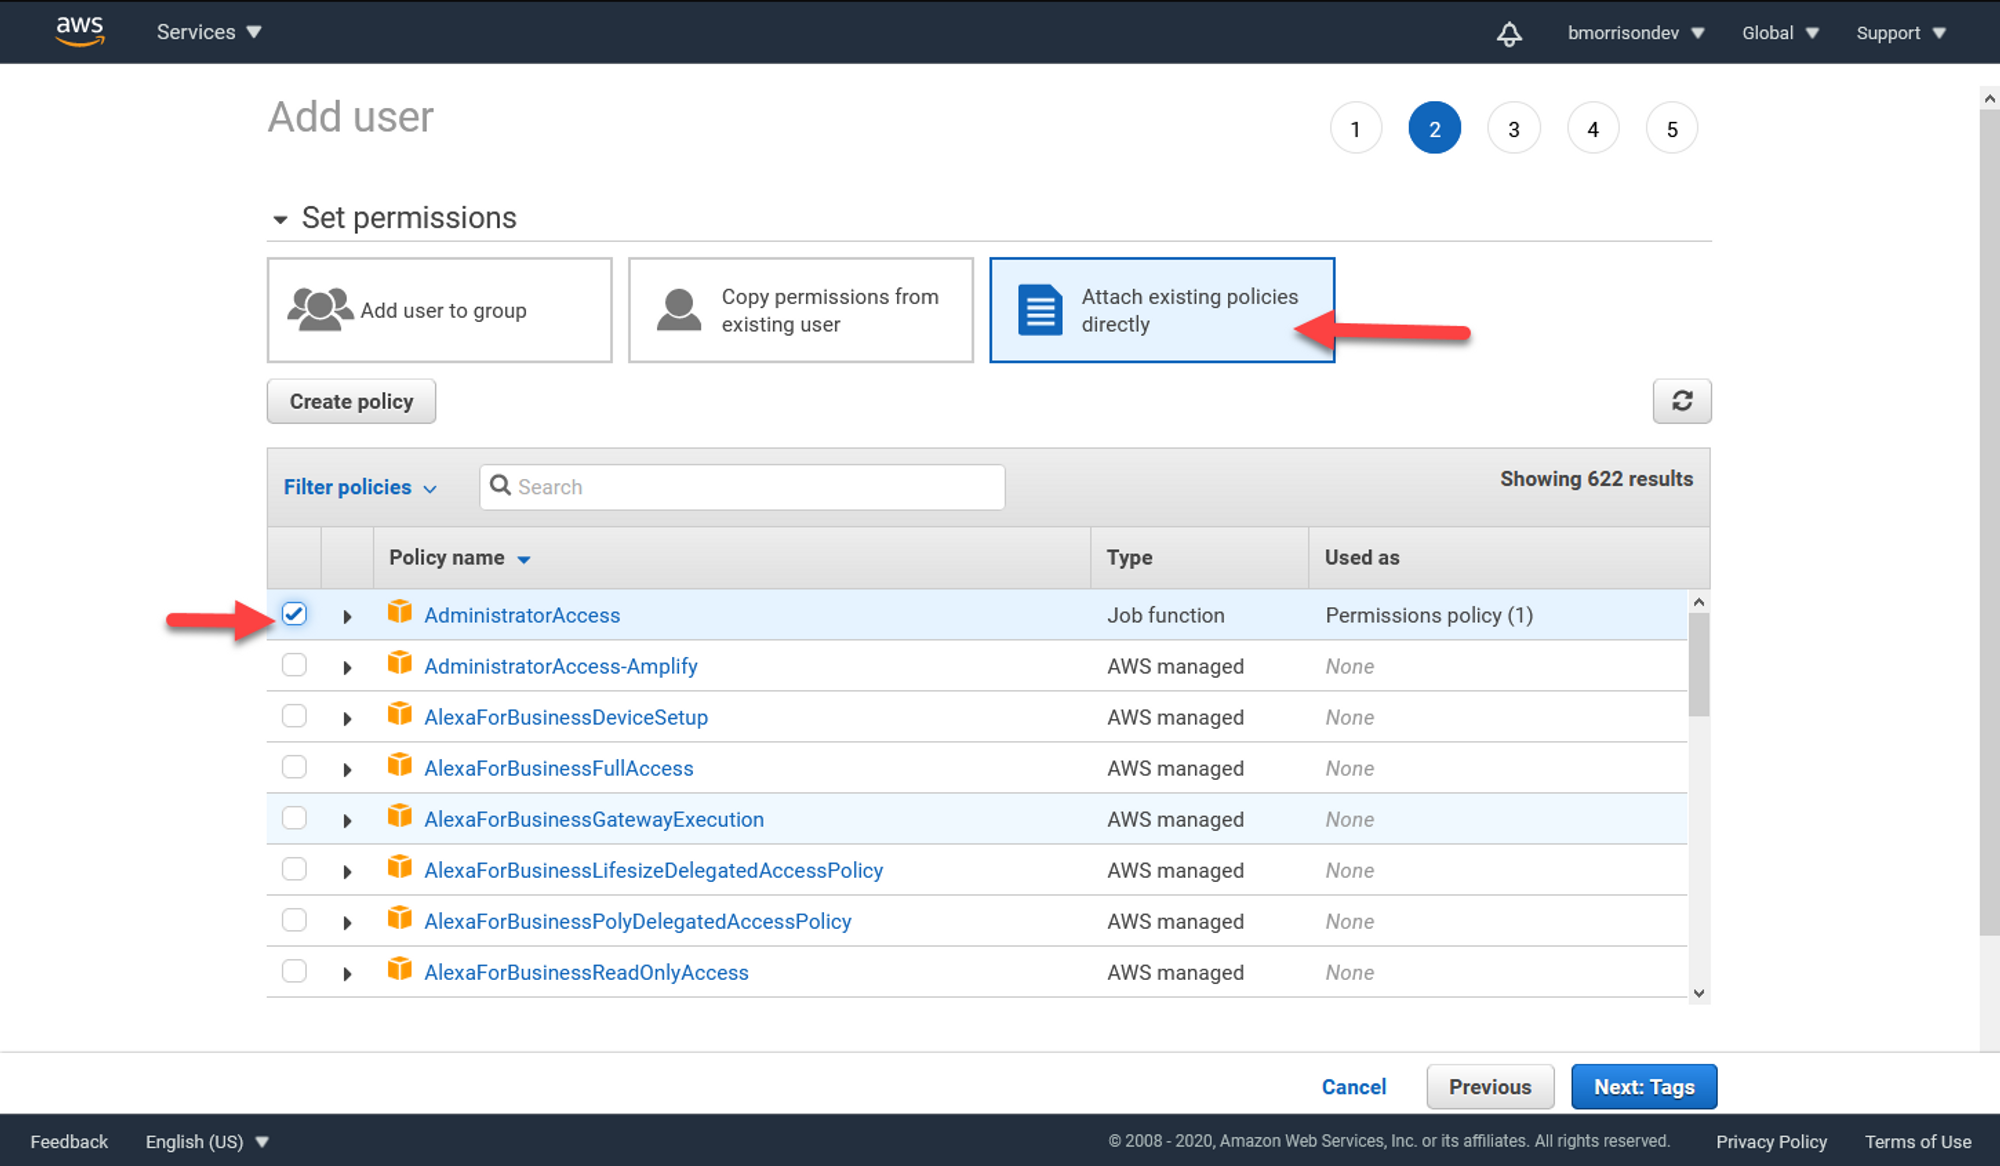
In the next view, select Attach existing policies directly and check AdministratorAccess. Note that this will give the account access to EVERYTHING in our AWS account. In a production scenario, it would be a good idea to create a custom policy with only the required permissions enabled, but thats beyond the scope of this article.
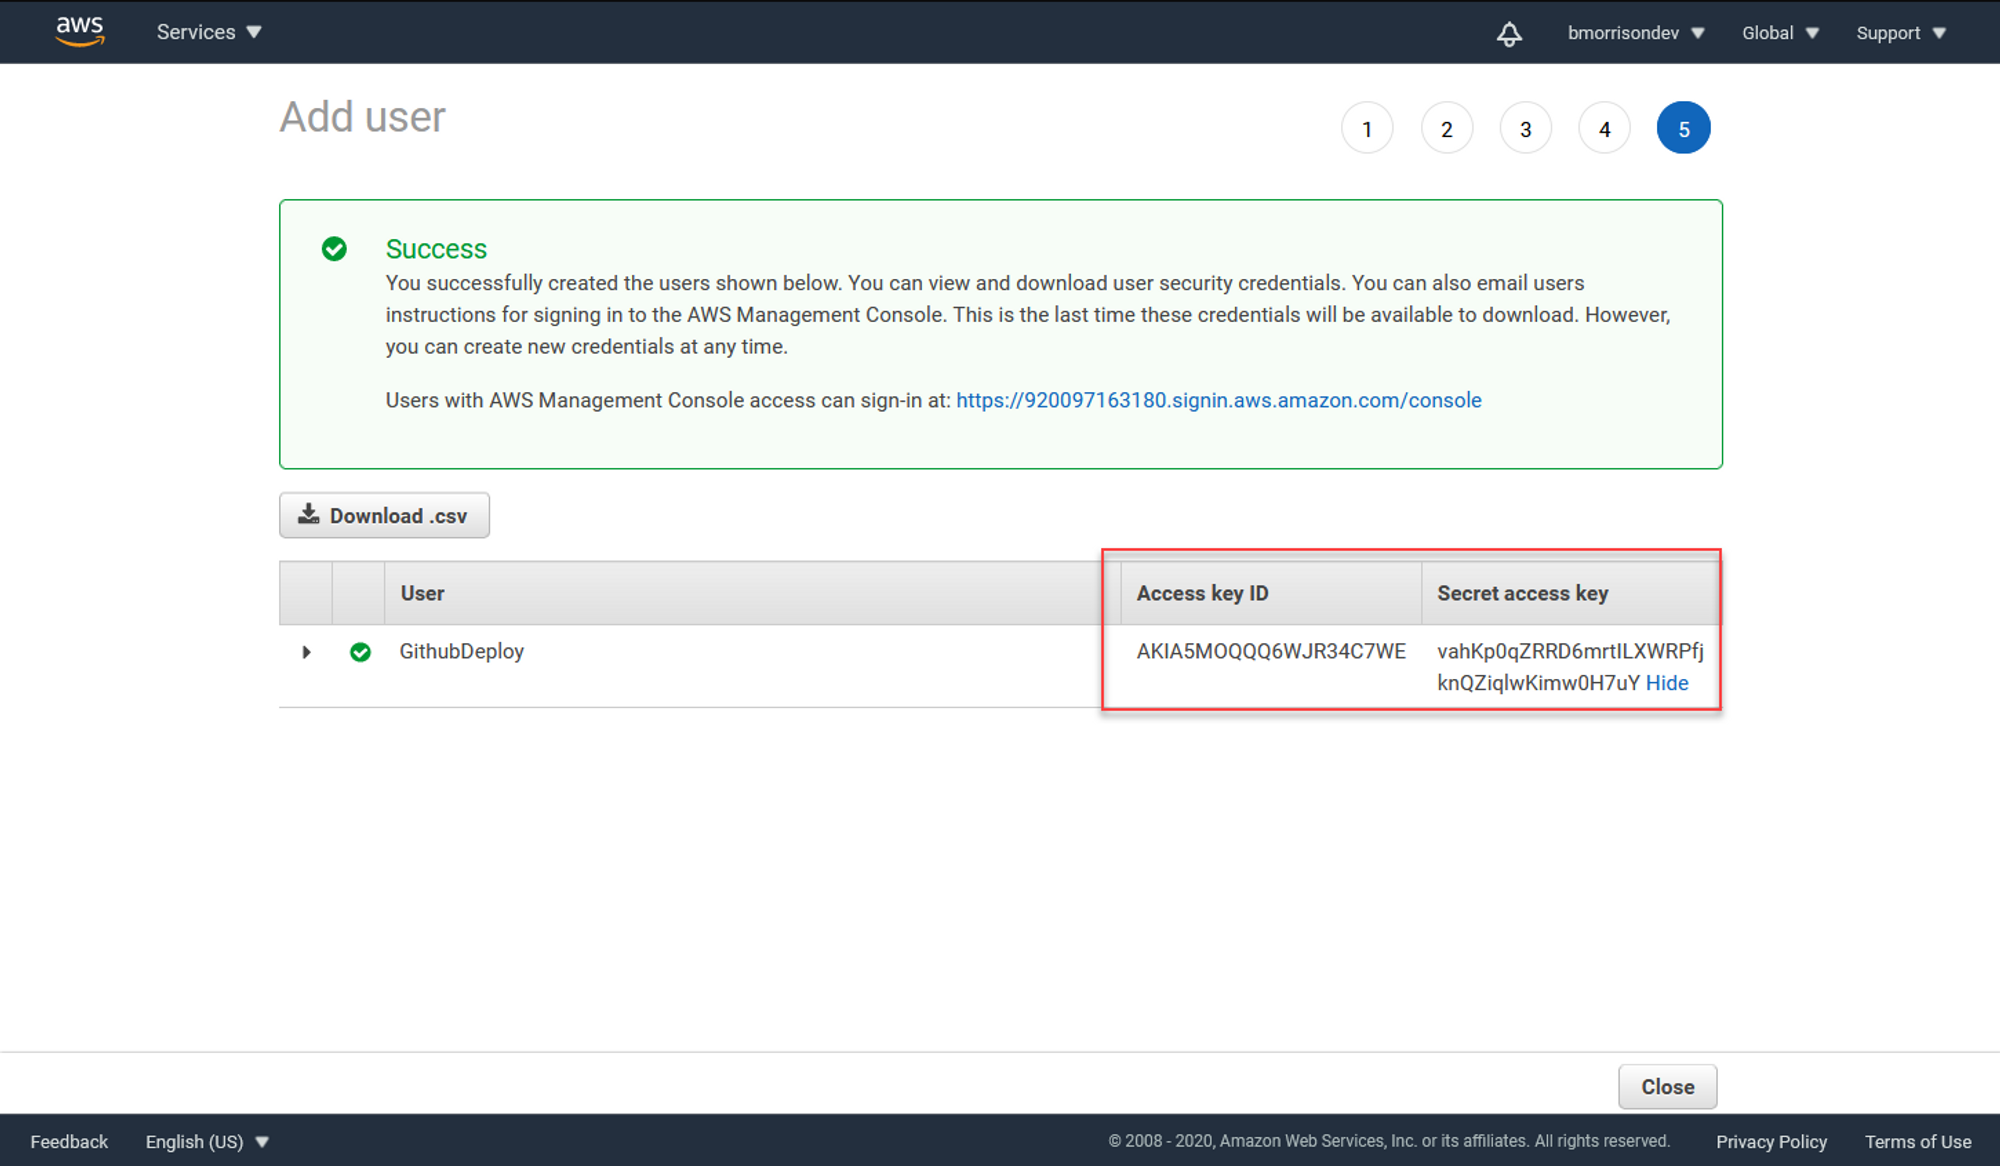
You can click next all the way to the final view, leaving the defaults as you go. You'll be presented with an Access key ID and Secret access key. Take note of these credentials as we'll need to add them into GitHub when we create our action. You also wont be able to retrieve the secret once you navigate away from this view.
Creating the GitHub Action
GitHub Actions are tools that allow you to perform actions with your code. Most commonly they are used to automate building, testing, and deployment of code. If you haven't already, push your code up to a GitHub repo. Then open the repo and select the Actions tab. From there, select set up a workflow yourself.
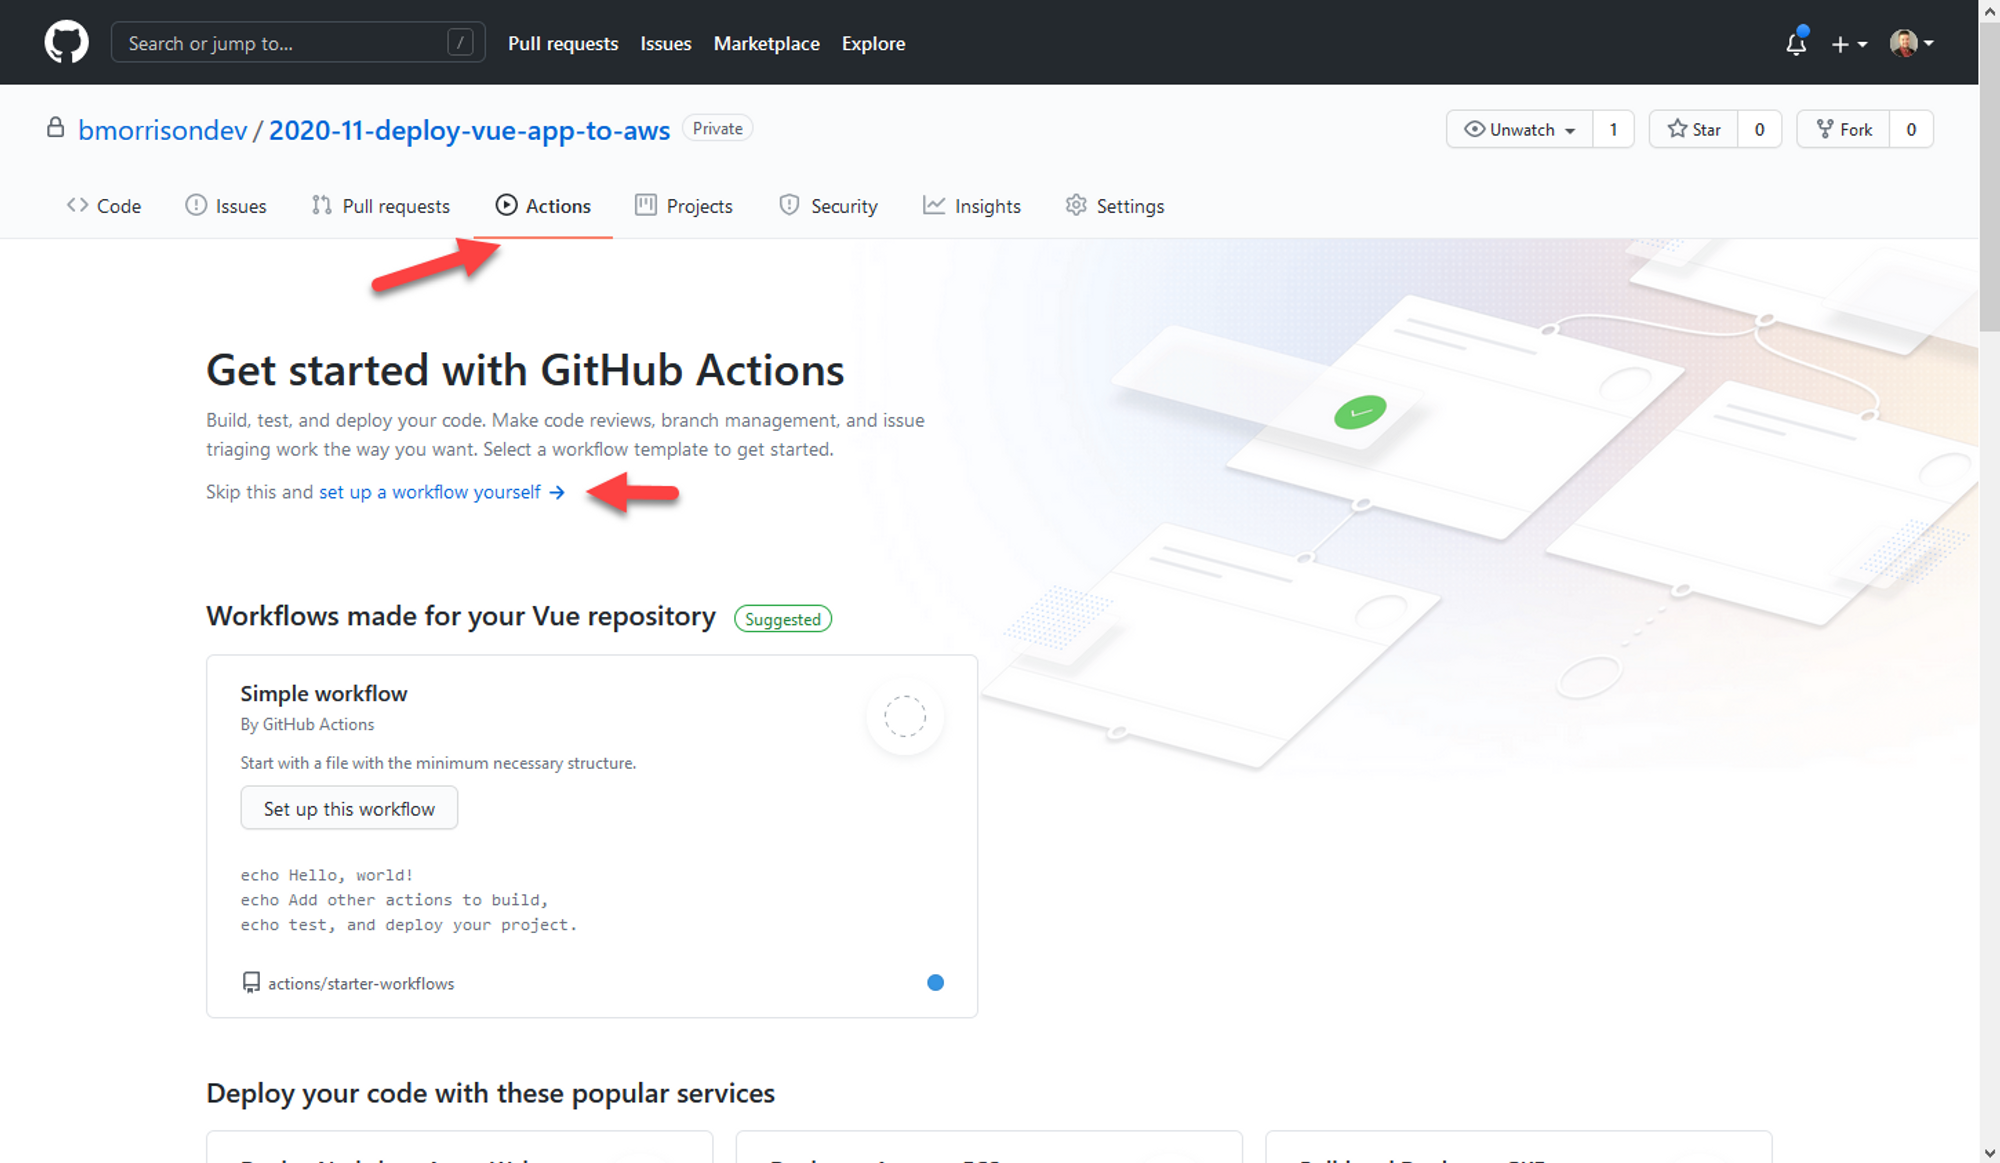
You'll be presented with a text editor to build your Action. Paste the following code into yours. Note the comments throughout as they explain what each section does.
# This is a basic workflow to help you get started with Actions

name: Deploy to AWS

on:
  # Triggers the workflow on push or pull request events but only for the main branch
  push:
    branches: [ main ]
  pull_request:
    branches: [ main ]

  # Allows you to run this workflow manually from the Actions tab
  workflow_dispatch:

# A workflow run is made up of one or more jobs that can run sequentially or in parallel
jobs:
  # This workflow contains a single job called "build"
  build:
    # The type of runner that the job will run on
    runs-on: ubuntu-latest

    # Steps represent a sequence of tasks that will be executed as part of the job
    steps:
      # Checks-out your repository under $GITHUB_WORKSPACE, so your job can access it
      - uses: actions/checkout@v2

      # Setup NodeJS in our environment
      - name: Setup Node.js environment
        uses: actions/setup-node@v2.1.2

      # Runs a set of commands using the runners shell
      - name: Run a multi-line script
        run: |
          npm install
          npm run build

      # Syncs your 'dist' folder from buildng the Vue app with an S3 bucket
      - name: S3 Sync
        uses: jakejarvis/s3-sync-action@v0.5.1
        with:
          args: --acl public-read --delete
        env:
          AWS_S3_BUCKET: ${{ secrets.AWS_S3_BUCKET }}
          AWS_ACCESS_KEY_ID: ${{ secrets.AWS_ACCESS_KEY_ID }}
          AWS_SECRET_ACCESS_KEY: ${{ secrets.AWS_SECRET_ACCESS_KEY }}
          AWS_REGION: 'us-east-1'
          SOURCE_DIR: 'dist'

      # Clears the CloudFront cache so new requests will receive the latest version of your app
      - name: Invalidate Cloudfront
        uses: chetan/invalidate-cloudfront-action@v1.3
        env:
          DISTRIBUTION: ${{ secrets.DISTRIBUTION }}
          PATHS: '/*'
          AWS_REGION: 'us-east-1'
          AWS_ACCESS_KEY_ID: ${{ secrets.AWS_ACCESS_KEY_ID }}
          AWS_SECRET_ACCESS_KEY: ${{ secrets.AWS_SECRET_ACCESS_KEY }}
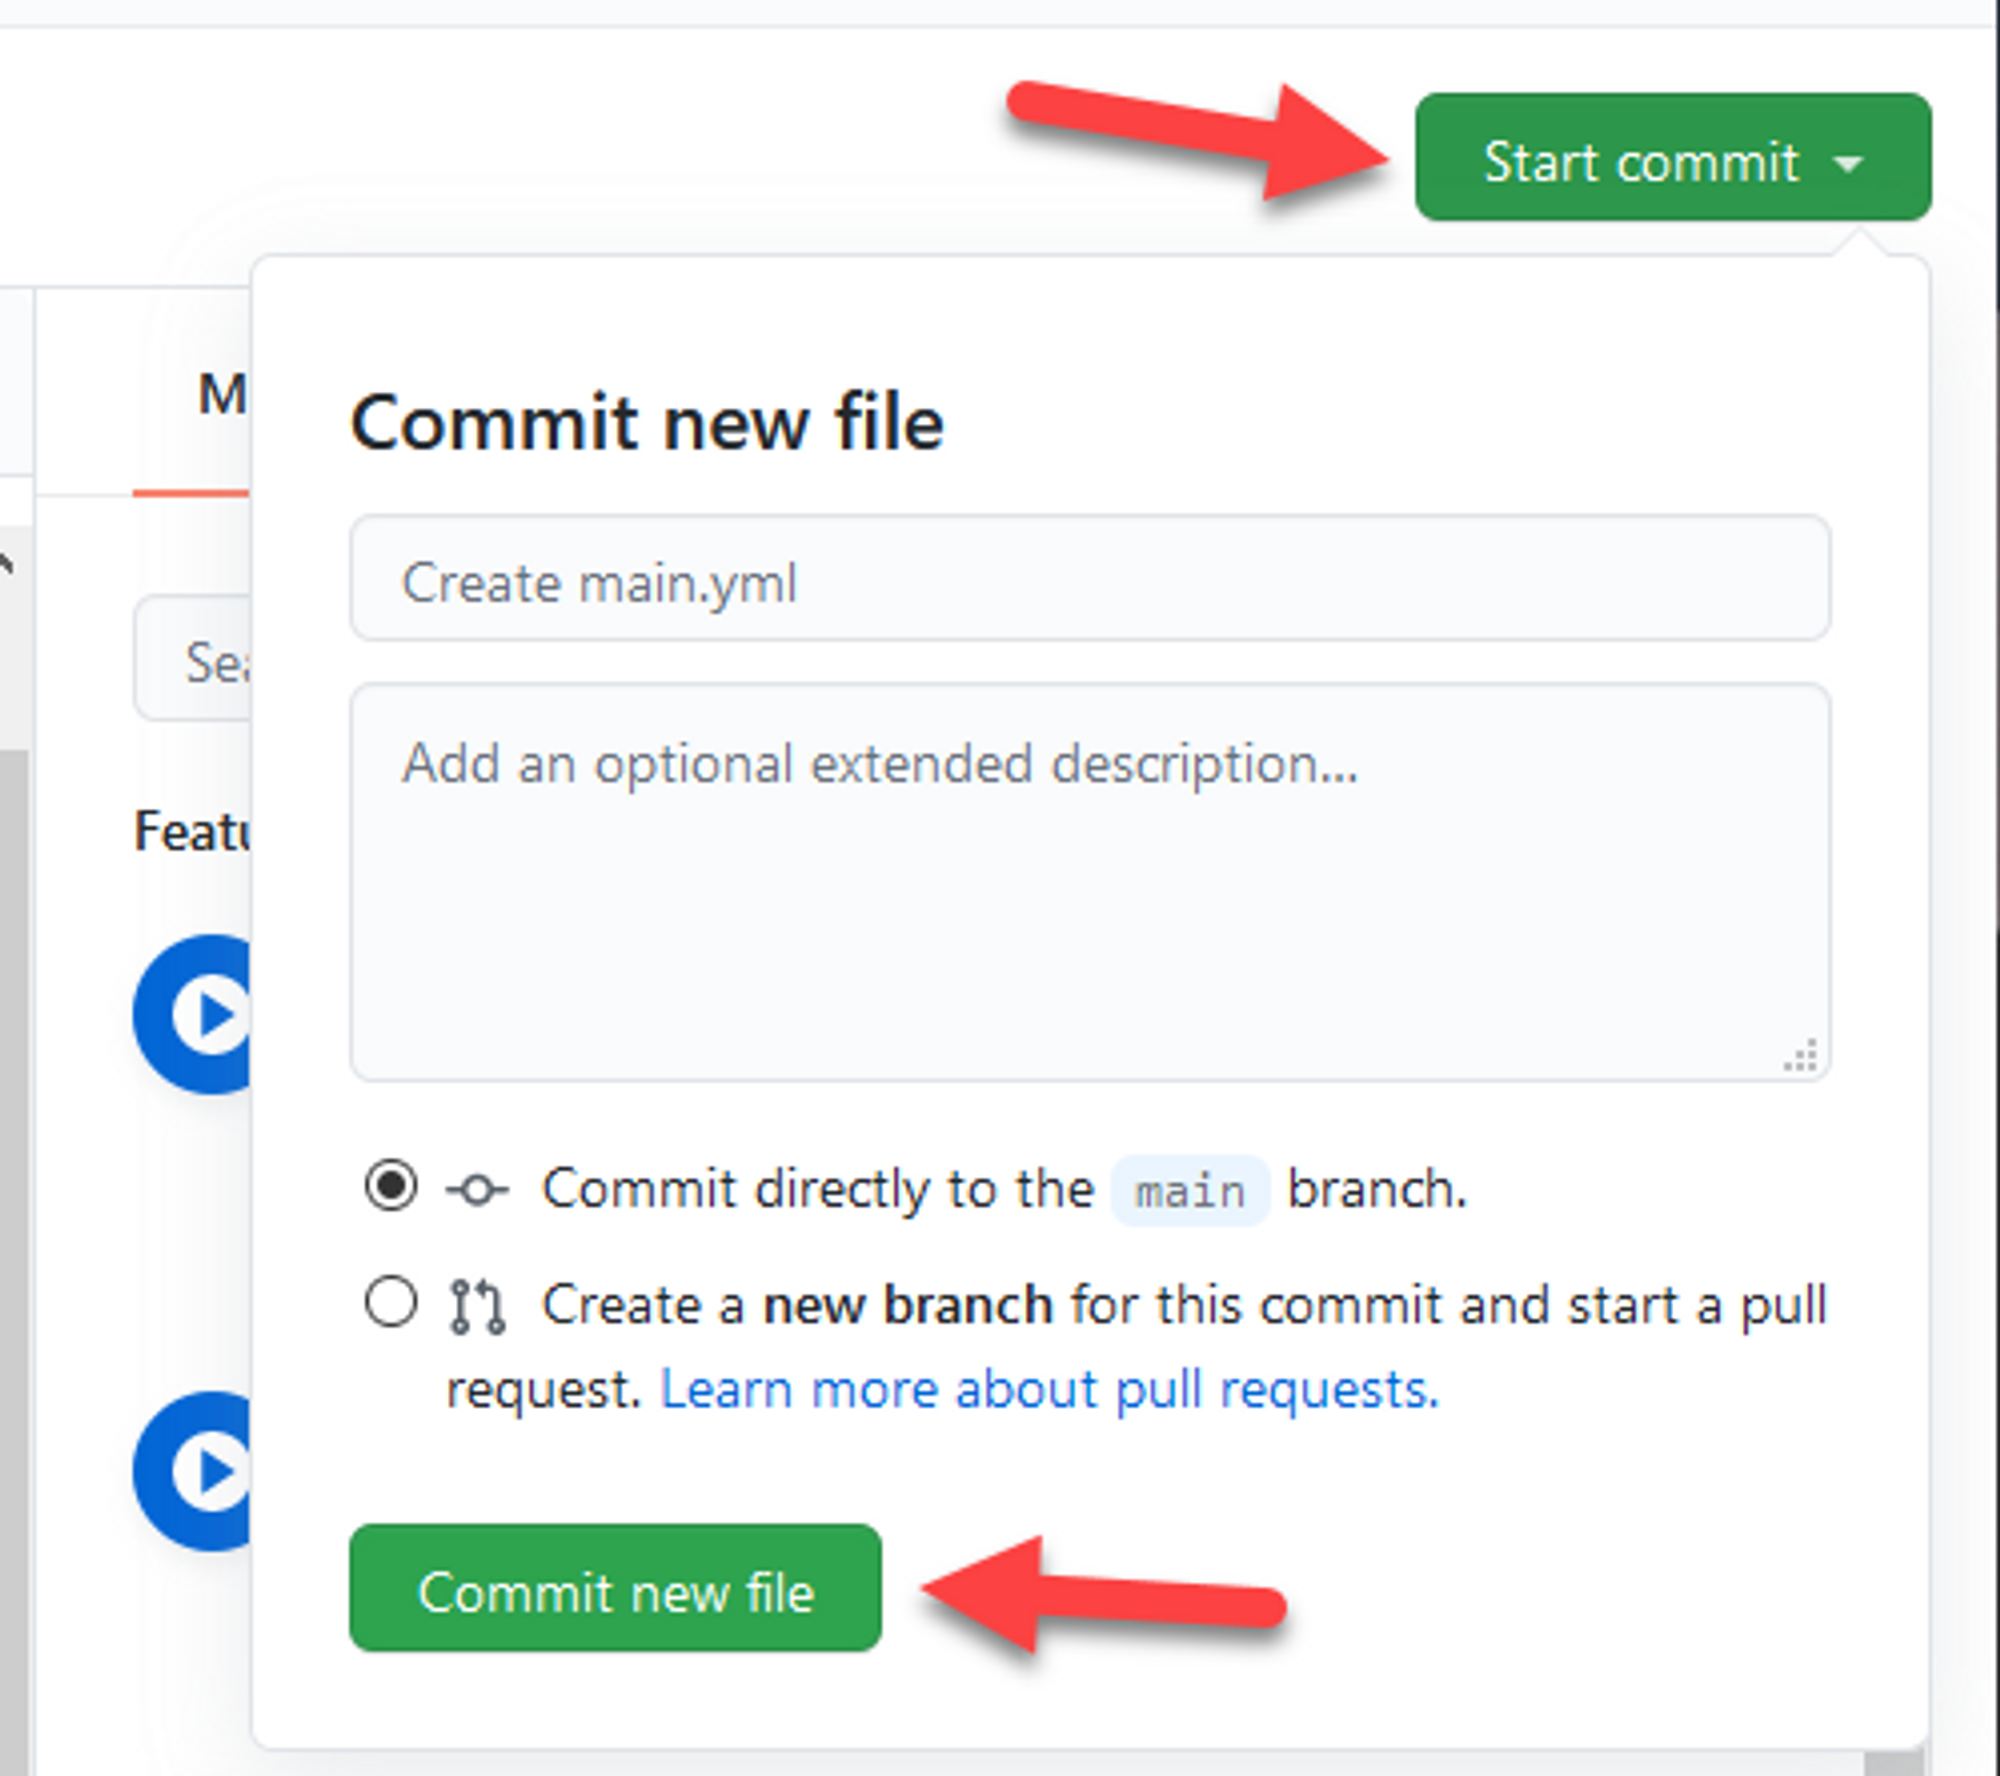
Once done, click on Start Commit then Commit new file.
Notice all the ${{ secrets.THING }} lines? Those are variables that we can store in the Settings of the repository so they aren't stored with the code. Since storing secrets mixed in with your code is bad practice, this is the route we will go. We've already captured the AWS Key ID & Secret Key, so we just need the S3 Bucket name and CloudFront Distribution ID. You can get these from their respective services as highlighted below.
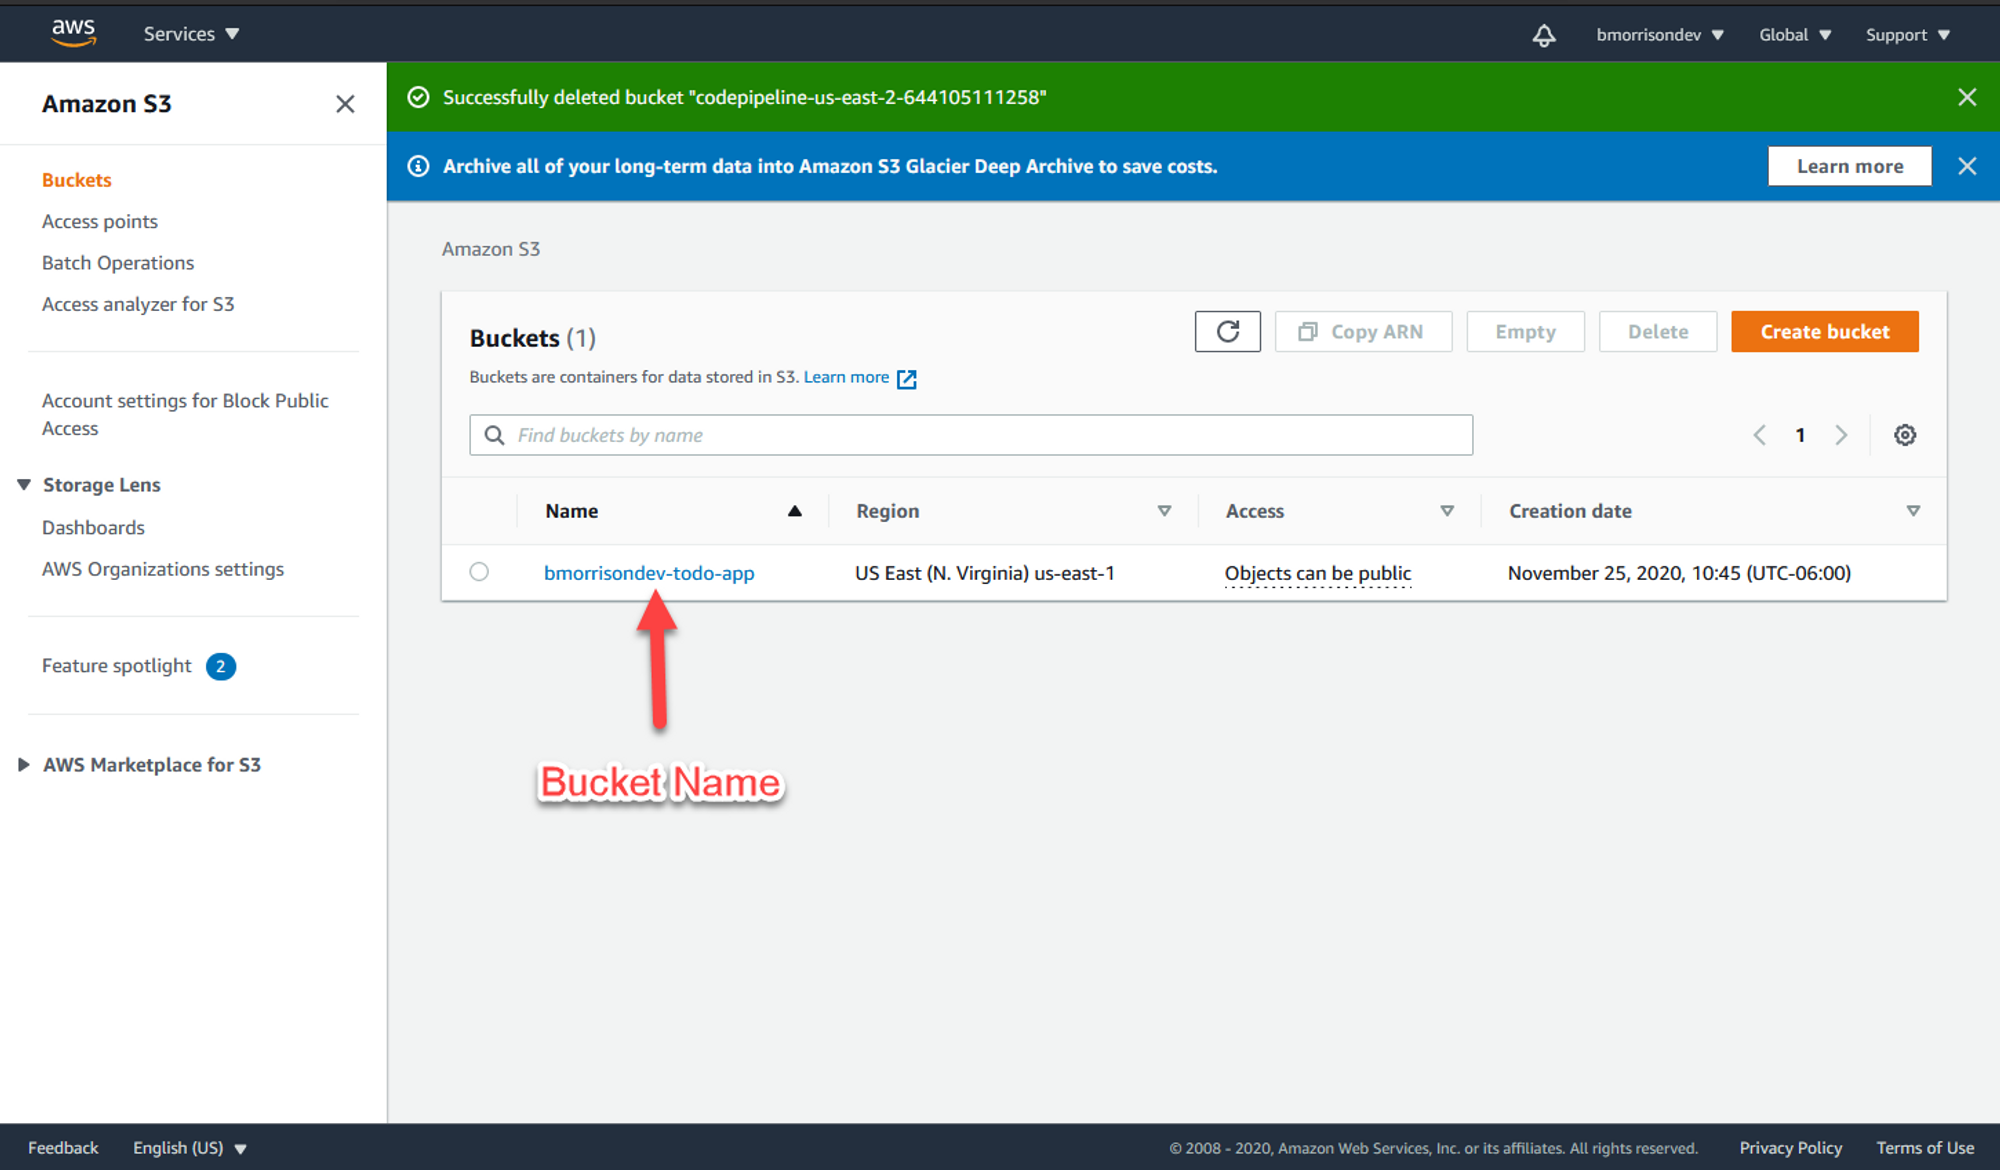
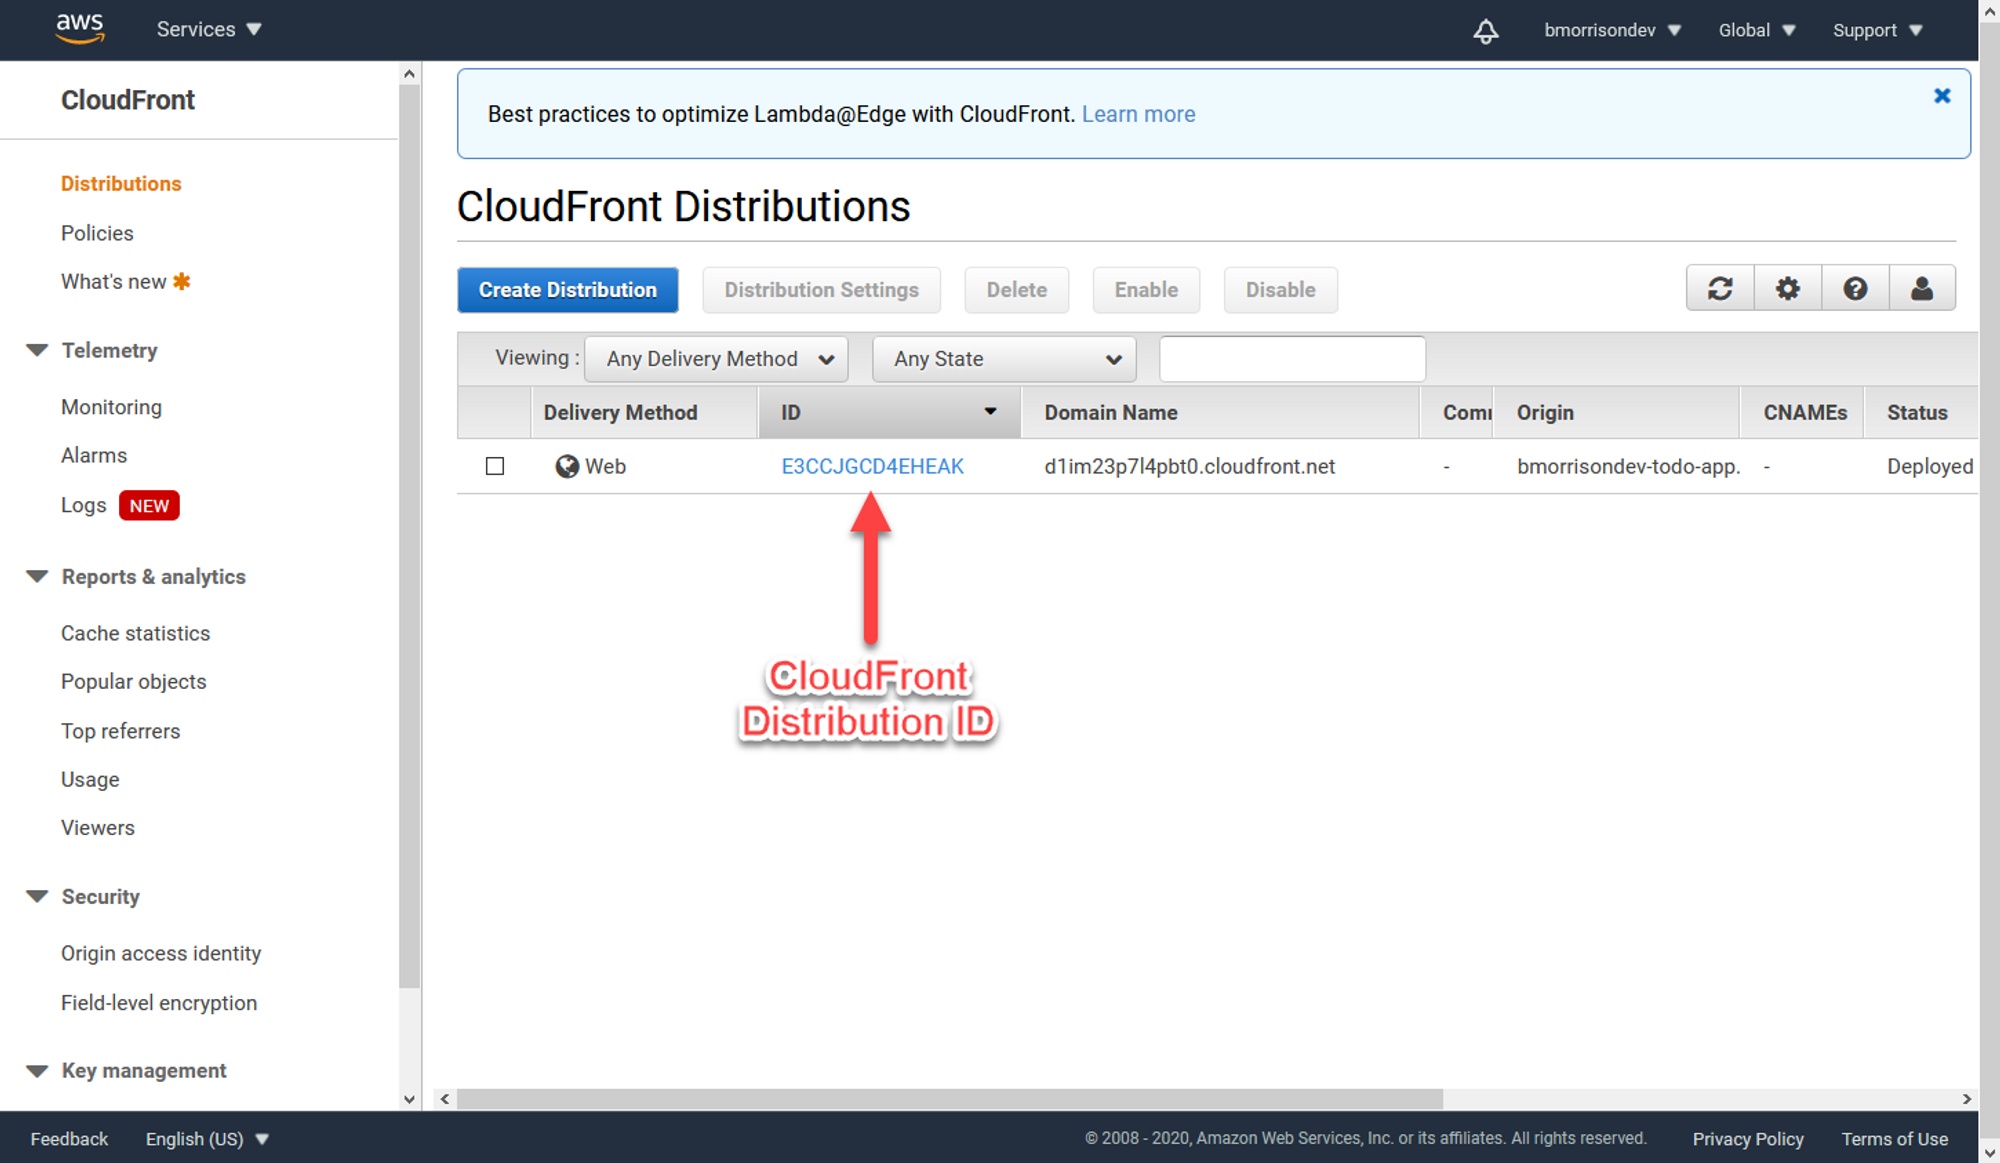
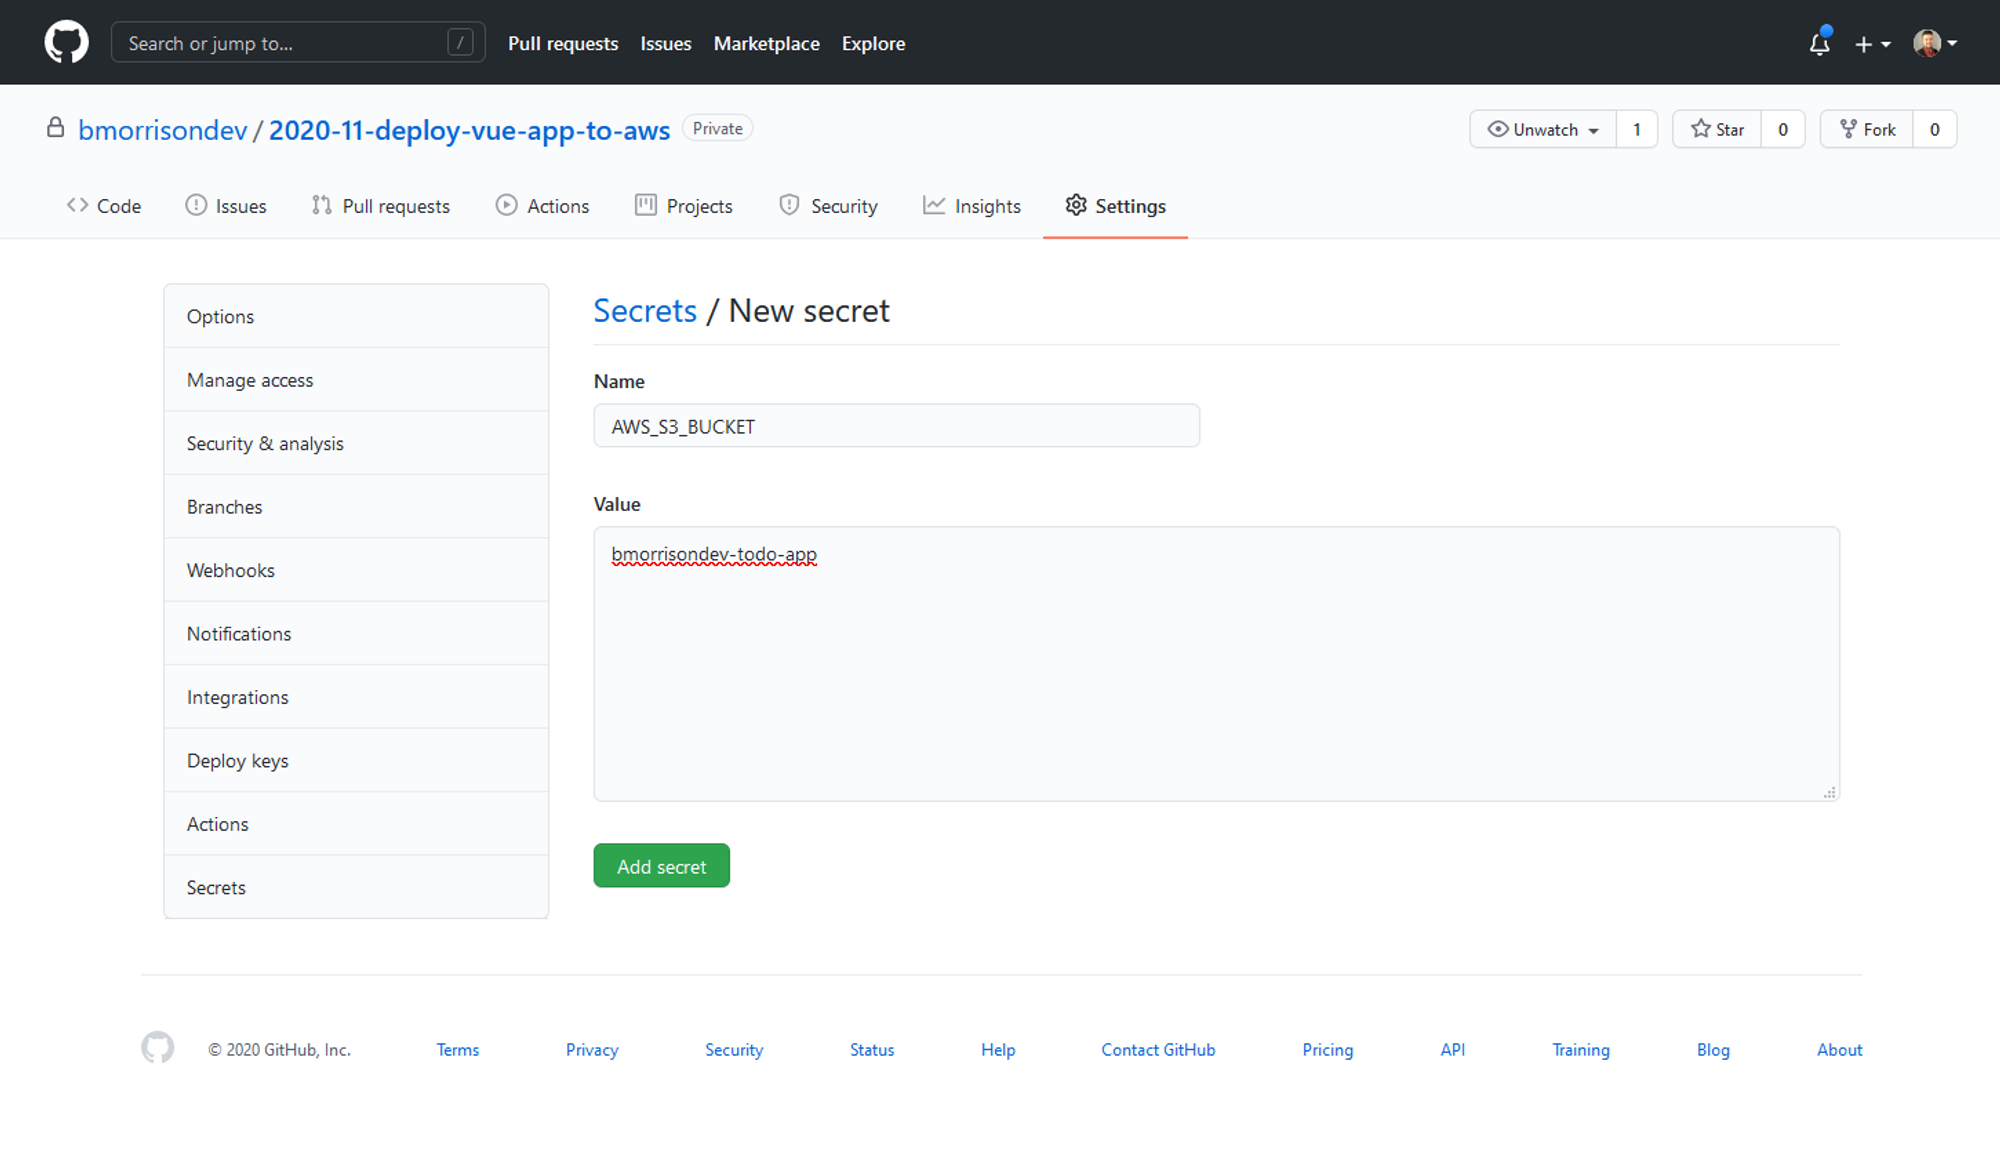
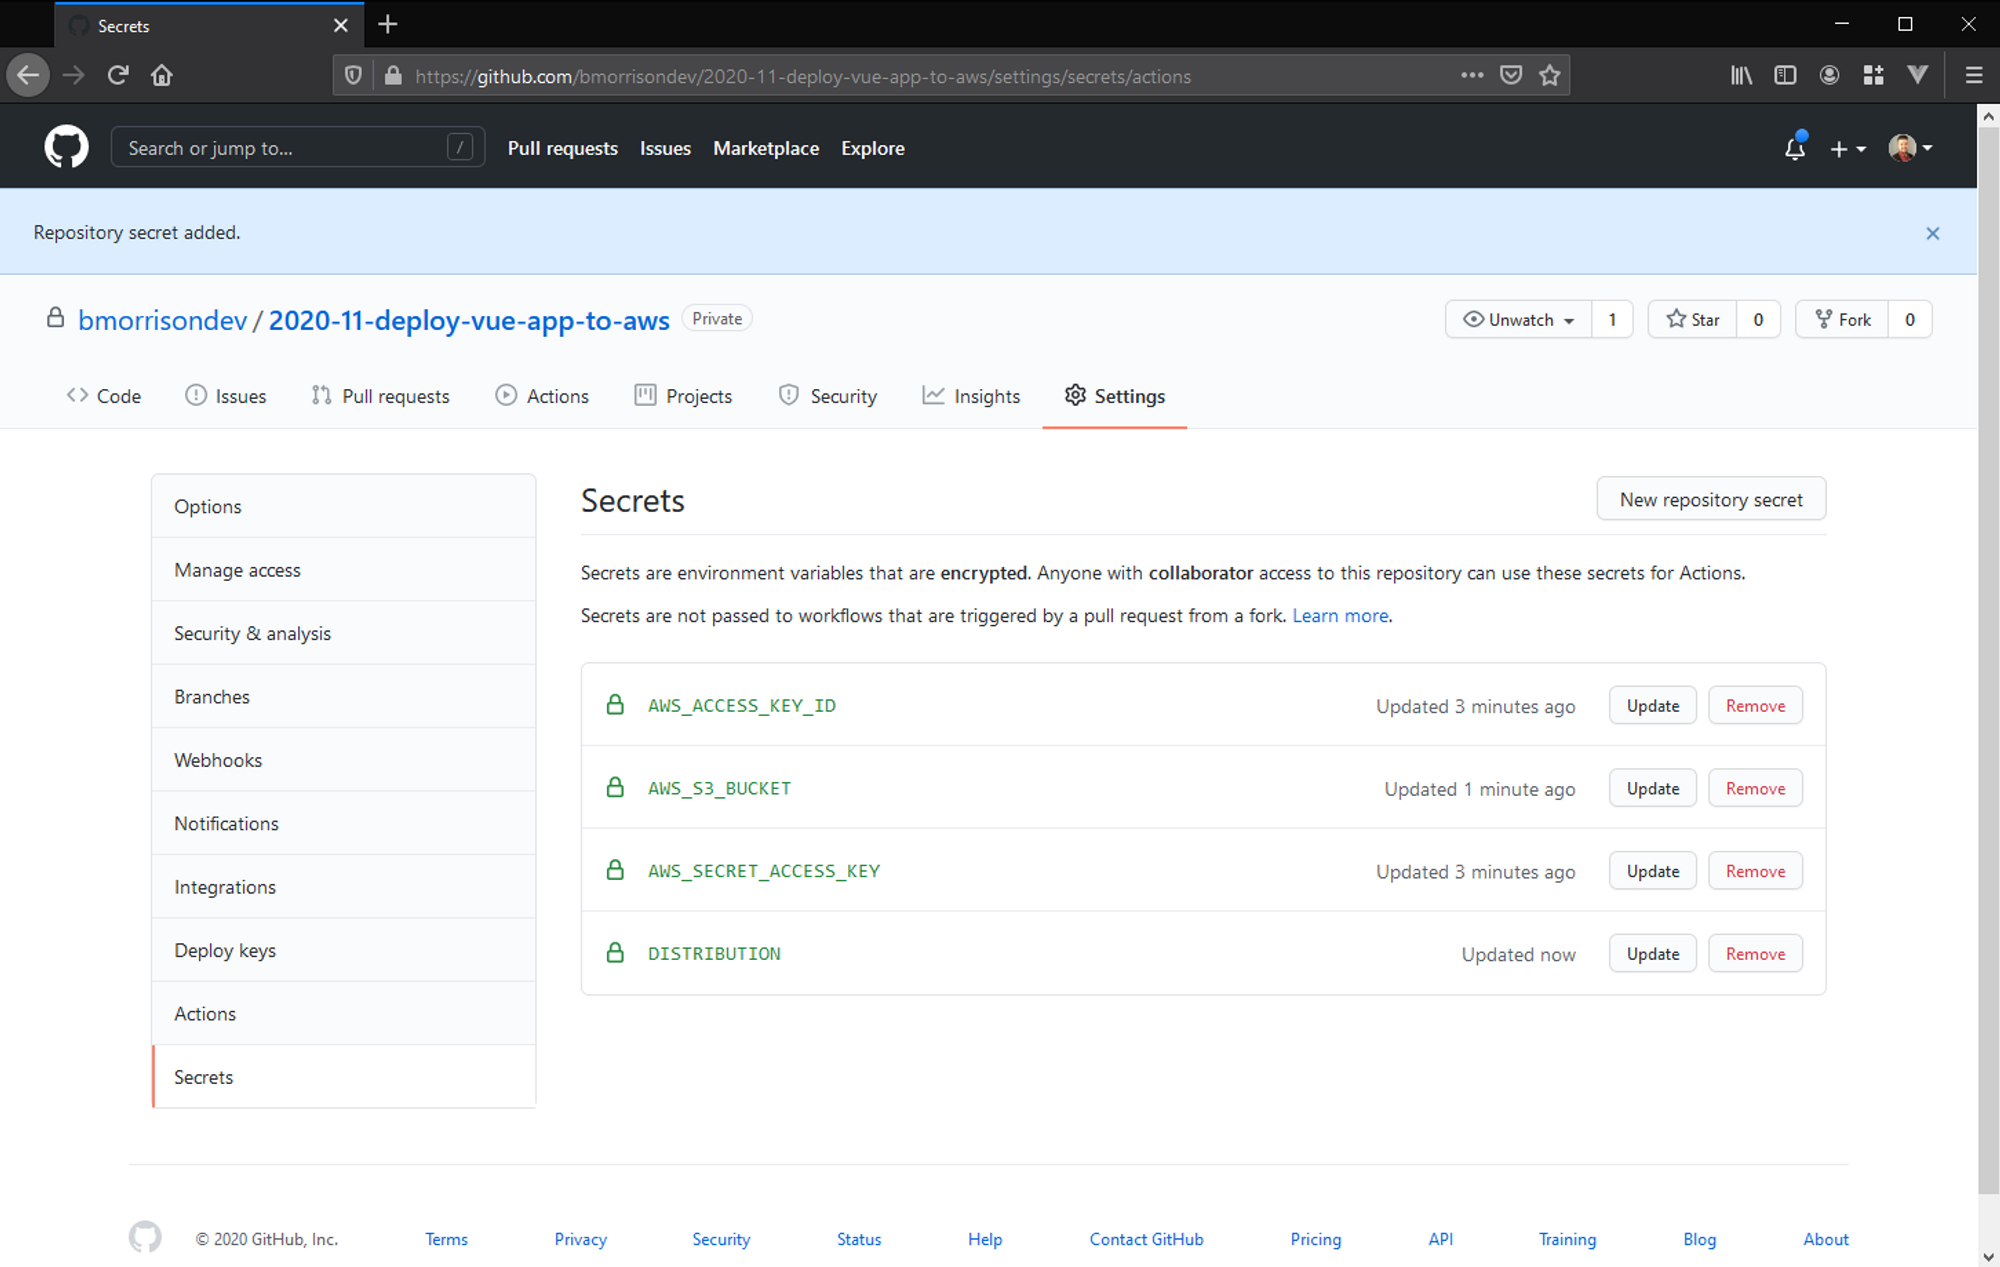
Now back in GitHub, head to Settings, then Secrets, and finally add a separate secret for each item we had in our YAML file from earlier. The four we need are.
- AWS_S3_BUCKET
- AWS_ACCESS_KEY_ID
- AWS_SECRET_ACCESS_KEY
- DISTRIBUTION
Here is an example of me creating one.
And here is the list once they are all added.
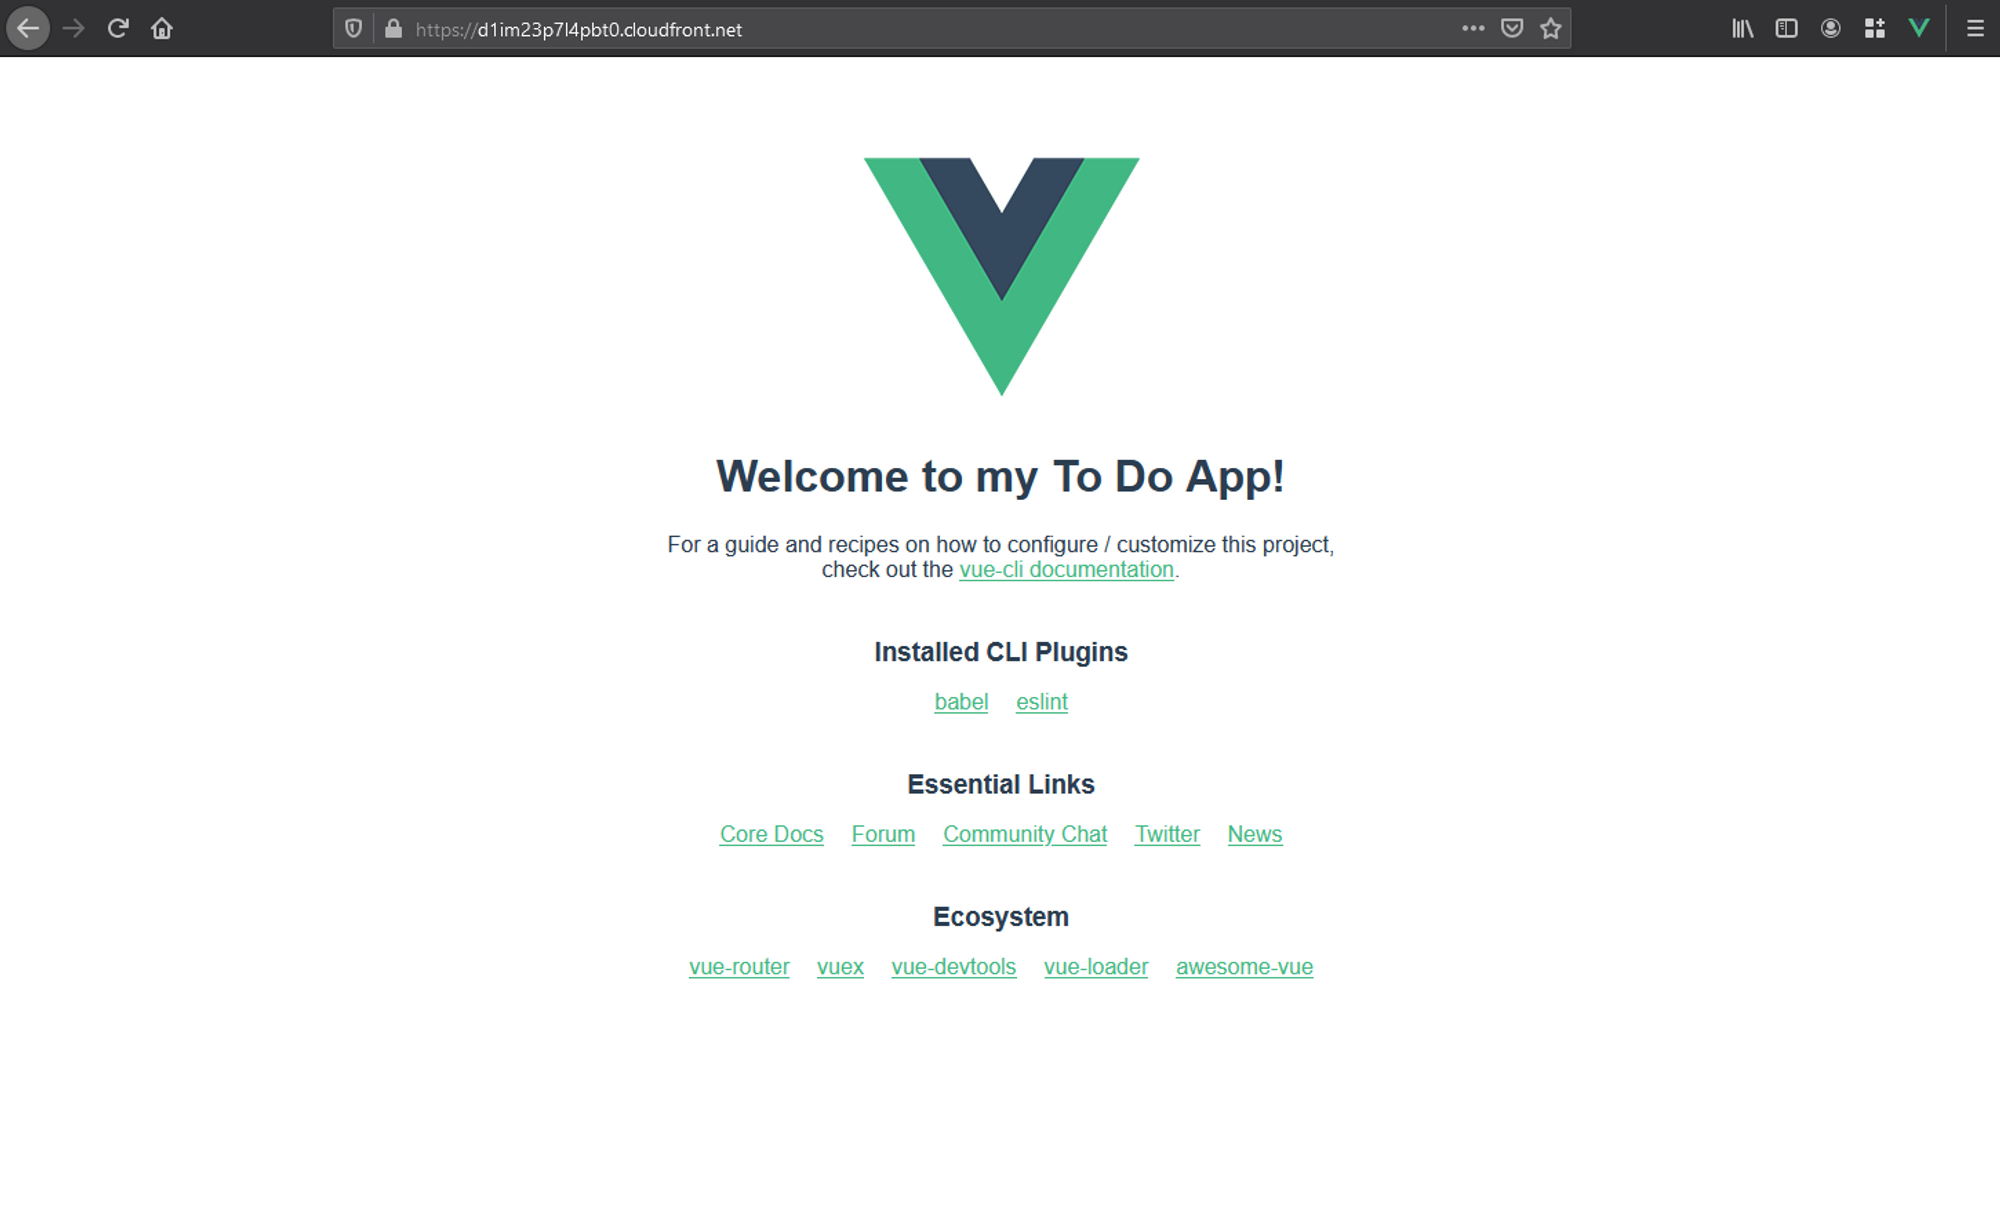
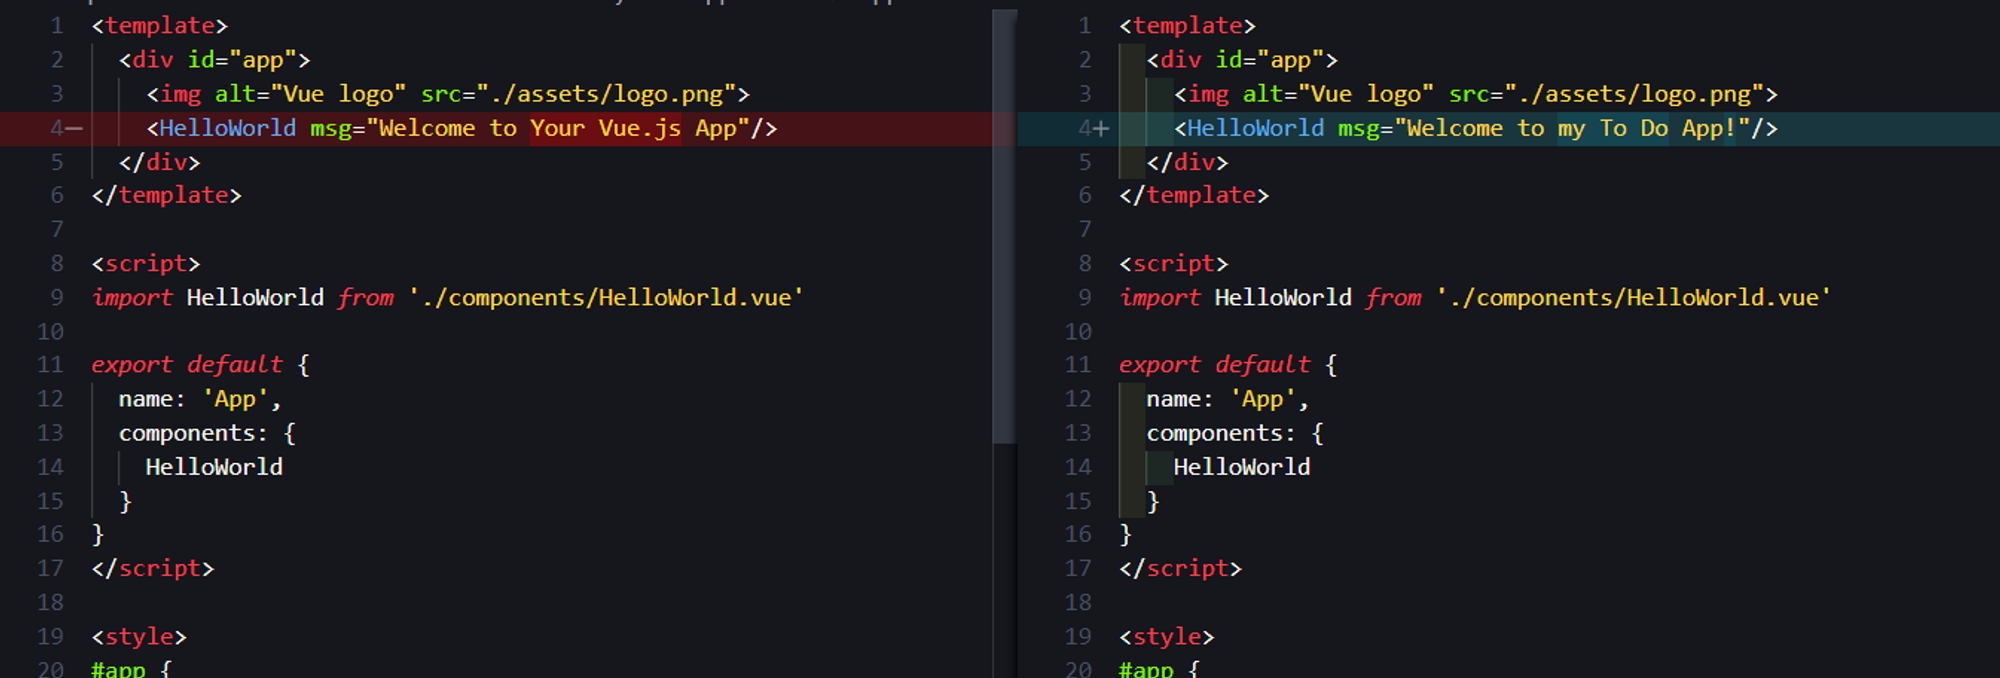
Once thats done, lets test everything by pulling down the new commits from our repo (creating the Action actually adds a commit to our repo) and changing a line of code somewhere. I simply changed the text thats displayed on my home page from "Welcome to Your Vue.js App" to "Welcome to my To Do App!".
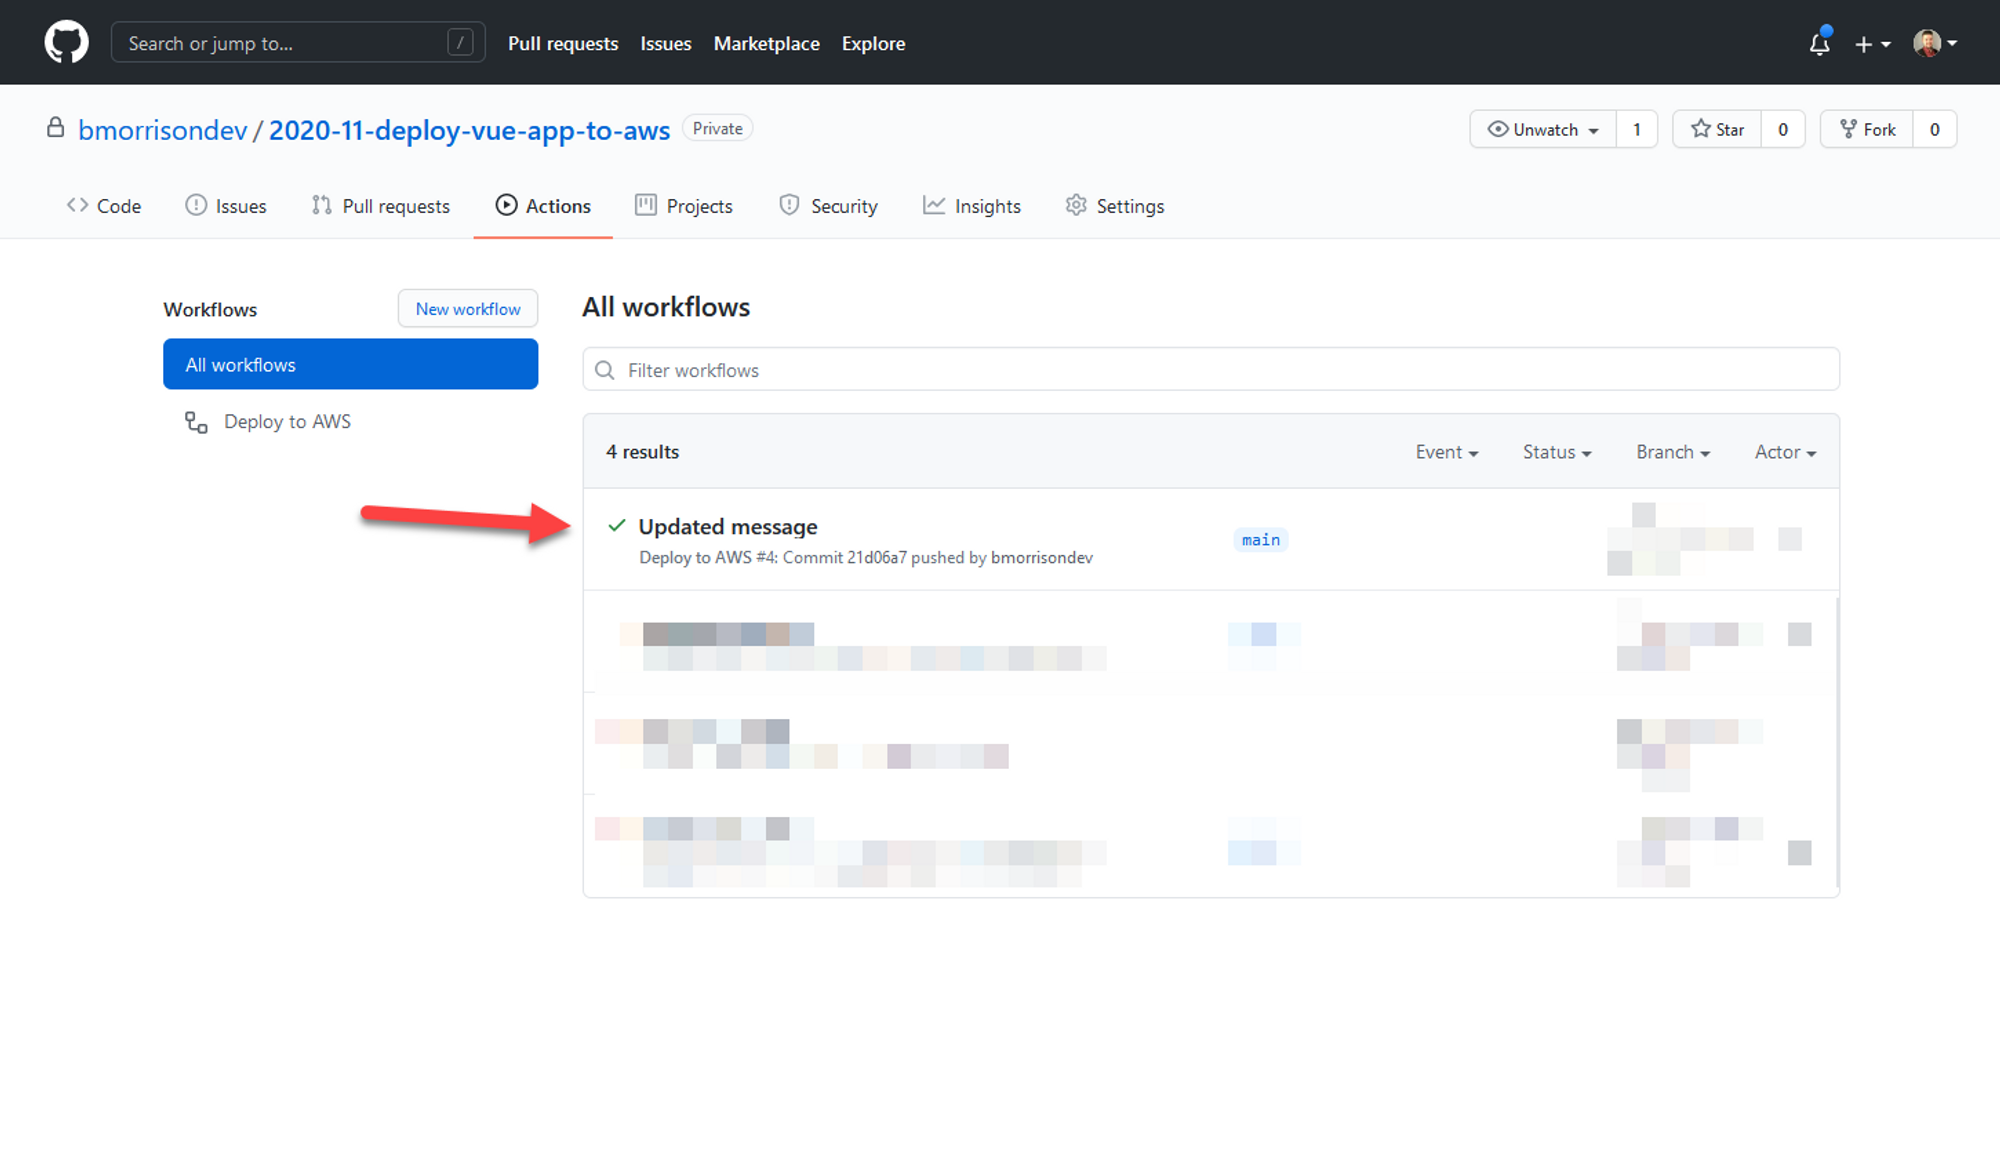
Commit & push your code, then head back to the GitHub Actions tab. You should see your Action running and deploying your code. Once its done, you'll get a green check next to it if everything went according to plan.
Now lets check the updated app (you might need to refresh your browser to clear its locally cached version).
